Ed Nisley's Blog: Shop notes, electronics, firmware, machinery, 3D printing, laser cuttery, and curiosities. Contents: 100% human thinking, 0% AI slop.
The question came up as to whether an external hard drive with a network interface was a Good Thing for backups and suchlike.
For humongous drives, a 100 Mbit/s network tap is painfully slow. In round numbers, on a good day you’ll get 80 Mbit/s throughput; call it 10 MBytes/s.
Transferring 1 TB at 10 MB/s requires a bit over a day: 28-ish hours. Streaming media will work fine, but filling up the drive in the first place will be tedious.
I was reminded of this the hard way when I had to do a full-drive backup to the file server in the basement. Seemed to take forever, but when I ran the numbers it was ticking along just about as fast as it could possibly go…
A USB local drive is better: 40 MB/s, more or less, if the software stack can keep up with it. I eventually pulled the drive, popped it on a USB-IDE adapter, jacked it into the server, and got it done that way.
Now, if you have gigabit Ethernet everywhere, things might be faster, but the limiting factor then becomes the drive’s sustained rate, which is probably a tad over 100 MB/s if you’re transferring large files.
Fancy eSATA drives have a higher burst rate, but the bits just don’t come off the platters all that much faster.
I’d be astounded if a consumer-grade network drive came anywhere close to those numbers. I have an IOmega 500 GB drive that’s an absolute piece of crap…
Feed the obvious keywords into Wikipedia and get all the numbers.
In the process of setting up a new PC for my mother, I finally figured out how to get remote desktop sharing in Kubuntu Hardy working. You’d think the bog-standard (and default) krfb would work, but it crashed every time. Come to find out, after much searching, the solution boils down to this…
Shoot krfb in the head, use vnc4server and x11vnc.
Use synaptic or apt-get to install those and all their dependencies on the remote machine (i.e., the one that will become my mother’s PC). While you’re at it, uninstall krfb: good riddance.
Run vncpasswd and feed in an appropriate password that you’ll use to authorize yourself to the vnc session.
Log out, restart X (with Ctrl-Alt-Backspace, perhaps), log back in again to get all the X11 infrastructure up to speed.
On your local machine (i.e., mine), use SSH to sign in to the remote box:
The -L creates a tunnel from your local machine’s port 5900 to the remote machine’s port 5900, through the authorized SSH session.
I use an unusual port because running SSH on port 22 on an internet-facing machine (even behind a firewall router) is just plain dumb. I doubt the unusual port provides much protection, but it should shake off a few script kiddies.
[Update: Just in case you regard shared-key authorization and a nonstandard port as evidence of clinical paranoia, read that. One of the comments notes that using a nonstandard port gets rid of all the low-speed zombies…]
Incidentally, the firewall router must forward the unusual port directly to the PC’s local IP address, which requires a bit of tweakage all by itself; that depends on which router you have. Word to the wise: do not use DHCP to get the PC’s IP address. Think about it.
That PC is also set up with my RSA keys, so that the kiddies can’t brute-force a username / password login attack. And, yes, I regenerated the keys after the Debian goof.
This is still on my LAN, so I use a dotted quad IP address (being too lazy to tweak /etc/hosts for a temporary machine), but you can use the host name maintained by DynDNS or their ilk for a truly remote box. See this post for the straight dope on making that work.
Then fire up a remote-desktop client like, for example, krdc on your local PC, with the “remote desktop” address aimed at:
localhost:5900
That’s the local end of the SSH tunnel to the remote PC. It won’t work if you aim it at the remote machine’s IP address, because it’s not watching for incoming connections (nor is the router forwarding them).
Type in the password and shazam you should see whatever’s appearing on the remote desktop. Mouse & keyboard control should work just fine, too. Word to the wise: make sure your local monitor is bigger than the remote monitor; while you can scroll around or scale what you see, that’s icky.
It should be obvious that you cannot “switch users” to a different X console on the remote box and expect it to work. I tried it, just for grins, and it doesn’t. You could probably tunnel another session in through port 5901 (or 5900 + whatever the X11 console might be), but I haven’t tried that.
Last year I set my mother up with Verizon’s cheapest DSL service: 768 kb/s down and 16 kb/s up, all for a whopping 15 bucks plus tax a month. Yes, that’s 16 kb/s: slower than old-school dial-up modems. Sheesh & similar remarks. So all this fancy remote-desktop GUI stuff won’t work for diddly with the PC in her apartment.
I have a somewhat antique Palm Zire 71 that has, periodically, synced perfectly with various flavors of GNU/Linux. On the other hand, sometimes a new release / kernel / version prevents it from syncing at all.
My life is simple enough that I really don’t need to actively sync it with an online calendar, which is a damn good thing. Back when I needed to do hotsyncing, it always came heartbreakingly close to working; apparently that’s still the case. Having to comb out a complete set of duplicate addressbook entries pretty much soured me on futher experimentation.
Currently, the Zire on the outs with Ubuntu / Kubuntu Hardy. The hack that makes it work goes a little something like this:
The file /etc/modprobe.d/libpisock9 blacklists the visor module, which allegedly lets all the pilot-* programs connect using libusb, but that flat-out doesn’t work for me.
Replace this stanza inside /etc/udev/rules.d/60-symlinks.rules:
#KERNEL=="ttyUSB*", ATTRS{product}=="Palm Handheld*|Handspring *|palmOne Handheld", \
#                                       SYMLINK+="pilot"

With this one:
Make sure you’re in the dialout group. If you’re not, add yourself, log out, then log back in again.
I back the Zire up once a month, which is rarely enough that I just load the visor module by hand:
sudo modprobe visor
Create a directory for backing up into:
cd ~/Zire71
mkdir 2009-01-03
And then backing up the Zire is easy enough. Pop the thing in the cradle, poke the hotsync button, and quick like a bunny whack Enter on this:
pilot-xfer -p /dev/ttyUSB1 -b 2009-21-03/
The ttyUSB1 device will, of course, vary depending on whether you have any other USB-serial gizmos plugged in at the time.
Frankly, the utter unreliability and instability of this whole USB PDA mess is one of the reasons why, IMHO, GNU/Linux really isn’t “ready for the desktop” despite the fact that all our boxen here run it. I don’t particularly want a phone / camera / PDA / ebook reader / pocketwarmer, but I can see I’ll wind up with one some day just to get a USB interface that actually works.
Memo to self: remember to modprobe visor
Update: Xubuntu 8.10 fixed all that, so USB hotplugging seems to work right out of the box. Install pilot-link, then just:
pilot-xfer -p usb: -b /path/to/backups
Now, whether syncing to contacts & calendars works correctly, I cannot say.
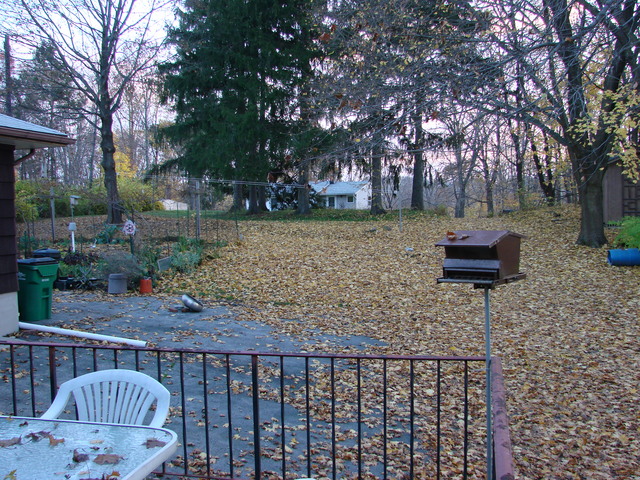
Being that sort of bear, I took a picture of the back yard from our patio every day at 7 am wall-clock time. DST/EST changeovers threw their usual monkey wrenches into the mix, not to mention my lack of attention to the camera’s internal clock settings, but I eventually got 321 pictures of the same scene at more or less the same time of day.
That’s all well and good, but this is the movie age…
The plan: use ffmpeg or maybe mencoder to convert the still images into a movie.
Zero: copy the files to a unique subdirectory to protect the originals!
One: sort & rename by date
Two: resize images
Three: convert to a movie
Four: . . . profit!
10 November 2008
I’d uploaded the files whenever I used the camera for something else, so the actual file dates were fairly well scrambled and didn’t correspond to the EXIF data inside the image file. Digikam‘s batch file rename operation can sort out the files in ascending order of EXIF date and rename them into something a bit more uniform & boring like 0001.jpg, which is vital for ffmpeg.
I used the camera’s full resolution, which is much too large for video, so I created Yet Another Subdirectory called Smaller to hold the reduced-size images. Imagemagick‘s convert program then squishes them down:
for f in *jpg ; do convert -verbose -resize 640x480 $f Smaller/$f; done
You can smash them even further to get a teeny postage-stamp movie for your media player.
Make the movie:
ffmpeg -r 3 -i %04d.jpg daily-3.mp4
The file specifier %04d must exactly match the filename sequence and a missing file will stop ffmpeg dead in its tracks. The file names coming out of your camera won’t work if they’re not exactly sequential, which is highly unlikely over the course of the year.
Then it’s showtime! I’d upload it, but you don’t have a need to know for our backyard activiites.
There, now, wasn’t that easy?
I didn’t actually figure all this out from first principles, of course. The basics are out there if you rummage around for a while with the obvious keywords.
Memo to self: affix a stable camera platform to the side of the house!
For some unknown reason, Kubuntu 8.04 doesn’t create a /dev/scanner link while it’s figuring out all the SCSI devices. I wanted to make the link sort of generic for any scanner that I might plug in, but I had to settle for a unique udev match.
The scanner popped out of udev as /dev/sg5 this time and
Memo to self: there’s got to be a way to make this generic, perhaps by piggybacking on whatever udev stanza assigns the scanner group to that /dev/sg? device.
Of course I do remote admin for my mother’s PC, which means I must know its IP address, which means it’s running ddclient and updating an entry at dyndns.
The setup seems straightforward. In /etc/ddclient.conf you find:
[Update: Something about checkip changed enough that the old line didn’t work. The web-skip made it work again. ]
But, as the comment in that file shows, that’s not where you configure ddclient in (K)Ubuntu. You actually tweak the entries in /etc/default/ddclient so the right answer pops out when ddclient gets reconfigured by something or another.
It’s not clear to me how ddclient figures out when to update the DNS entry (when an update is “necessary”), so I also force an update by putting this in /etc/rc.local:
ddclient -force
Actually, I added that tweak when I was setting up another, slightly newer, PC for her and managed to fire off ddclient from my network. That aimed the DNS entry at my IP address and, had I not already been signed into her system, would have locked me until her ddclient grabbed it back.
I hate it when that happens.
Memo to self: make sure the defaults match the current configuration.
A long time ago I got an HP54602B oscilloscope with a serial port data link. HP provided a sample app that snarfed screenshots & data from the scope, but it wasn’t really ready for prime time and, besides, I vastly preferred to use OS/2 (!) and then Linux rather than Windows.
Here’s my Kermit script to fetch screenshots. All the software comes more-or-less standard in Ubuntu Linux and (I presume) in most others. If you’re running Windows, you’re on your own.
Scope Setup
HP54602B Serial Setup Screenshot
The oscilloscope’s HP Plotter setting spits out bog-standard HPGL commands in flat ASCII. I’ve always meant to investigate what HP Printer does, but …
I wish the scope ran faster than 19200 b/s, but that speed works reliably over generic USB-to-serial converters (and the scope can’t feed data that fast, anyway). The other choice, back in the day, was HPIB / GPIB; I’d have had to buy three or four different adapters to suit all the PC data buses since then: ISA, EISA, VLB, PCI …
Xon/Xoff flow control (a.k.a. handshaking) works better than hardware flow control, simply because the cable’s easier to build.
The Factors setting adds a bunch of text to the end of the data stream that’s not useful, except for the fact that an HPGL LB instruction follows all of the useful data and gives the Kermit script something to look for. Otherwise, the only way to detect the end of the stream is to time out after a looong time.
I haven’t the foggiest idea what Resolution does, but High seems appropriate.
Hardware Notes
The scope requires a Null Modem in front of a standard DB-25 to DB-9 cable. I’ve been meaning to rewire my standard cable to eliminate the Null Modem, but …
Adding an LED breakout / monitoring adapter to the serial port loads the signals too much and can lead to puzzling errors. Maybe it’s just my adapter: YMMV.
I’ve run the cable all the way across my basement lab with no problem. This is, after all, good old RS-232, not some high-falutin’ USB or Firewire interconnect.
Taking the Shot
Get a picture you like, poke the Print Screen button, then quick like a bunny run the script. The scope copies the current screen into an internal buffer, then sends out a torrent of HPGL commands. The script will capture the data and eventually spit out a PNG file.
You may want to Stop the trace, rather than leave it running.
In XY mode, the scope seems to have trouble copying the entire trace. I tap Auto Store twice, then Stop, then Print Screen. It’s fuzzier, but copies the whole thing.
What Happens
The script captures the incoming serial data into a log file, processes that text through the hp2xx program to get an Encapsulated Postscript EPS file, then runs that though convert to get a PNG file. The bank shot off EPS results in better-looking output, for reasons I don’t understand.
The 240-second timeout value for the Input command seems long, but it takes a lot of plotter commands to define a four-trace plot. A too-short timeout chops off the tail end of the HPGL stream and prompts bizarre error messages from hp2xx.
The parameters for hp2xx and convert came from protracted and tedious twiddling. The ‘scope image is 512 dots across and 300-some-ish vertically; the output mimics the not-quite-square graticule aspect ratio on the actual screen. If HP thinks it looks good, then it looks good to me.
The active (bright) traces use Pen 2, which I’ve set to Blue (color 4). The graticule, annotations, and stored traces all use Pen 1, which appears as Black (color 1). Tweak -c 14 as you wish.
The pen widths (set by -p 34) don’t actually seem to do very much, although I vaguely recall that using the default width of 1 makes the output entirely too faint.
The PNG has a transparent background that turns white when you actually use it in a document; I suppose you could overlay it atop a background image if you wanted to get cute.
When the dust settles and the smoke clears, you get PNG images like this. It’s an XY plot, so the blue section appears as a bright trace on the oscilloscope’s screen.
BH curve for LC0263-A coil
Kermit Script
#!/usr/bin/kermit +

# Fetches screen shot from HP54602B oscilloscope

# Presumes it's set up for plotter output...

# Converts HPGL to PNG image
set modem none
set line /dev/ttyS0
set speed 19200
set flow xon/xoff
set carrier-watch off
# Make sure we have a param
if not defined %1 ask %1 {File name? }
set input echo off
set input buffer-length 150000
# Wait for PRINT button to send the plot
echo Set HP54602B for HP Plotter, FACTORS ON, 19200, XON/XOFF
echo Press PRINT SCREEN button on HP54602B…
log session “%1.hgl”
# Wait for end of data stream
input 240 lb
echo … got final lb command
close session
close
echo Converting HPGL in
echo — %1.hgl
echo to PNG in
echo — %1.png
# without labels = no terminating lb info
#run hp2xx -m png -a 1.762 -h 91 -c 14 “%1.hgl”
#run mogrify -density 300 -resize 200% “%1.png”
# with labels = terminating lb
run hp2xx -q -m eps -r 270 -a 0.447 -d 300 -w 130 -c 14 -p 34 “%1.hgl”
run convert -density 300 -resize 675×452+2+2 “%1.eps” “%1.png”