My old Microsoft Comfort Curve keyboard having gotten on in years, I picked up a Kinesis Freestyle2 (KB800B for PC) split keyboard:
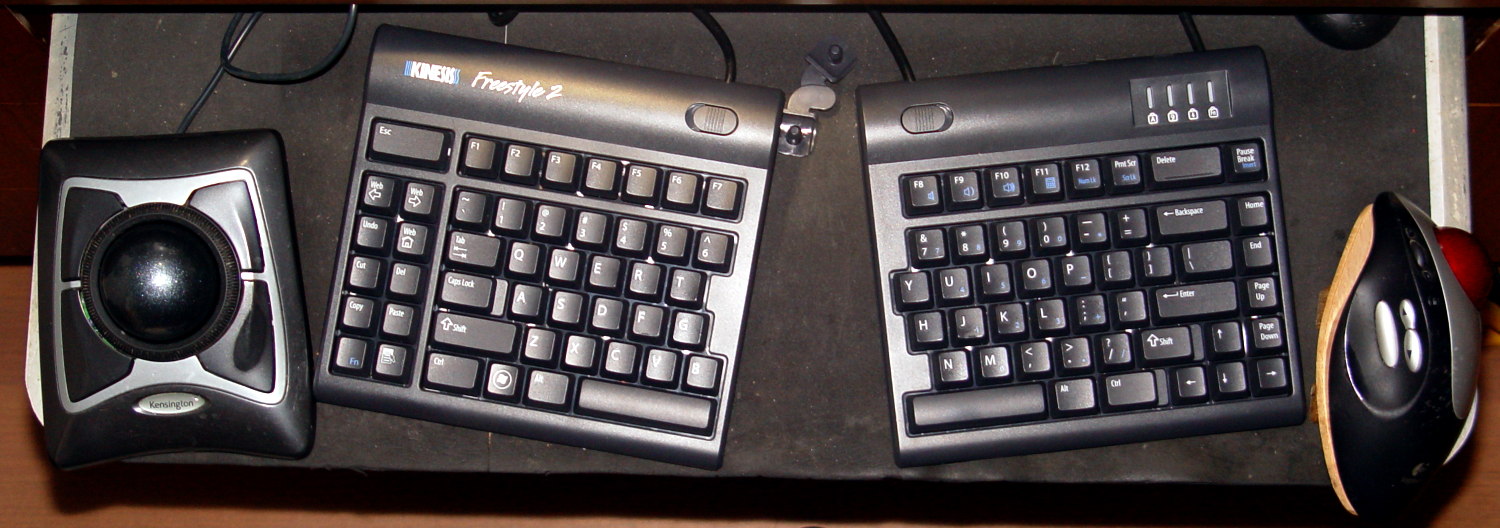
The little hinged dingus (“Pivot Tether”) between the halves (“Keying Modules”) has two posts that pop into into sockets on the back of the halves and are retained by the two sliding latches. The cord connecting the halves allows 9 inches of separation; I don’t need that much, but more than zero seemed about right.
Kinesis also sells various staggeringly expensive (IMO) doodads that attach to the back of the keyboard to “tent” the middle upward with varying degrees of refinement. None of the doodads offer to raise the back of the keyboard, which I vastly prefer to the current flat or reverse-tilted recommendations.
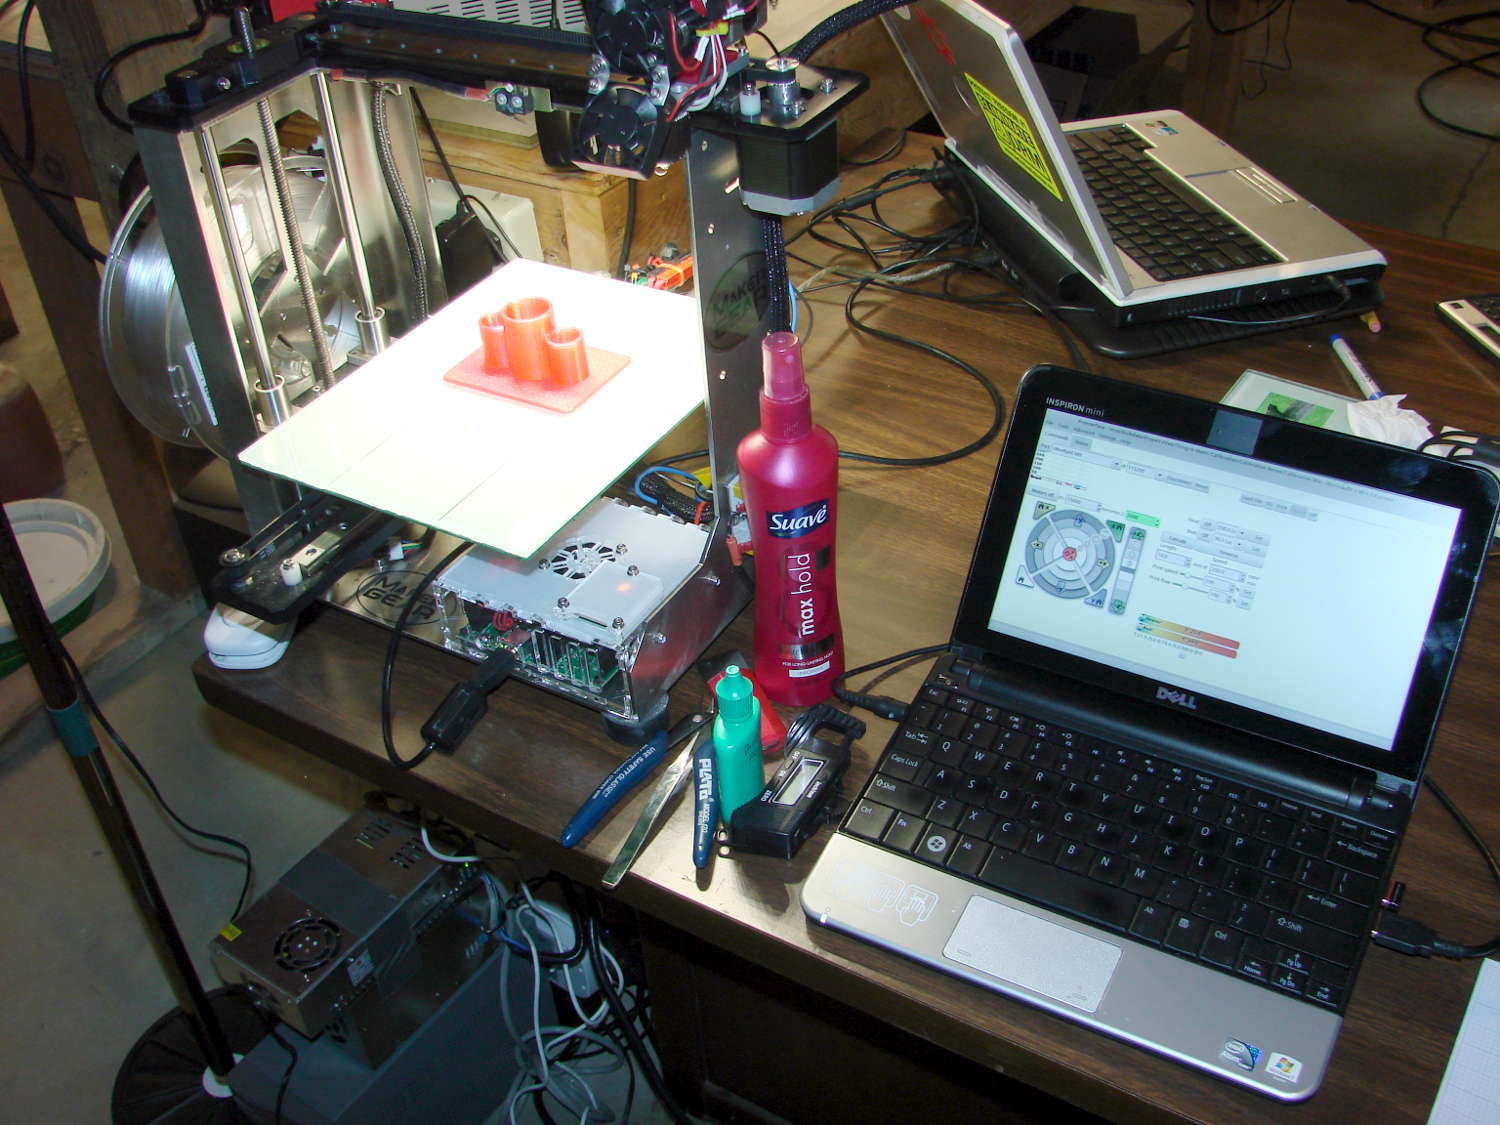
The keyboard & trackballs rest on a homebrew shelf that slides out from where the desk used to have a center drawer, which puts the keyboard slightly above elbow height (heck, slightly above thigh height), whereupon tilting the keyboard puts the keys exactly where they should be. I bandsawed some wood into vaguely triangular sticks, topped them with foam sheets, and tinkered for best tilt. Works for me, anyhow.
The Compatibility section of the Freestyle2 User Manual describes the “special driverless hot keys”: Most will also work with Linux. Four of them do not work, to the extent that they don’t even send key codes to exv. Some searching suggests this is an intractable problem, for reasons that make no sense to me. Their HID Usage Codes, whatever that might mean:
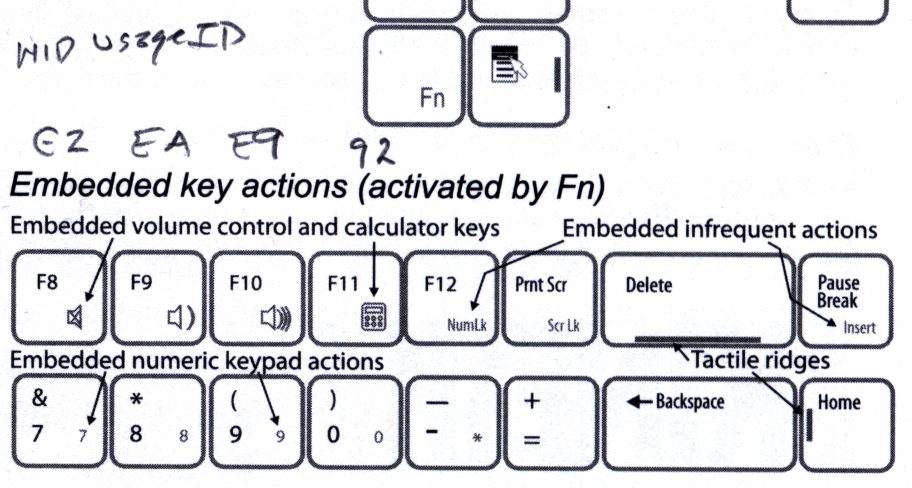
That’s only a minor inconvenience; I prefer a physical calculator and don’t spend much of my life listening to anything through the headphones.
For whatever it’s worth, the scroll ring on the most recent warranty replacement Kensington Expert “Mouse” (I think it’s the third) has worked flawlessly for years; they seem to have fixed the sudden death syndrome.