Ed Nisley's Blog: Shop notes, electronics, firmware, machinery, 3D printing, laser cuttery, and curiosities. Contents: 100% human thinking, 0% AI slop.
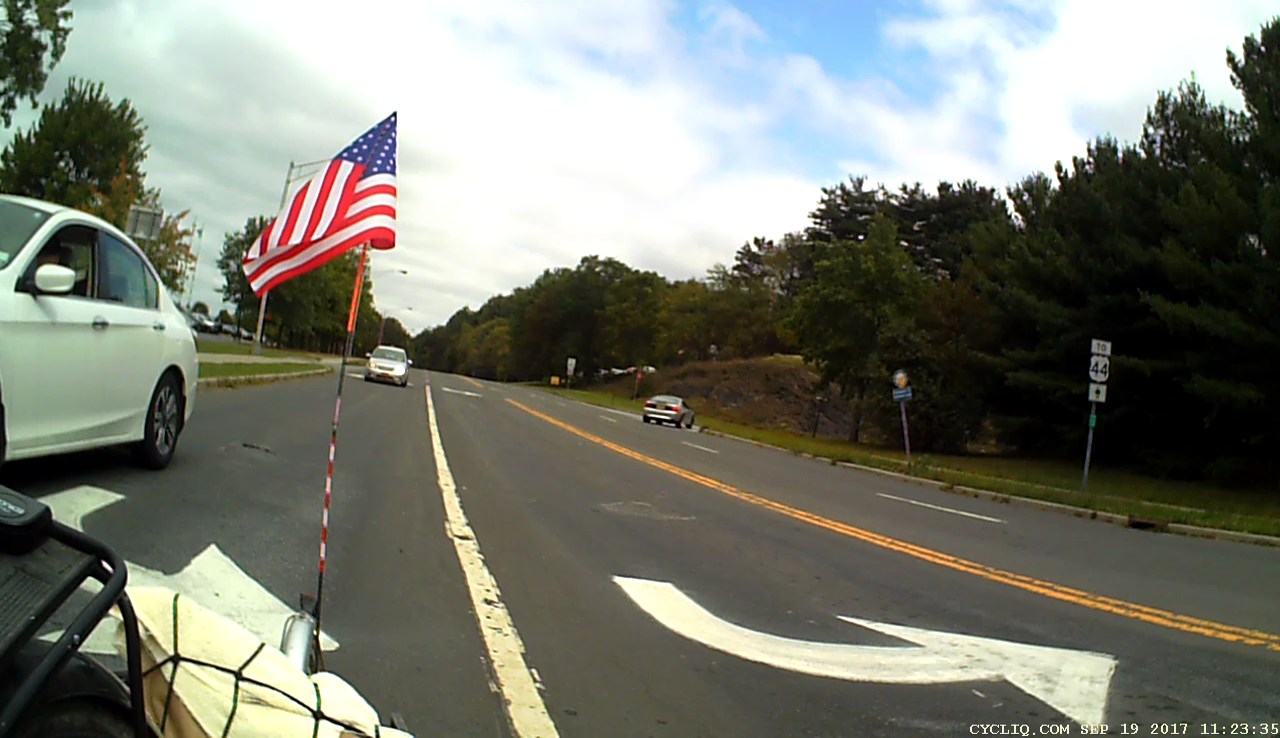
As usual, we’re at the Rt 55 end of Burnett Blvd, returning home from a grocery trip; I’m hauling two full bags of chow in the trailer. The white car pulling up immediately to our left will make a left turn from the left lane:
Burnett at Rt 55 – Right Pass – 2017-09-19 – 01
The more distant white car, turning left out of Overocker, is eases past us in the right lane to make a right turn:
Burnett at Rt 55 – Right Pass – 2017-09-19 – 02
We’re on the left side of the right lane, rather than the right, to avoid right hook collisions with drivers who flat-out do not stop before turning. Been there, had that happen, we know better.
The car approaching in the right lane will attempt to pass us on the right:
Burnett at Rt 55 – Right Pass – 2017-09-19 – 03
That’s happened before, too, so I’m watching this happen in my mirror. My line will pass to the right of the inconveniently placed manhole cover in the intersection:
Burnett at Rt 55 – Right Pass – 2017-09-19 – 04
Mary’s nearing the right side of the lane, I’m in the middle, and the driver jams to a stop rather than run up over the sidewalk:
Burnett at Rt 55 – Right Pass – 2017-09-19 – 05
The passenger window is rolling down, which is always a Bad Sign:
Burnett at Rt 55 – Right Pass – 2017-09-19 – 06
It’s all the way down and I know what’s about to happen:
Burnett at Rt 55 – Right Pass – 2017-09-19 – 07
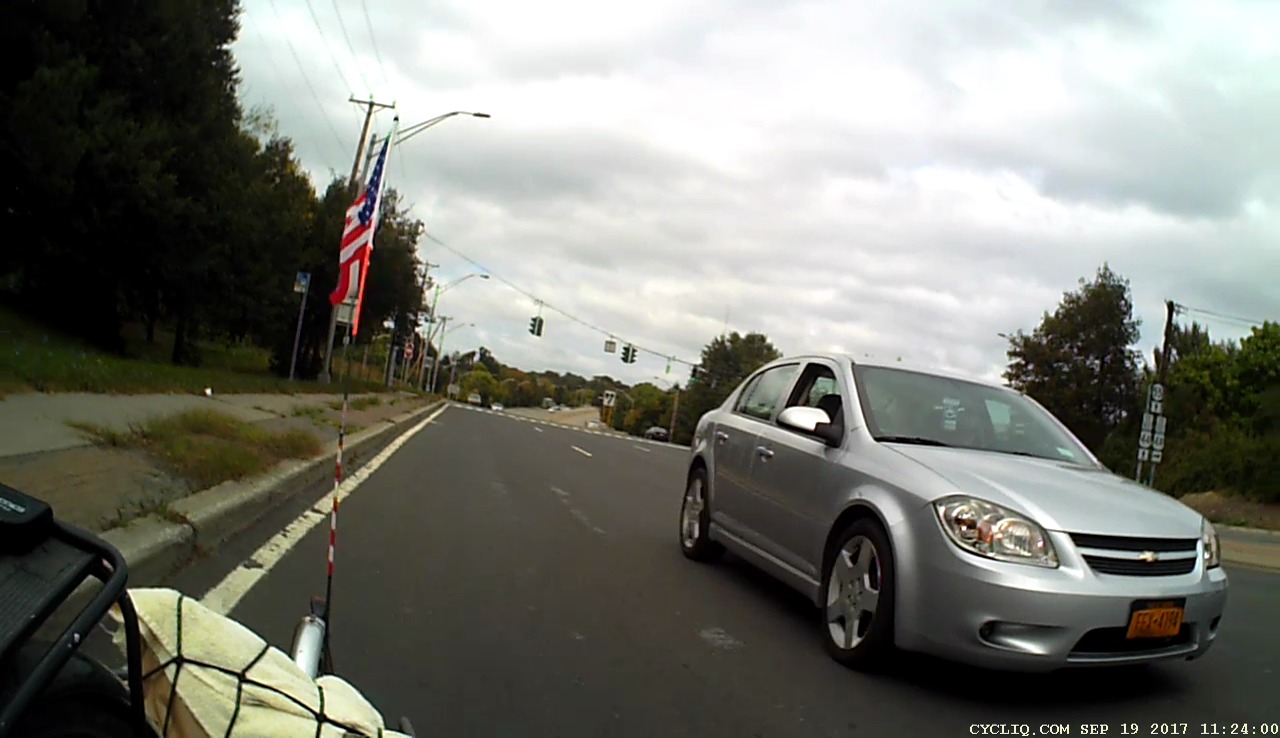
So I preempt the discussion by pointing out she was passing in an intersection and the license plate on the silver Chevy say FEX-4194:
Burnett at Rt 55 – Right Pass – 2017-09-19 – 08
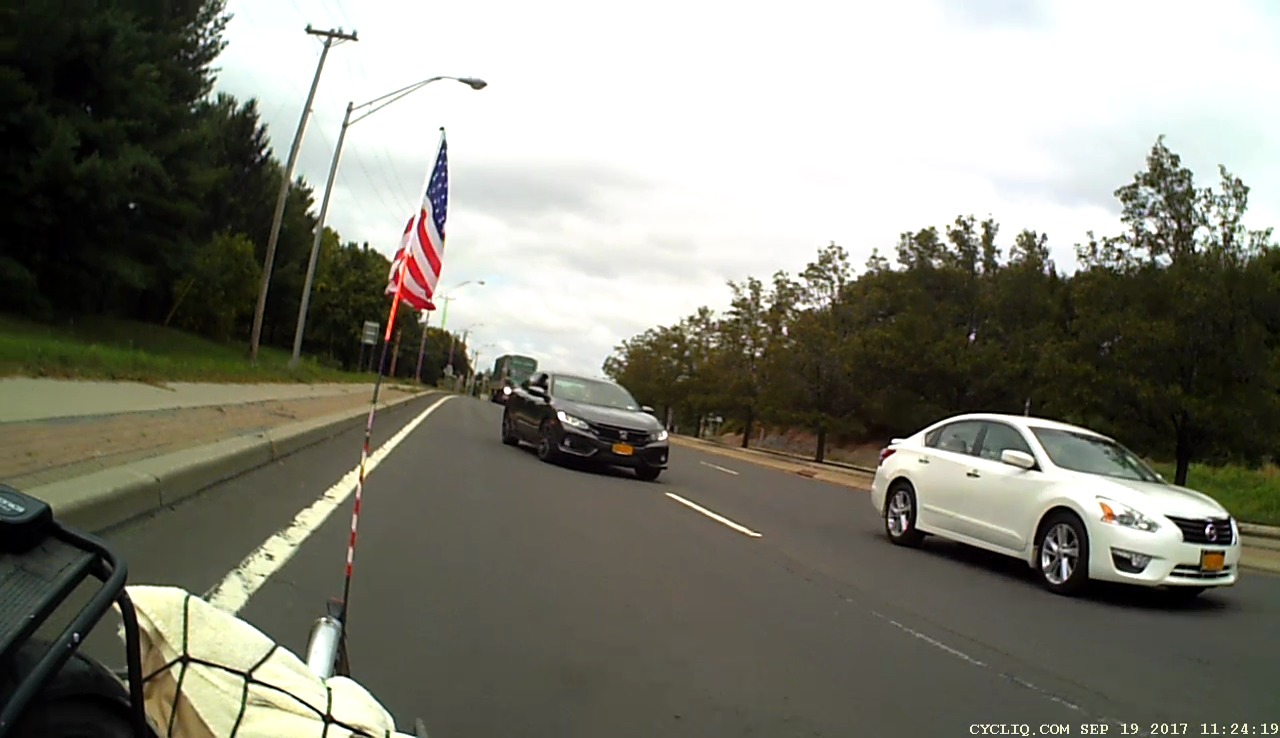
She passes Mary and stops directly ahead of us in the middle of the right-hand lane. We jam to a stop behind her. The black car approaching us swerves into the middle lane:
Burnett at Rt 55 – Right Pass – 2017-09-19 – 09
She pulls around the corner onto Manchester and stops in the intersection. I stop well behind her to remain visible from Rt 55, which turns out to be a Good Idea:
Burnett at Rt 55 – Right Pass – 2017-09-19 – 10
Mary eases beside the drivers window, which rolls down. The driver says she’s going to call the police, “because we pulled directly in front of her”. Mary points out we have video of the entire encounter. The window rolls up and the driver pulls away.
Overocker, Burnett, and a short sprint on Rt 55 to Manchester is the only route from the grocery store to Rt 376 and home, so it’s not like we’re looking for trouble.
No helmet camera video, alas, because I tried those piece-of-crap Wasabi batteries in the Sony HDR-AS30V and the second one was flat-out dead. The first one, in the camera when I left home, showed empty after the half-hour ride to the grocery store, so they really are junk; “Premium Japanese cells” my foot.
This notification appeared every day after I got my shiny-new / soon-to-be-obsolete Google Pixel XL:
Screenshot_20170906-085931 – Update Your Phone Number – detail
Fast-forward through nearly a month of doing the obvious things to no avail:
Tap the notification to update my phone number
Update my phone number from Firefox on the Pixel
Update my phone number from Firefox on my desktop
Ditto, from Chromium
Just dismiss the notification, repeatedly
Change my phone number in various Google places
Ditto, in various ways
Searching on the obvious keywords provided very few hits and none with a resolution. I followed one suggestion to flush the Google Play and Google Play Services caches, to no visible effect.
So I started a chat with Google Support by coredumping the entire list of Things Already Tried. After ten minutes of pleasantries, mostly spent idling while Holmes (great name for a tech support guy) read my coredump (and, most likely, timeshared a dozen other support chats), this transpired:
The “troubleshooting steps” look like a generic list of progressively more desperate measures applicable to any mysterious Android problem:
Clear app data for the Play Store
Go to Settings > Apps.
Tap Google Play Store > Storage > Clear data > Ok.
At the top left, tap the Back arrow to go to the “App info” screen.
At the top right, tap More (3 dots) > Uninstall updates > Ok > Ok to restore the app to its factory version.
Note: The Play Store will update automatically within 48 hours. If “Uninstall updates” is dimmed, you can skip this step.
Note: If you’ve changed the Google Play Store app settings (content filters, password protection, etc.), you’ll need to set them up again.
Clear the app data of Google Play services
Warning: Clearing the app data of Google Play services can reset settings, affect app performance, and cause unpredictable behavior across the device.
Go to Settings > Apps or Application Manager.
At the top right, tap More (3 dots) > Show system apps (on Android versions lower than 6.0, go to All instead).
Tap Google Play services.
Note: If you don’t see “Google Play services,” check Show all system apps and make sure that both Google Play Framework and Google Play Services are enabled. If they aren’t enabled, download the Google Play Service from Play Store.
Tap Storage > Clear cache.
Then tap Manage Space > Clear All Data > Ok.
After completing this step, you should check the settings on your apps to see if they’re still configured correctly.
Remove and re-add your Google Account
Note: This may reset settings and remove in-app content. However, your purchases and synced data (Gmail, Google contacts, etc.) are tied to your account and will be available after re-adding your account.
Go to Settings > Accounts > Google.
Tap the name of the account you wish to remove.
Important: Make sure you remember your account password. You’ll need it to sign back in to your account.
At the top right, tap More (3 dots) > Remove account > Remove account.
At the top left, tap the Back arrow > Add account > Google.
Sign in to your Google Account.
Uninstall and reinstall Play Store updates
Temporarily uninstalling updates to the Google Play Store app can help fix some issues.
To revert the Play Store app to the previous version:
Go to Settings.
Tap Apps or Application manager (depending on the device).
Tap Google Play Store (depending on the device, you may need to go to All).
Tap on the menu button, and then Uninstall updates.
If the Uninstall updates button isn’t available, skip the rest of this step and continue troubleshooting.
When prompted to change the Play Store app back to the factory version, tap OK.
Go back to the device’s home screen and relaunch the Play Store. Your Play Store app should update to the latest version within a few minutes.
If the Play Store app doesn’t update, tap on the menu button from within the app and go to Settings. Scroll down until you see Play Store Version. Tap on that to check for an update. If none is available, continue to the next step.
Uninstall updates for Google Play Services
Go to Settings.
Tap Apps or Application manager (depending on the device).
Tap Google Play Services (depending on the device, you may need to go to All).
Tap on the menu button, and then Uninstall updates.
If the Uninstall updates button isn’t available, skip the rest of this step and continue troubleshooting.
When prompted to change the Play Store app back to the factory version, tap OK.
Reset your device to factory settings
If you’d like help with resetting your device, contact us from another device and we’ll walk you through it.
To reset your device:
If you have an SD card, remove it to save the data on the card.
Reset your Android device to factory settings.
Sign in to your device with a Google Account that was signed in before the reset.
If you removed an SD card, reinsert it.
To reload your apps and data:
Open the Play Store app.
Tap the Menu (3 lines) > My apps & games > Library.
Next to the apps that you’d like to install, tap Install or Enable.
If the issue still persist after performing all the troubleshooting steps I request you to reply to this email with the screenshot.
As it turned out, blowing away “the app data of the Google Play services” did the trick; the notification Went Away and hasn’t returned.
Datasheets loosely associated with the tuning fork resonators in hand suggest 1 μW maximum drive power, which works out to maybe 100 mVrms = 150 mVpk at about 10 kΩ ESR. If you inadvertently apply 500 mVpk = 375 mVrms, the resulting 14 μW does this:
Broken 60 kHz Tuning Fork Resonator – overview
I was applying a precisely tuned 60 kHz sine wave to the first pass at a crystal filter grafted onto the loop antenna preamp and wasn’t paying attention to the amplitude. For all I know, though, the poor thing died from a power-on transient. I’m pretty sure I didn’t break it during extraction, because it stopped being a resonator while in the circuit.
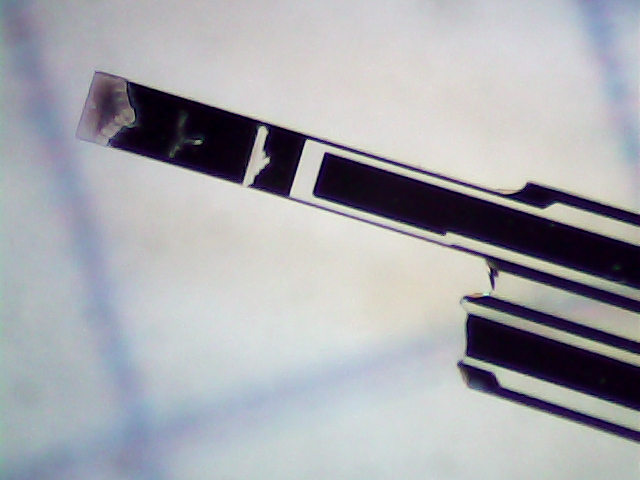
The missing tine fell out of the can:
Broken 60 kHz Tuning Fork Resonator – tine detail
Laser trim scars form a triangle near the tip, a T a bit further down, a slot just above the nicely etched gap.
A closer look at the fractured base:
Broken 60 kHz Tuning Fork Resonator – detail
The metalization appears black here and gold in person.
The O-rings on the spout of our American Standard kitchen faucet wore out again; having described that repair many times, there’s no need to say much more about it. I didn’t want to get into this repair while thinking about the hot limit problem, but I did check to make sure the box under the sink had some O-ring replacement kits.
A bench vise with soft jaws holds the spout while you remove the escutcheon ring retainer:
Kitchen faucet spout – in vise
Basically, just tap around the ring with a long drift punch and it’ll eventually fall out onto the reasonably clean rag below it.
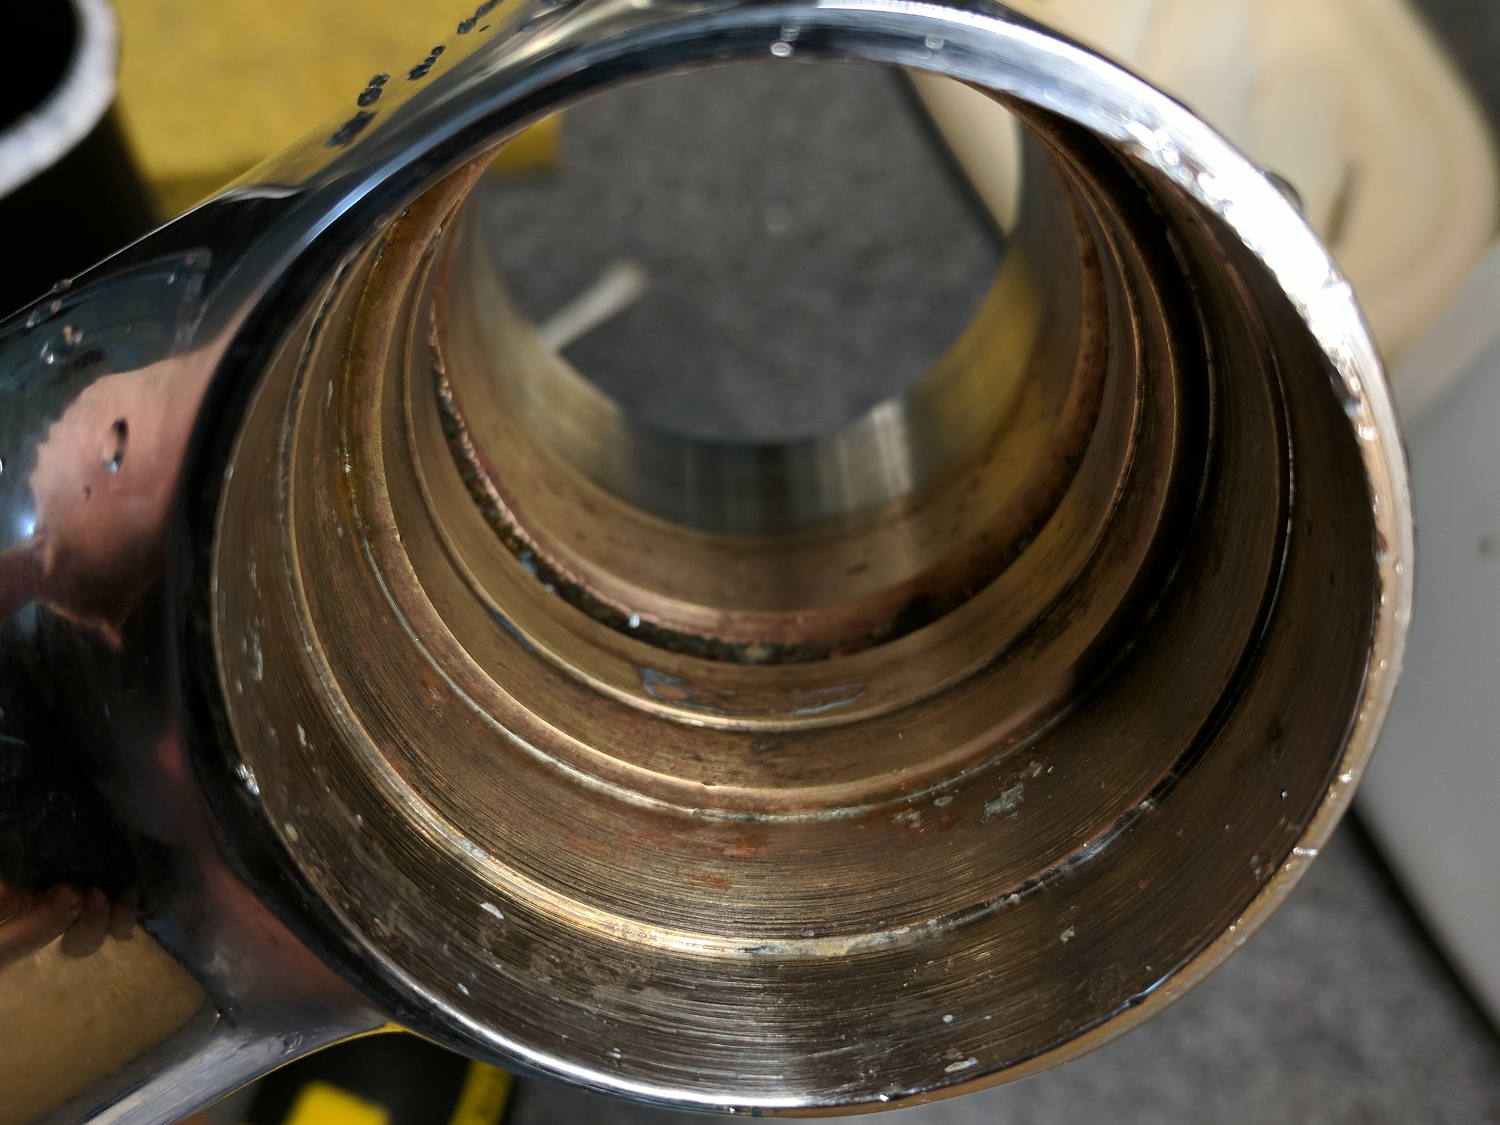
The interior of the spout before cleaning shows why you should never look into your plumbing:
Kitchen faucet spout interior – before
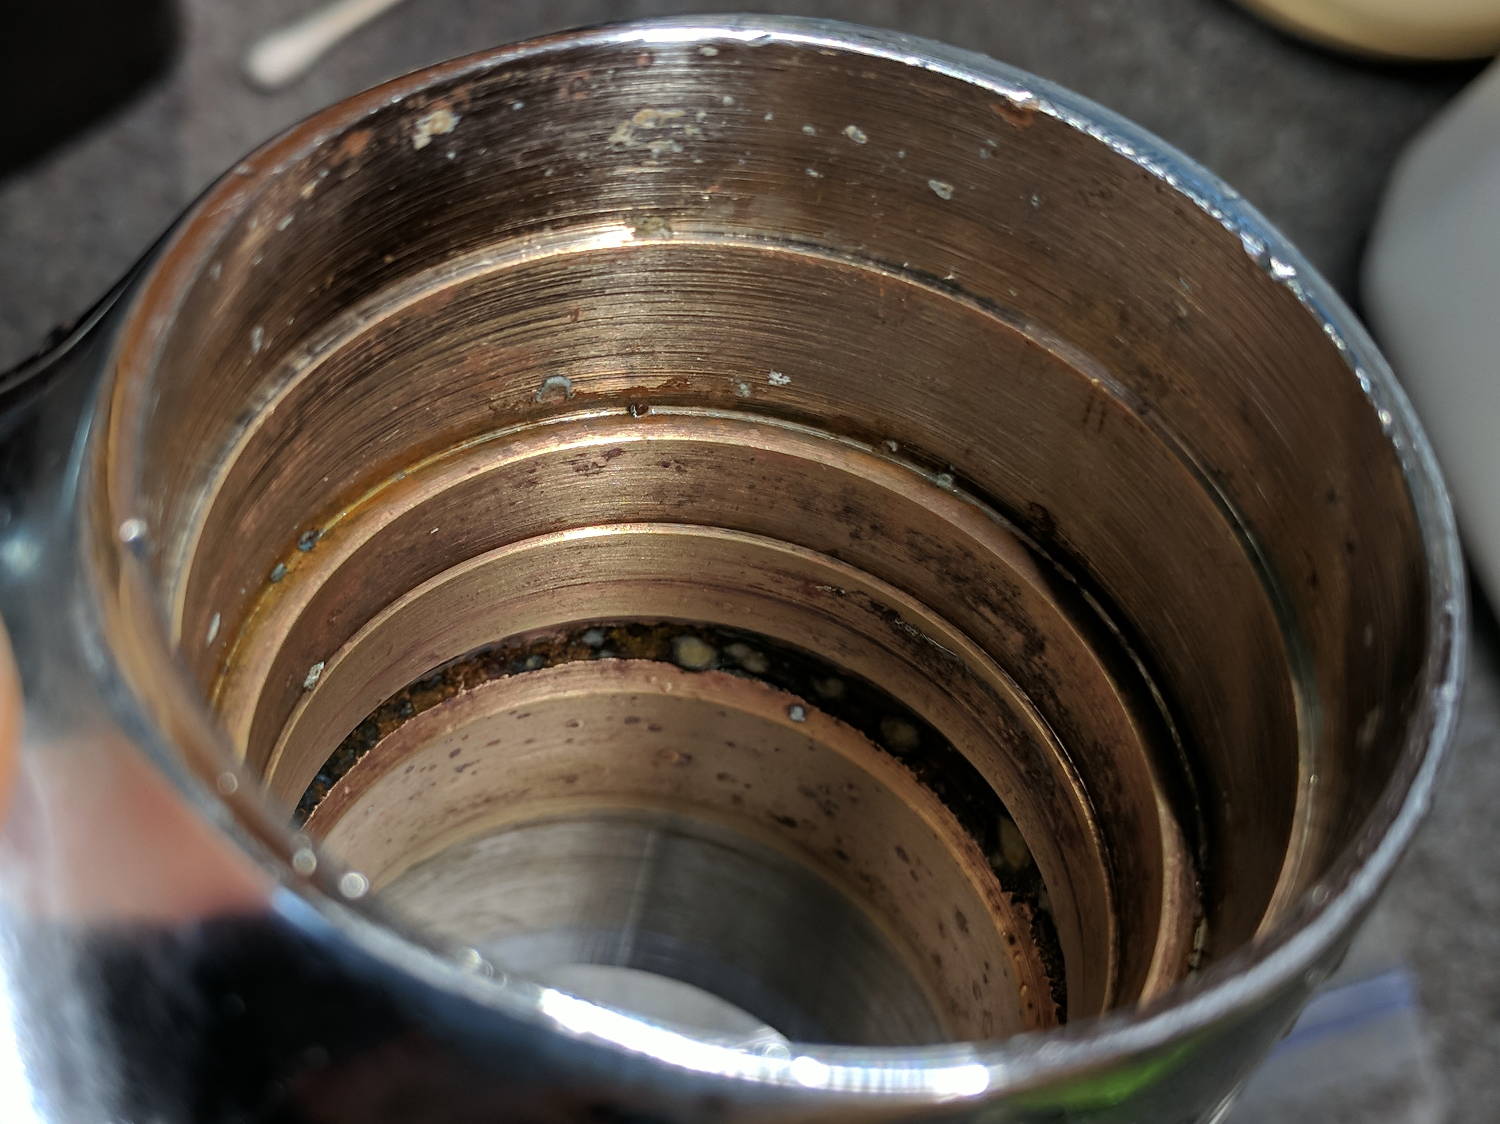
After a few hours in a white vinegar bath and a few minutes of scrubbing with a ScotchBrite pad:
Kitchen faucet spout interior – after – 1
Another view:
Kitchen faucet spout interior – after – 2
Obviously, you could do better, but it’s hard to get excited about the last few nodules. For whatever it’s worth, the nodules grow despite our water softener; I have no clue what’s going on in there.
A few wipes of silicone grease, reassemble in reverse order, apply a firm shove, and it’s leakless again. For a while, anyhow.
The Pixel’s camera shows a black stripe across both the live preview and the final image:
Pixel XL Camera – shutter stripe
That’s under the high-intensity LED lamp on my desk, which must have a high-frequency flicker. I’m amazed the camera remains in absolutely stable sync with the flicker for as long as I’m willing to aim it.
The stripe covers only the moth and greenery, not the LCD monitor in the background, so it’s caused by the overhead lamp, not something internal to the Pixel or its camera.
A closer look shows shading on either side of the deepest black (clicky for more dots):
Pixel XL Camera – shutter stripe – detail
The stripe location and width differ based on the image zoom level, although in no predictable way:
Pixel XL Camera – shutter stripe – 2
The Pixel camera definitely doesn’t have optical zoom, so it’s surely related to the scaling applied to convert the physical sensor array into the final image. Even though all images have 4048×3036 pixels (or the other way around, at least for these portrait-layout pix), zoomed images get made-up (pronounced “interpolated”) data in their pixels.
Not a problem under any other illumination I’ve encountered so far, so it’s likely something to do with this specific and relatively old LED lamp.
This eight-pointer was one of two browsing in the back-yard grove:
Eight point buck deer in velvet
The other was a mere four-pointer. In a few weeks they’ll get all feisty and browse the grove in shifts.
The notion of a “suburban hunting license”, perhaps with crossbows, may eventually gain traction.
A few days later, Mary awoke to a great clattering caused by a buck fighting free of the slot between the garden’s mesh “deer fence” and the neighbor’s wood fence, flattening the corner post in the process. A similar encounter a few years ago ended poorly.