Ed Nisley's Blog: Shop notes, electronics, firmware, machinery, 3D printing, laser cuttery, and curiosities. Contents: 100% human thinking, 0% AI slop.
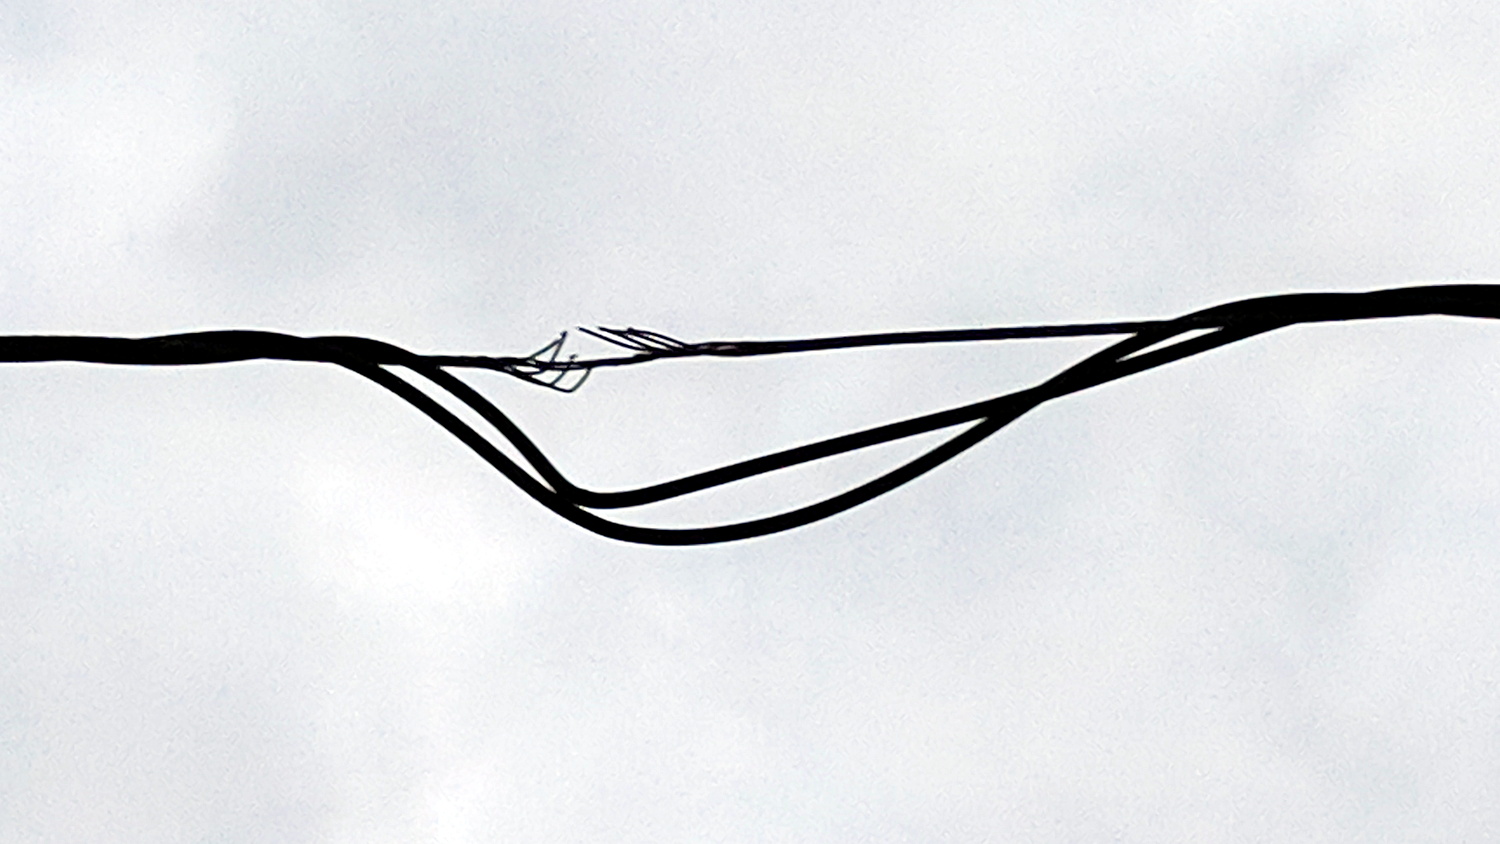
The neutral conductor is down to its last three strands:
Damaged neutral – over Redondo near pole 62859
Perhaps the power drop got snagged twice, because there’s a splice only a few feet away:
Damaged neutral and splice – over Redondo near pole 62859
Spotted overhead on Redondo near Rt 376 during an evening walk. I reported it using Central Hudson’s dead streetlight page, because there seems no other way to get their attention. It may be the homeowner’s responsibility, in which case a second splice will surely appear after the next power outage.
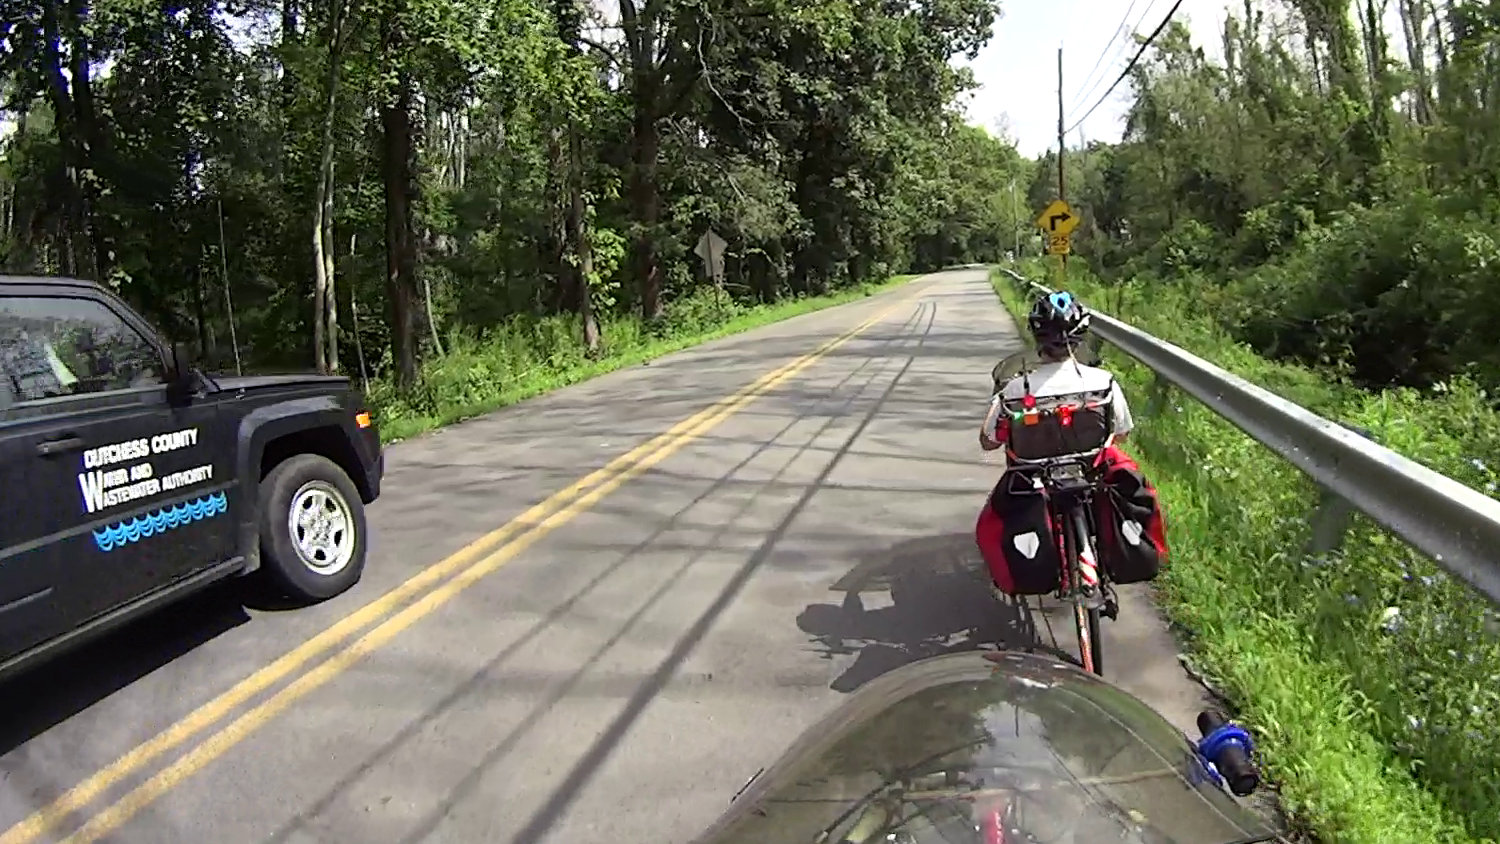
The driver gave us plenty of room, which is always nice:
Tire tracks at Maloney Trailhead – DCWWA SUV on Maloney 2018-08-20
But then the SUV turned into the Maloney Rd entrance to the Dutchess Rail Trail:
Tire tracks at Maloney Trailhead – DCWWA SUV entering – 2018-08-20
Which was specifically designed to exclude motor vehicles:
Tire tracks at Maloney Trailhead – DCWWA SUV tracks – 2018-08-20
Later, I was told it’s an “allowable access” for Water Authority vehicles and, in any event, because their SUV didn’t leave the biggest ruts and tracks, they think it’s all good:
Tire tracks at Maloney Trailhead – 2018-08-20
The ramp joins the trail at an acute angle, so the SUV required some backing & filling to get around:
Then it’s an easy drive to the water meter about 2500 feet down the trail:
Tire tracks at Maloney Trailhead – Dutchess Water Authority SUV – 2018-08-20
There’s an Official Vehicle Access gate one mile south of the Maloney ramp that’s about 3800 feet from the water meter. I’m told they use the Maloney ramp to reduce the distance they drive on the rail trail; evidently, destroying the entrance Just Doesn’t Matter.
I’m trying to develop an attitude between Zen and apathy, with just enough indifference to not care when somebody tells me how wonderful things will be in the future.
However, the actual SCL frequency comes from dividing the CPU’s core clock by an even integer, so you can’t always get what you want. The Pi 3 ticks along at 1.2 GHz (actually 1.1 GHz, because marketing) from a core clock of 550 MHz, so a 200 kHz clock calls for a 2750 divider: 550 MHz / 2750 = 200 kHz.
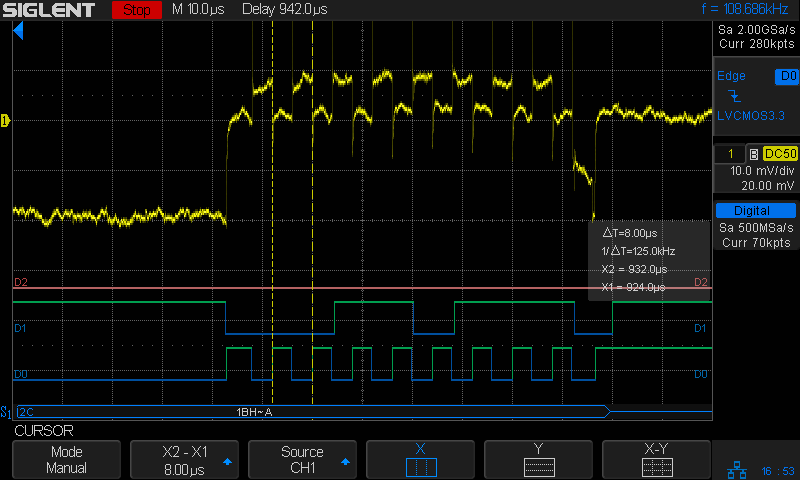
Actually measuring the SCL frequencies suggests something else is going on:
I2C 200kHz – actual 125kHz
D0, the bottom trace, is SCL, D1 is SDA, and D2 is a trigger output not used in this setup. The yellow analog trace is the current in the SCL line between the Pi and the BNO055, about which more later.
So a 200 kHz nominal frequency produces a 125 kHz actual frequency.
The BNO055 pulls the clock low (“clock stretching”), which can (and does) cause problems, but it’s not active during the main part of the transfer where the Pi determines the SCL frequency.
More measurement along those lines produces a table:
CPU Core Clock:
550
MHz
I2C SCL kHz
Nominal
Ratio
Actual
Ratio
250
2200
156.20
3521
200
2750
125.00
4400
150
3667
92.59
5940
125
4400
78.12
7040
100
5500
62.50
8800
50
11000
31.25
17600
25
22000
15.63
35189
10
55000
6.25
88000
Apparently, the code converting the nominal I2C rate in config.txt uses a table of divider values intended for another CPU core clock. AFAICT, the boot code could divide the actual core clock by the desired I2C frequency to produce the appropriate value.
I have no particular desire to Use The Source to figure out what’s going on …
[Update: Perhaps this comes along with CPU clock throttling due to temperature. For completeness, I should dump the temperature and actual clock speed.]
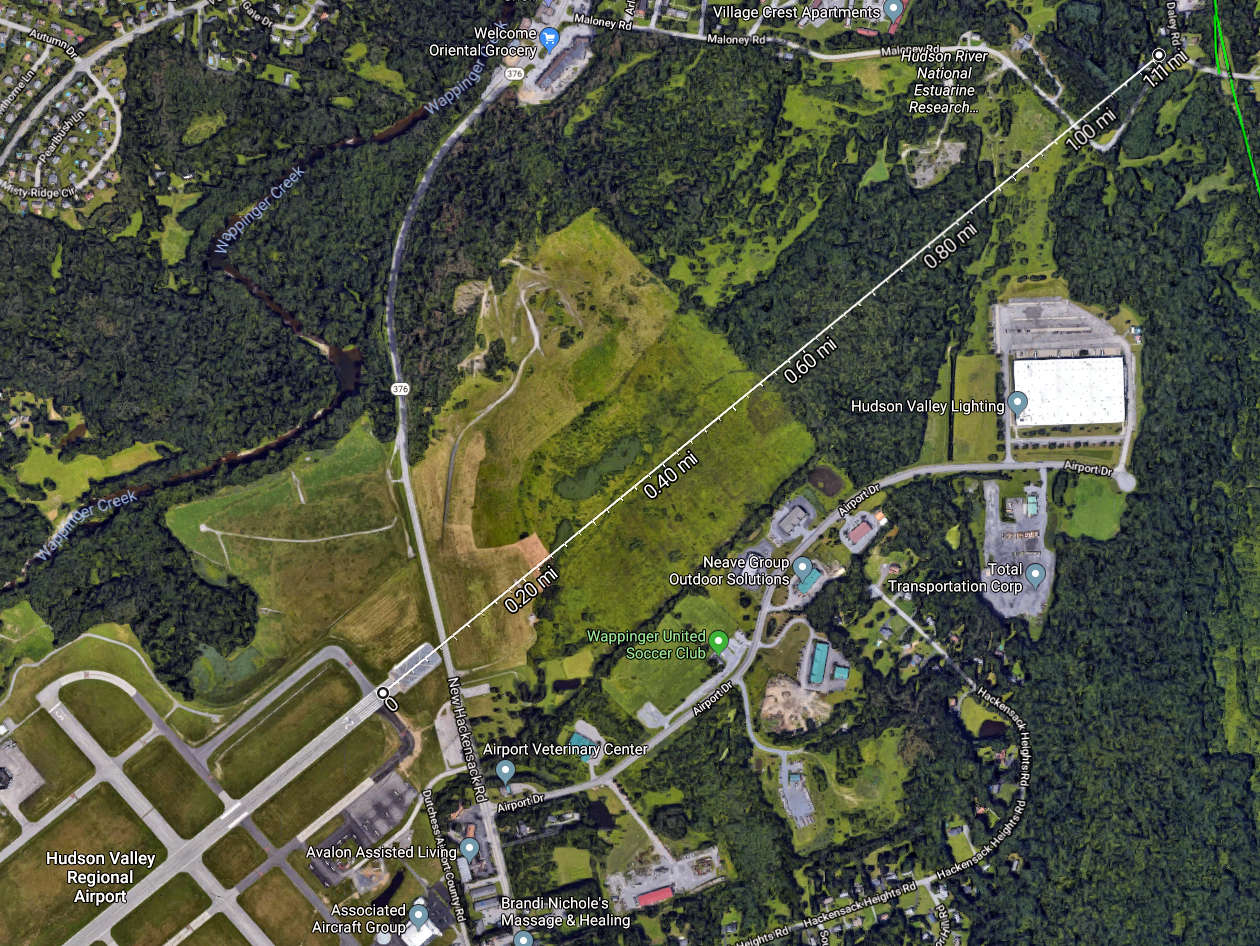
So it’s not unusual to ride under a small plane on final approach. Having a Gulfstream V fly directly overhead, however, is a real attention-getter:
Gulfstream V on final – Maloney Rd – 2018-08-26
What’s not at all obvious from the picture is how big a GV looks when seen directly overhead through those trees just ahead on the corner where our paths crossed. There’s a 360 ft (above sea level) hill directly on the flight path, so it’s at maybe 600 ft ASL and 400-ish ft AGL.
Thrust-reversal thunder rolled over us 50 seconds later, as we rode up the rail trail access ramp. Figuring we’re 15 sound-seconds from the strip, the GV was 30 seconds from touchdown.