Ed Nisley's Blog: Shop notes, electronics, firmware, machinery, 3D printing, laser cuttery, and curiosities. Contents: 100% human thinking, 0% AI slop.
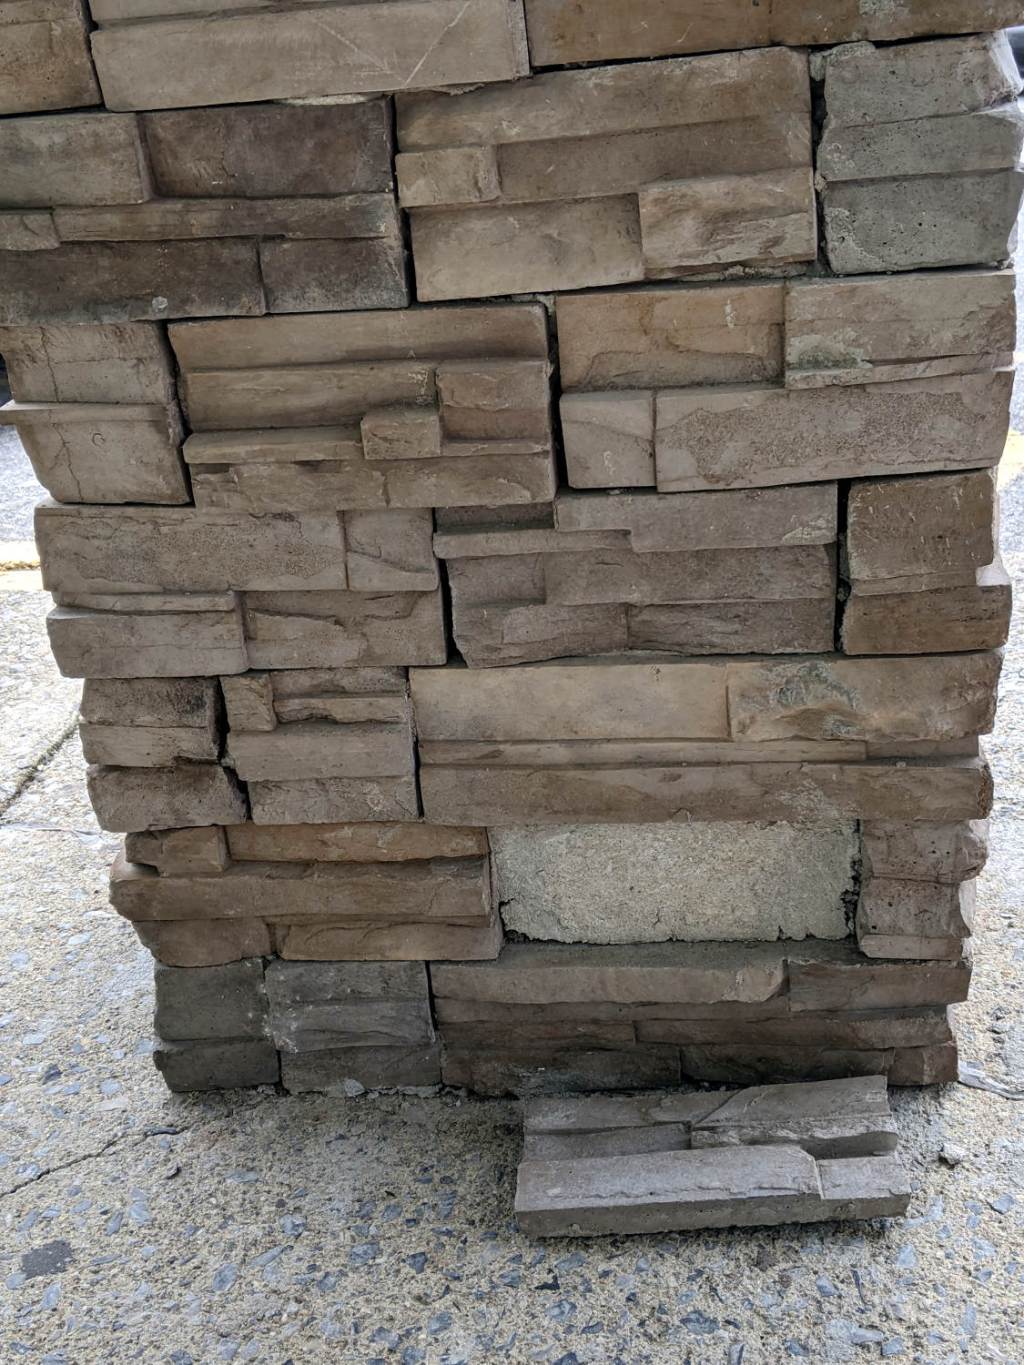
The strip mall down the road recently sprouted ersatz stone pillars around the steel posts holding up the roof:
Ersatz stone pillar failure
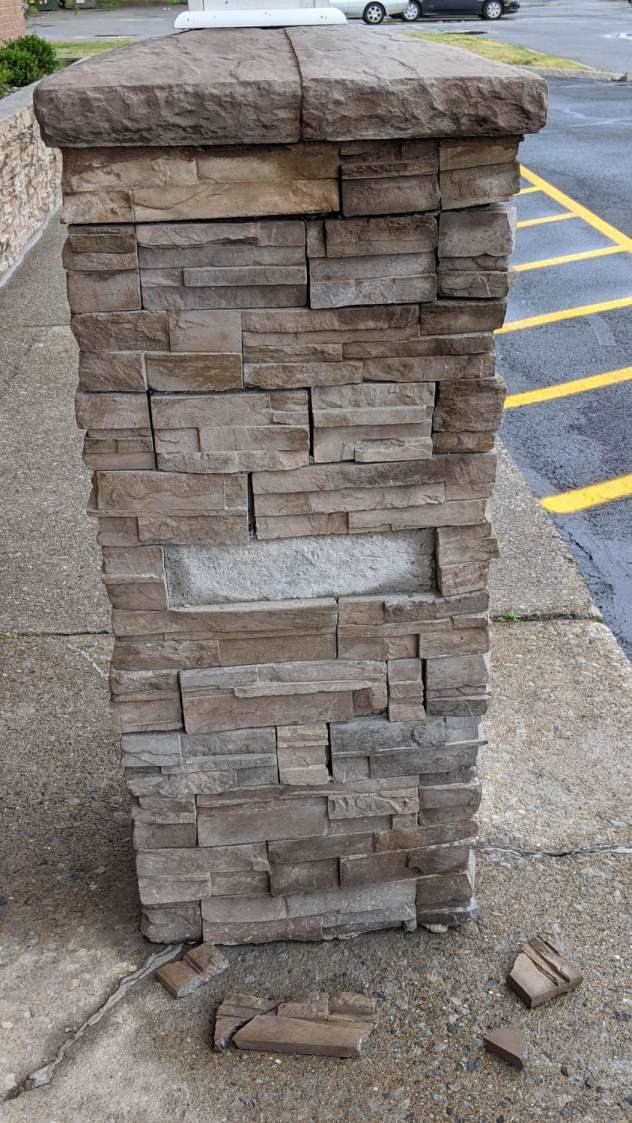
Six days later, more slabs have fallen off the first pillar in the row:
Ersatz stone pillar – failure 2
And the second pillar:
Ersatz stone pillar – failure 3
Those fancy(-ish) bases consist of a wood frame covered with a mortar layer holding tiles of imitation stonework. From what little I know of stonework, mortar works only in compression, so you can’t glue tiles onto the side of a concrete lump using mortar.
I’ve been putting this type of support structure inside screw holes & suchlike for years:
Browning Hi-Power Magazine Block – solid model – Generic 1 – support detail
It’s basically a group of small rectangles rotated around the hole’s axis and about one thread thickness shorter than the overhanging interior.
I’ve found that incorporating exactly the right support structure eliminates Slic3r’s weird growths, eases removal, and generally works better all around.
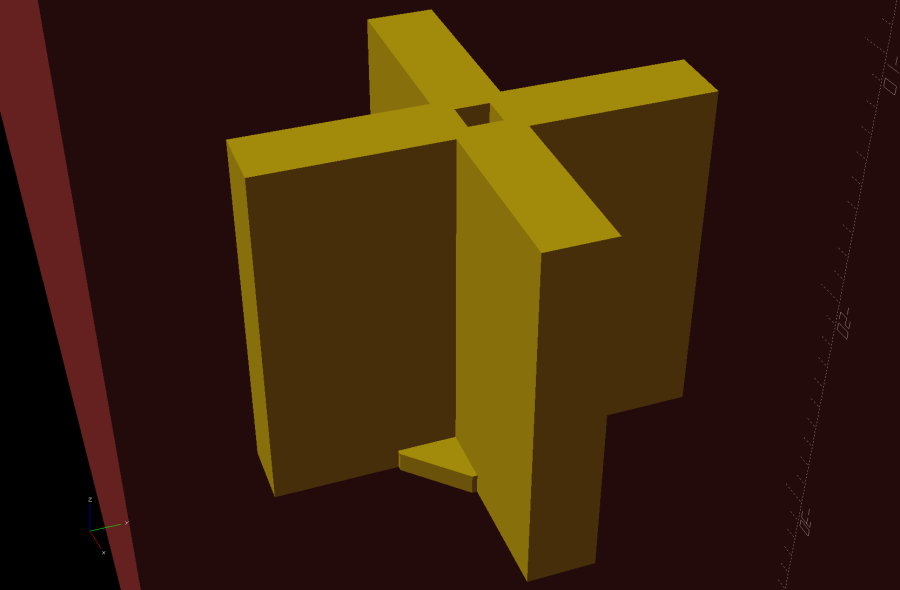
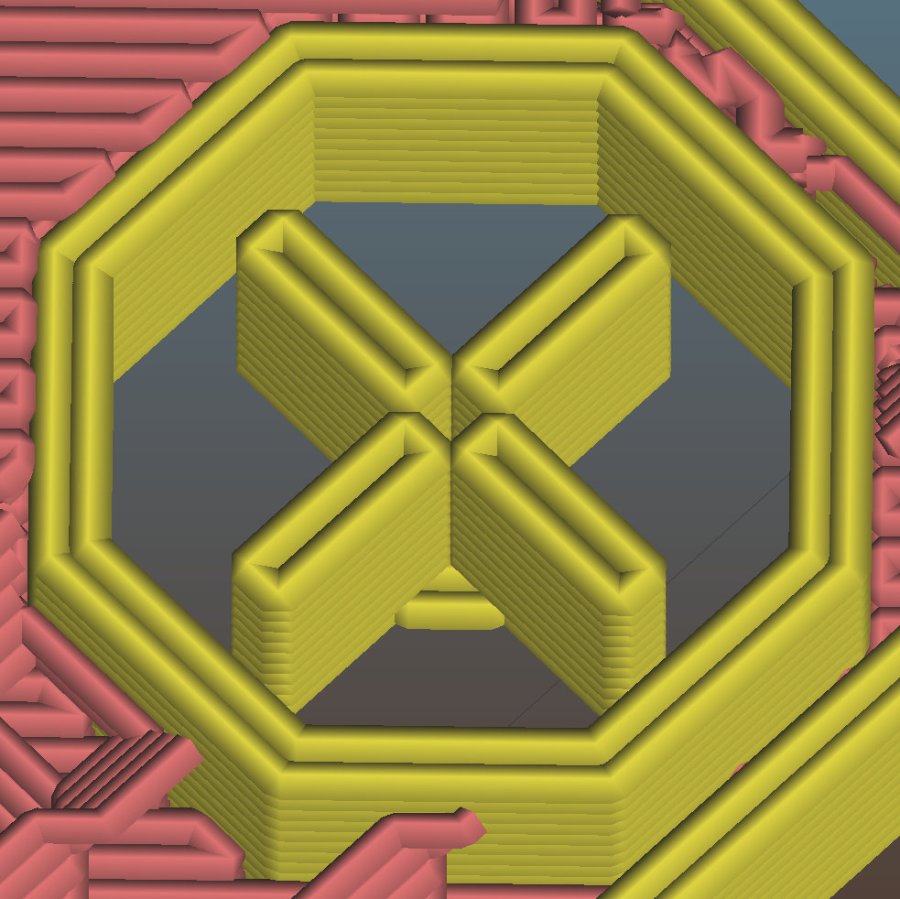
So doing this for the baseplate of the Glass Tile frame came naturally:
Glass Tile Frame – octagonal support
This OpenSCAD snippet plunks one of those asterisks in each of four screw holes:
  if (Support)
    color("Yellow")
      for (i=[-1,1], j=[-1,1])
        translate([i*InsertOC.x/2,j*InsertOC.y/2,0])
          for (a=[0:45:135])
              rotate(a)
                translate([0,0,(Screw[LENGTH] - ThreadThick)/2])
                  cube([Screw[OD] - 2*ThreadWidth,2*ThreadWidth,Screw[LENGTH] - ThreadThick],center=true);
The “cubes” overlap in the middle, with no completely coincident faces or common edges, so it’s 2-manifold. Slic3r, however, produces a weird time estimate whenever the model includes those structures:
Slic3r – NaN time estimate
NaN stands for Not A Number and means something horrible has happened in the G-Code generation. Fortunately, the G-Code worked perfectly and produced the desired result, but I’m always uneasy when Something Seems Wrong.
Messing around with the code produced a slightly different support structure:
Glass Tile Frame – quad support
The one thread thick square on the bottom helps glue the structure to the platform and four ribs work just as well as eight in the octagonal hole:
  Fin = [Screw[OD]/2 - 1.5*ThreadWidth,2*ThreadWidth,ScrewRecess - ThreadThick];
  if (Inserts && SupportInserts)
    color("Yellow")
      for (i=[-1,1], j=[-1,1])
        translate([i*InsertOC.x/2,j*InsertOC.y/2,0]) {
          rotate(180/8)
            cylinder(d=6*ThreadWidth,h=ThreadThick,$fn=8);
          for (a=[0:90:360])
              rotate(a)
                translate([Fin.x/2 + ThreadWidth/2,0,(ScrewRecess - ThreadThick)/2])
                  cube(Fin,center=true);
        }
Which changed the NaN time estimates into actual numbers.
One key difference may be the small hole in the middle. The four ribs (not two!) now overlap by one thread width around the hole, so they’re not quite coincident and Slic3r produces a tidy model:
Glass Tile Frame – quad support – Slic3r
The hole eliminates a smear of infill from the center, which may have something to do with the improvement.
In any event, I have an improved copypasta recipe for the next screw holes in need of support, even if I don’t understand why it’s better.
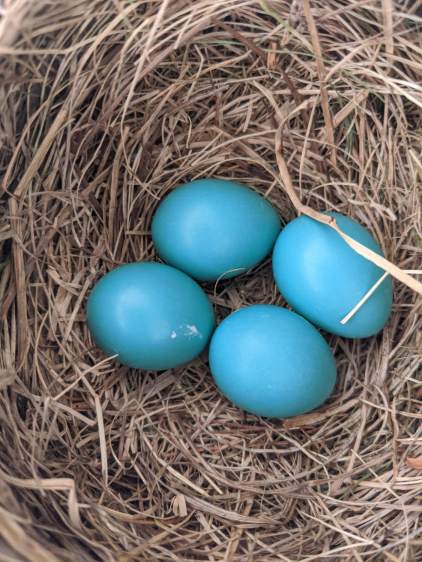
She’s surprisingly tolerant of our comings and goings, as well as garage door openings and closings:
Garage Robin Nest – robin brooding
We’re trying to stay out of her way as much as possible.
The gallery pix come from my phone, held against the soffit over the nest, and aimed entirely by feel, while standing on the Greater Ladder. If I had access to the top of the soffit, I’d drill a webcam hole, but …
The previous owners apparently surrounded a cedar (?) tree with a ring of large, decorative rocks. The tree vanished long before we arrived, with the stump accreting random stones, bricks, and similar impedimenta ever since; my first task involved (re)moving a couple hundred pounds of rocky debris.
After using the stump as a fulcrum for that steel bar to break the rotted roots and loosen the surrounding soil, it’s out and away:
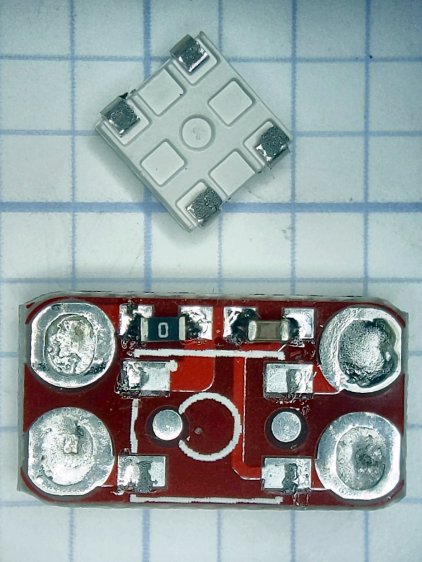
After building the third Glass Tile unit, one of the LEDs didn’t light up due to an easily diagnosed problem:
Glass Tile – WS2812 failure – PCB cold solder – as found
A closer look:
Glass Tile – WS2812 failure – PCB cold solder
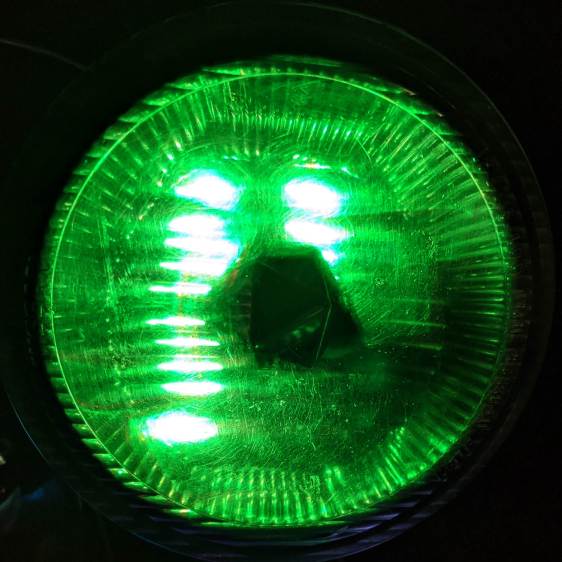
Shortly thereafter, the Nissan Fog Lamp developed an obvious beam problem:
Nissan Fog Lamp – failed WS2812 effect
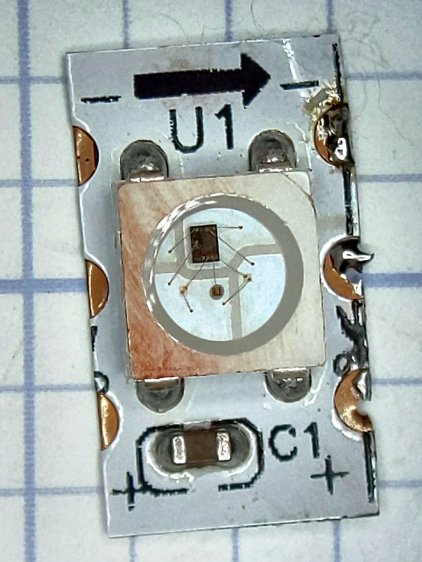
The WS2812 had the proper voltages / signals at all its pins and was still firmly stuck to the central “heatsink”:
Nissan Fog Lamp – failed WS2812 detail
It also passed the Josh Sharpie Test:
Glass Tile – WS2812 failure – tape – unknown
I’m particularly surprised by this one, because eleven of the twelve flex-PCB WS2812s in the Hard Drive Platter light have been running continuously for years with no additional failures.
The alert reader will note the common factor: no matter what substrate the LED is (supposed to be) soldered to, no matter when I bought it, no matter what it’s wired into, a WS2812 will fail.
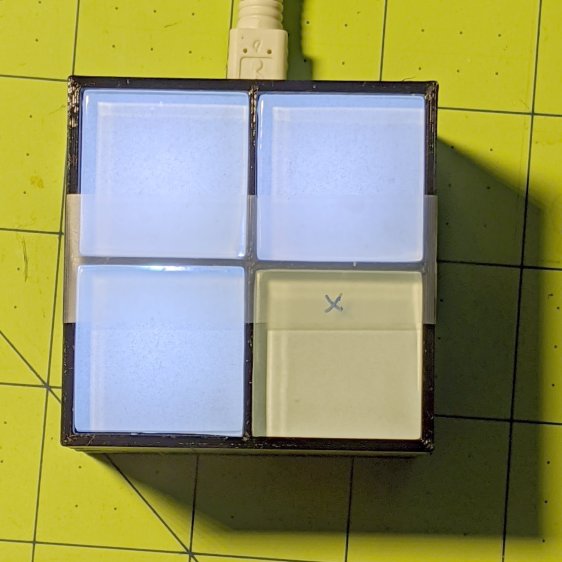
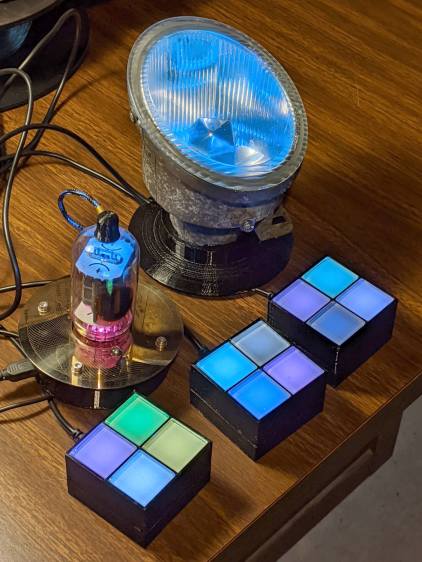
They’re all back in operation:
Glowing Algorithmic Art
Although nobody knows for how long …
Obviously, it’s time to refresh my programmable RGB LED stockpile!