Ed Nisley's Blog: Shop notes, electronics, firmware, machinery, 3D printing, laser cuttery, and curiosities. Contents: 100% human thinking, 0% AI slop.
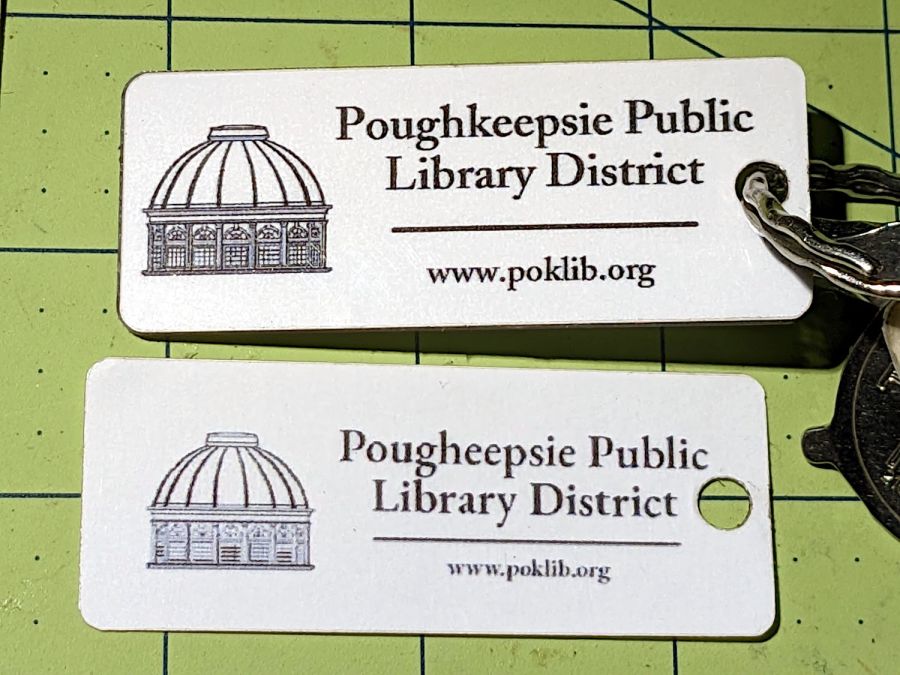
Sharpereyes than mine pointed out I misspelled Poughkeepsie, so I took advantage of the opportunity to make the whole thing look better:
Library card tag – revised front
It turns out the low-surface-energy tape stuck like glue to the acrylic tag (because that’s what it’s designed for) and peeled right off the laminating film on the printed paper. So I stuck some ordinary adhesive film to the back of the new paper label, left its protective paper on the other side, cold laminated the film+paper, laser-cut the outline, peeled off the back side of the laminating film with the protective paper, and stuck the new adhesive to the LSE tape still on the tag.
I have no idea how well this will work out in the long term, what with two adhesive layers bonded to each other, but this whole thing is in the nature of an experiment.
The improved Holly Mirror Coaster looks pretty good:
Holly Coaster – overview
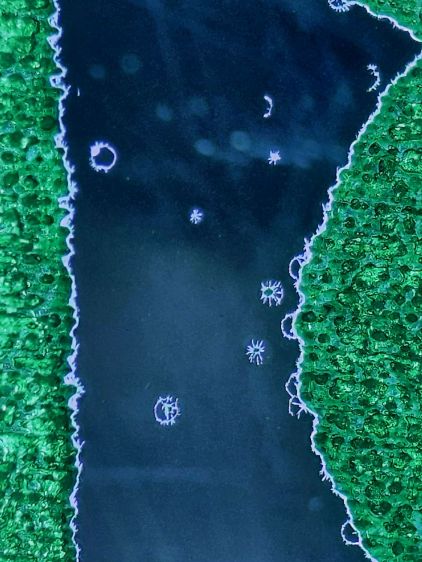
Until you realize some of those specks aren’t surface dust and take a closer look:
Holly Coaster – mirror speckles 1
The surface scratches are doubled by their reflection in the bottom mirror. The little dots that aren’t doubled reveal marks in the mirror surface itself.
In this case, they cause defects in the mirror coating allowing alcohol from the fat-tip permanent markers coloring the engraved areas to hit the acrylic. The starbursts come from stress cracks around the punctures.
Peering even closer shows similar cracks along the edges of the colored areas:
Holly Coaster – mirror speckles tight detail
Not much to do about the random speckles, but it’s obvious I must up my coloring game.
Which would be significantly easier if rattlecan spray paint sprayed at winter temperatures …
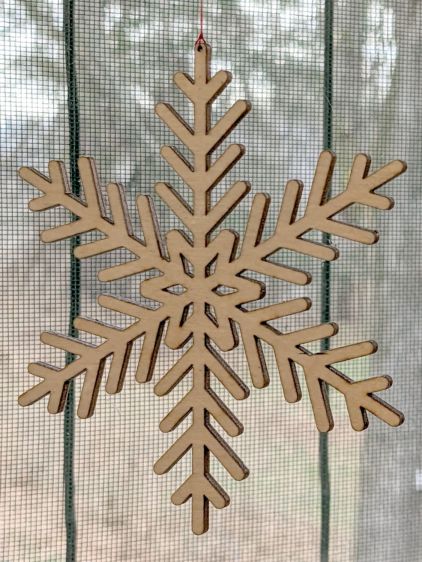
After the first two snowflake coasters, it finally penetrated my thick skill that putting a 1 mm hole in the flake cut from the center of the plywood would convert it into a decorative window hanging:
Snowflake Hanger – plywood
Admittedly, I may be using the word “decorative” in a manner you had not previously encountered, but work with me on this.
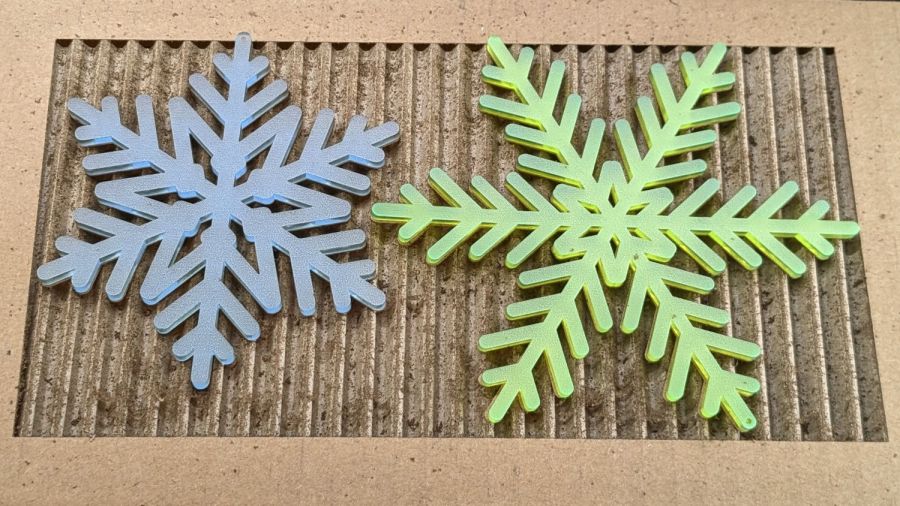
Cutting a similar flake from transparent acrylic looks better:
Snowflake Hanger – blue acrylic
Transparent acrylic turned out to be, well, too transparent, so I set up a LightBurn layout to “engrave” a light frosting on the flake before cutting it out:
Snowflake Hangers – engraving in situ
That worked for all subsequent flakes, but I had to do something about the first few flakes. After realizing that the time to engrave an object depends only on its width, I set up a rectangle with the proper parameters, snugged two forlorn flakes next to each other, and fired the laser:
Snowflake Hangers – retroactive engraving
I thought using cardboard was a Good Idea™ for a stable backing, but lightly vaporizing the top layer produced an unbelievable amount of filth:
Snowflake Hangers – frosted
I had to scrub those poor flakes with dish detergent and a toothbrush to get them even close to their former pristine state; the blue one may never recover.
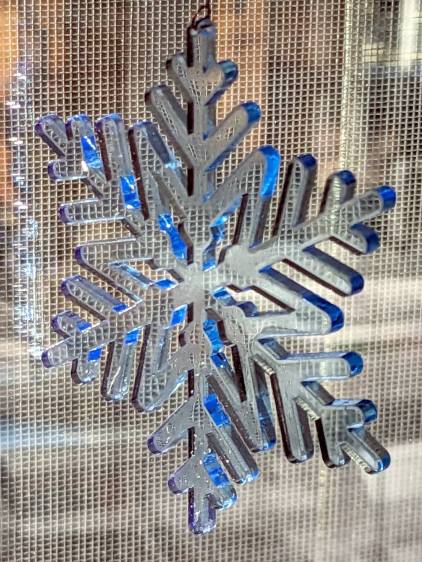
Anyhow, frosted flakes look good if you don’t look closely:
Snowflake Hangers – frosted
The grid pattern comes from the window screen in direct sunlight; the vertical bars are DIY BirdSavers.
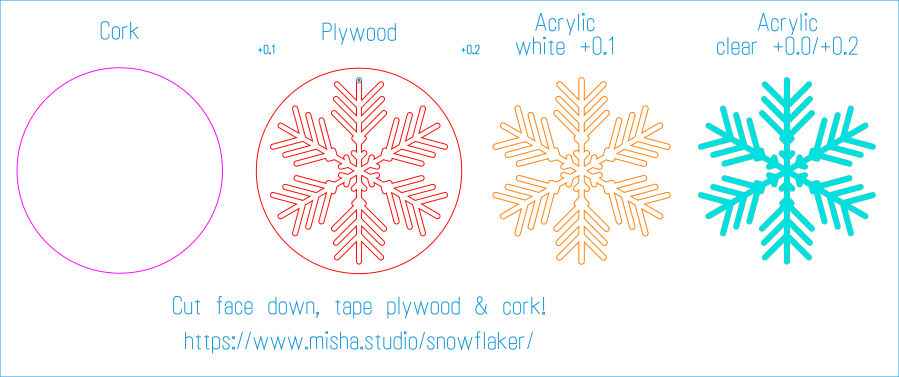
The LightBurn layout produces 120 mm coasters to fit my 20 ounce mugs:
Snowflake Coaster 120 mm – LB Layout
You get two hanging flakes: one plain plywood and one frosted acrylic!


