The Smell of Molten Projects in the Morning

Ed Nisley's Blog: Shop notes, electronics, firmware, machinery, 3D printing, laser cuttery, and curiosities. Contents: 100% human thinking, 0% AI slop.

Category: Machine Shop

Mechanical widgetry

  • Google Pixel 3a Photomicrography vs. Ballpoint Pens

    The Google Pixel 3a camera, unlike the camera in my older Google Pixel XL, takes spectacularly good images through a widefield 5X eyepiece on the stereo zoom microscope:

    0.5 1.0 mm ball pens - 0.7 mm lead pencil
    0.5 1.0 mm ball pens – 0.7 mm lead pencil

    That’s hand-holding the phone against the eyepiece while manipulating it with the other hand. Definitely not the most stable arrangement, but the camera copes well with slight motions. I really need a gripping hand for the camera, to free up another for the microscope’s focus knob.

    For the record:

    Zooming in (because it’s a stereo zoom microscope and I can), the 1.0 mm ball seems surprisingly un-wetted by its ink:

    1.0 mm ball pen
    1.0 mm ball pen

    The Pilot V5 ball seems more smoothly covered:

    0.5 mm ball Pilot V5RT pen
    0.5 mm ball Pilot V5RT pen

    Those are at the same magnification & crop size, so they’re to the same scale.

    This definitely calls for a customized phone-to-eyepiece holder!

  • CNC 3018XL: Pilot V5RT Pen Holder

    It turns out my all-time favorite Pilot Precise V5 Extra Fine stick pen also comes in a clicky-top retractable version:

    Pilot V5 and V5RT pens
    Pilot V5 and V5RT pens

    The cartridge is a nice 6 mm cylinder, eminently transformable into a plotter pen:

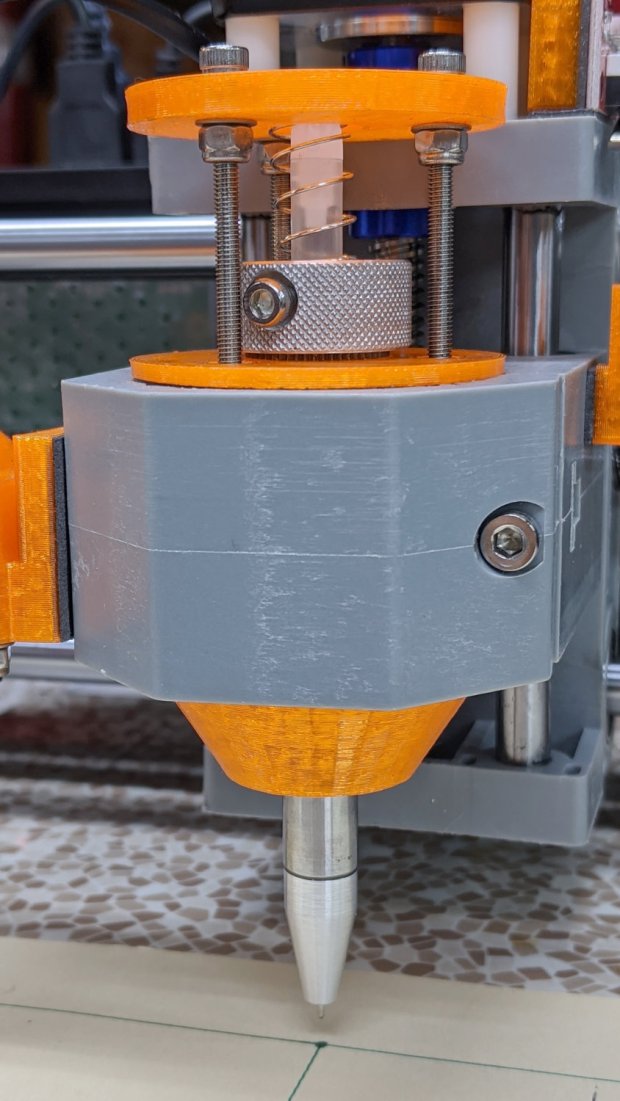
    Pilot V5RT holder - installed
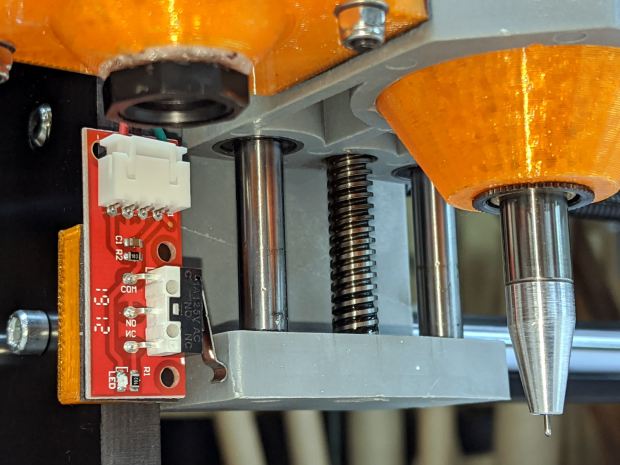
    Pilot V5RT holder – installed

    A few minutes with a caliper provides key measurements for a snout surrounding the business end:

    Pilot V5RT Pen Holder - snout dimension doodle
    Pilot V5RT Pen Holder – snout dimension doodle

    The green letters & numbers give the nearest drill sizes. The “T” values along the bottom are the tailstock turns (at 1.5 mm/turn) required to poke the drills to the indicated depths, eyeballed when the body just enters the hole.

    Having recently decomissioned the Thing-O-Matic and harvested its organs parts, I have a vast collection of 3/8 inch = 9.52 mm shafts and matching bronze bushings:

    9.52 mm shaft and bushings
    9.52 mm shaft and bushings

    Bronze bushings have low stiction, at least when they’re co-axial, and are much shorter than linear ball bearings.

    I chopped off a 70 mm length of shaft and faced the raw end:

    Pilot V5RT holder - facing shaft
    Pilot V5RT holder – facing shaft

    The other end had a maker’s logo, but I don’t recognize it:

    Pilot V5RT holder - center drill
    Pilot V5RT holder – center drill

    I really wanted an 8 mm bore around the snout, but it just didn’t work out. The ring around the 7.5 mm counterbore shows where the larger drill just … stopped:

    Pilot V5RT holder - drilled shaft
    Pilot V5RT holder – drilled shaft

    A trial fit with the pen cartridge:

    Pilot V5RT holder - pen in shaft
    Pilot V5RT holder – pen in shaft

    The top of the shaft gets a somewhat longer knurled ring for the 3 mm SHCS holding the cartridge in place:

    Pilot V5RT holder - knurling pen clamp
    Pilot V5RT holder – knurling pen clamp

    The screw bears on a split collar turned and drilled from a Delrin rod:

    Pilot V5RT holder - drilling Delrin clamp
    Pilot V5RT holder – drilling Delrin clamp

    The “split” came from a simple saw cut across one side and I milled a flat spot in the knurling to seat the screw. As usual, the knurled ring got epoxied to the shaft.

    The snout started as a 3/8 inch aluminum rod, drilled as shown in the sketch, with a (scant) 7.5 mm section to fit the shaft. The carbide insert left a nicely rounded shoulder that required trimming to fit snugly into the shaft:

    Pilot V5RT holder - shaping snout seat
    Pilot V5RT holder – shaping snout seat

    The compound can handle the shallow angle required to shape the snout:

    Pilot V5RT holder - tapering snout
    Pilot V5RT holder – tapering snout

    A trial fit showed the snout was a bit too long for comfort:

    Pilot V5RT holder - snout test fit
    Pilot V5RT holder – snout test fit

    Making something shorter doesn’t pose much of a challenge:

    Pilot V5RT holder - trimming snout
    Pilot V5RT holder – trimming snout

    Another trial fit shows it’s spot on:

    Pilot V5RT holder - shaft snout pen test fit
    Pilot V5RT holder – shaft snout pen test fit

    The critical part is having the snout support the plastic around the pen tip to prevent wobbulation.

    Epoxy the whole thing together, add a suitable spring, tighten the screws & nuts for the reaction plate, and it’s all good. I write with about 50 g of force for these pens, so a light preload seemed in order:

    Pilot V5RT Pen Holder - initial downforce measurement
    Pilot V5RT Pen Holder – initial downforce measurement

    If I’d weighed the full-up shaft + snout + collar + cartridge, I’d know if the Y intercept matches that weight. It seems a little lighter, but I’m not taking the thing apart to find out.

    The first version of the 3D printed holder (shown above) is a straightforward modification of the LM12UU diamond drag bit holder, but, after building enough of these things, I realized the circular reaction plate should be triangular to get more clearance in front of the Z-axis stepper motor when installing & removing the holder:

    Pilot V5RT Pen Holder - solid model - show view
    Pilot V5RT Pen Holder – solid model – show view

    It also has a recess for the serrated top of the bearing, to prevent the knurled collar from clicking annoyingly as the Z-axis rises at the end of each stroke.

    Now, to see how well it draws!

    The OpenSCAD source code as a GitHub Gist:

    // Diamond Scribe in linear bearings for CNC3018
    // Ed Nisley KE4ZNU – 2019-08-9
    Layout = "Build"; // [Build, Show, Base, Mount, Plate]
    /* [Hidden] */
    ThreadThick = 0.25; // [0.20, 0.25]
    ThreadWidth = 0.40; // [0.40, 0.40]
    /* [Hidden] */
    Protrusion = 0.1; // [0.01, 0.1]
    HoleWindage = 0.2;
    inch = 25.4;
    function IntegerMultiple(Size,Unit) = Unit * ceil(Size / Unit);
    ID = 0;
    OD = 1;
    LENGTH = 2;
    //- Adjust hole diameter to make the size come out right
    module PolyCyl(Dia,Height,ForceSides=0) { // based on nophead's polyholes
    Sides = (ForceSides != 0) ? ForceSides : (ceil(Dia) + 2);
    FixDia = Dia / cos(180/Sides);
    cylinder(r=(FixDia + HoleWindage)/2,h=Height,$fn=Sides);
    }
    //- Dimensions
    PenOD = 6.1; // pen refill shaft, max OD
    Bearing = [(3.0/8.0)*inch,16.0,10.6]; // linear bearing body, ID = shaft diameter
    BearingFlange = [Bearing[OD],17.2,1.0]; // flange around end of bearing
    Spring = [8.5,9.5,15.5]; // compression spring around shaft, LENGTH = uncompressed
    SpringRecess = 4*ThreadThick;
    WallThick = 4.0; // minimum thickness / width
    Screw = [3.0,6.75,25.0]; // holding it all together, OD = washer
    Insert = [3.0,4.2,7.9]; // brass insert
    //Insert = [3.0,5.0,8.0];
    //Insert = [4.0,6.0,10.0];
    Clamp = [43.2,44.0,34.0]; // tool clamp ring, OD = clearance around top
    LipHeight = IntegerMultiple(2.0,ThreadThick); // above clamp for retaining
    BottomExtension = 15.0; // below clamp to reach workpiece
    MountOAL = LipHeight + Clamp[LENGTH] + BottomExtension; // total mount length
    echo(str("Mount OAL: ",MountOAL));
    Plate = [PenOD + 4*ThreadWidth,Clamp[ID] – 0*2*WallThick,WallThick]; // spring reaction plate
    echo(str("Screw length: ",Spring[LENGTH] + Plate[LENGTH] + Insert[LENGTH]));
    NumScrews = 3;
    ScrewBCD = Bearing[OD] + Insert[OD] + 2*WallThick;
    echo(str("Retainer max OD: ",ScrewBCD – Screw[OD]));
    NumSides = 9*4; // cylinder facets (multiple of 3 for lathe trimming)
    // Basic mount shape
    module CNC3018Base() {
    translate([0,0,MountOAL – LipHeight])
    cylinder(d=Clamp[OD],h=LipHeight,$fn=NumSides);
    translate([0,0,MountOAL – LipHeight – Clamp[LENGTH] – Protrusion])
    cylinder(d=Clamp[ID],h=(Clamp[LENGTH] + 2*Protrusion),$fn=NumSides);
    cylinder(d1=Bearing[OD] + 2*WallThick,d2=Clamp[ID],h=BottomExtension + Protrusion,$fn=NumSides);
    }
    // Mount with holes & c
    module Mount() {
    difference() {
    CNC3018Base();
    translate([0,0,-Protrusion]) // bearing
    PolyCyl(Bearing[OD],2*MountOAL,NumSides);
    translate([0,0,-Protrusion]) // bearing flanges
    PolyCyl(BearingFlange[OD],BearingFlange[LENGTH] + Protrusion,NumSides);
    translate([0,0,MountOAL – 1.5*BearingFlange[LENGTH]]) // sink into surface
    PolyCyl(BearingFlange[OD],2*BearingFlange[LENGTH],NumSides);
    for (i=[0:NumScrews – 1]) // clamp screws
    rotate(i*360/NumScrews)
    translate([ScrewBCD/2,0,MountOAL – Clamp[LENGTH]])
    rotate(180/8)
    PolyCyl(Insert[OD],Clamp[LENGTH] + Protrusion,8);
    }
    }
    module SpringPlate() {
    difference() {
    hull()
    for (i=[0:NumScrews – 1])
    rotate(i*360/NumScrews)
    translate([ScrewBCD/2,0,0])
    cylinder(d=Screw[OD] + 4*ThreadWidth,h=Plate[LENGTH],$fn=24);
    translate([0,0,-Protrusion])
    PolyCyl(Plate[ID],2*MountOAL,NumSides);
    translate([0,0,Plate[LENGTH] – SpringRecess]) // spring retainer
    PolyCyl(Spring[OD] + 4*ThreadWidth,SpringRecess + Protrusion,NumSides);
    for (i=[0:NumScrews – 1]) // clamp screws
    rotate(i*360/NumScrews)
    translate([ScrewBCD/2,0,-Protrusion])
    rotate(180/8)
    PolyCyl(Screw[ID],2*MountOAL,8);
    }
    }
    //—–
    // Build it
    if (Layout == "Base")
    CNC3018Base();
    if (Layout == "Mount")
    Mount();
    if (Layout == "Plate")
    SpringPlate();
    if (Layout == "Show") {
    Mount();
    translate([0,0,MountOAL + Plate[LENGTH] + Spring[LENGTH]])
    rotate([180,0,0])
    SpringPlate();
    }
    if (Layout == "Build") {
    translate([0,-0.75*Clamp[OD],MountOAL])
    rotate([180,0,0])
    Mount();
    translate([0,0.75*Plate[OD],0])
    SpringPlate();
    }

  • Cheese Slicer: JB Weld Epoxy FTW

    The JB Weld epoxy I slathered on our trusty hand-held cheese slicer a year ago continues to withstand daily washing and occasional trips through the dishwasher:

    Cheese Slicer JB Weld 1 year - top
    Cheese Slicer JB Weld 1 year – top

    The bottom is in fine shape, too:

    Cheese Slicer JB Weld 1 year - bottom
    Cheese Slicer JB Weld 1 year – bottom

    Compare it with XTC-3D epoxy, which admittedly isn’t rated for continuous water exposure, after a year:

    Cheese Slicer - epoxy coating split
    Cheese Slicer – epoxy coating split

    JB Weld FTW!

  • Monthly Image: CD Diffraction

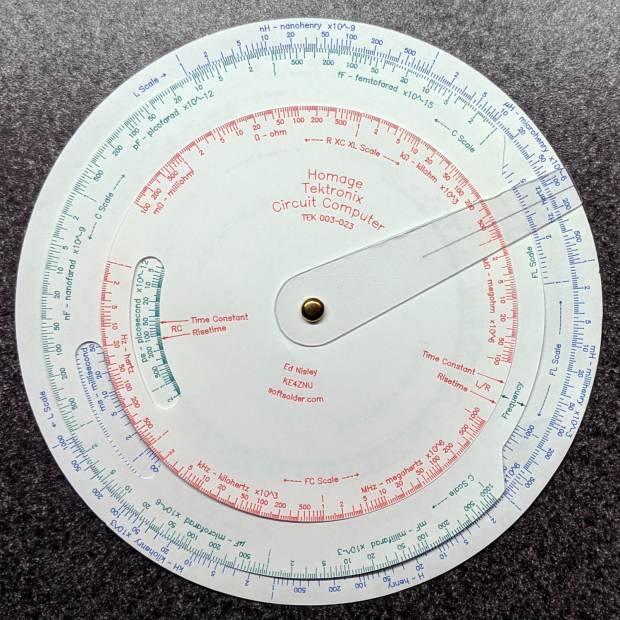
    Just to see how it worked, I engraved the Tek Circuit Computer scales on scrap CDs:

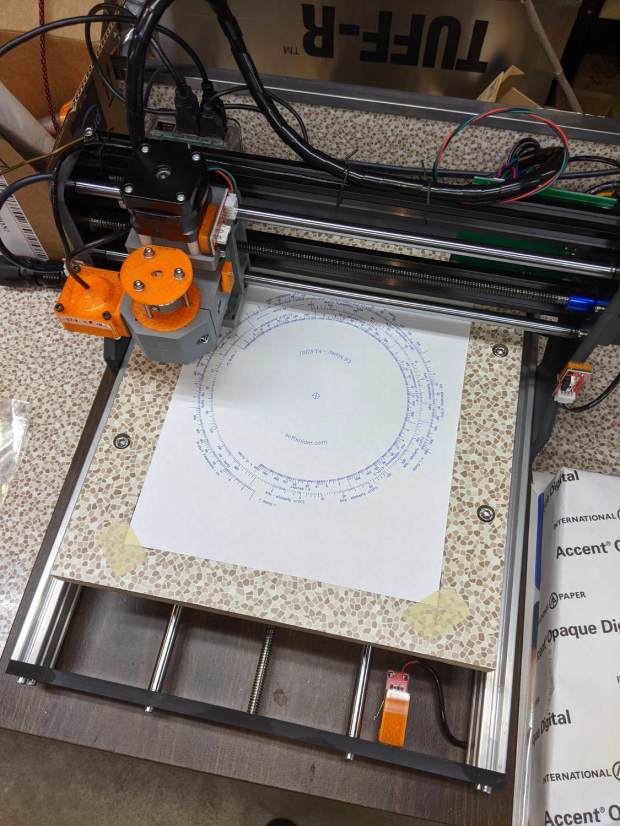
    CNC 3018-Pro - front overview
    CNC 3018-Pro – front overview

    At first, I hadn’t correctly scaled the text paths, but the diffraction patterns caught my eye:

    Tek CC on CD - bottom - unscaled text
    Tek CC on CD – bottom – unscaled text

    The illumination comes from two “daylight” T8 LED tubes in a shoplight fixture, running left-to-right, so it seems I held the camera rotated 1/4 turn in landscape mode. The pix look OK either way.

    Bottom deck:

    Tek CC on CD - bottom
    Tek CC on CD – bottom

    Middle deck:

    Tek CC on CD - middle
    Tek CC on CD – middle

    Top deck, with the camera held portrait-style:

    Tek CC on CD - top
    Tek CC on CD – top

    I’m a sucker for diffraction patterns …

    The tiny engravings don’t photograph well, because they’re floating atop the transparent disc and the rainbow patterns from the data layer, but they still come out OK even when scaled to fit on a hard drive platter:

    Tek CC - bottom deck - scaled to HD platter
    Tek CC – bottom deck – scaled to HD platter

    Looking good!

  • eBay Drop-Ship Addressing

    So I bought some LM12UU linear bearings from a nominally US-based eBay seller and received a suitably marked bag:

    eBay - LM8UU bearings in LM12UU bag
    eBay – LM8UU bearings in LM12UU bag

    They looked a bit on the skinny side:

    eBay - LM8UU bearing
    eBay – LM8UU bearing

    It seems somebody in the supply chain wasn’t paying attention, which isn’t surprising given the its ability to deliver ten hunks of reasonably precise machining to my mailbox for a buck-and-a-half apiece.

    As it happens, I already have far too many LM8UU bearings and, after some unavailing back-and-forth with the seller, eBay customer service determined neither of us was “at fault” and refunded the whole order.

    Being in no particular hurry, I ordered the next lot from halfway around the planet. Apparently, I’m now known throughout the land:

    eBay - drop-ship addressing
    eBay – drop-ship addressing

    Another label atop that one sported my actual address, with a matching Orange Connex tracking number barcode. Turns out OC is a “a joint venture between a leader in Chinese private equity investment, CITI CPE, and the a [sic] pioneer of global e-commerce platform, ebay”.

    AFAICT, containers of “direct from China” packages arrive in the belly of a cargo airplane, get a sticker with their final destination, and enter the US postal system. It’s not clear buying from a “US seller” changes anything, as many of those packages come from addresses matching a building next to an airport.

  • Mini-Lathe, Maxi-OD

    This came about while tinkering up a shade for a repurposed LED downlight:

    PVC fitting - boring setup
    PVC fitting – boring setup

    It’s a 4 inch DWV pipe coupling I bored out to fit the LED housing, which was ever so slightly larger than the pipe OD.

    Cutting it off required as much workspace as the poor little lathe had:

    PVC fitting - cutoff setup
    PVC fitting – cutoff setup

    Ignore the toolpost handle across the top. What’s important: the cutoff blade poking out of the QCTP, above the orange carriage stop lock lever, extending just far enough to cut through the coupling’s wall before the compound hits the coupling. The compound slide is all the way out against the cross-slide DRO, rotated at the only angle putting the tool where it needs to be and clearing the end of the coupling.

    It ended reasonably well:

    PVC fitting - LED floor lamp
    PVC fitting – LED floor lamp

    But, in retrospect, was hideously bad practice. Next time, I’ll make a fixture to hold the fitting on a faceplate.

  • MPCNC Drag Knife Holder: Showing More Blade

    Attempting to cut laminated cardstock decks for the Homage Tektronix Circuit Computer required a bit more blade extension than my LM12UU holder made available:

    Drag Knife - LM12UU ground shaft - assembled
    Drag Knife – LM12UU ground shaft – assembled

    Shortening the 12 mm shaft wasn’t going to happen, so I knocked a little bit off the blade holder to give the knurled lock ring slightly more travel:

    Drag Knife Holder - shortening stop
    Drag Knife Holder – shortening stop

    The lathe cutoff blade is a bit to the right of the new cut, but you get the general idea: not a whole lot of clearance in there.