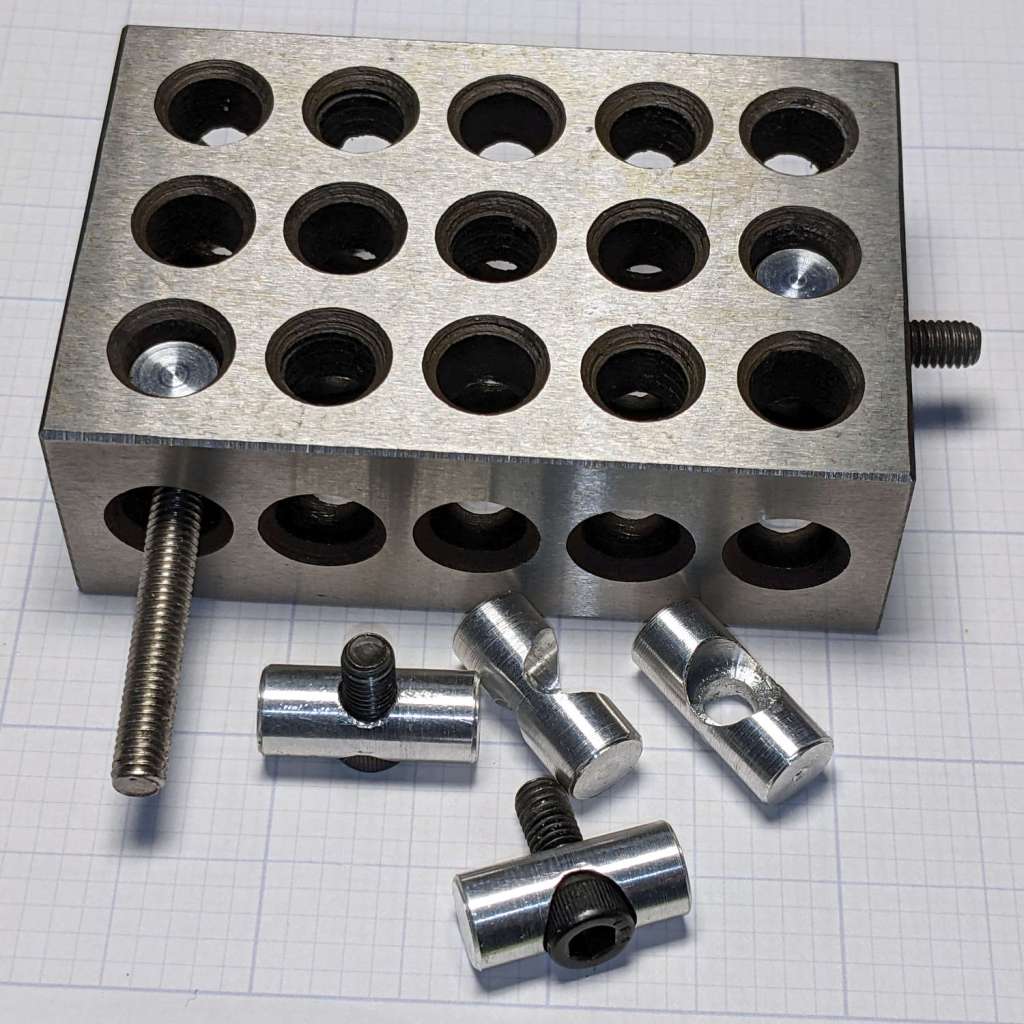
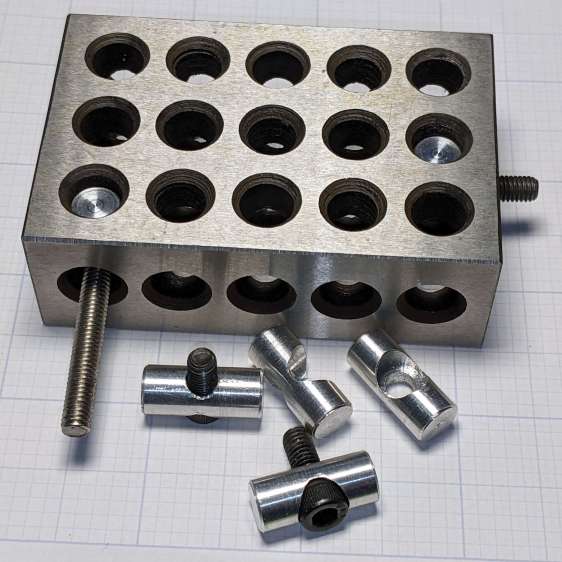
Contemplating a project using a small saw in the Sherline suggested that attaching the workpiece to the side of a 123 block would simplify the machining. My blocks have a centered quintet of 3/8-16 tapped holes through the 2×3 side, all the remaining holes are untapped, and it has no smaller holes. The hole spacing doesn’t match the Sherline tooling plate, but the T-nut slots in the underlying table would suffice.
Rather than run long 10-32 screws through the entire block, It Would Be Nice to use short screws from, say, the nearest holes:
I cannot possibly be the first person to have this idea, but the obvious keywords don’t produce any useful results on The Intertubes, other than a link to a different (and far more complex) block with counterbored holes of various sizes.
Update: Jason found a video about building those blocks and somebody else built some pins similar to mine. Nope, I’m definitely not the first person to have this idea!
Further doodling produced some useful dimensions:

The holes through the blocks probably came from a 5/16 inch drill, the 75% thread depth diameter for the 3/8-16 taps used on the threaded holes. They’re distorted, full of debris, and hardened enough to kill a file, so I eventually settled on 8.2 mm pins that pass through most of the holes.
The socket head screws seat at the pin axis, because the pin diameter is scary close to the counterbore diameter and I didn’t see much point in finesse. I started with a half-inch aluminum rod and peeled it to size, because it simplified the clamping and I have a bunch of them.
The pins are 3/4 inch long to leave a little space on either side of the 1 inch deep holes. I started with comfort marks along the length of the rod:

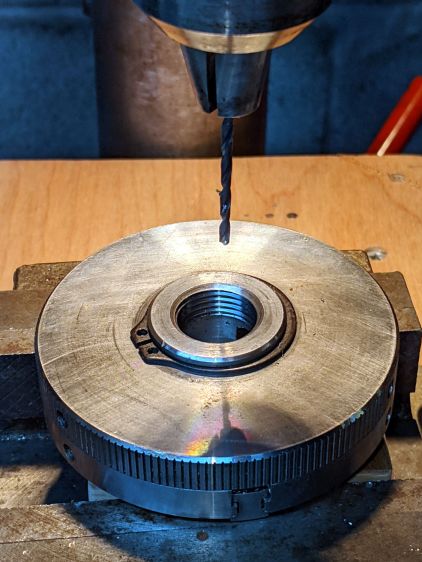
Center-drill so the clearance drill doesn’t skitter off the top:

The counterbore calls for a 0.204 inch = #6 drill, just slightly larger than the #7 clearance drill for a 10-32 screw:
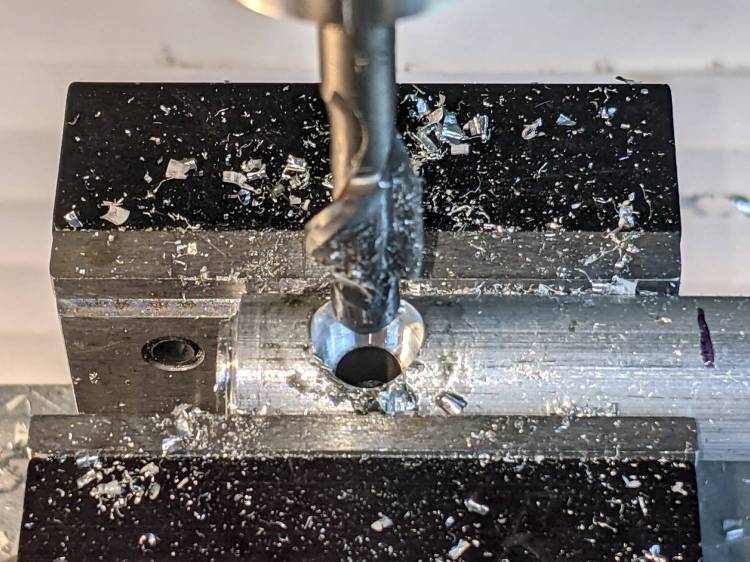
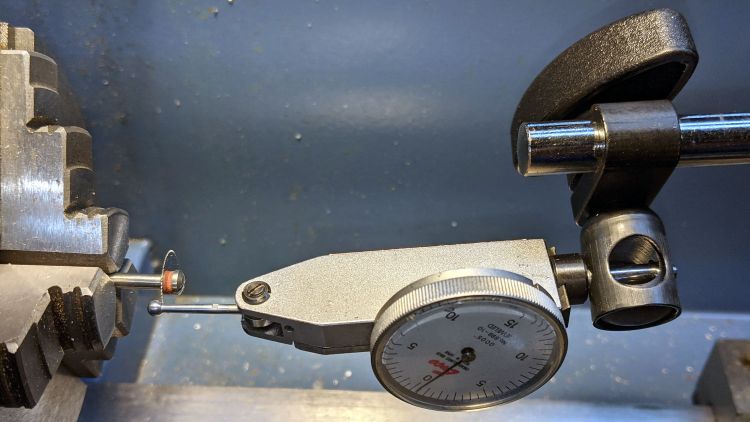
I touched off the counterbore flutes on the sides of the hole, then drilled downward half the 12.8 mm actual rod diameter:

Lower the counterbore into the hole again, relax the vise enough to let the rod slide, jog the spindle to X = -25.4 mm, and tighten the vise again:

I figured I needed four pins, tops, so make half a dozen to be sure:
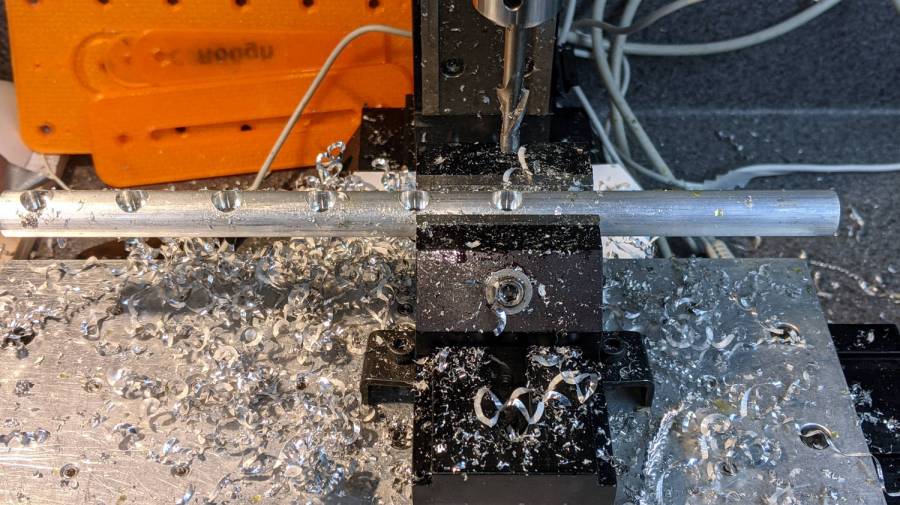
Stick the rod in the mini-lathe chuck, add some comfort marks, and prepare to peel it down to 8.2 mm:

Having done the lathe work during a Squidwrench remote meeting, I have no pictures of the process, but it goes a little something like this:
- Peel off 0.5 mm at a time, stopping just beyond the mark on the left
- Mark 3/8 inch on each side of the hole center
- Face the end
- Chamfer the rim with a file
- Clean up the body hole and counterbore
- Part the pin off a bit to the left of the mark
- Remove the rod
- Chuck the pin with the cut off end outward
- Face to the mark
- Chamfer
- Repeat for all six pins
- Done!
It’s tedious, but not particularly difficult.
Futher doodling suggested the need for threaded pins to join two blocks together.