Ed Nisley's Blog: Shop notes, electronics, firmware, machinery, 3D printing, laser cuttery, and curiosities. Contents: 100% human thinking, 0% AI slop.
Mary made a batch of veggies in tomato sauce and froze meal-size portions as winter treats. The moist air inside the containers froze into delicate ice blades on the zucchini slices:
Veggie ice crystals – overview
A closer look:
Veggie ice crystals – detail
The blade cross-sections might be oblong hexagons, but it’s hard to tell with crystals melting almost instantly after the lid comes off. Some of the smaller hair-like blades reminded me of tin whiskers.
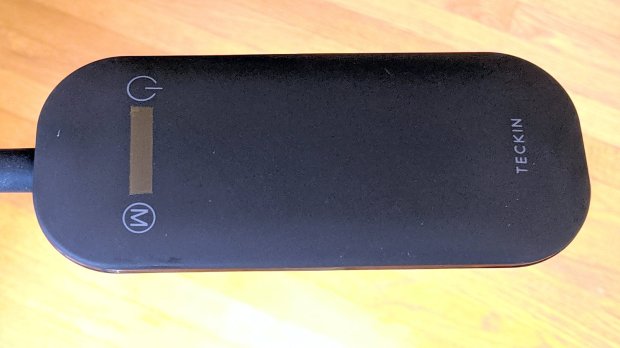
A new floor lamp arrived with the usual dark-gray-on-black annotations on an absolutely non-tactile pair of capacitive controls. For a device intended for use in a dim room, this makes little sense, unless you’re both trendy and concerned about manufacturing costs.
A strip of 1/4 inch Kapton tape added just enough tactility to find the damn buttons without looking at the lamp head:
Teckin floor lamp – tactile switch tape
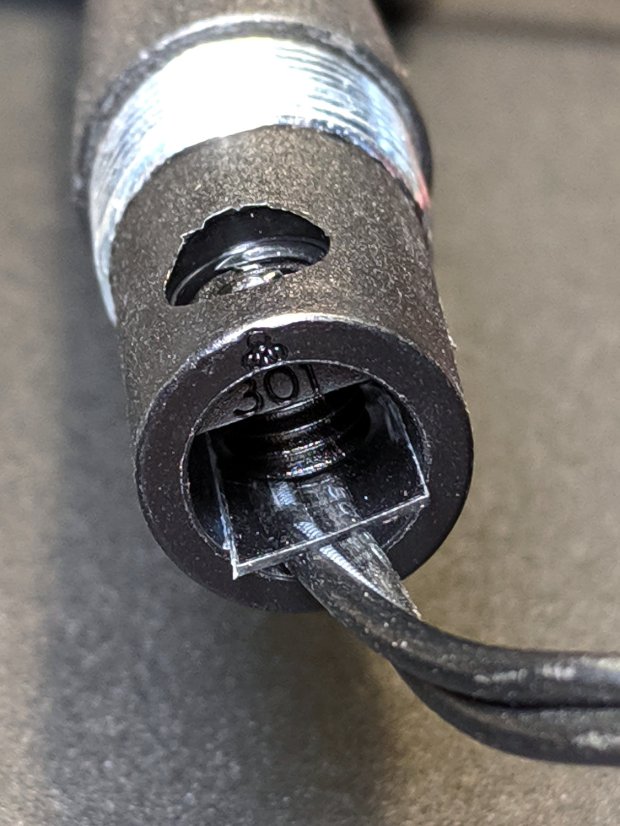
The pole’s non-adjustable length put the lamp head well above eye level, so I removed one pole segment. This required cutting the 12 V zipcord and crimping a pair of connectors:
Teckin floor lamp – spliced wire
I briefly considered conjuring a skinny connector, but came to my senses: there’s plenty of zipcord if I must chop out the connectors, particularly seeing as how shortening the pole added a foot.
The setscrew at the bottom of the gooseneck crunched the zipcord against the metal shell. A polypropylene snippet made me feel better, even if it makes no difference:
Long ago, a wood-base countertop cheese slicer arrived with a tenuous connection between its screw-on knob / handle and the bolt securing the cutting wire. The problem seemed to be boogered bolt threads:
Cheese slicer – original bolt
The knob screwed firmly onto a known-good 10-24 screw, not the M5 bolt I expected, so the slicer may be old enough to be Made In America. Ya never know around here.
However, the hex head is essential, because you must hold it while tightening the nut capturing the slicing wire. Not having a 10-24 or even 10-32 bolt in hand, I went full-frontal metric with an M5 bolt.
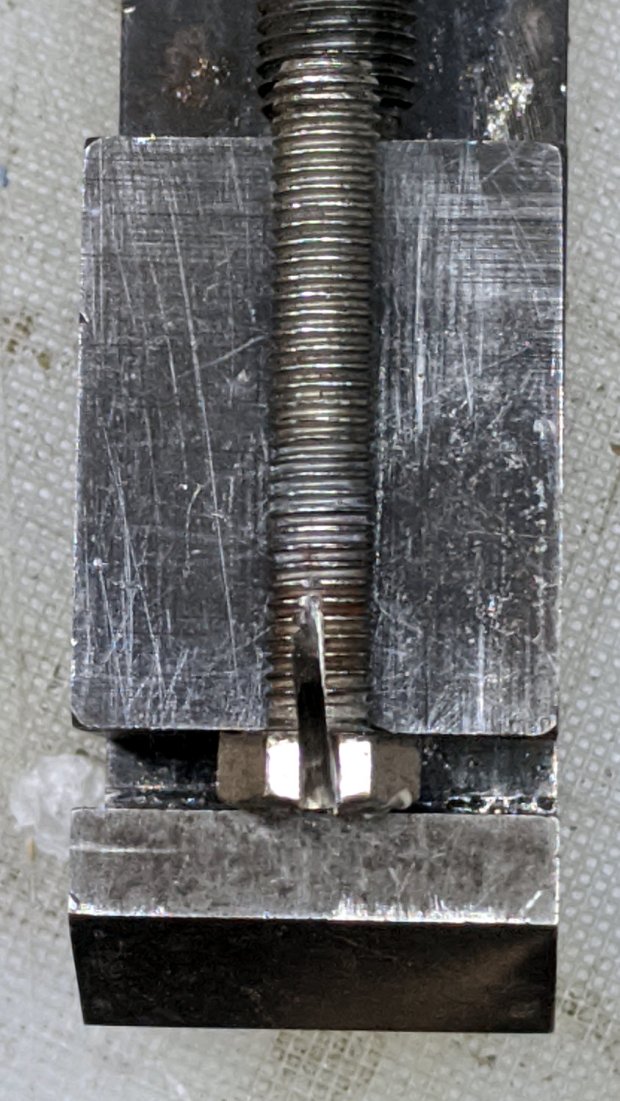
Even with a full face shield, I don’t like standing in the plane of an abrasive cutting tool, even a piddly Dremel disk, so the slot through the head isn’t the best work I’ve ever presented:
Cheese slicer – slotted bolt head
Indeed:
Cheese slicer – skewed slot
But it’s hereby defined to be Good Enough™ for the purpose.
As you might expect, I ran an M5×0.8 tap into the existing 10-24 knob thread, hand-turning the lathe chuck and lining up the tap wrench with the tailstock.
Drill out the slicer’s frame hole to clear the bolt, re-string wire through slot, tighten jam nut, add a locking nut on the other side, screw on the knob, and it’s All Good:
Cheese slicer – repaired
Ugly, but good.
I expect the re-wrapped wire will break in short order, because you just can’t re-bend steel wire with impunity. So far, so good.
My pre-trip checklist now includes “Duct Tape”, so, when the tiny screw holding my sunglasses together went spung and dropped the lens on the parking lot gravel, I was prepared:
Sunglasses – duct tape FTW
I continued the mission in full-frontal Harry Potter mode.
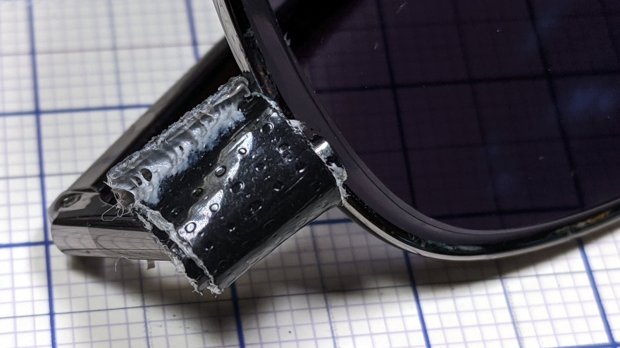
Fortunately, it’s a captive screw and returned home with us. Back in the Basement Laboratory, with a Philips 00 screwdriver and threadlocker at hand, the repair was no big deal:
Sunglasses – loose lens screw
You’re looking at the screw head, believe it or not.
And, no, I’m not packing a Philips 00 screwdriver on our next trip.
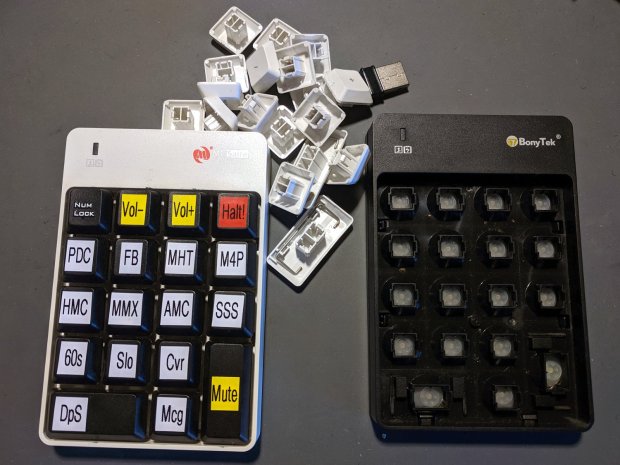
I swapped the Frankenpad + receiver to the least-conspicuous streamer and, someday, I’ll update all the labels on all the keypads to match the current streams. Until then, the white keycaps shall remain in the same bag as the defunct black keypad, tucked into the Big Box o’ USB mice & suchlike.
While washing our ancient electric crock pot (“slow cooker”), I wondered how corroded the inside of the steel shell had become. A simple nut secured the base plate and unscrewed easily enough, whereupon what I thought was a stud vanished inside the shell.
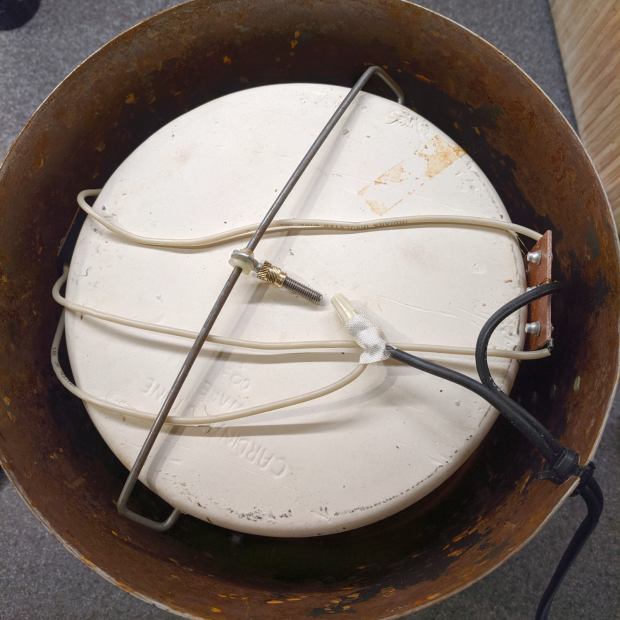
The shell wasn’t rusty enough to worry about, but the stud turned out to be a crudely chopped-off thumbscrew on a springy rod pulling the base toward the ceramic pot:
Crock Pot Base – OEM thumbscrew
Evidently, they pulled the thumbscrew through the base, tightened the nut, then cut off the thumbscrew flush with the nut.
I desperately wanted to drill a hole in a new thumbscrew and repeat the process, but I no longer have a small drawer full of assorted thumbscrews. So I must either lengthen the existing thread just enough to complete the mission or build a screw from scratch.
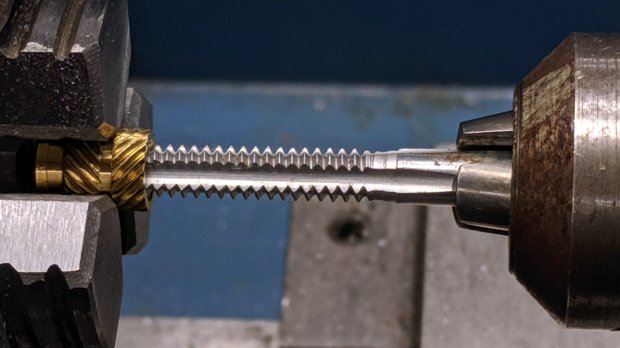
The thumbscrew is threaded 10-24, I have a bunch of 10-32 threaded inserts, so pretend they have the same thread diameter and tap one end to 10-24:
Crock Pot Base – tapping insert
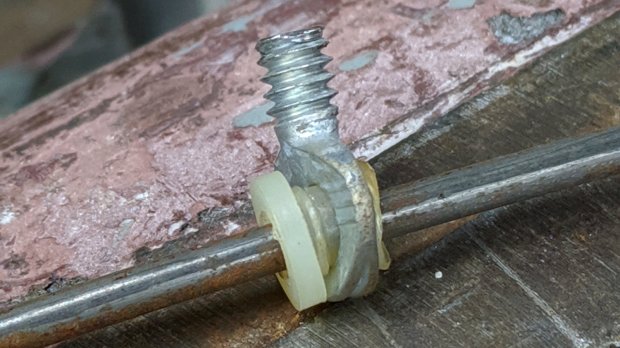
Jam the new threads on the thumbscrew and jam a 10-32 setscrew into the un-wrecked end:
Crock Pot Base – thumbscrew extender
You can see the surface rust in there, right?
Make a Delrin bushing to fit around the insert poking through the base:
Crock Pot Base – drilling Delrin button
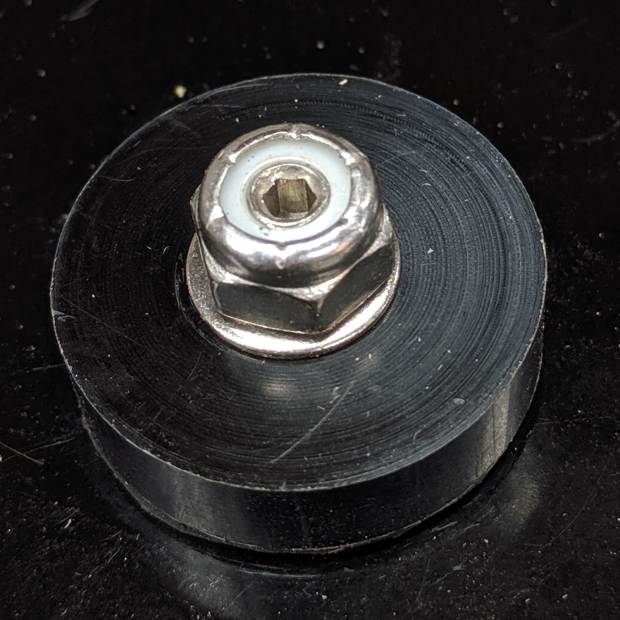
Reassemble the internal bits with permanent Loctite, top with a nyloc nut, and it’s only a little taller than the original nut:
Crock Pot Base – assembled
The setscrew let me hold the new “stud” in place while torquing the nut, plus it looks spiffy.
Memo to Self: If it ain’t broke, don’t look inside. Hah!
Surprisingly, both Amazon and eBay lack useful thumbscrew assortments …
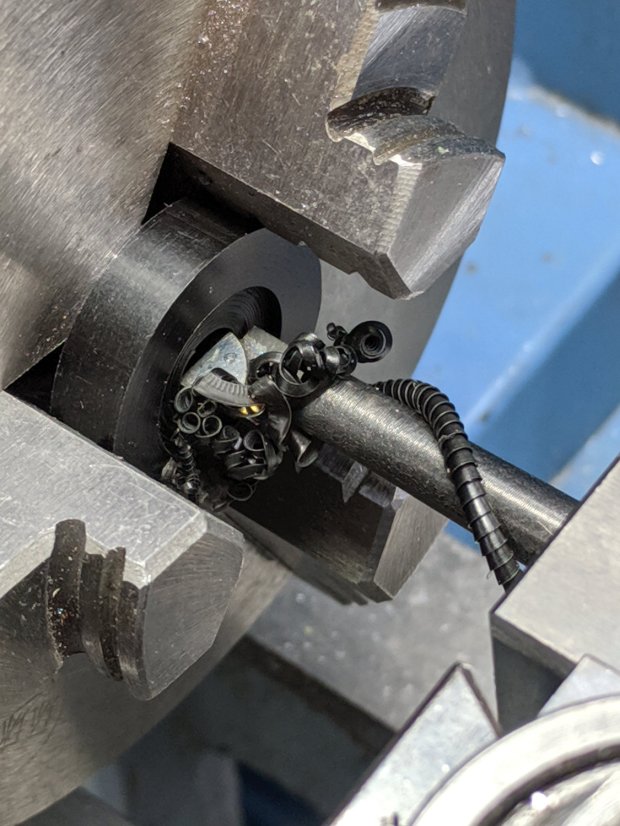
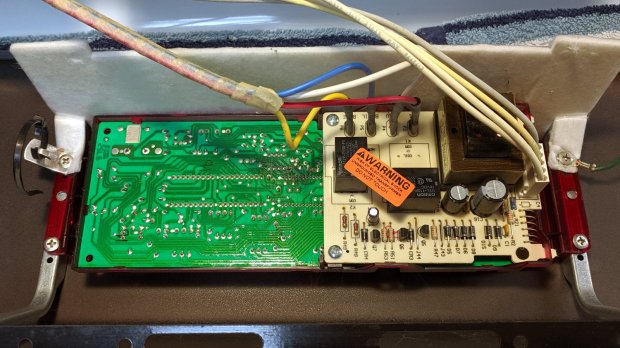
For the last year or so, the oven temperature control on our Kenmore gas stove has been decreasingly stable, sometimes varying by 100 °F from the setpoint before settling down somewhere close to what it should be. Spotting a replacement control board for a bit over $100, I decided the board used an absolute rotary encoder of the open-frame variety, so I took the thing apart:
Kenmore oven control – PCB overview
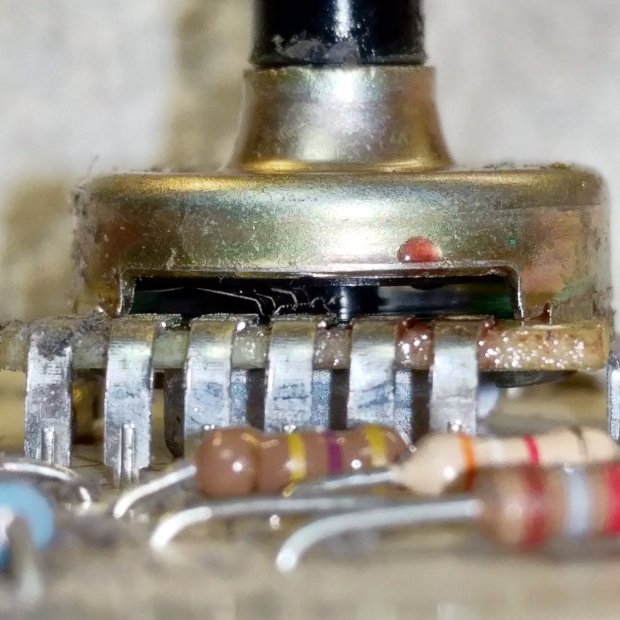
The encoder was, indeed, an open frame:
Kenmore oven control – rotary encoder
The red droplet is DeoxIT, the rest of which went inside, just ahead of the contact fingers, and got vigorously massaged across the switch contacts on the wafer by spinning the shaft.
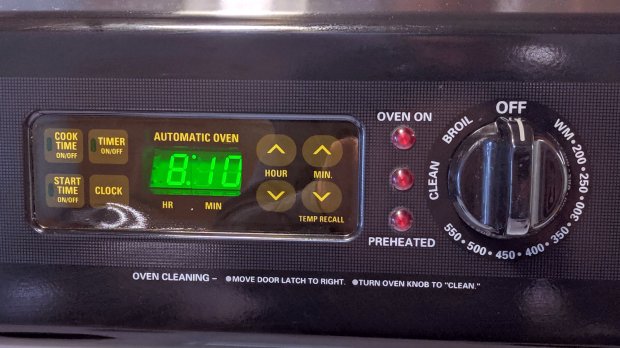
Some time ago, the membrane over the TIMER ON/OFF switch cracked and I applied a small square of Kapton tape. Having the entire controller in hand, I replaced the square with a strip of 2 inch Kapton, carefully aligned with the bezel marks embossed on the membrane, and now it’s smooth all over:
Kenmore oven control – Kapton tape cover
The MIN(ute) ^ switch required a much firmer than usual push, so I tucked a shim cut from a polypropylene clamshell between the membrane and the pin actuating the switch.