The Smell of Molten Projects in the Morning

Ed Nisley's Blog: Shop notes, electronics, firmware, machinery, 3D printing, laser cuttery, and curiosities. Contents: 100% human thinking, 0% AI slop.

Category: Home Ec

Things around the home & hearth

  • Dirt Devil Vacuum Tool Adapters

    Dirt Devil Vacuum Tool Adapters

    Being the domain expert for adapters between a new vacuum cleaner and old tools, this made sense (even though it’s not our vacuum):

    Dirt Devil Nozzle Bushing - solid model
    Dirt Devil Nozzle Bushing – solid model

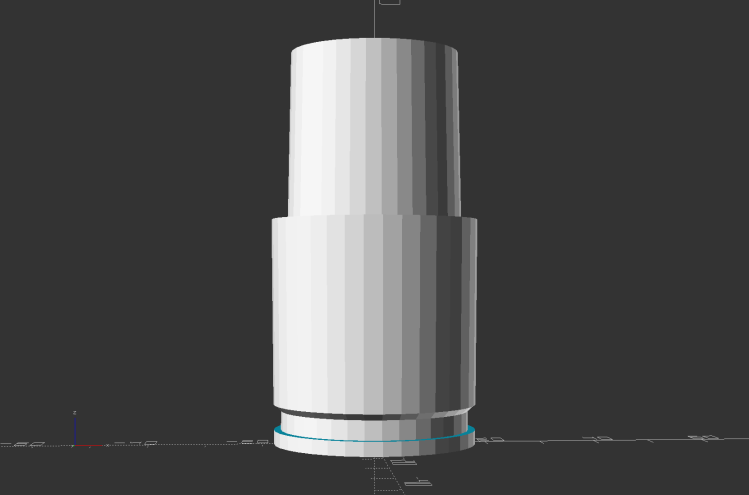
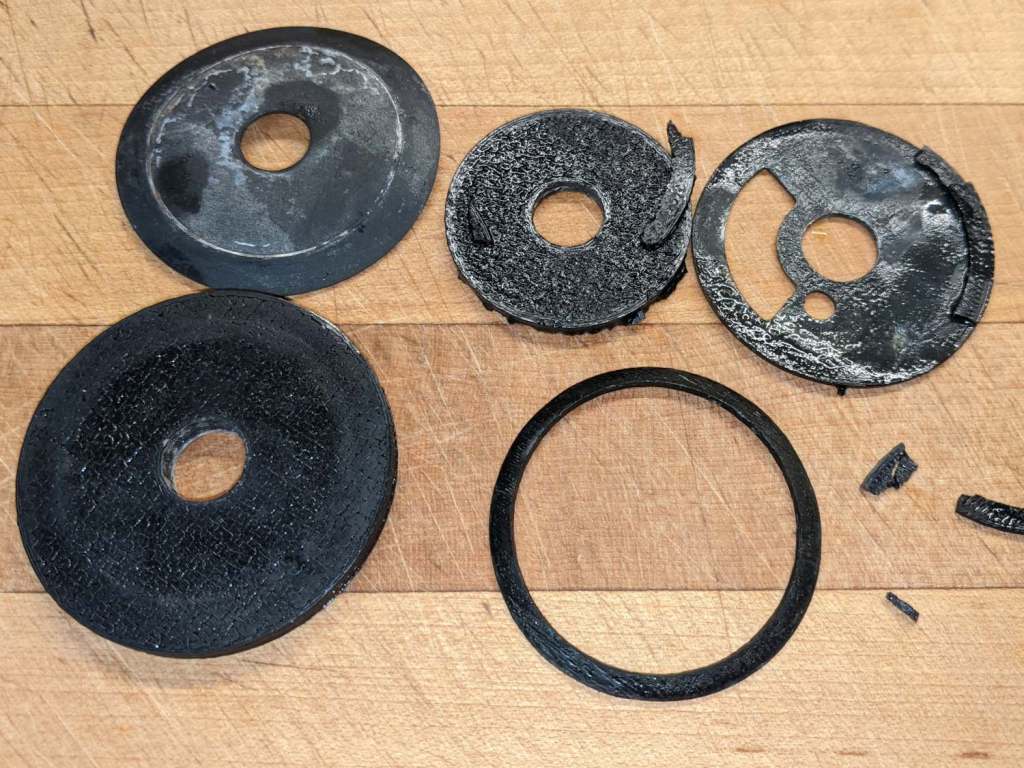
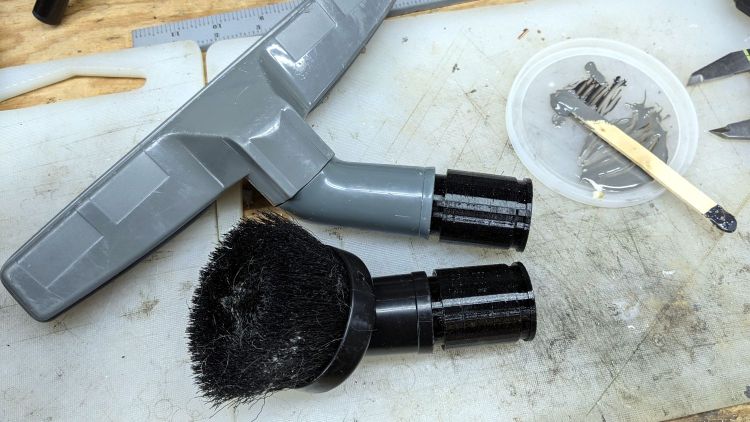
    The notch snaps into a Dirt Devil Power Stick vacuum cleaner and the tapered end fits a variety of old tools for other vacuum cleaners:

    Dirt Devil Nozzle Bushing top view - solid model
    Dirt Devil Nozzle Bushing top view – solid model

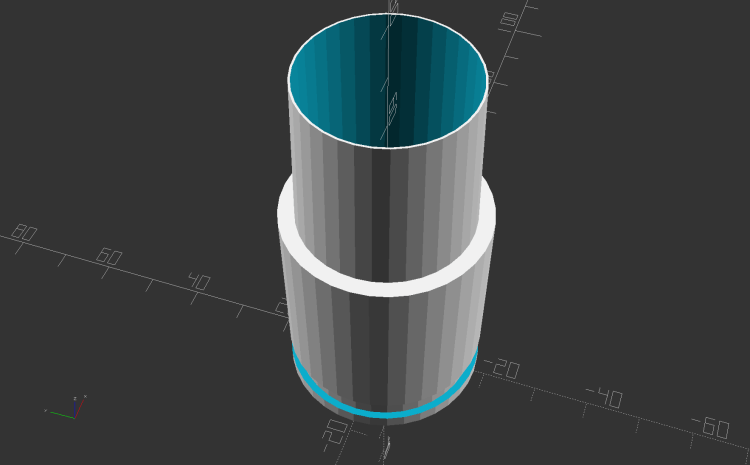
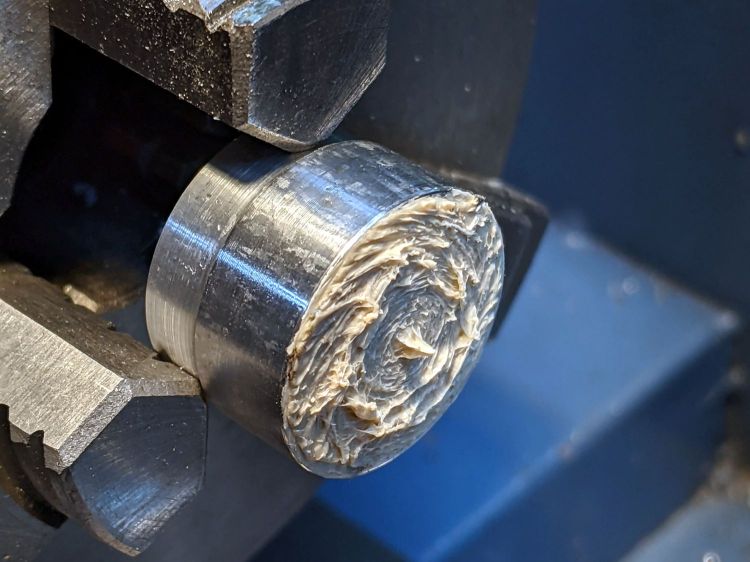
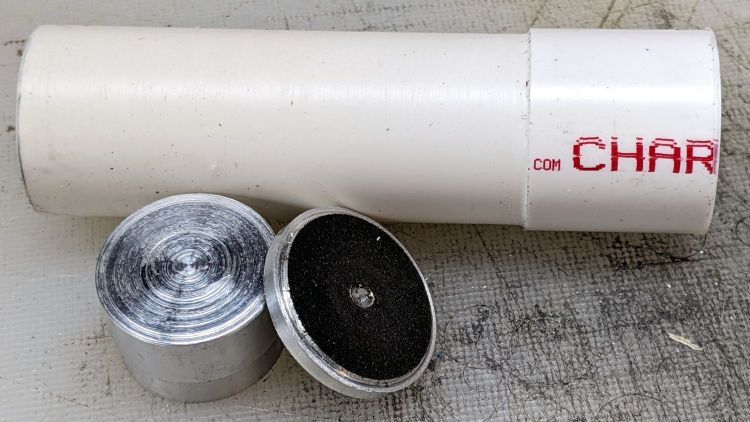
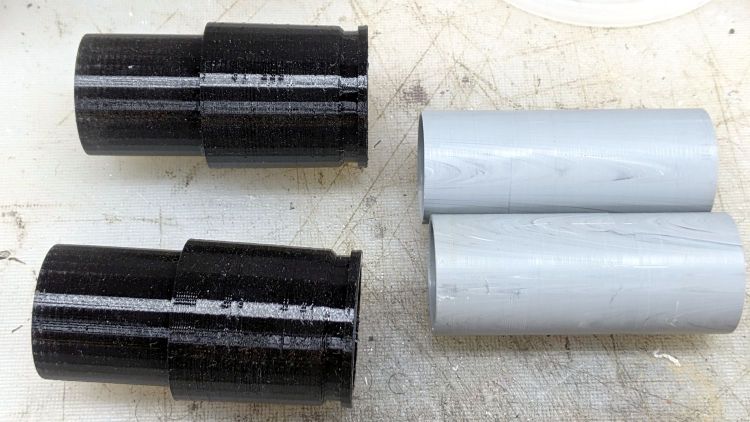
    Having some experience breaking thin-walled adapters, these have reinforcement from a PVC tube:

    Dirt Devil adapter - parts
    Dirt Devil adapter – parts

    A smear of epoxy around the interior holds the tube in place:

    Dirt Devil adapters - assembled
    Dirt Devil adapters – assembled

    Building the critical dimensions with a 3D printed part simplified the project, because I could (and did!) tweak the OpenSCAD code to match the tapers to the tools. Turning four of those tubes from a chunk of PVC conduit, however, makes a story for another day.

    The OpenSCAD source code as a GitHub Gist:

    // Dirt Devil nozzle adapter
    // Ed Nisley KE4ZNU 2021-10
    // Tool taper shift
    Finesse = -0.1; // [-0.5:0.1:0.5]
    // PVC pipe liner
    PipeOD = 28.5;
    /* [Hidden] */
    //- Extrusion parameters
    ThreadThick = 0.25;
    ThreadWidth = 0.40;
    HoleWindage = 0.2;
    function IntegerMultiple(Size,Unit) = Unit * ceil(Size / Unit);
    Protrusion = 0.1; // make holes end cleanly
    //———————-
    // Dimensions
    TAPER_MIN = 0;
    TAPER_MAX = 1;
    TAPER_LENGTH = 2;
    Socket = [36.0,37.0,40.0];
    LockringDia = 33.5;
    LockringWidth = 4.5;
    LockringOffset = 2.5;
    Tool = [Finesse,Finesse,0] + [30.0,31.1,30.0];
    AdapterOAL = Socket[TAPER_LENGTH] + Tool[TAPER_LENGTH];
    NumSides = 36;
    $fn = NumSides;
    //———————-
    // Useful routines
    module PolyCyl(Dia,Height,ForceSides=0) { // based on nophead's polyholes
    Sides = (ForceSides != 0) ? ForceSides : (ceil(Dia) + 2);
    FixDia = Dia / cos(180/Sides);
    cylinder(r=(FixDia + HoleWindage)/2,h=Height,$fn=Sides);
    }
    //——————-
    // Define it!
    module Adapter() {
    difference() {
    union() {
    difference() {
    cylinder(d1=Socket[TAPER_MIN],d2=Socket[TAPER_MAX],h=Socket[TAPER_LENGTH]);
    translate([0,0,LockringOffset])
    cylinder(d=2*Socket[TAPER_MAX],h=LockringWidth);
    }
    cylinder(d=LockringDia,h=Socket[TAPER_LENGTH]);
    translate([0,0,LockringOffset + 0.75*LockringWidth])
    cylinder(d1=LockringDia,d2=Socket[TAPER_MIN],h=0.25*LockringWidth);
    translate([0,0,Socket[TAPER_LENGTH]])
    cylinder(d1=Tool[TAPER_MAX],d2=Tool[TAPER_MIN],h=Tool[TAPER_LENGTH]);
    }
    translate([0,0,-Protrusion])
    PolyCyl(PipeOD,AdapterOAL + 2*Protrusion,NumSides);
    }
    }
    //———————-
    // Build it!
    Adapter();

    The taper in the code almost certainly won’t fit whatever tool you have: measure thrice, print twice, and maybe fit once …

  • Another Snapper

    Another Snapper

    An approaching cyclist warned to watch out for the snapping turtle:

    Snapping Turtle - DCRT near Page Park - front - 2021-09-24
    Snapping Turtle – DCRT near Page Park – front – 2021-09-24

    This one claims the pond near Page Industrial Park along the Dutchess Rail Trail:

    Snapping Turtle - DCRT near Page Park - rear - 2021-09-24
    Snapping Turtle – DCRT near Page Park – rear – 2021-09-24

    We’ll not dispute any snapper’s territory!

    I’m hauling PYO apples from Prospect Hill Orchards in the hills on the west side of the Hudson; it was a lovely fall day for a 25 mile ride!

  • Bondhus Wrench Replacement

    Bondhus Wrench Replacement

    The Bondhus Lifetime Guarantee works, as a replacement wrench just arrived:

    Bondhus hex wrenches - 7-64 ball end - replacement
    Bondhus hex wrenches – 7-64 ball end – replacement

    A close look at the aligned tips suggests the defective wrench blank was mis-chucked in the machine cutting the ball end:

    Bondhus hex wrenches - 7-64 ball end - replacement - detail
    Bondhus hex wrenches – 7-64 ball end – replacement – detail

    All’s well that ends well: thank you, Bondhus!

  • Rear Running Light: Too-aggressive Turning

    Rear Running Light: Too-aggressive Turning

    The same lathe fixture and double-sided duct tape trick I used for the amber running light’s end cap should have worked for this one, but only after I re-learned the lesson about taking sissy cuts:

    Tour Easy Rear Running Light - end cap fixture - swirled adhesive
    Tour Easy Rear Running Light – end cap fixture – swirled adhesive

    Yet another snippet of tape and sissy cuts produced a better result:

    Tour Easy Rear Running Light - end cap
    Tour Easy Rear Running Light – end cap

    Protip: when you affix an aluminum disk bandsawed from a scrap of nonstick griddle to a lathe fixture, the adhesive will grip the disk in only one orientation.

  • Beverage Faucet Replacement

    Beverage Faucet Replacement

    The lesser kitchen faucet began dribbling and required replacement, as there are no user serviceable parts within. One of the 3D printed adapters I built during the previous iteration had disintegrated:

    Beverage faucet base plate adapter disintegration
    Beverage faucet base plate adapter disintegration

    The new faucet came with a somewhat different baseplate and I managed to conjure a firm, sealed mount from the various parts without further construction.

    The nicely curved brass snout is the third in my collection. Surely they’ll come in handy for something!

    While I was in a plumbing state of mind, I again replaced the spout O-rings in the never-sufficiently-to-be-damned American Standard Elite (hah!) faucet, as it was also dribbling.

    This time, I used oxalic acid to remove the assorted scale and crud inside the spout. It seemed to be more effective than the usual white vinegar, although nothing seems to preserve the O-rings.

  • Bat House

    Bat House

    We found this critter while checking for water after Hurricane Ida drenched the area:

    Bat on attic vent
    Bat on attic vent

    It’s on the outside of the vent screen and we have no objection.

    We should put up a bat house to encourage more of its friends to hang out with us …

  • Sticky Trap Results

    Sticky Trap Results

    In late May we deployed six sticky traps in and around the onion bed, attempting to reduce the number of Onion Fly maggots. By mid-June the sheets were covered with the shredded leaves Mary uses to mulch the onions, but half a dozen flies were out of action:

    Sticky trap - 2021-06
    Sticky trap – 2021-06

    We’re pretty sure that’s what these things are:

    Sticky trap - Onion Fly - 2021-06
    Sticky trap – Onion Fly – 2021-06

    They’re supposed to have red eyes, but being affixed to a sheet of snot for a few weeks doesn’t do the least bit of good for your eyes.

    We replaced the sheets and left them in place until the end of July:

    Sticky trap - 2021-07
    Sticky trap – 2021-07

    The sheets took another half-dozen flies out of circulation, Mary began harvesting the onions, and observed it was the healthiest onion harvest she’s ever had.

    We declared victory, removed the traps, and the remaining onions suffered considerable maggot damage over the next few weeks.

    Anecdotally, it seems reducing the Onion Fly population by (what seems to be) a small amount and maintaining pressure on the population dramatically reduces the number of maggots available to damage the onion crop. At least for a single bed in a non-commercial setting.

    The plural of anecdote is not anecdata, but we’ll try it again next year, leave the traps in place while the onions are in the ground, and see what happens.