Ed Nisley's Blog: Shop notes, electronics, firmware, machinery, 3D printing, laser cuttery, and curiosities. Contents: 100% human thinking, 0% AI slop.
Although these passed the annual New York State safety inspection, I thought they needed replacing:
HB3 9005 Bulbs – bulged glass
A closer look:
HB3 9005 Bulbs – bulged glass – detail
The bulge was upward, of course.
The Forester’s manual says they’re HB3 bulbs, but the rest of the world knows them as 9005 bulbs. At full power they draw 60 W = 5 A each, although we rarely drive at night and then rarely have the opportunity for much high-beam use. I assume the blackening comes from nine years of running at half-ish power as the Forester’s daytime running lights.
The low beam headlights seem to be in fine shape.
These two went into the tray under the floor of the rear cargo area, because the crappy bulb you have is better than the one that just burned out on the road.
Inspired by a LightBurn forum post I can no longer findonce again tracked down, I tried my hand at popsicle craft stick plant markers:
Plant Markers – craft stick tests
You’d have only one name on the end of each stick, with the uncut section jammed into the ground: these are test pieces to demonstrate capability.
Wood is better than acrylic because it checks all the eco-friendly attribute boxes. Admittedly, craft sticks don’t exactly grow on trees, but we seem to ignore such externalities in nominally eco-friendly products.
Bonus: a recurring revenue stream from the replacement market!
The design, such as it is, involves subtracting the letters from a rectangle maybe half a millimeter short of their top & bottom extents and a few millimeters longer than their length. Using a chonky font with generous letter spacing may prevent prompt disintegration by weathering:
Plant Marker – craft sticks – LB layout
Engraving the letters marks their uncut sections outside the rectangle, although we know laser char on wood-ish materials fades in sunlight. The two big sticks have Radish engraved with varying density; the darker version looks better against a lighter background never found in an actual garden.
Mary thinks they might be a nice fundraiser for the next Master Gardener Plant Sale.
According to the manual, which I have hitherto had no reason to doubt, our non-turbo 2015 Subaru Forester has a 15.9 gallon fuel tank:
Subaru Forester – Fuel Capacity Chart
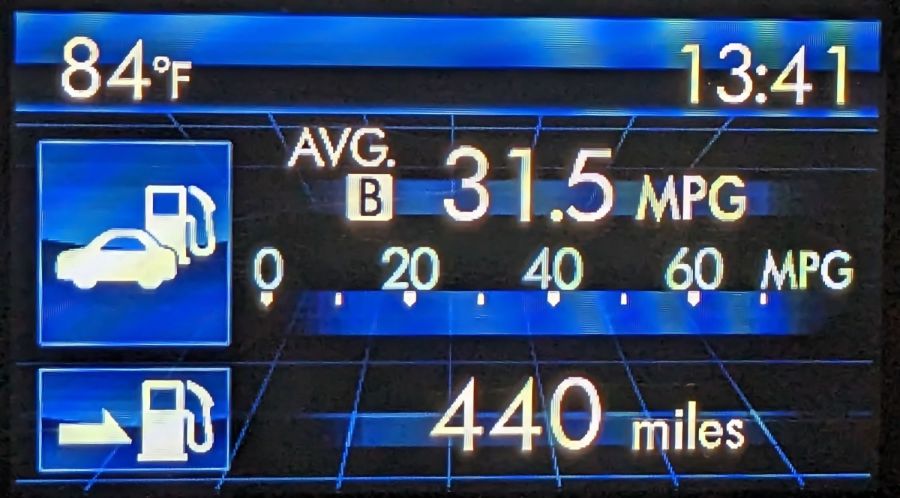
One screen shown on the dashboard’s Multi-Function Display gives the current mileage and estimated range:
Forester – MPG Range
Dividing those two numbers gives you 13.97 gallons, the current fuel level. As you’d expect, should the average miles per gallon change, the range will change accordingly.
The trip odometer says we have driven 72.8 miles since I filled the tank. Dividing that by the average mpg gives 2.3 gallons, so the tank could possibly hold 16.2 gallons, which, given all the averages involved, is reasonably close to the 15.9 gallons shown in the manual.
Being that type of guy, I have a spreadsheet tallying each fillup since the car was new:
8.1 gal average
7.5 gal median
13.9 gal maximum
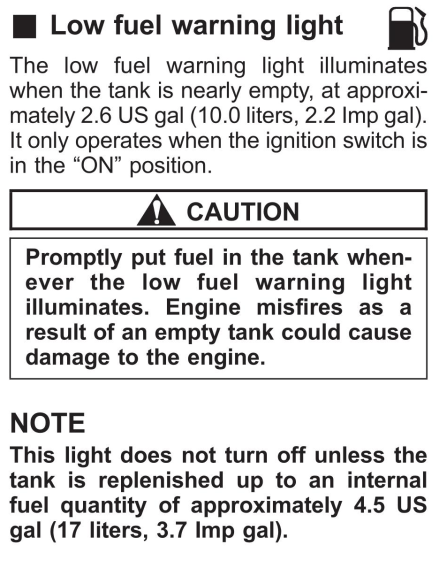
Long ago, my father taught me to fill the tank when the needle got halfway down and I’ve been doing so ever since. As a result, we have only rarely seen the Low Fuel Warning Light:
Subaru Forester – Low Fuel Warning Light info
A concatenation of unavoidable events put us southbound on I-87 when that light went on. Given the estimated range of 70-ish miles, I planned to refuel at the New Baltimore Service Area, about a dozen miles ahead.
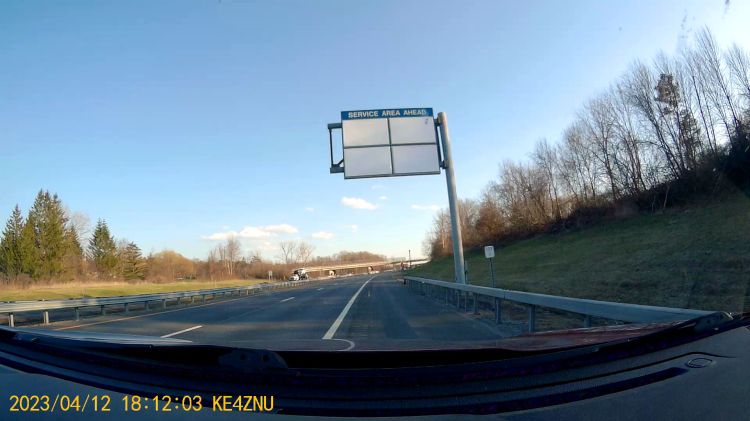
The engine shut down and all the dashboard warning lights lit up with the Service Area Ahead sign in view:
Out of Gas – Service Area Ahead
All the “facilities” are blank because they’re rebuilding the whole place, with the gas station remaining open.
So I slapped the shifter into neutral and we drifted slowly along the shoulder, under the bridge visible ahead, and eventually came to a halt at the beginning of the exit lane.
There was only one thing to do:
Out of Gas – Walking On
Some storytelling later:
Out of Gas – Walking Back
Just because I could:
Refueling – GPS Track
For what are, I trust, understandable reasons, I started the tracker after I began hiking and forgot to turn it off before driving away.
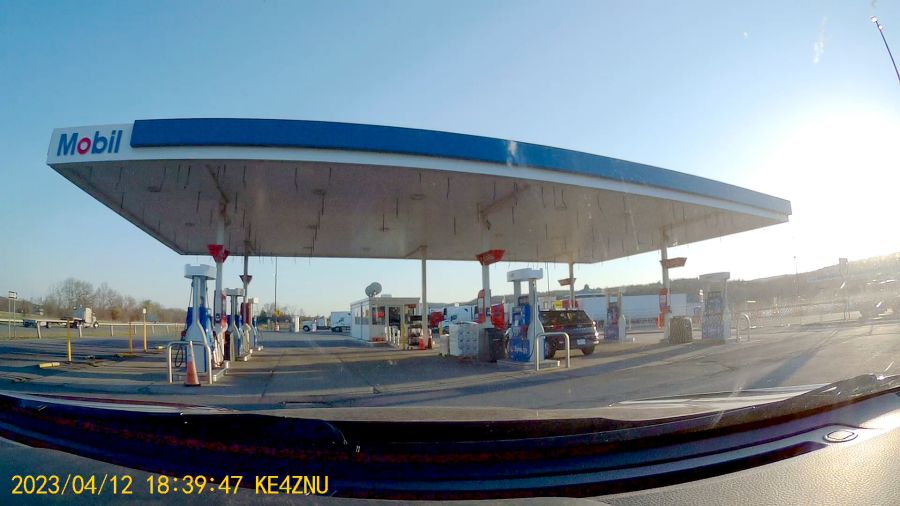
After figuring out the devilishly complex spring-loaded anti-spill spout on the gas can, we drove 1500 feet to the Service Area:
Out of Gas – Service Station
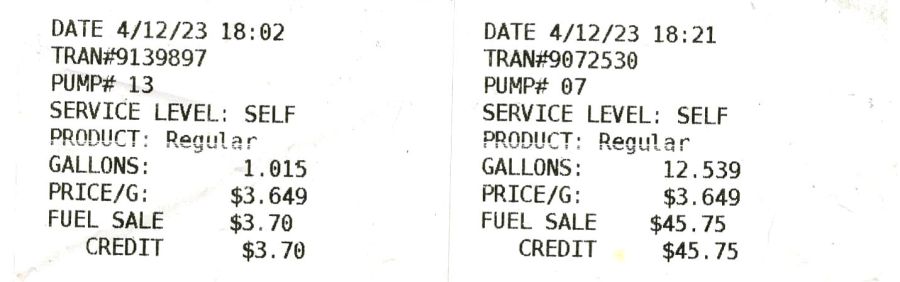
As usual, I filled the tank until the nozzle automatically shut off, for a total of 13.554 gallons in two transactions:
Pump Receipts
Now, it is possible the Forester fuel system has another 2.3 gallons tucked away somewhere, but if that reserve doesn’t make the wheels go around, it’s not doing me the least bit of good.
The fact that I’ve occasionally added just short of 14 gallons suggests the estimated remaining capacity depends strongly on the average mileage up to that point and I have come very very close to running out of gas on several occasions.
As far as I can tell, the usable fuel capacity is a scant 14 gallons and the Low Fuel Light goes on with, at most, a dozen more miles in the tank.
This is the second time in more than half a century of driving I’ve run out of gas.
My father was right and I shall henceforth mend my wayward behavior.
While I was thinking about something else, I added a back shield to our kitchen scale:
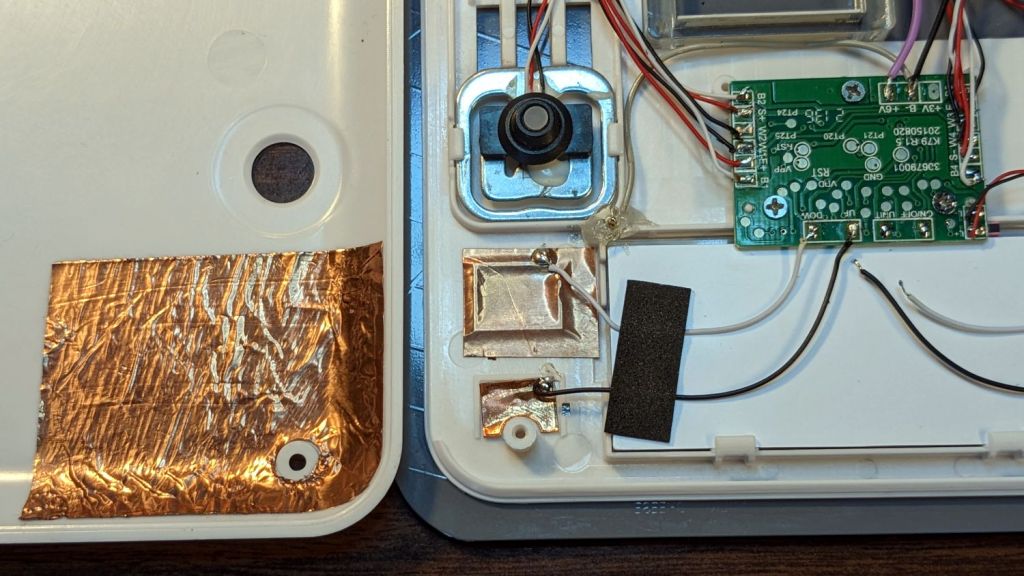
SmartHeart 19-106 Scale – button shield
A pogo pin connected to the circuit common contacts the copper foil when the bottom cover is screwed down:
SmartHeart 19-106 Scale – shield pogo pin – detal
The shield prevents the buttons from responding to fingers on the bottom of the scale, so it no longer wakes up when I extract it from the under-cabinet shelf, and concentrates its attention on the buttons, so it no longer seems quite so willing to lock up due to mysterious influences.
With an absurd amount of rebuilding, this scale is becoming not a complete waste of free money.
The batteries soaked up 240 mA·hr of charge, which means the scale drew about 10 mA/day over the last three weeks. Given that the scale’s original 2032 lithium cells have a total capacity around 220 ma·hr for currents in the microamp range, expecting them to supply a current around 10 mA is was absurd.
The aperiodic monotile discovery prompted some reverse engineering, snapping a path to regular hexagons for the proper lengths and angles without mathing too hard:
Aperiodic tile – hexagon overlay
The resulting red path is the “hat” monotile, here shown as a PNG for neatness:
Aperiodic monotile
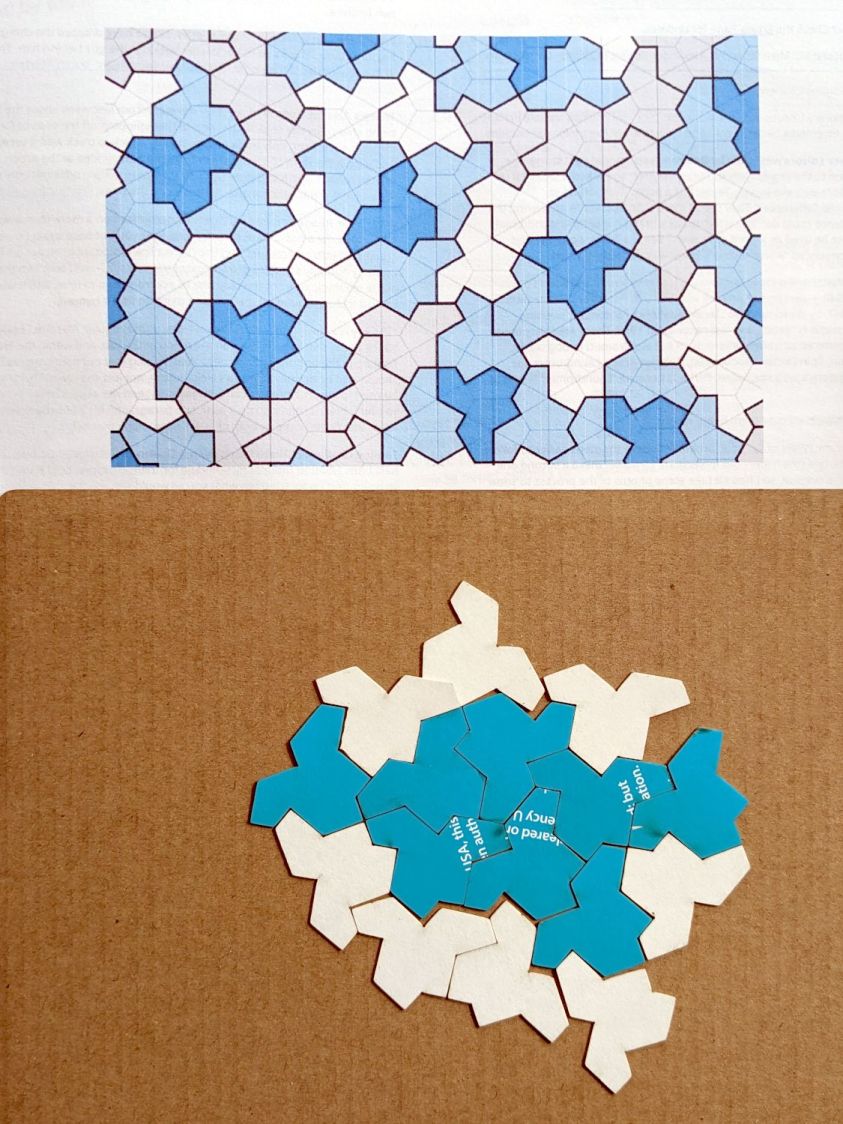
With SVG hat in hand, I laid and cut a trial puzzle based on the sample shown in the paper:
Aperiodic tile layout
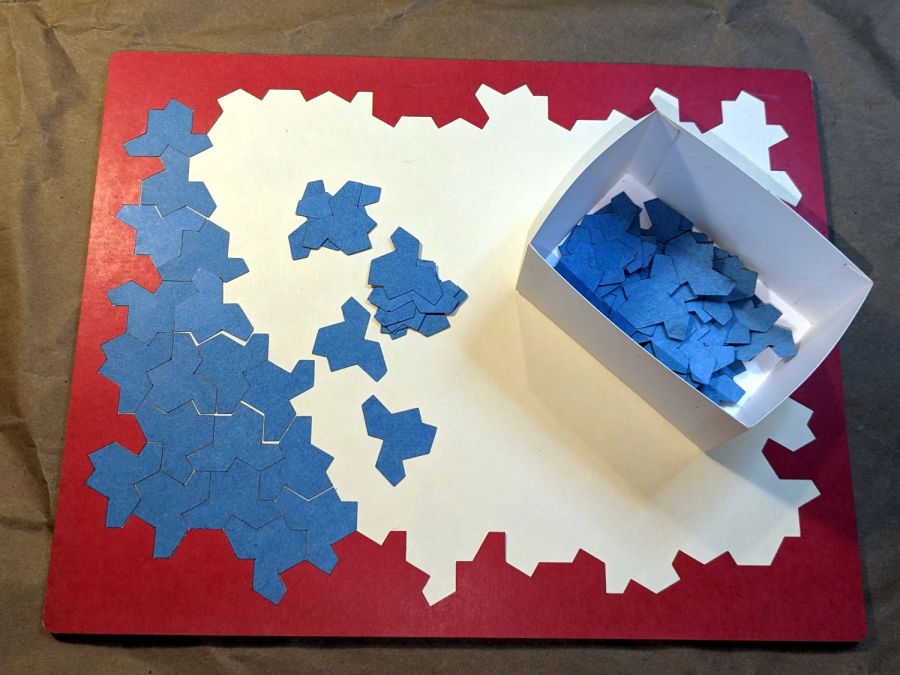
Which looked promising enough to add a few rings around that layout and turn it into an actual, albeit low budget, puzzle:
Aperiodic tile puzzle – starting
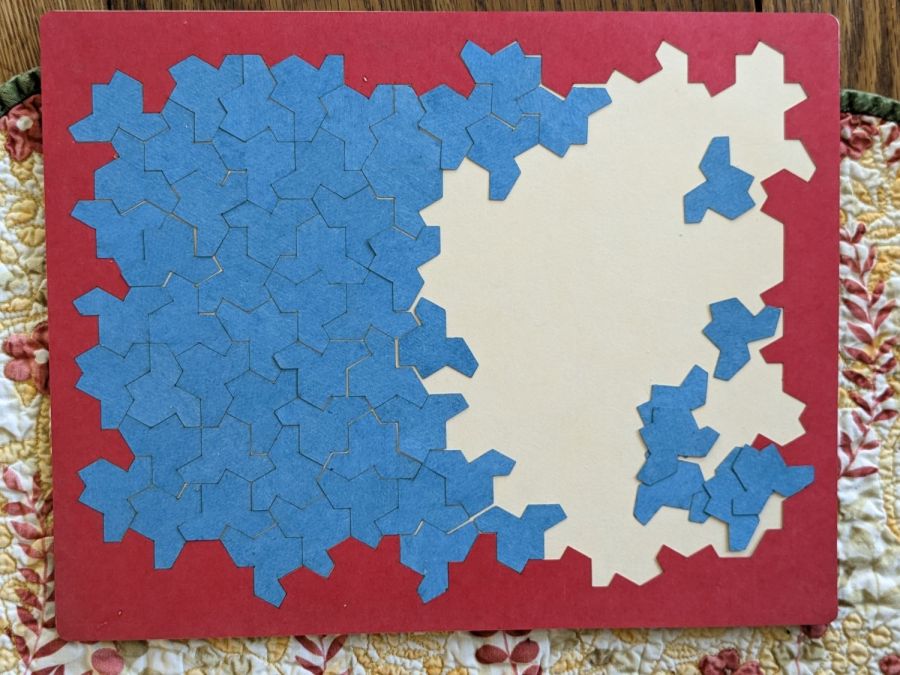
The paper notes that one can build mutually incompatible patches, which is the state I immediately blundered into:
Aperiodic tile puzzle – progress
The upper and lower left halves cannot be combined to extend rightward, as the middle section is incompatible with both. I began growing patches from the upper and lower right corners, hoping to use them to rectify the left half, but producing a small un-fillable situation in the middle:
Aperiodic tile puzzle – incorrect layout
Obviously, I need a cheat code. I’m resolutely not looking at the source layout for a while.
It’s basically ten identical identical spacers cut from 3 mm plywood, with a side benefit of dramatically reducing my scrap plywood stash, then skewered by a pair of absurdly long 4 mm self-tapping metal screws into holes drilled half an inch into the ¾ inch solid wood cabinet floor.
It clears some clutter atop the microwave and, at least to my deflicted ears, sounds much better. At some point I must screw the Raspberry Pi under the cabinet, too, but that awaits further rearrangement.
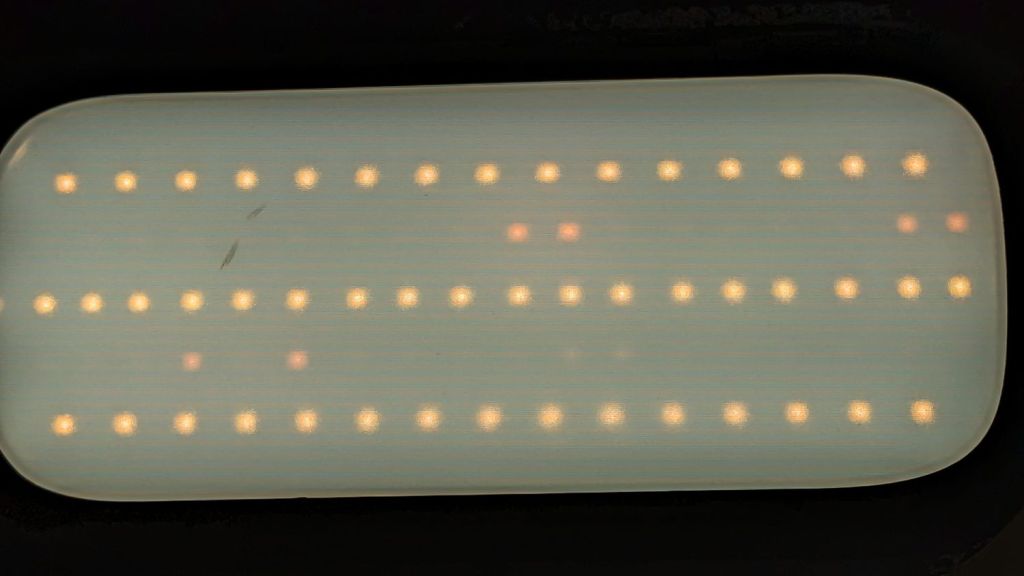
Confirming the diagnosis, the cool white LEDs worked fine with the light turned on:
Miroco floor lamp – all-LED mode fail
With nine spare SI2306 transistors in hand from the last time in this rodeo and minus the sticky adhesive foam covering the PCB, replacing the other driver transistor was no big deal, whereupon the lamp once again worked the way it should:
Miroco floor lamp – restored warm LEDs
While I was in there, I spotted a dent in the input filter cap:
Miroco floor lamp – OEM capacitor
Most likely I squished a wire between the cap and the U-shaped steel strut joining the two halves of the pole. I relocated the replacement cap off the circuit board into an open space with a bit more room:
Miroco floor lamp – recapped
The fragile wires running to the lamp head got their own sheet of silicone tape (not shown here) to isolate them from the U-strut:
Miroco floor lamp – LED wiring
Tuck all the wires back inside, snap the housing together, and it should be good for another uhh half year or two.
It’s hard to be sure about such things, but I now have eight spare transistors …


