Ed Nisley's Blog: Shop notes, electronics, firmware, machinery, 3D printing, laser cuttery, and curiosities. Contents: 100% human thinking, 0% AI slop.
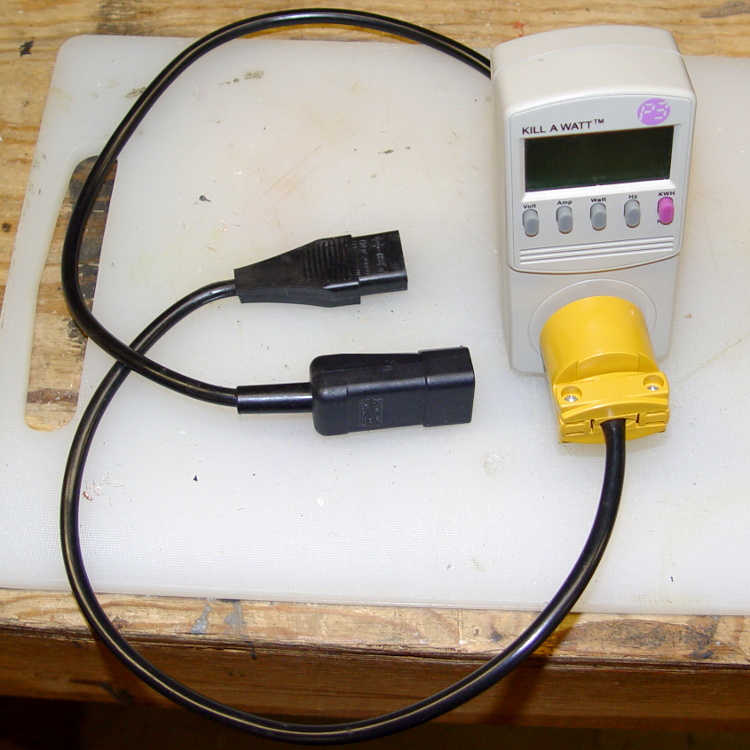
It makes measuring PC power consumption much easier!
I picked up some cheap AC plugs and sockets, cut a short IEC extender cable in half, and wired ’em up. If the IEC extender link breaks again, search amazon.com for something like “computer power cord extension” and rummage around.
US NEMA 5 plug / socket hint: the blade marked W is neutral. More expensive hardware will have dark brass = hot, light brass = neutral, but don’t bet your life on it.
This may not be a LibreOffice problem, but that’s where it shows up: the font selection dialog won’t display fonts with nonstandard Style names. There is, of course, no documentation anywhere (that I can find, anyway) on what Style names are permitted, so you discover this only when a font style that’s properly installed and accessible by other programs (like, say, Inkscape or Scribus) doesn’t render properly and doesn’t appear in the list.
In Xubuntu 12.10, LibreOffice 3.6.2.2 can’t handle the American Typewriter font style called Medium, which is what I’ve been using for the return address field on my (very few, these days) mail envelopes. Over the years, various versions of OpenOffice and LibreOffice have alternately accepted and rejected the Medium style, so this isn’t exactly a regression. It is, however, Yet Another Annoyance.
The solution, hinted at in that thread, involves using FontForge to rename the offending Style to, say, Regular, then saving the font. It’s actually the Weight property, hidden in Element → Font Info → PS Names tab. In this case, I changed the word “Medium” in the Fontname, Name for Humans, and Weight fields to “Regular”, which also updates the values in the TTF Names tab.
I save the modified font files in ~/.local/share/fonts using TrueType format, just to be sure I don’t confuse them with the original Postscript version in /usr/share/fonts/custom, delete the original, and then run fc-cache -v -f to update the caches. This surely isn’t the cleanest way to make it happen and almost certainly isn’t allowed by the Adobe EULA I agreed to, back when I actually bought the fonts, but so it goes.
Three rack protectors have gone missing over the last few months, presumably being digested by the dishwasher’s grinder, so I ran off another batch:
Dishwasher Rack Protectors – on platform
I used the original solid model, shown here with the support structure outside for visibility:
Dishwasher rack protector – support model
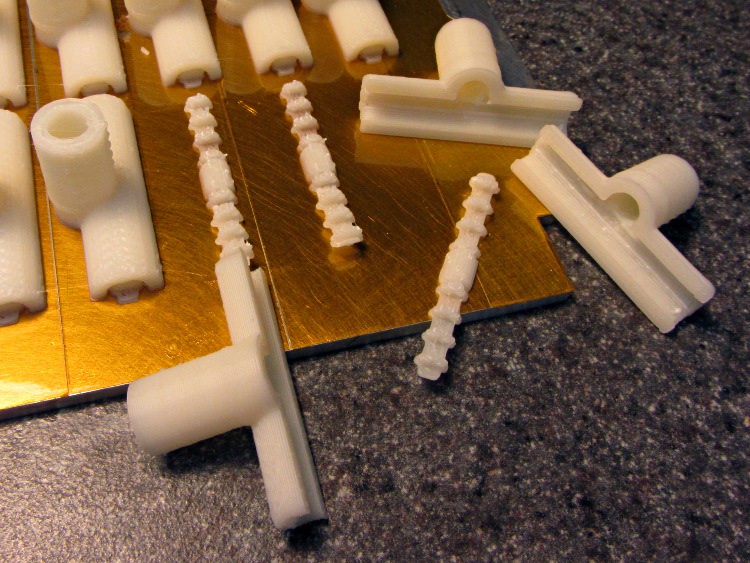
I re-sliced the model to pick up whatever printer config tweakage happened since then. Those ribbed doodads snapped out easily and, in fact, some remained bonded to the platform:
Dishwasher Rack Protectors – support structures
No finishing required: just slide them over the pins atop a blob of acrylic caulk. Despite the few missing protectors, it does a good job of bonding them to the rack and sealing gaps in the worn vinyl coating.
I picked up a jar of ReRack glop on closeout duing my last pass through the Big Box Home Repair Store. It seemed a bit stiff, so I’ve added generous dollops of xylene, acetone, and MEK to thin it out; that’ll take a while to stabilize.
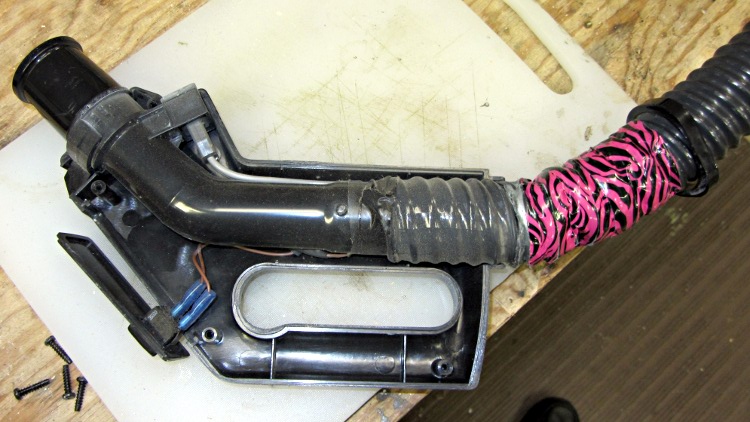
After beating the Samsung’s nozzle handle and hose into submission, I made a set of floor brush strips for the hard-floor attachment:
Floor brush strips – replacements in place
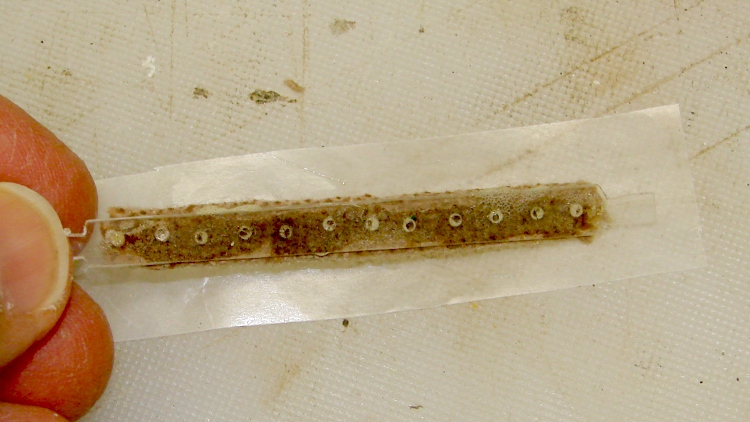
The original brushes had non-woven felt glued to a cleverly molded strip of white plastic, which lasted not very long at all. I’d replaced them (*) with wool fabric glued to hand-hewn strips of polypropylene cut from the usual blister pack material, but that was so labor-intensive as to make no sense at all; it did show that replacement brushes would work, though, which was the whole point. This view looks through a finished strip to the urethane glue and wool fabric:
Floor brush strip – manual version
Fortunately, there’s an easier way to make the strips:
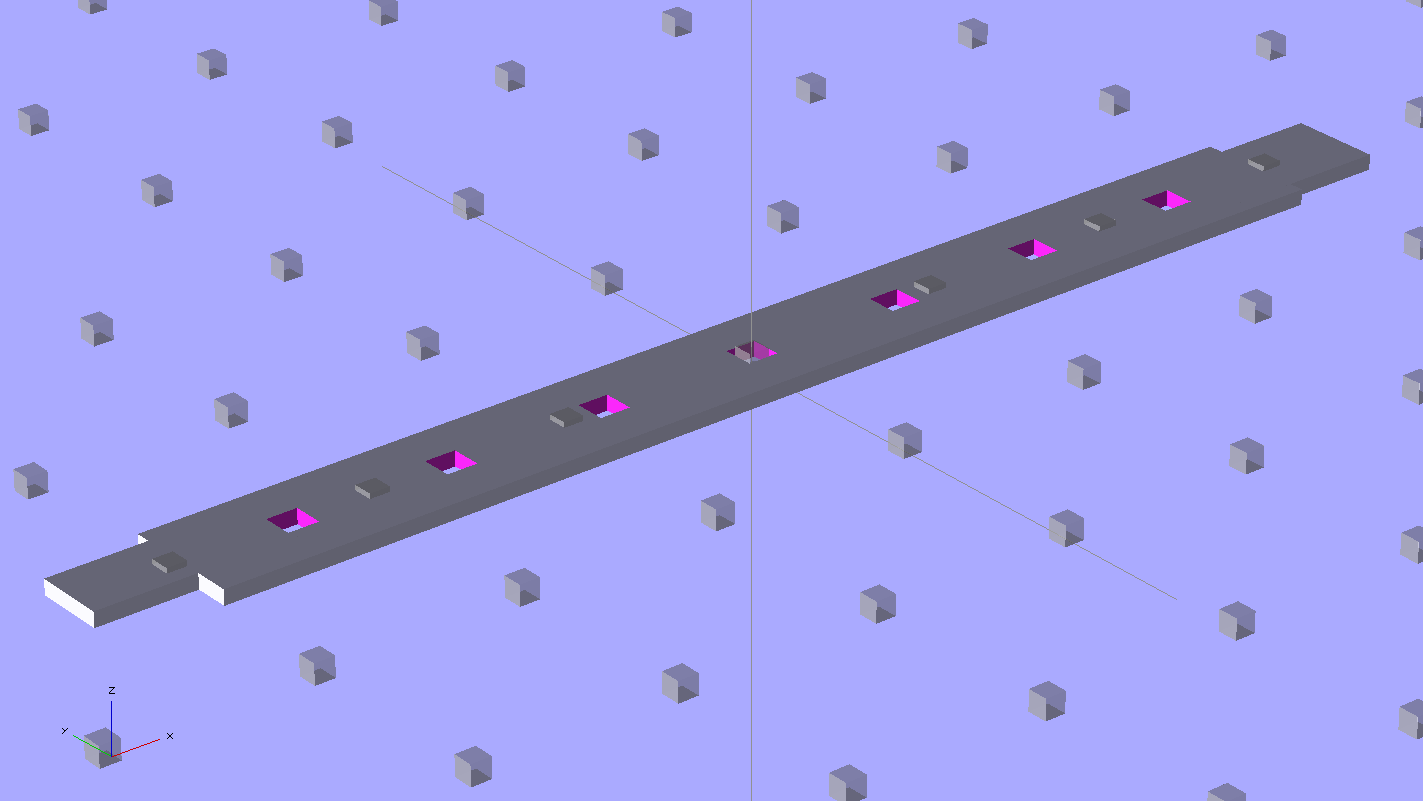
Floor brush strip – solid model
Note that the smaller tab (the one in the front) is not centered on the midline. The openings for the larger tab in the floor brush housing seem to have a small offset, but it’s not worth worrying about. The printed ones are 4 layers thick, but I think 3 layers will work as well; that’s what the OpenSCAD source will produce.
This is one of the few situation where the hand-knitted top surface of a 3D-printed object is an advantage: that, plus the holes, provides enough griptitude for urethane glue to hold the fabric strips firmly in place.
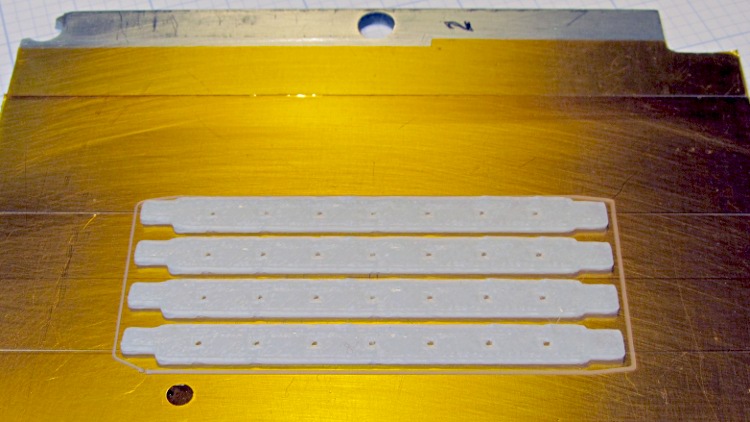
Obviously, you print them in multiples:
Floor brush strips – on platform
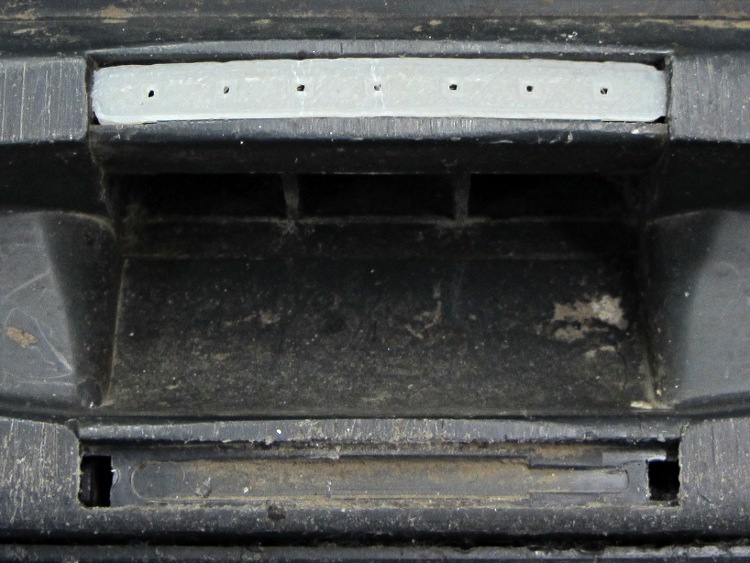
A trial fit:
Floor brush strip – trial fit
They really are bowed slightly outward in the middle, which ensures there’s more pressure on the middle of the strip against the floor. I think the weird indented pattern in the brush housing under the strips was for a complex spring assembly that never made it into production; the OEM strips looked just like the ones I’m making, minus the perforations.
I glued two strips individually to make sure everything lined up, then glued these two in one operation and separated them with a razor knife:
Floor brush strips – gluing fabric
(*) It goes without saying that OEM replacement brushes weren’t available and, in fact, they have never been available at any time when we’ve owned the vacuum cleaner. Maybe I’m not looking in the right place, but so it goes.
The OpenSCAD source code, which you’ll want to print with Multiply set to maybe 8:
// Samsung Vacuum cleaner nozzle floor strips
// Ed Nisley KE4ZNU January 2013

Layout = "Build";			// Show, Build

//- Extrusion parameters must match reality!
//  Print with +0 shells and 3 solid layers

ThreadThick = 0.25;
ThreadWidth = 2.0 * ThreadThick;

HoleWindage = 0.75;

function IntegerMultiple(Size,Unit) = Unit * ceil(Size / Unit);

Protrusion = 0.1;           // make holes end cleanly

//----------------------
// Dimensions

Body = [6.0,59.0,3*ThreadThick];	// width, length, thick

Tab1 = [4.5,5.0,0.0];				// width, length, offset from centerline
Tab2 = [3.5,5.0,0.5];

HoleOC = 8.0;						// adhesive anchoring holes
HoleDia = 1.0;
HoleSides = 4;
HoleMax = floor(Body[1]/(2*HoleOC));

echo("HoleMax: ",HoleMax);

//----------------------
// Useful routines

module PolyCyl(Dia,Height,ForceSides=0) {           // based on nophead's polyholes

Sides = (ForceSides != 0) ? ForceSides : (ceil(Dia) + 2);

FixDia = Dia / cos(180/Sides);

cylinder(r=(FixDia + HoleWindage)/2,
         h=Height,
         $fn=Sides);
}

module ShowPegGrid(Space = 10.0,Size = 1.0) {

    Range = floor(50 / Space);

    for (x=[-Range:Range])
        for (y=[-Range:Range])
            translate([x*Space,y*Space,Size/2])
            %cube(Size,center=true);

}

module BackingStrip() {

	difference() {
		union() {
			translate([0,0,Body[2]/2])
			cube(Body,center=true);
			translate([Tab1[2],-1*Body[1]/2,Body[2]/2])
			cube([Tab1[0],2*Tab1[1],Body[2]],center=true);
			translate([Tab2[2],+1*Body[1]/2,Body[2]/2])
			cube([Tab2[0],2*Tab2[1],Body[2]],center=true);
		}
		for (i = [-HoleMax:HoleMax])
			translate([0,i*HoleOC,-Protrusion])
			rotate(45)
			PolyCyl(HoleDia,(Body[2] + 2*Protrusion),HoleSides);
	}
}

//----------------------
// Build it!

ShowPegGrid();

if (Layout == "Show")
	BackingStrip();

if (Layout == "Build")
	rotate(90) BackingStrip();
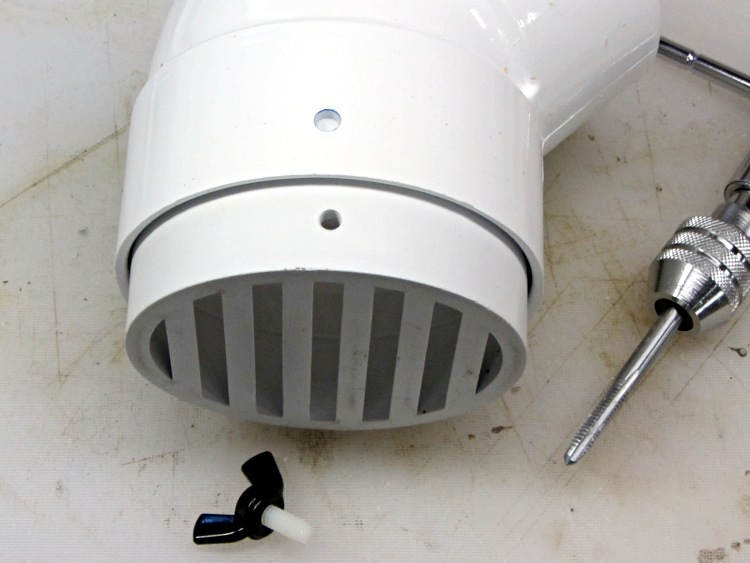
The hose going into the handle of the never–sufficently-to-be-damned Samsung VAC-9048R suck dog has been collapsing for quite some time, but I couldn’t figure out how to take the handle apart. Recently, the lock ring that I would have sworn was glued in place came loose, revealing the secret:
Samsung vacuum cleaner – handle lock ring
You slide four lugs on the lock ring into the open slots, then turn the ring clockwise to force the lugs over barriers into recesses that capture them and hold the lock ring against the handle. The handle under the lock ring isn’t quite circular, nor is the lock ring, and I think (based on later events) that they expect the ring to deform as it turns in order to let the lugs spring over the barriers.
Anyhow, with the lock ring loose, removing four screws released the two halves of the handle:
Samsung vacuum cleaner – handle interior
The handle includes a switch for the powered floor brush, which we rarely use, and a suction control lever that’s basically a binary leak: on or off. With the handle opened in front of you, remove the innards, unwrap the decorative duct tape, unwind enough of the two power conductor / spring wire ribs to allow for rebuilding the electrical connections, and cut off the damaged part of the hose.
Now, obviously, what that hose needs is a little bit of strain relief, along the lines of the hideous snout I’d affixed to its other end a while ago. The general idea is to replace the lock ring with a little attachment that will hold the heatshrink tubing in place. Something like this:
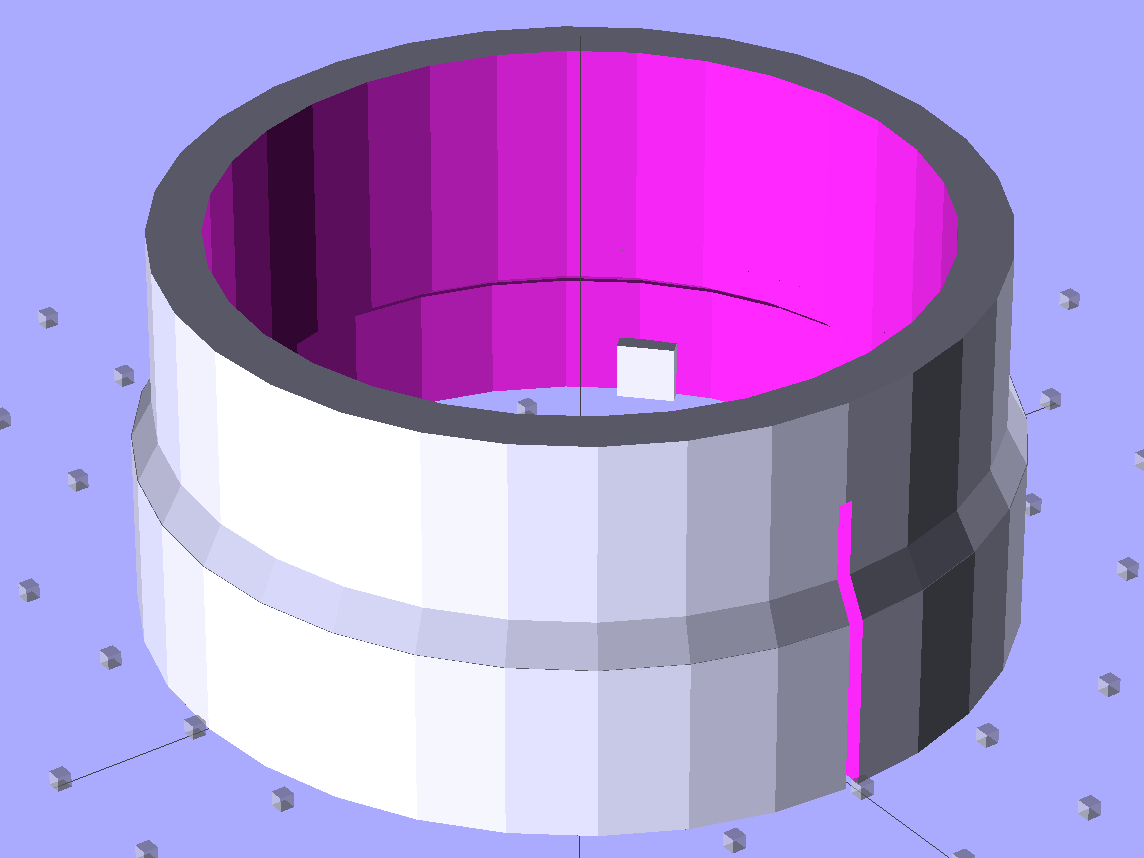
Bushing Solid Model – top
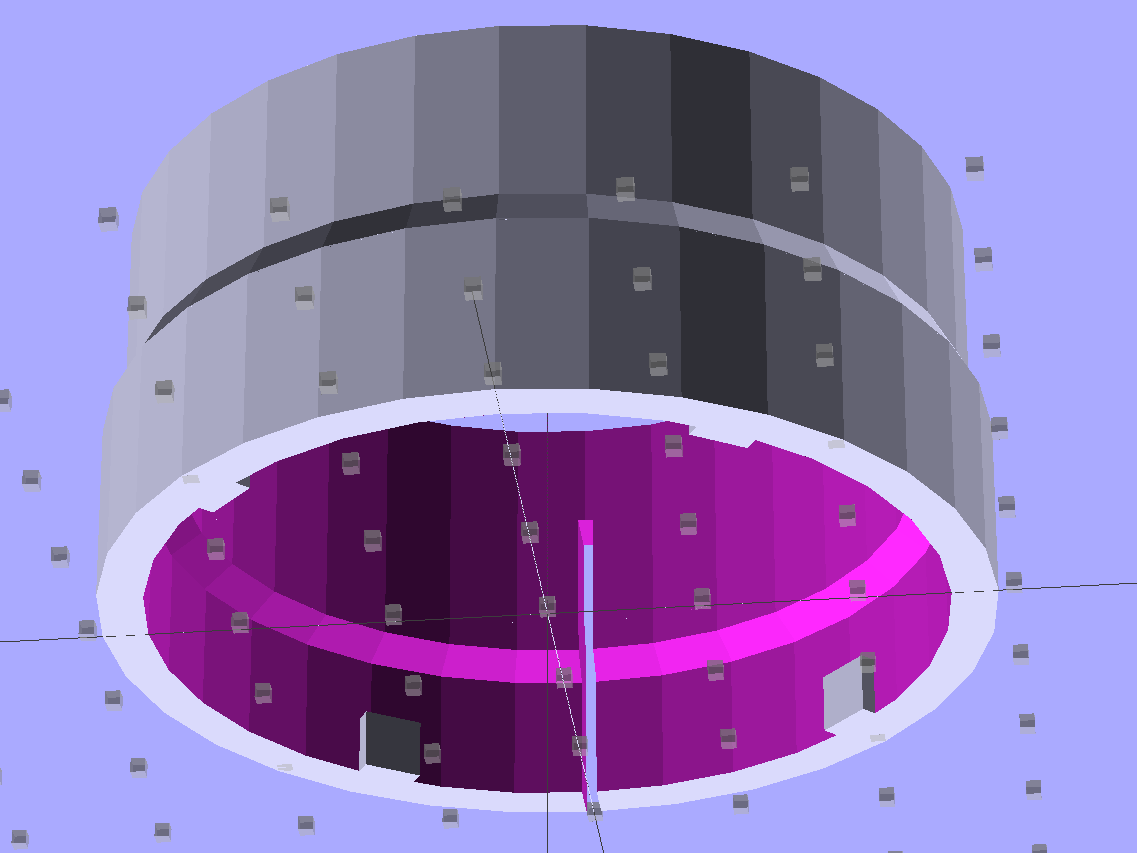
The bottom view, looking up through the layer of 1 mm cubes defining the Z=0 plane, shows the lugs:
Bushing Solid Model – bottom
I thought the slit would provide enough springiness to let the lugs bump over the ridges, but it wasn’t quite enough: the relatively stiff ABS isn’t nearly as springy as the original black plastic for about the same thickness. For the next version, I’ll try four slits, all of which must end at different levels to avoid concentrating the stress on a single layer.
In any event, it came out about like you’d expect:
Handle Bushing – on platform
As with many projects, though, I had to make a pair of simpler prototypes to get the measurements correct. The lugs, for example, are not 90° apart, spaced neatly around the handle’s midline seam, as I assumed for Prototype 1 on the right:
Handle bushings – prototypes 2 and 1
Prototype 2, on the left, has a support structure holding up a horizontal step that butted against the handle, which turned out to be unnecessary. The OpenSCAD version substitutes a pair of conical transitions that worked much better; they’re at different levels with a thicker wall section between them.
With the ring and somewhat preshrunk heatshrink tubing slipped along the hose, rewiring proceeds in reverse order. Next time, I’ll add a QD fitting in the hose-to-socket wire so I can take the whole thing apart again without cutting that wire:
Samsung Vacuum Handle – wiring detail
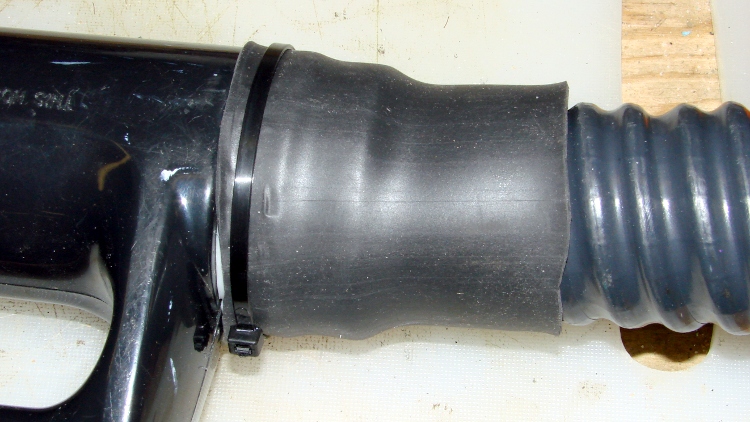
Assemble the handle, snap the glaring white strain relief fitting in place, shrink the tubing, add a cable tie mostly for show:
Samsung Vacuum Handle – heatshrink over bushing
I cut a few slits in the tubing’s end to improve its bendiness, but it’s already Much Better than it was.
A few things I’d do differently:
Add a recess for the cable tie, with a flat spot for its latch
Four slits, not just one
Ribs on the snout to help anchor the tubing
Longer snout?
The OpenSCAD source code for the final version, with a module for the support ring that you won’t need:
// Samsung Vacuum cleaner hose bushing
// Ed Nisley KE4ZNU January 2013

// Layout options

Layout = "Build";
                    // Overall layout: Show Build
                    // Parts: Ring Sleeve

//- Extrusion parameters must match reality!
//  Print with +1 shells and 3 solid layers

ThreadThick = 0.25;
ThreadWidth = 2.0 * ThreadThick;

HoleWindage = 0.75;

function IntegerMultiple(Size,Unit) = Unit * ceil(Size / Unit);

Protrusion = 0.1;           // make holes end cleanly

//----------------------
// Dimensions

HoseOD = 47.0;					// spiral tube diameter
TubeWall = 1.4;					// heatshrink tubing wall thickness
HandleRingLong = 8.5;			// length of ring stub on handle

RingID = 51.0;					// lock ring over handle end
RingOD = 58.0;
RingLong = 12.0;

Locks = 4;						// bumps inside lock ring
LockLength = 4.0;
LockWide = 4.0;
LockThick = 0.75;

LockAngleOffset = 52.0;			// offset of lock bump from handle top dead center
LockAngleIncluded = 102.4;		// between first and second lock bump (also 3 & 4)
LockAngles = [-LockAngleOffset,
				-(LockAngleOffset+LockAngleIncluded),
				-(LockAngleOffset+180),
				-(LockAngleOffset+LockAngleIncluded+180)];

BushID = HoseOD + 1.0;			// over spiral hose
BushOD = RingOD - 2*TubeWall;	// allow flush heatshrink fit
BushLength = 15.0;

SlitWidth = 2*ThreadWidth;		// allow expansion of lock ring, sorta kinda
SlitHeight = 20.0;
SlitAngle = 0;
SlitLength = max(RingOD,BushOD);

RingSides = 4*8;
RingAlign = 360/(2*RingSides);
$fn = RingSides;

//----------------------
// Useful routines

module PolyCyl(Dia,Height,ForceSides=0) {           // based on nophead's polyholes

Sides = (ForceSides != 0) ? ForceSides : (ceil(Dia) + 2);

FixDia = Dia / cos(180/Sides);

cylinder(r=(FixDia + HoleWindage)/2,
         h=Height,
         $fn=Sides);
}

module ShowPegGrid(Space = 10.0,Size = 1.0) {

    Range = floor(50 / Space);

    for (x=[-Range:Range])
        for (y=[-Range:Range])
            translate([x*Space,y*Space,Size/2])
            %cube(Size,center=true);

}

//-------------------
// Component parts

module Ring() {
	union() {
		difference() {
			union() {
				cylinder(r=RingOD/2,h=(RingLong + Protrusion));
				translate([0,0,RingLong])
					cylinder(r1=(RingOD/2),r2=(BushOD - Protrusion)/2,h=(RingOD - BushOD));
			}
			translate([0,0,-Protrusion]) {
				PolyCyl(RingID,(HandleRingLong + Protrusion),RingSides);
				cylinder(r=BushID/2,h=(2*RingLong));
			}
			translate([0,0,(HandleRingLong - Protrusion)])
				cylinder(r1=((RingID/2) / cos(180/RingSides) + HoleWindage),
						 r2=BushID/2,
						 h=(RingID - BushID)/2);
		}
		for (i=[0:Locks-1])
			rotate(LockAngles[i] + RingAlign)
				translate([(RingID/2),0,LockWide/2])
					cube([2*LockThick,LockLength,LockWide],center=true);
	}
}

module Sleeve() {
	difference() {
		cylinder(r=BushOD/2,h=(BushLength + Protrusion));
		translate([0,0,-Protrusion])
			cylinder(r=BushID/2,h=BushLength + 3*Protrusion);
	}
}

module Bushing() {
	difference() {
		union() {
			Ring();
			translate([0,0,RingLong])
				Sleeve();
		}
		rotate(SlitAngle)
			translate([SlitLength/2,0,(SlitHeight - Protrusion)/2])
				cube([SlitLength,SlitWidth,(SlitHeight + Protrusion)],center=true);
	}
}

// This turned out to be unnecessary after tapering the transitions
module Support() {

SuppHeight = RingLong - ThreadThick;

	color("Yellow")
	union() {
		difference() {
			cylinder(r=(RingID/2 - LockThick - ThreadWidth/2),h=SuppHeight);
			translate([0,0,-Protrusion])
				cylinder(r=(BushID/2 - ThreadWidth),h=2*RingLong);
			for (i=[0:RingSides-1])
				rotate(i*2*RingAlign)
					translate([RingID/4,0,SuppHeight - ThreadThick/2 + Protrusion/2])
						cube([RingID/2,(LockLength - 3*ThreadWidth),(ThreadThick + Protrusion)],center=true);
		}
	}
}

//----------------------
// Build it!

ShowPegGrid();

if (Layout == "Build")
	union() {
		Bushing();
//		Support();
	}

if (Layout == "Show")
	Bushing();

if (Layout == "Ring")
	Ring();

if (Layout == "Sleeve")
	Sleeve();

if (Layout == "Support")
	Support();
That didn’t matter with a three-foot pipe attached directly to the downspouts, but, as part of the driveway project, I routed the house storm drains and wall footing drain pipes about 20 feet down from the new retaining wall, with the two joining into a single outlet. There’s a cleanout plug on the storm drain line, but the footing drain consists of about 50 feet of corrugated and perforated tubing that would be just about the finest possible chipmunk habitat.
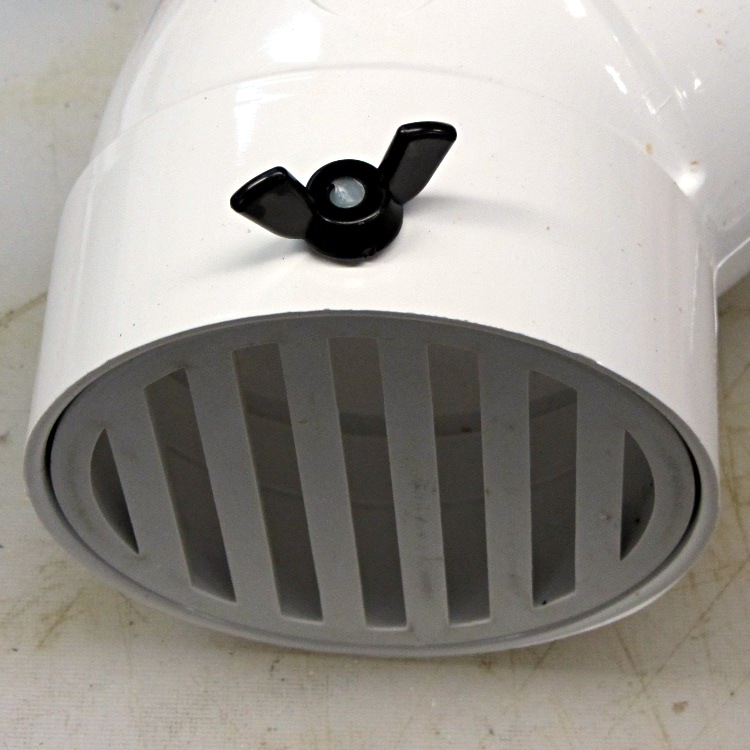
In principle, one would simply glue a grate into the final fitting and be done with it, but leaves from the gutter will pack behind the grate, so it must be removable. Leaving the grate loose means it’ll pop out at the slightest provocation and, most likely, roll another hundred feet down the driveway into the street.
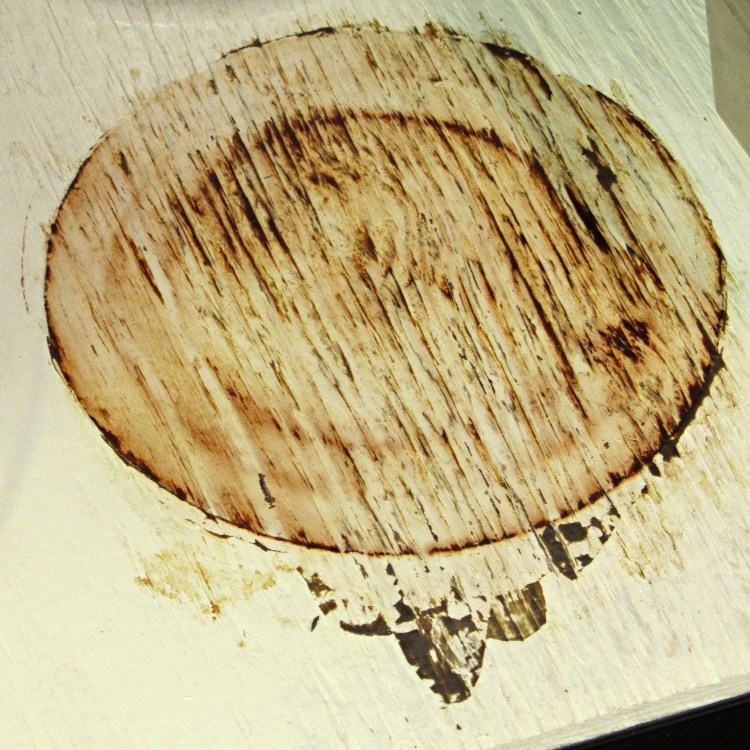
Rather than coping with that, I drilled a clearance hole in the elbow and tapped a matching hole in the grate:
Drain pipe grate – hole tapping
I have a few white nylon 1/4-20 cutoffs from the bike fairing clamps, so I wrecked the threads on one and jammed it into a black nylon thumbscrew:
Drain pipe grate – thumbscrew
Now, of course, the critters can still climb down the drainpipes from the gutters and set up housekeeping in the plumbing, but I’m not putting grates where I must climb onto the roof to clear them. A chipmunk dropped from two stories will scamper away; I’d never walk again.