Ed Nisley's Blog: Shop notes, electronics, firmware, machinery, 3D printing, laser cuttery, and curiosities. Contents: 100% human thinking, 0% AI slop.
The original owner of our house positioned two blue plastic barrels along the driveway, filled with salt for ice melting. We’ve neither used the salt (a snowblower suffices for most storms) nor removed the barrels; they’ve been in those spots for at least three decades.
The never-sufficiently-to-be-damned O-rings in the kitchen’s American Standard faucet wore out again; the faucet spout went from a tolerable piddle to a major flow over the course of a few weeks.
The inner circumference of the bottom O-ring had most of the wear:
American Standard faucet – worn lower o-ring
In cross-section, it’s more of a D-ring:
American Standard faucet – worn lower o-ring – section
Once again, I soaked the spout & pillar in vinegar to remove the mineral deposits (despite the soft water), gave them a light sanding with 800 grit paper to regularize the surfaces, cleaned everything up, lubed it with petroleum jelly, and it’s all good.
Disassembly and replacement went smoothly, mostly because I could look up what I did before and avoid all the usual mistakes.
Our standard dishwasher loadout changed a while back, so I ran off more protectors to fill the bottom rack. The crystalline look of natural PETG is probably wasted in there, even though it puts the old, rather yellowed, PLA protectors to shame:
Dishwasher Rack Protectors – old PLA new PETG
Dollops of silicone sealant hold them in place: the bigger the blob, the better the job.
We don’t activate the drying heater, so the plastic doesn’t get exposed to absurdly high temperatures. As nearly as I can tell, those PLA protectors remain in fine physical condition, even though they’re turning an odd color.
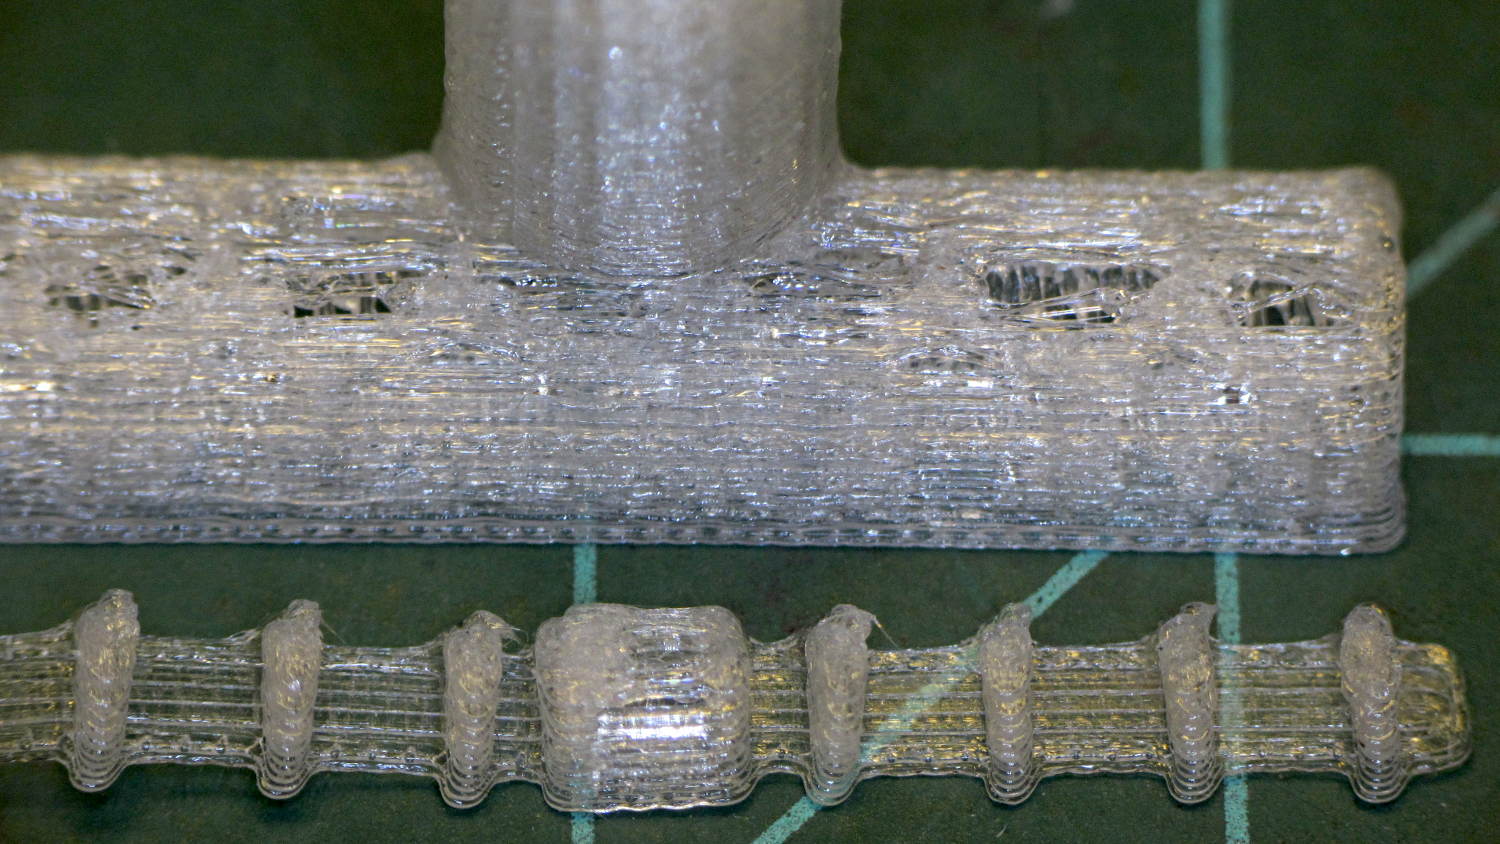
The support structures peeled out easily with a fingernail pull:
Dishwasher Rack Protectors – 0.20 mm PETG bridging – detail
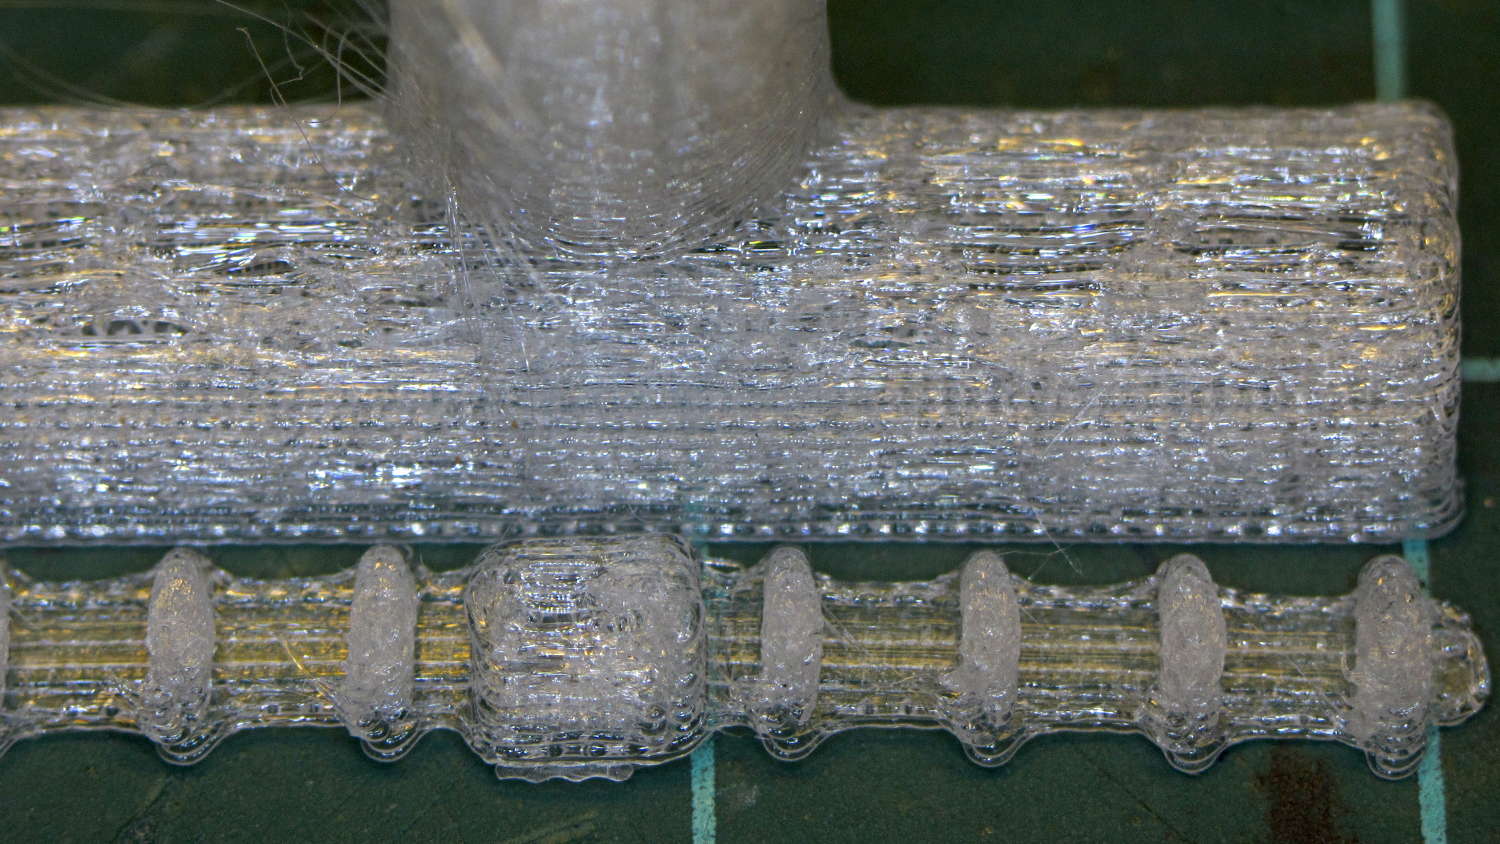
PETG doesn’t bridge well, as shown by the gaps between the support ridges. Those 0.20 mm layers seemed skimpy for lightly supported PETG, so I ran another set at 0.25 mm:
Dishwasher Rack Protectors – 0.25 mm PETG bridging – detail
Not quite enough improvement for a Happy Dance, although fine for the application.
We look forward to seeing what grows in those little crevices…
Yeah, tanker boots and all; not the weirdest thing we saw during RIT’s graduation ceremonies.
This summer marks her fourth of four co-op semesters with Real Companies Doing Tech Stuff and her final classes end in December; RIT holds one ceremony in the spring and being offset by a semester apparently isn’t all that unusual. She (thinks she) has a job lined up after graduation and doesn’t need her doting father’s help.
But, hey, should you know someone with a way-cool opportunity (*) for a bright, fresh techie who’s increasingly able to build electronic & mechanical gadgets and make them work, drop me a note and I’ll put the two of you in touch. [grin]
(*) If that opportunity should involve 3D printed prosthetics with sensors and motors, she will crawl right out of your monitor…
The mower tried to eat a protruding root, emitted a horrible crash, and ran poorly until I shut it off, after which it refused to restart. Hoping against hope that the flywheel’s aluminum key had sheared, I pulled the cover, removed the starter, and found:
Mower flywheel key
Alas, the key is in fine shape. I made the two diagonal scratches to confirm it really is aluminum.
After letting the mower sit for a day, it started and ran briefly, blatted a giant backfire that probably startled the neighborhood (because I had the exhaust aimed into the garage, which served as a wonderful resonator), died a sudden death, then made clanking sounds whenever I pulled the rope. Something is definitely broken inside, but I suspect diagnosing & fixing it will require more time and money than is justified.
I no longer form deep emotional attachments to lawn mowers, so I ordered a similar one online and the local Sears had it ready for pickup in an hour.
If I had to pull the flywheel, I’d tap the two obvious holes (one behind the shaft in the picture) and gimmick up a puller with two matching screws around a central bolt that does the heavy lifting; I can’t justify the Special Service Tool I’m sure it requires.
The old mower lasted an hour at the foot of the driveway with a “FREE – Engine probably severely broken” sign affixed to its handle; both parties got a great deal on that transaction!
A somewhat lighter, more rye-tasting loaf than my classic recipe:
Combine dry ingredients in a 4.5-quart mixer bowl:
½ Tbsp dry yeast (1 Tbsp for more boost)
2 Tbsp brown sugar
½ cup dried milk
Stir in:
1-½ cup warm water
Dump more dry ingredients on top, do not mix:
½ cup flax seed meal
1 cup bread flour
1 cup rye flour
2-½ cup whole wheat flour
1 tsp salt
Let the dry ingredients sit on top of the liquid for 15 minutes as the yeast revs up, then run the mixer until the dough ball cleans the bowl sides. Oil the bowl, cover, and let the dough rise for maybe an hour (45 minutes in warm weather / oven).
Form the ball into an ingot, pack it into a non-stick loaf pan, cover loosely with aluminum foil, and let it rise another hour (30 minutes in warm weather / oven) to fill the pan with a nice loaf. I’ve been using a King Authur 8-½ x 4-½ inch non-stick bread pan to good effect.
Bake loaf with the foil on top in a 350 °F oven for 50 minutes. You can set the oven to start at a convenient time, run for an hour at 350 °F from a cold start, and the bread will come out fine. If it’s too durable, try 325 °F.
Drop loaf onto a cooling rack, wait five minutes, slice generous QC sample from one end, apply (peanut) butter, give thanks to the yeast, enjoy.
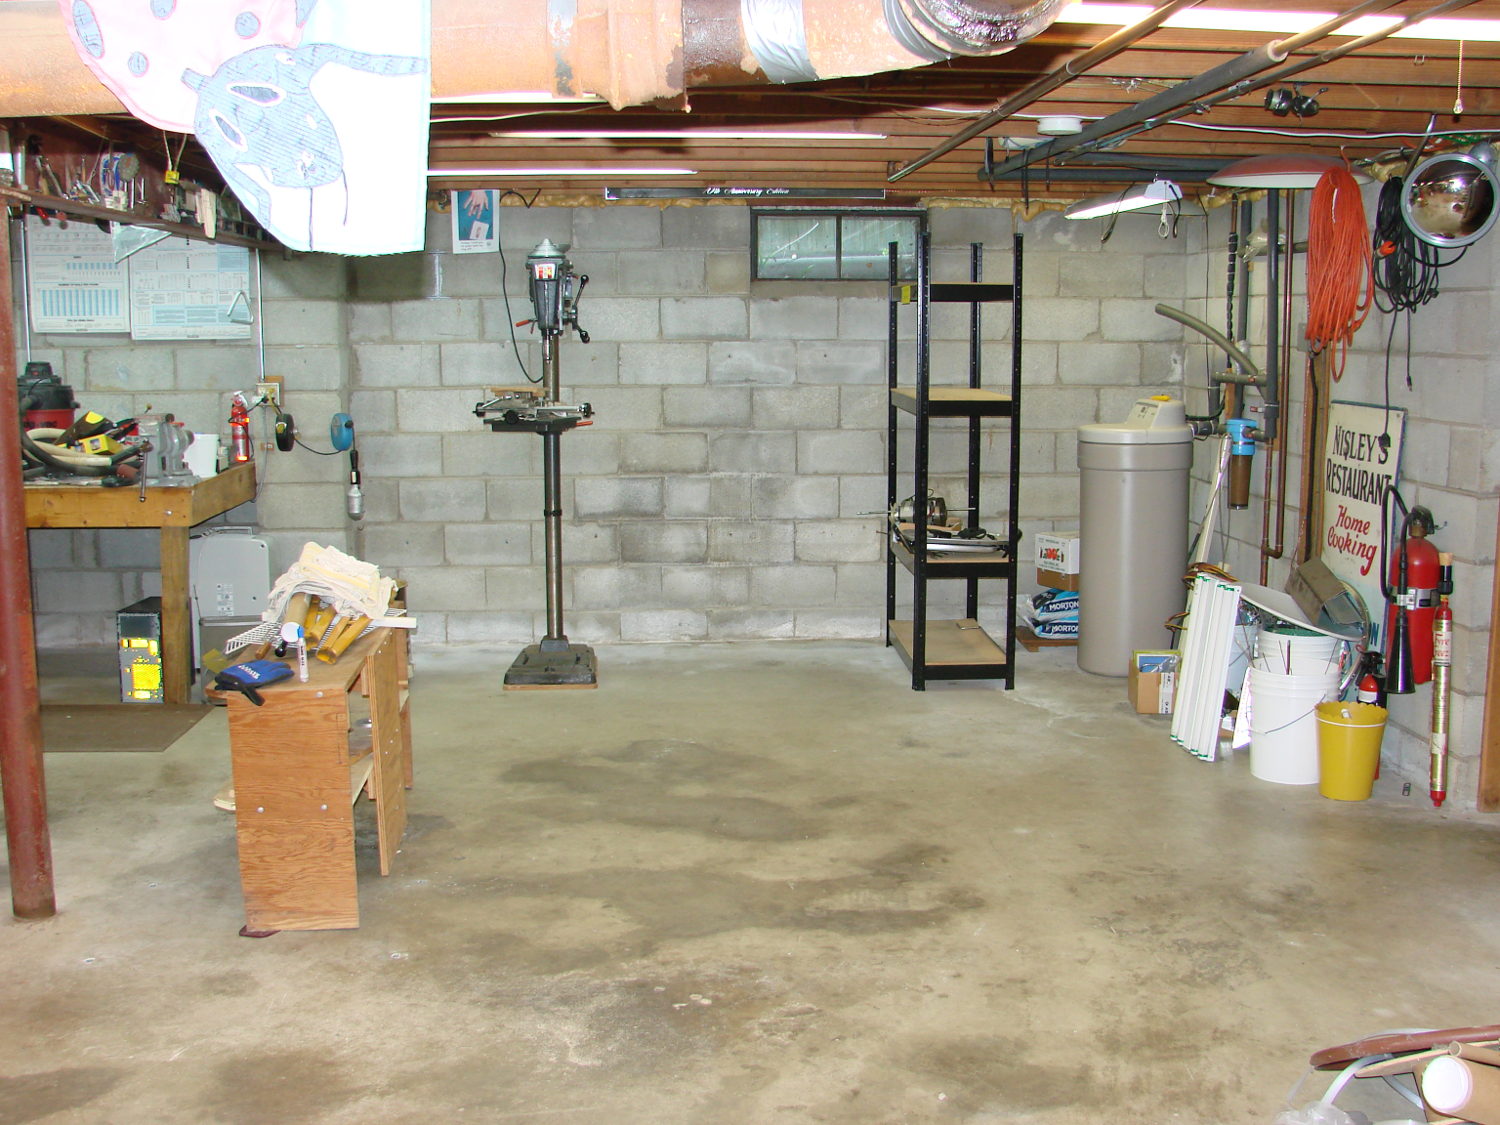
So I spent the last month (*) extracting the tools, parts, and stock I use on a regular basis, filling 20-ish boxes with stuff I wanted to keep:
Basement shop – right – before
After I moved all those boxes out of the way, three very industrious guys (and two teens who gradually got into the spirit of the thing) from MakerSmiths devoted all of a Saturday and a bit of Sunday morning converting an entire basement like that into this:
Basement Shop – right
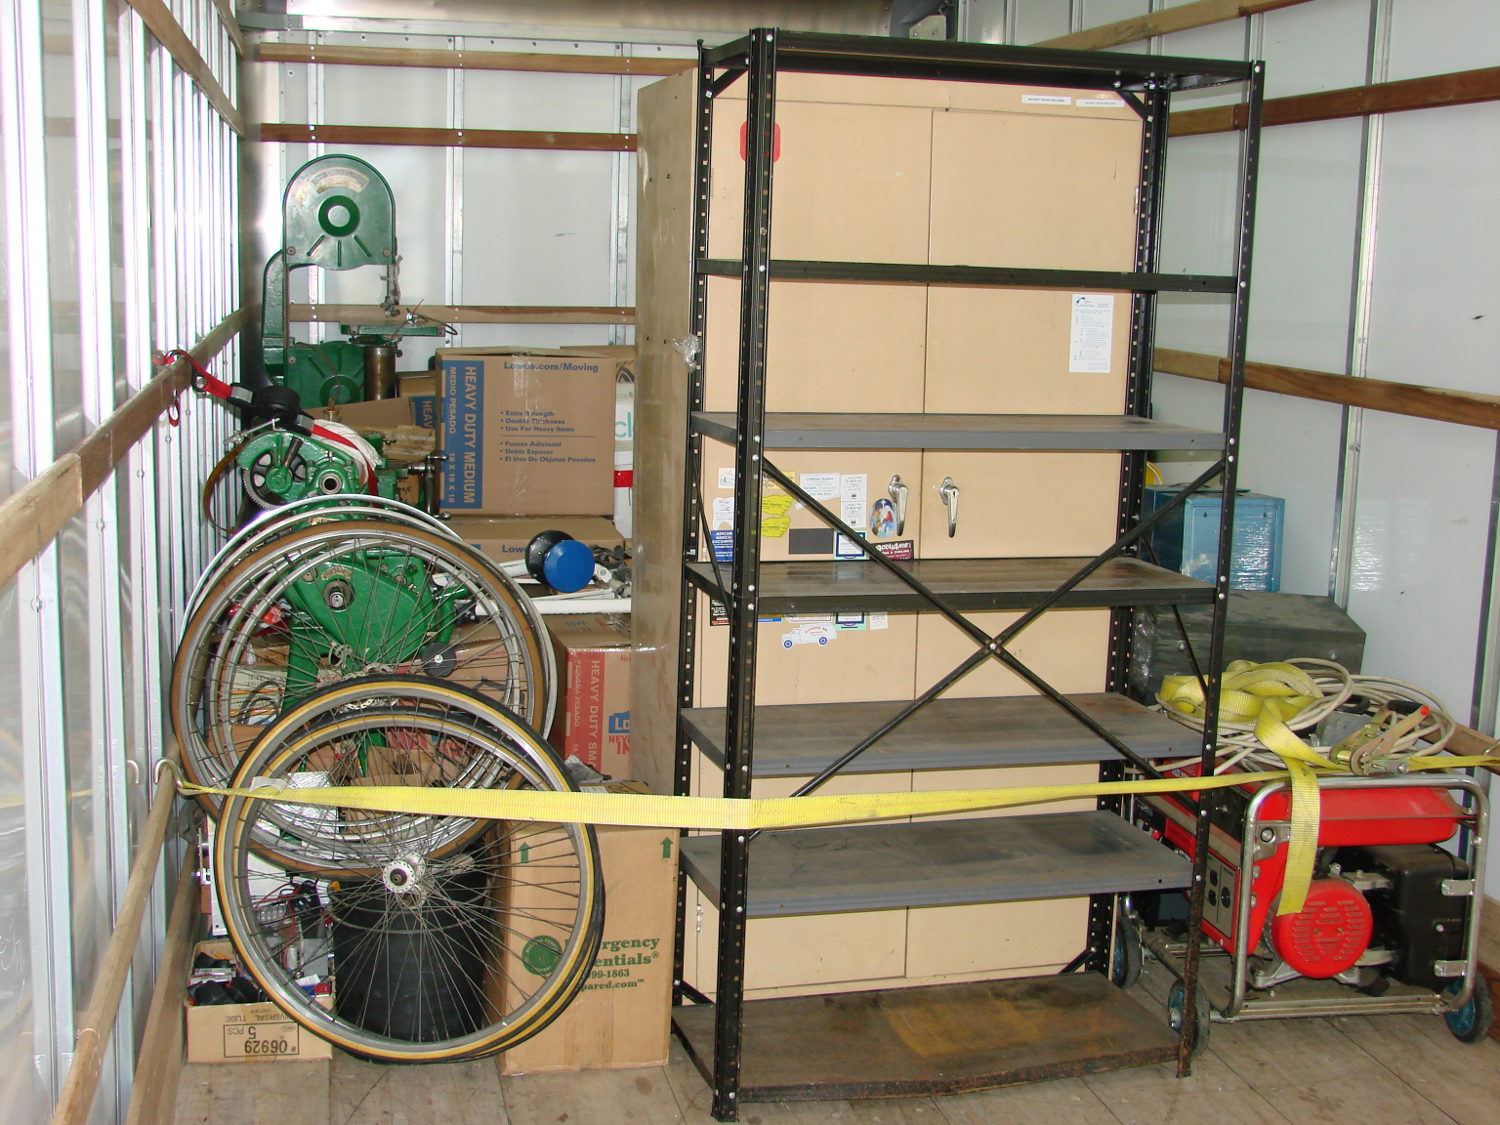
The stuff filled about 3/4 of the floor space in a pair of 26 foot box trucks:
Each truck had a snug 10,000 pound load limit and the stuff didn’t stack well:
The strap under the pile of metal, plus some plywood stiffeners, prevented it from running amok during transit. As long as they didn’t flip the truck, everything seemed well packed and cross-braced.
Only a few minor injuries; all’s well that ends well.
Alas, most of the spatial memory that let me find a tool or a part is now wrong; it’ll take a while to re-learn the new locations.