Ed Nisley's Blog: Shop notes, electronics, firmware, machinery, 3D printing, laser cuttery, and curiosities. Contents: 100% human thinking, 0% AI slop.
Unfortunately, reinforcing the USB Micro-B jack on the side of the LitUp LED Light Pad only delayed the inevitable: the light became erratic even without the slightest touch. The pad consists of three acrylic sheets glued together around the entire perimeter, so there’s no way to get access to the no-user-serviceable-parts within. Apparently, you’re supposed to just throw it out.
On the other paw, it’s already dead, so there’s nothing to lose:
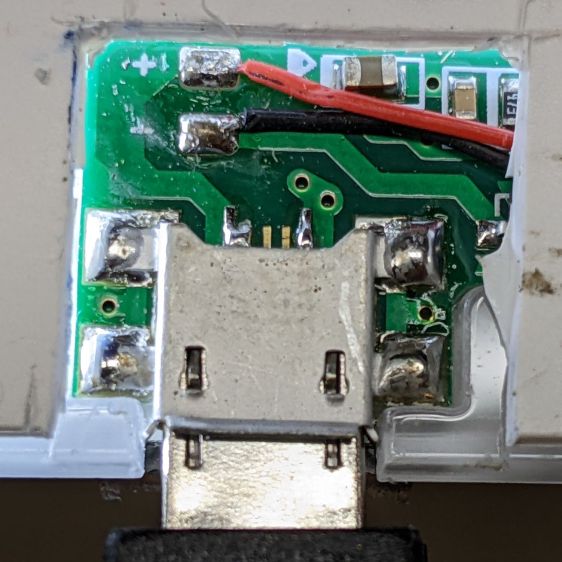
LitUp LED Light Pad – failed USB jack
A little deft razor knife work chopped through the rear sheet without doing any (more) damage to the PCB within. The LEDs can still be convinced to light, but the USB jack is definitely wrecked.
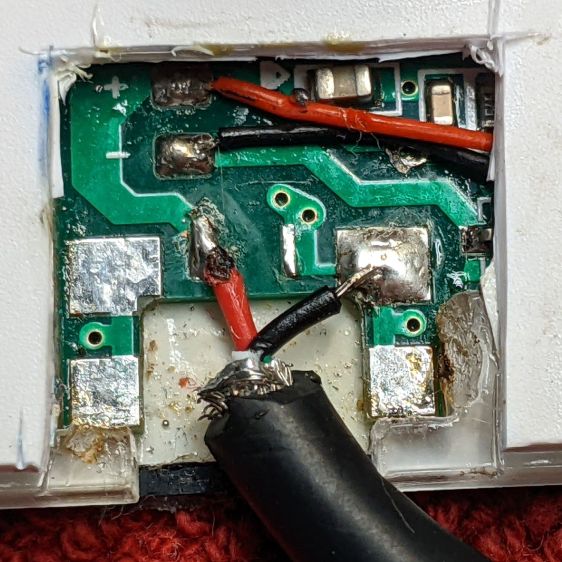
Applying some ChipQuik let me extract the jack without (too much) more damage. Rather than replace it, I just soldered a pigtail USB cable to the obvious PCB pads:
LitUp LED Light Pad – direct power wiring
If I’d noticed that little solder ball, I’d have removed it before filling the cavity with hot melt glue and squishing the cut-out piece of white acrylic in place.
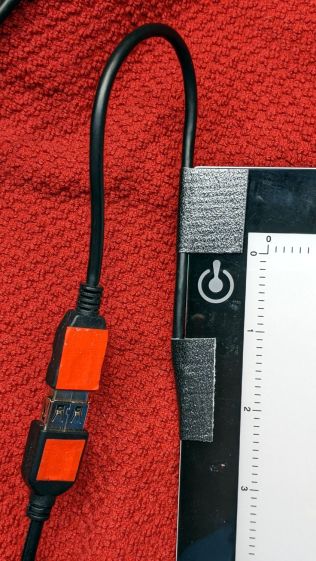
A little black duct tape should keep the wiring stable enough for the foreseeable future:
LitUp LED Light Pad – redirected cable
That was another (relatively) easy zero-dollar repair that should not be necessary.
In round numbers, the total capacity declined from 3.25 W·hr to 2.5 W·hr, which means a single battery can’t quite power the camera for the duration of our normal hour-long rides. I do not know what voltage trips the camera’s decision, but the batteries definitely shut down sooner.
So, based on their previous track record, I bought another quartet of Batmax batteries. Being that type of guy, I tested both the old (2020) and new (2022) sets:
NP-BX1 – BatMax 2022 vs 2020 – used-new
The blue traces are the C/D batteries from the as-new tests back in early 2020, the green traces are C/D after two years of use, and the red traces are the “new” quartet after their first charge in the Official BatMax Charger.
It looks very much like BatMax is selling used batteries repackaged as new items, because they are indistinguishable from my used ones. They definitely are not the “Premium Grade A cells” touted in the description.
I returned them for a refund and sent the test results to BatMax; they sent “new replacements” even though I said I would not pay for any future shipments. The batteries had a slightly different wrapper, but the test results were still indistinguishable from used batteries. I offered to return the package and was told that would not be needed.
It seems three good batteries now cost about as much as four crap batteries, under the reasonable assumption chargers are essentially free.
Three batteries isn’t quite enough for my usual rotation and, for unknown reasons, one cannot buy only batteries, so in short order I will have two chargers and six batteries.
The consolidated test results:
NP-BX1 – Newmowa Batmax 2022 comparison
The color code:
Newmowa: red
BatMax 2020 new: blue
BatMax 2020 used: orange
BatMax 2022 new: green + lime
I stopped writing Amazon reviews after having a few detailed-writeups-with-graphs rejected for the usual unspecified reasons. As the Finn put it, “You wanna download, you know the access code already.”
A rare trip to the Poughkeepsie Railroad Station provided an opportunity to check out the LED bulbs in the chandeliers:
The 108 bulbs had only one deader (lower left in chandelier C).
I have no way of knowing if they’re the same bulbs from six years ago, but the accumulation of bugs / dust / crud inside the (what I would expect to be) sealed envelopes suggests they’ve been hanging there for quite a while:
Pok RR Station – Chandelier B – detail
The dark cruciform patches might come from failed LED chip strings, although the bulbs all had the same eyeballometric brightness. The patches all seem to have a hard lower edge, so we may be seeing shadows from dust accumulating atop the chips on the PCB.
The Dell Optiplex 9010 acting as a file server woke up dead after I plugged it in after returning from a road trip. Its ID sticker shows a manufacturing date almost exactly nine years ago and the problem was exactly what you might expect:
Optiplex CR2032
I’d never measured 100 mV on a CR2032 before.
Because the Optiplex runs headless in the basement, diagnosis required hauling it upstairs, booting it with a display & keyboard, whacking the date into the current decade, then resetting a few other vital bits.
Some weeks ago the Sunbeam clothes iron Mary uses for her quilting projects stopped retracting its cord and a few days ago the entire compartment holding the cord spool simply fell off:
Sunbeam 3035 Iron – detached cord compartment
One plastic stud and two thin plastic tabs held the compartment onto the rest of the iron. How they lasted this long I do not know, but they are neither replaceable nor fixable.
When you see badly rusted screws in an electrical device, you know the story cannot end well:
Sunbeam 3035 Iron – cord connections
And, indeed, it hasn’t:
Sunbeam 3035 Iron – retraction spring rust
This being a steam iron, it has a water tank that gets filled through an awkward port with a sliding cover. Mary is as conscientious a person as you’ll ever meet, but the occasional spill has certainly happened and it is painfully obvious the iron’s designers anticipated no such events.
The coil spring had rusted into a solid mass:
Sunbeam 3035 Iron – spring rust – detail
I removed the spring, soaked it in Evapo-Rust for a few hours, then cleaned and oiled it:
Sunbeam 3035 Iron – relaxed spring
Rewinding and reinstalling the spring showed it has lost its mojo and cannot retract more than a few feet of cord.
She’s in the middle of a quilting project and will replace the iron with whatever cheapnified piece of crap might be available these days. Similar irons have reviews reporting they begin spitting rust after a few months, which suggests the plastic tank or stainless steel hardware in this one have been cost-reduced with no regard for fitness-for-use.
An upcoming project calls for cutting dozens of lengths from a spool of 550 (pound tensile strength) all-nylon paracord, which means I must also heat-seal the ends. Cold-cutting paracord always produces wildly fraying ends, so I got primal on an old soldering iron tip:
Paracord cutting – flattened soldering iron tip
Bashed into a flattish blade, it does a Good Enough job of hot-cutting paracord and sealing the end in one operation:
Paracord cutting – results
Setting the iron to 425 °C = 800 °F quickly produces reasonably clean and thoroughly sealed cut ends.
Obviously, I need more practice.
Yes, I tried laser cutting the paracord. Yes, it works great, makes a perfectly flat cut, and heat-seals both ends, but it also makes no sense whatsoever without a fixture holding a dozen or so premeasured lengths in a straight line. No, I’m not doing that.
The entire control panel of our longsuffering Kenmore gas range became increasingly erratic, eventually reaching the condition where touching the upper right corner would blank the display, touching the lower right corner would restore it, and gently touching the temperature knob might elicit an F2 or F4 error code on the display. Given the symptoms, the old adage “It’s always the connectors” sprang unbidden to mind; I was pretty sure the oven temperature sensor had nothing to do with it.
Pulling the thing apart reveals the PCB across the back of the control panel:
Kenmore oven control – PCB overview
Note that all of the external connections arrive on the white power supply PCB attached over the main PCB.
A closer look shows one of the two groups of wire interconnects between the two boards:
Kenmore gas range – rear PCB
There’s a similar group hidden behind the hulking transformer.
Removing the two obvious screws and easing the PCB out of the red plastic latches made the problem instantly obvious:
Kenmore gas range – failed solder joint
Yeah, that broken solder joint would definitely be touch-sensitive!
The solder joints in the other group also show signs of fatigue:
Kenmore gas range – broken solder joints
It’s of interest only the upper joints on the power supply PCB have fractured. Perhaps those ends of the wires were hand-soldered separately from the other ends in the main PCB?
Resoldering both ends of all the wires restored perfect operation:
Kenmore gas range – resoldered joints
For the record, the Kapton tape I laid over the entire control panel 2-½ years ago continues to protect the slightly cracked membrane over the pushbutton switches:
Kenmore oven control – Kapton tape cover
Gotta love yet another zero-dollar appliance repair …