Ed Nisley's Blog: Shop notes, electronics, firmware, machinery, 3D printing, laser cuttery, and curiosities. Contents: 100% human thinking, 0% AI slop.
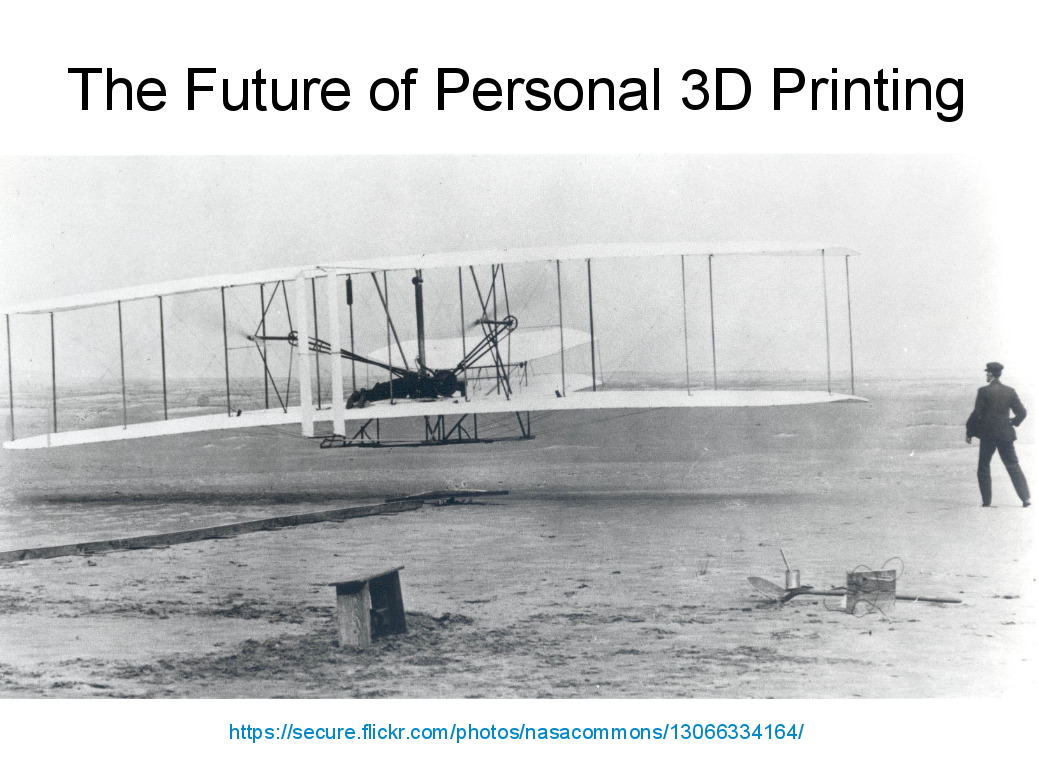
Herewith, the MHVLUG – 3D Printing Status 2104 slides (remember slides?) I’ll be using for my talk this evening at the MHVLUG meeting; you don’t get the audio track in the PDF, but the pictures may be informative.
If you believe everything you read, you might think personal 3D printing will go like this:
3D Printing 2014 – What They Say
But it requires entirely too much of this:
3D Printing 2014 – What They Dont Say
Personal 3D printing requires that you take full control:
3D Printing 2014 – Personal 3D Printing
Not knowing the answers, I’ll still make some guesses about what lies ahead:
3D Printing 2014 – The Future
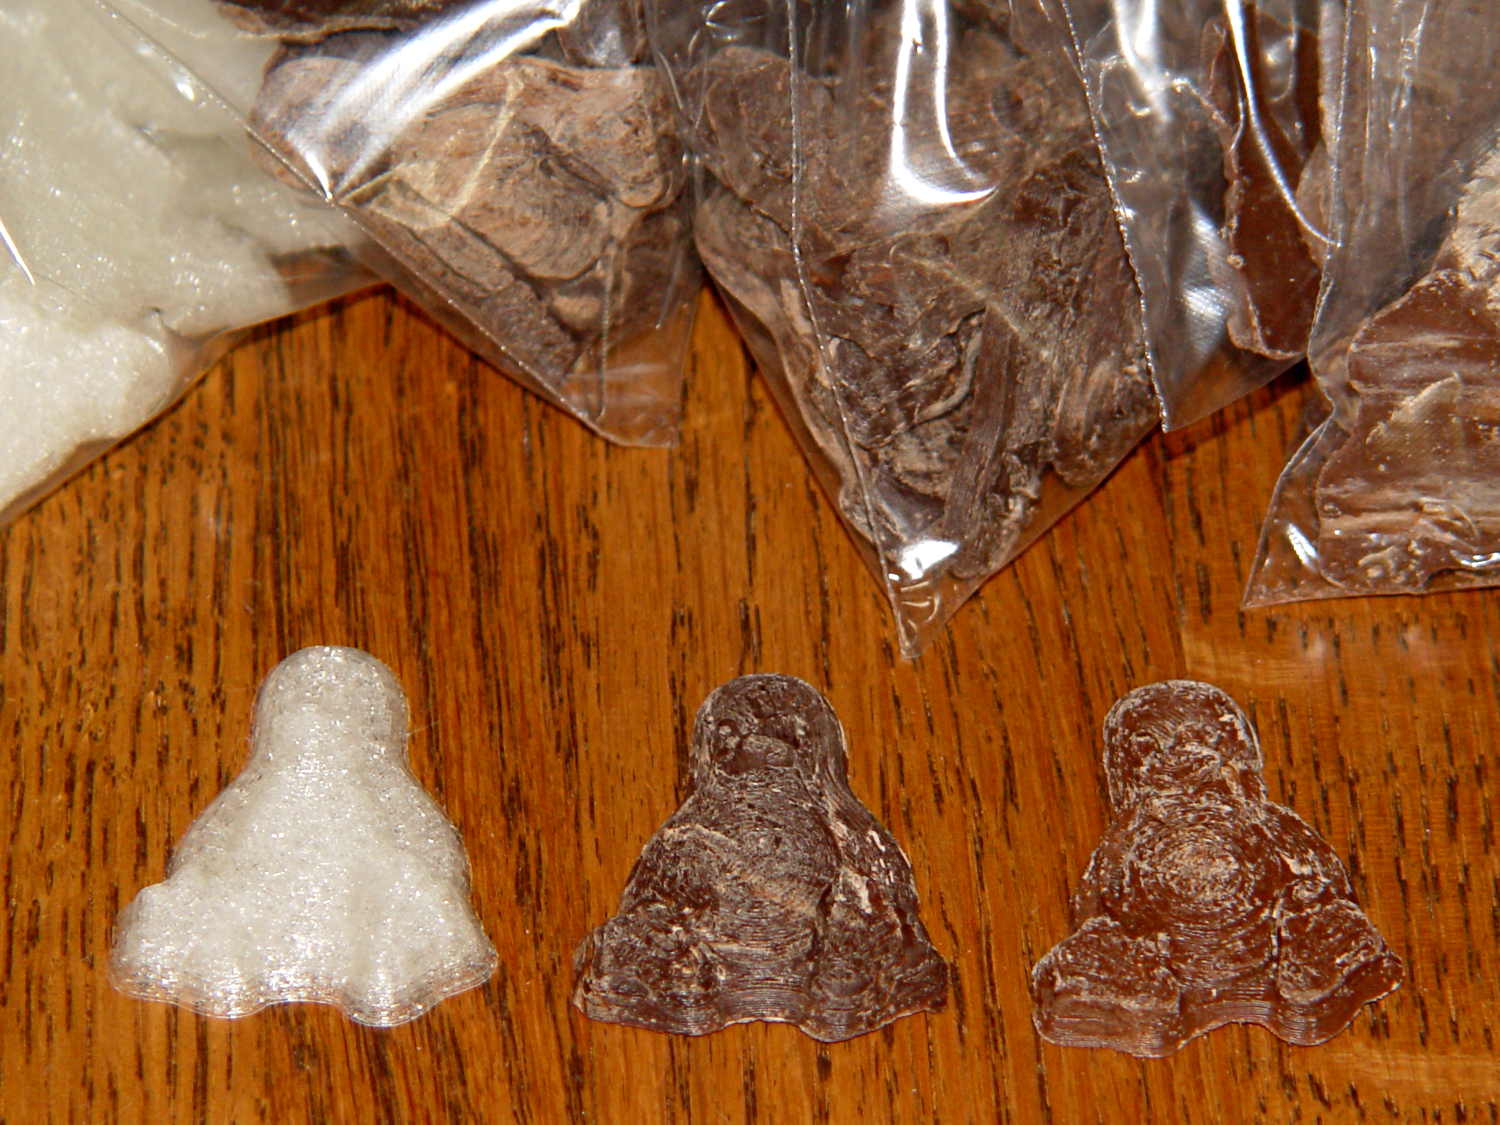
And I found the best tchotchkes ever:
3D Printing 2014 – Tchotchkes
See you there…
(The PDF has clickable links for those images, plus the 60-some-odd other slides. The plan: talk like an auctioneer for an hour!)
Seeing as how the Tux chocolates were produced in a facility containing a big nut, some folks may prefer an (inedible, at least by humans, but correspondingly more permanent) Tux tchotchke in PLA. I plan to have the M2 running off more of them, so there should be enough to go around.
For what it’s worth, you can actually buy a 3D chocolate printer that seems rather overpriced for what’s basically a desktop CNC gantry mill with a heated syringe. The site seems dead, so maybe other folks came to that conclusion, too.
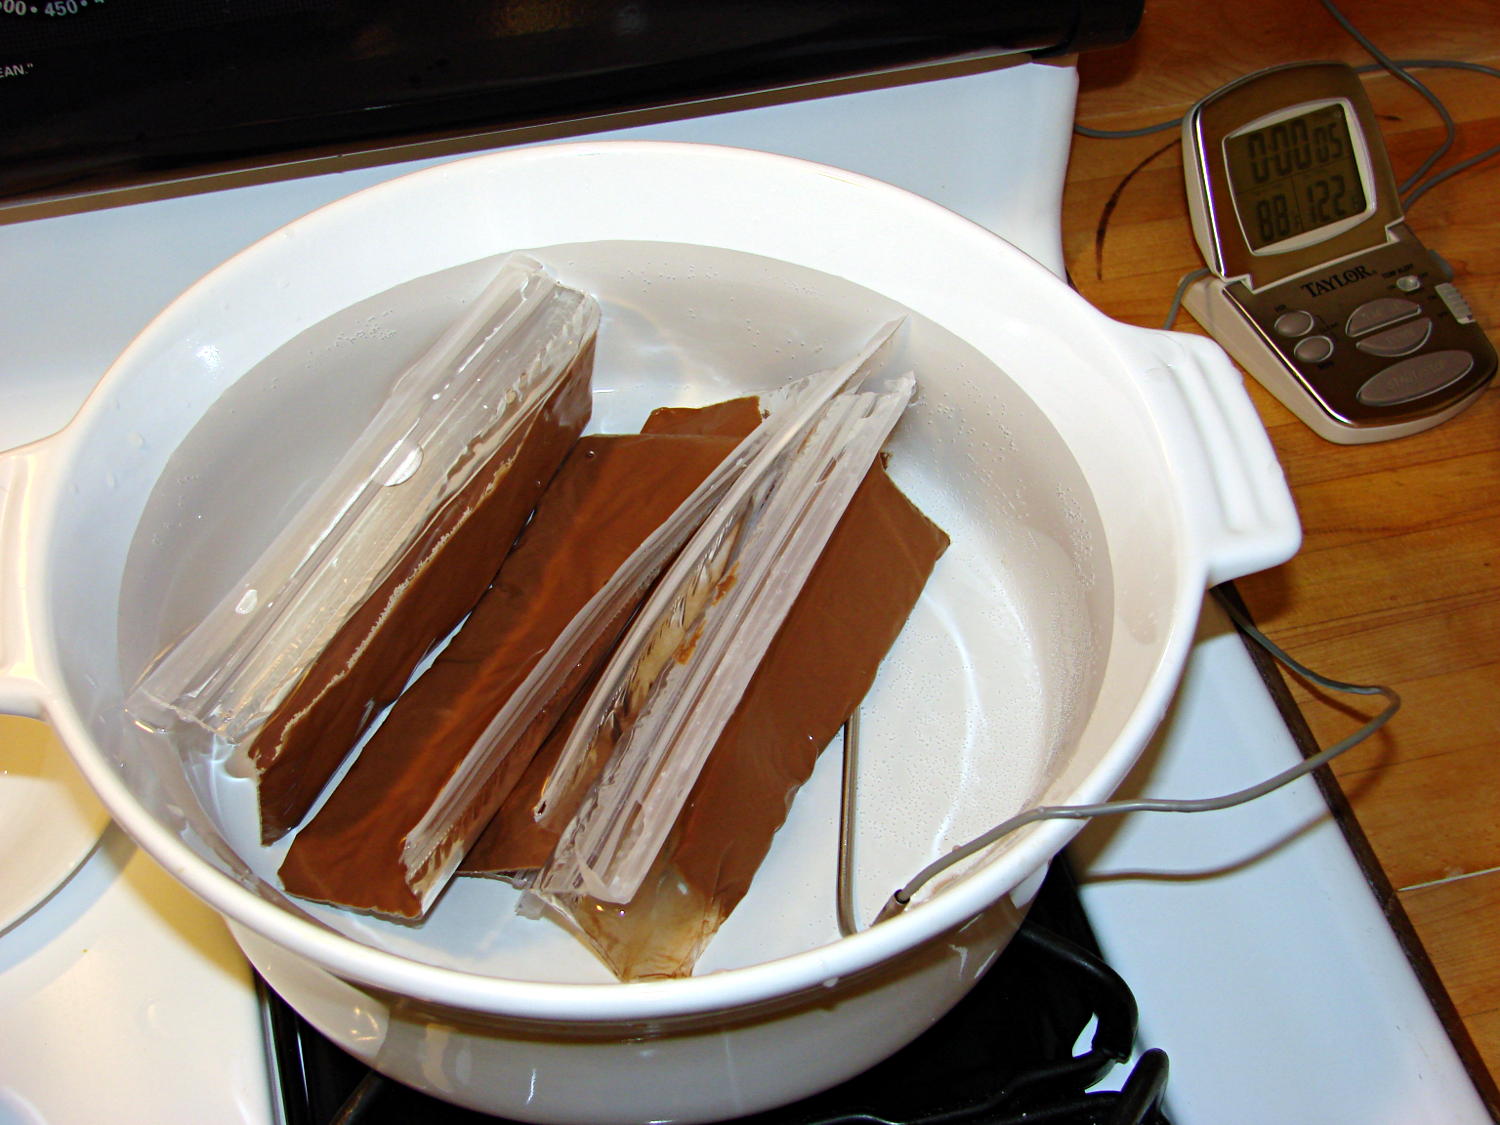
I’m producing more Tux chocolates with the 16 cavity silicone mold, so I dumped four bags (each with 50 g of chocolate chips) into a big pot of tepid water:
Milk Chocolate Bags – in Tempering Bath
I taped them closed to ensure the zip tops didn’t come unzipped while squeezing the chocolate, which worked out quite well: highly recommended.
Based on previous experience, I paid a bit more attention to the water temperature and kept it at 88±1 °F, transferring a cup or two at a time between this pot and the slightly hotter water (about 95 °F) in another pot. Although I’m sure a closed-loop sous vide bath would maintain tighter tolerances, I’m also sure that wouldn’t make any real difference in this operation.
I also wore thin white cotton gloves, in an attempt to prevent my hands from warming the chocolate above the proper temperature while squeezing the bags. That probably didn’t make any difference, because you must get pretty chummy with the bags and the gloves didn’t amount to much.
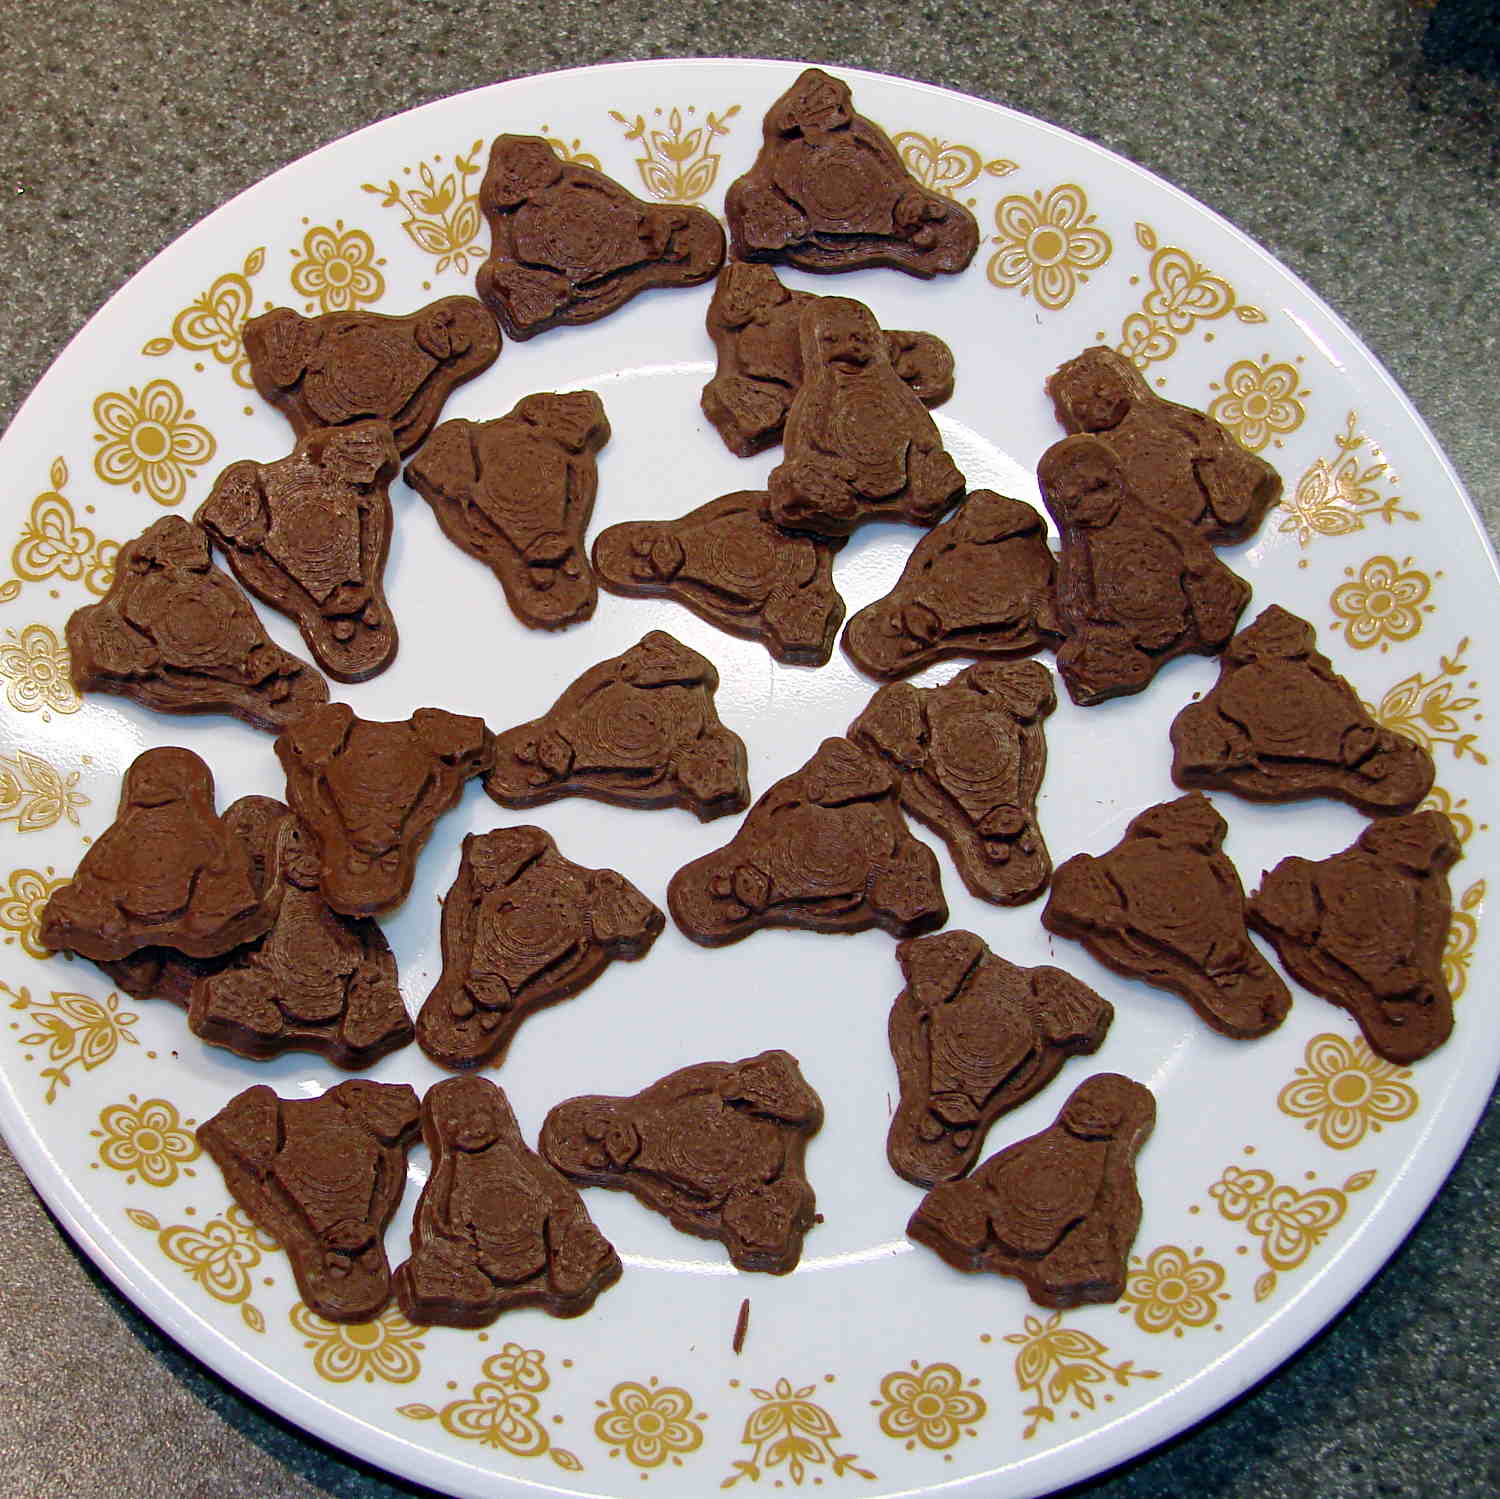
The results, just after extracting the second set of 16 chocolates (minus some, ah, shrinkage), looks pretty good:
Tux – Milk Chocolate – Batch 1
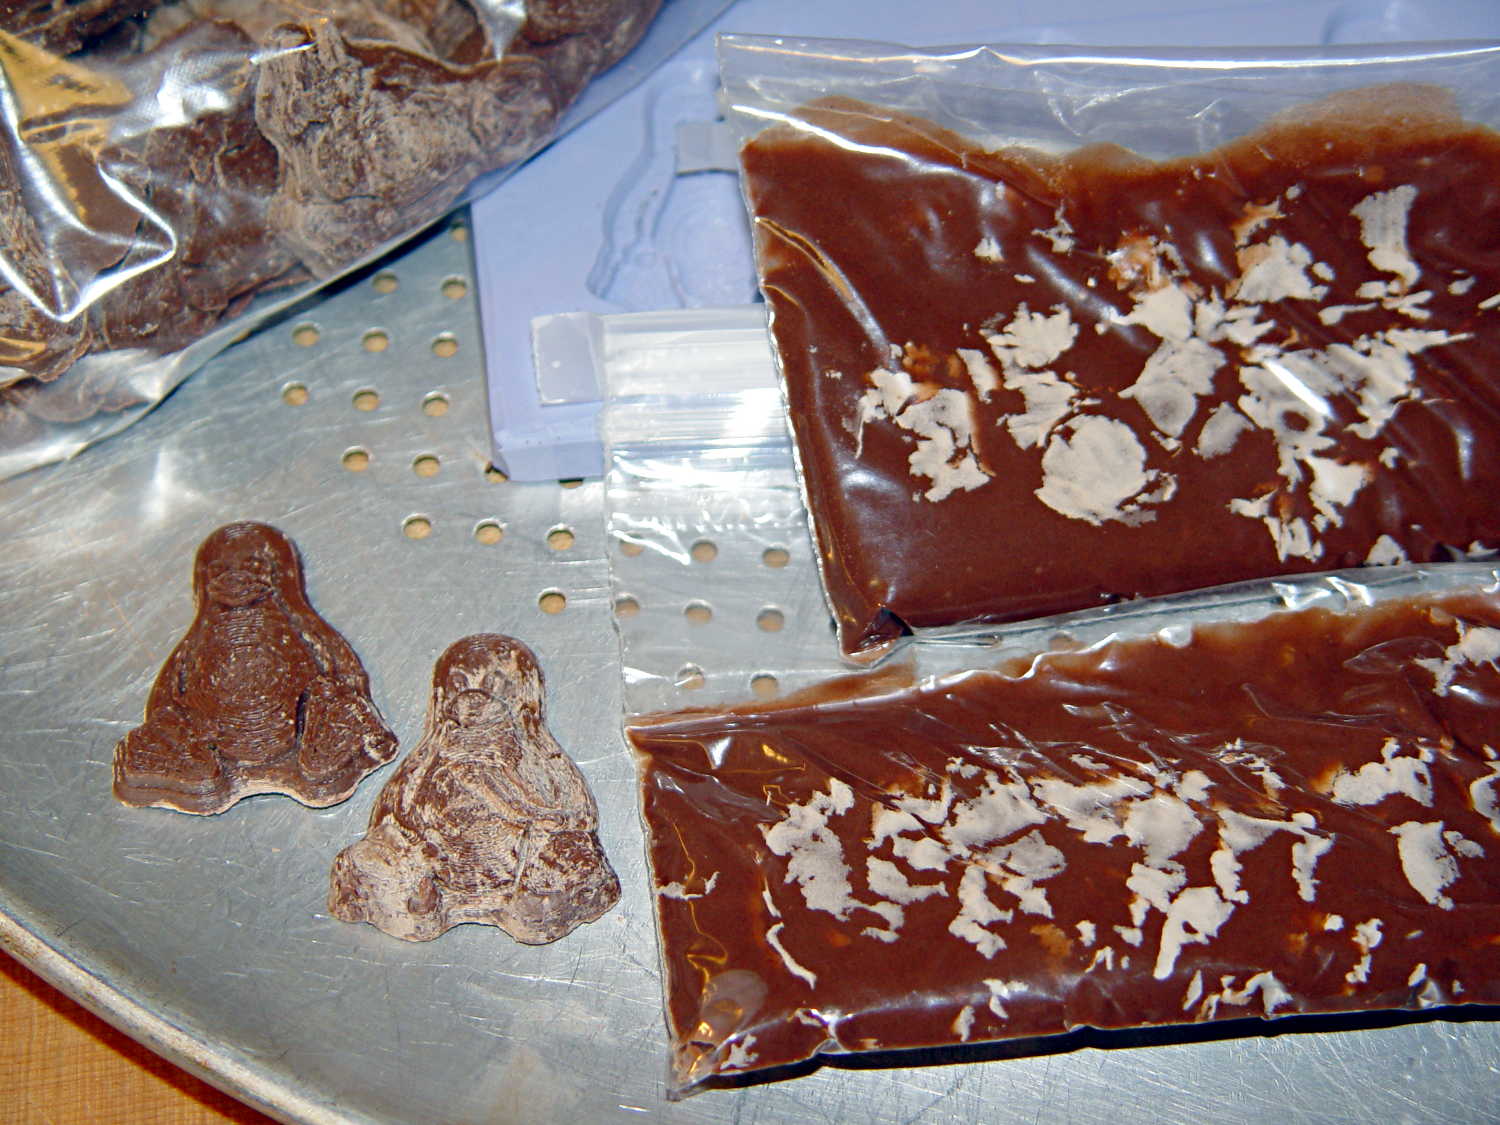
I called it quits for the evening, extracted the two unopened bags from the bath, and let them cool overnight. The next morning revealed an interesting sight:
Milk Chocolate Blooming – Tux and bags
Now, I’d kneaded all the bags to mash the melting chocolate chips together and squeeze out the air, but hadn’t done much more than that. The patches of white cocoa butter seem to correspond to individual chips within the melted mass, so it’s not entirely a temperature thing; I don’t see how to make an individual chip hotter (or colder) than everything else in the bag.
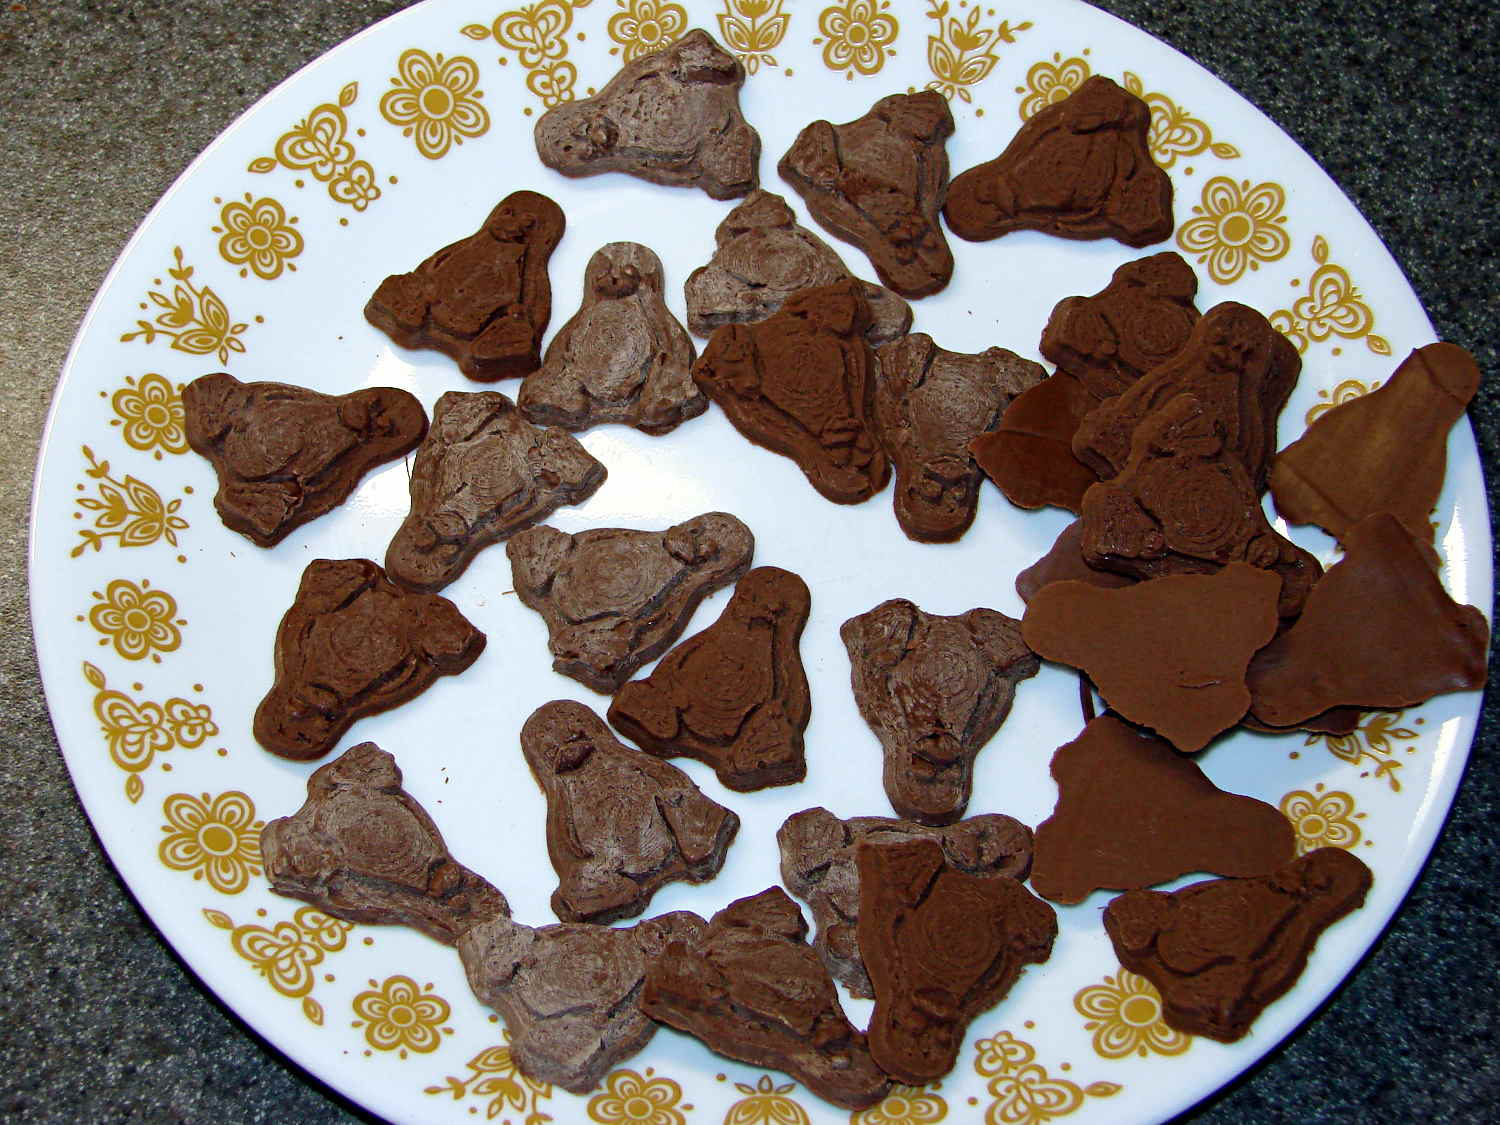
Remelting those two bags the next morning produced these Tuxen, with the very brown ones having just emerged from the mold:
Tux – Milk Chocolate – Batch 2
The proper temperature for dark chocolate is about two degrees higher than for milk chocolate, so I boosted the water bath from 88 °F to 90 °F and dropped in four bags of dark chocolate chips.
At those low temperatures, the chocolate resembles putty, rather than honey, and requires firm pressure on the bags. I think the close contact with my fingers, even with gloves, raises the temperature too much; the chocolate isn’t untempered (I think that’s the right word; “distempered” sounds much more ominous), but it may be more prone to blooming.
Thinking that the silicone mold might chill the chocolate too rapidly, I put a warming pad under the aluminum pizza pad, brought the silicone slab up to about 85 °F, and found that the chocolate molded much more readily. Cooling the mold to 72 °F, just over room temperature, took quite a while.
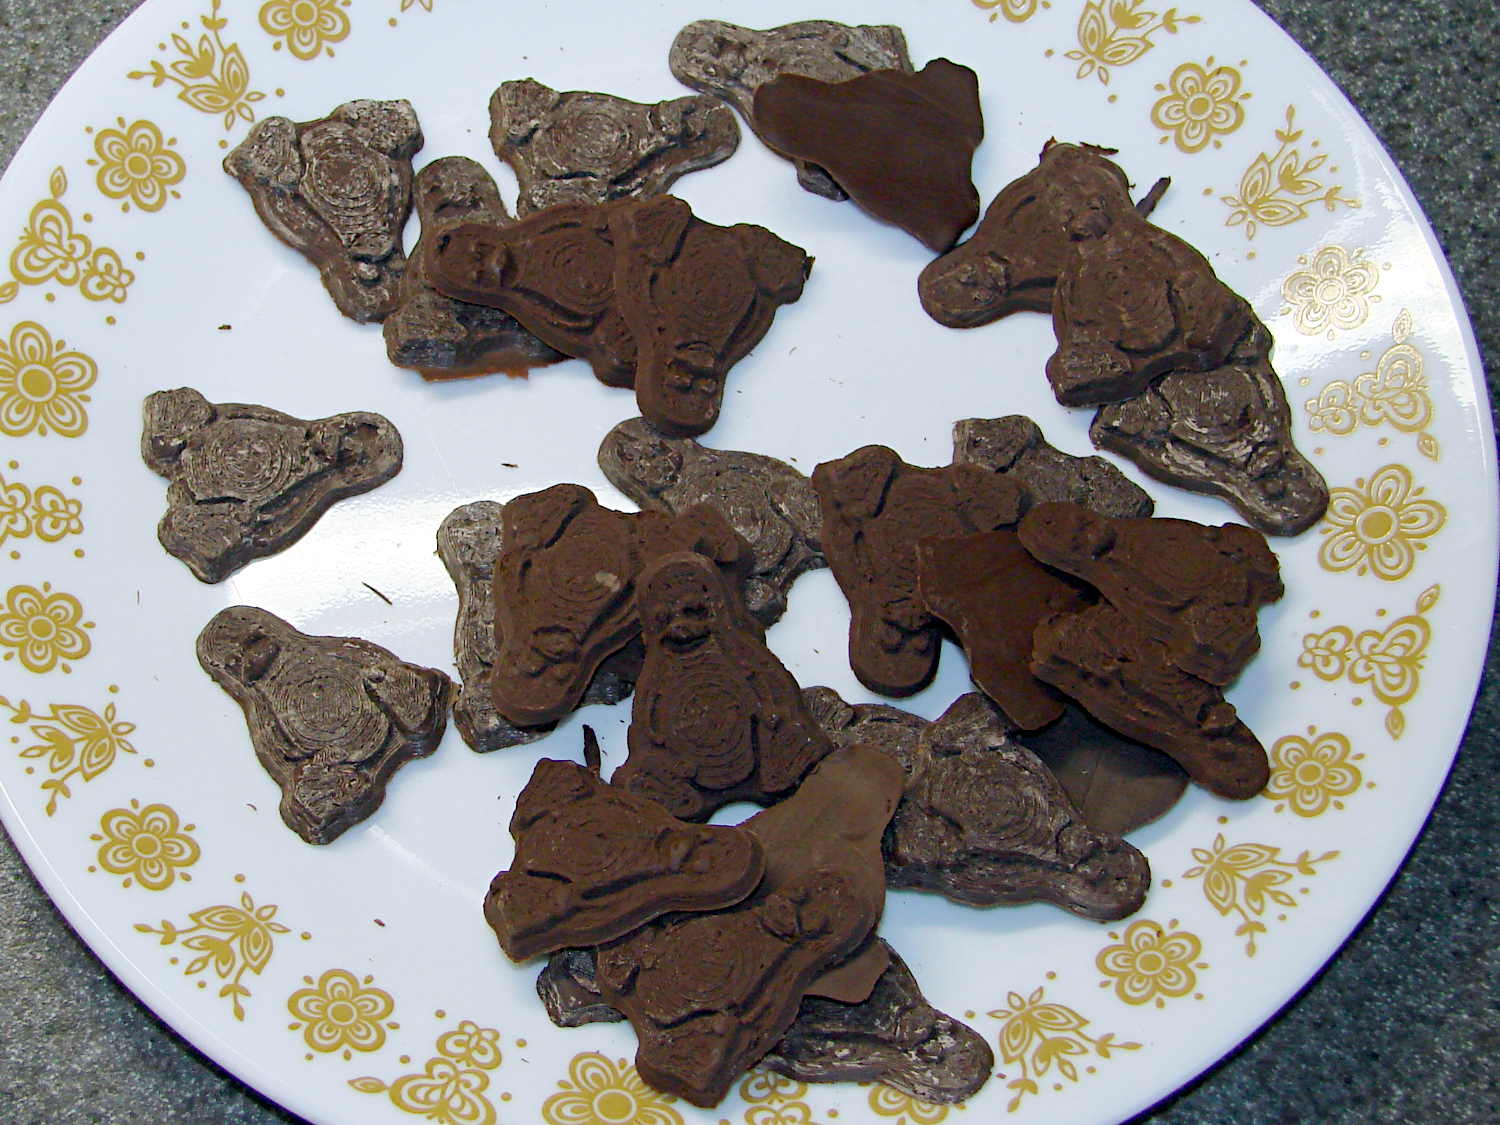
The first dark chocolate Tuxen were already blooming when the second set emerged:
Tux – Dark Chocolate – Batch 1
I tried cooling the mold by putting a damp towel under the pizza pan, with equivocal results: the last two sets of dark chocolate bloomed about as rapidly as the first.
It is, perhaps, significant, that the blooming seems confined to the chocolate surfaces in contact with the mold. The flat back surface of each Tux remains in good condition, which suggests that the mold temperature is more critical than I expect.
So my process, such as it is, doesn’t produce good results. Obviously, I need more practice…
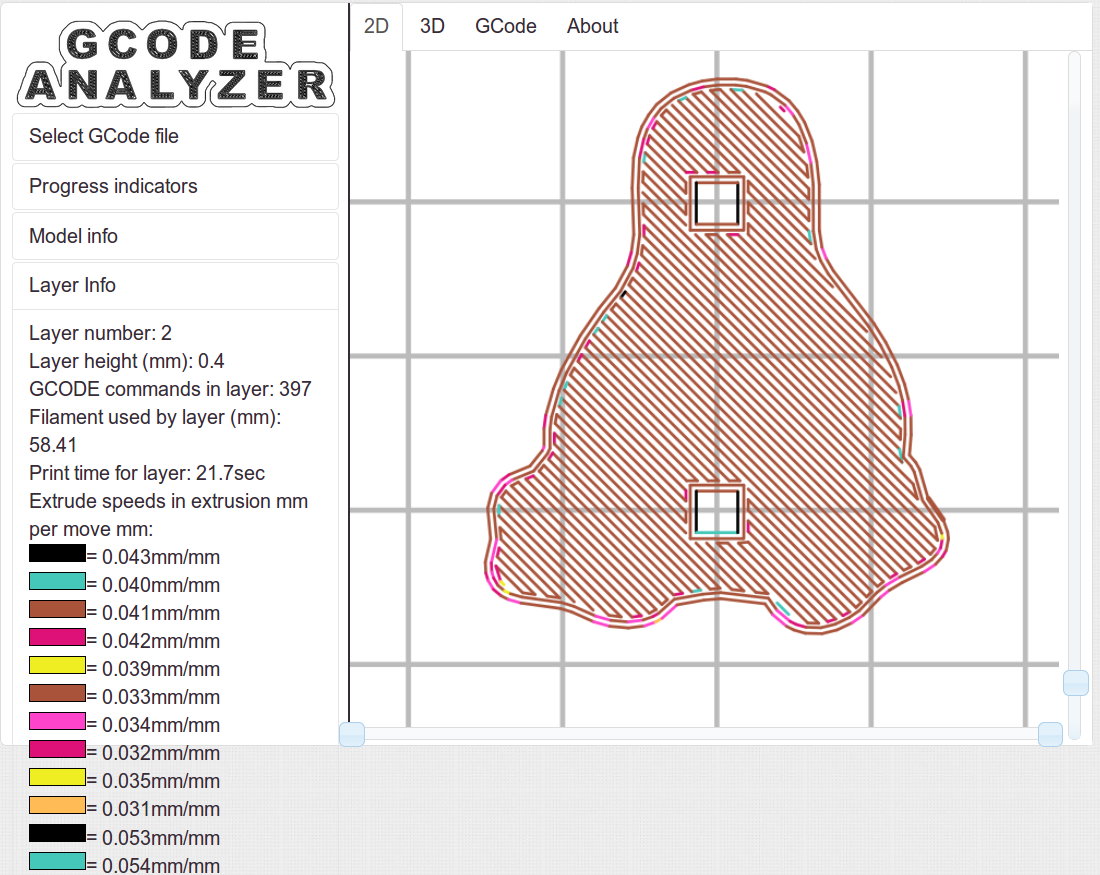
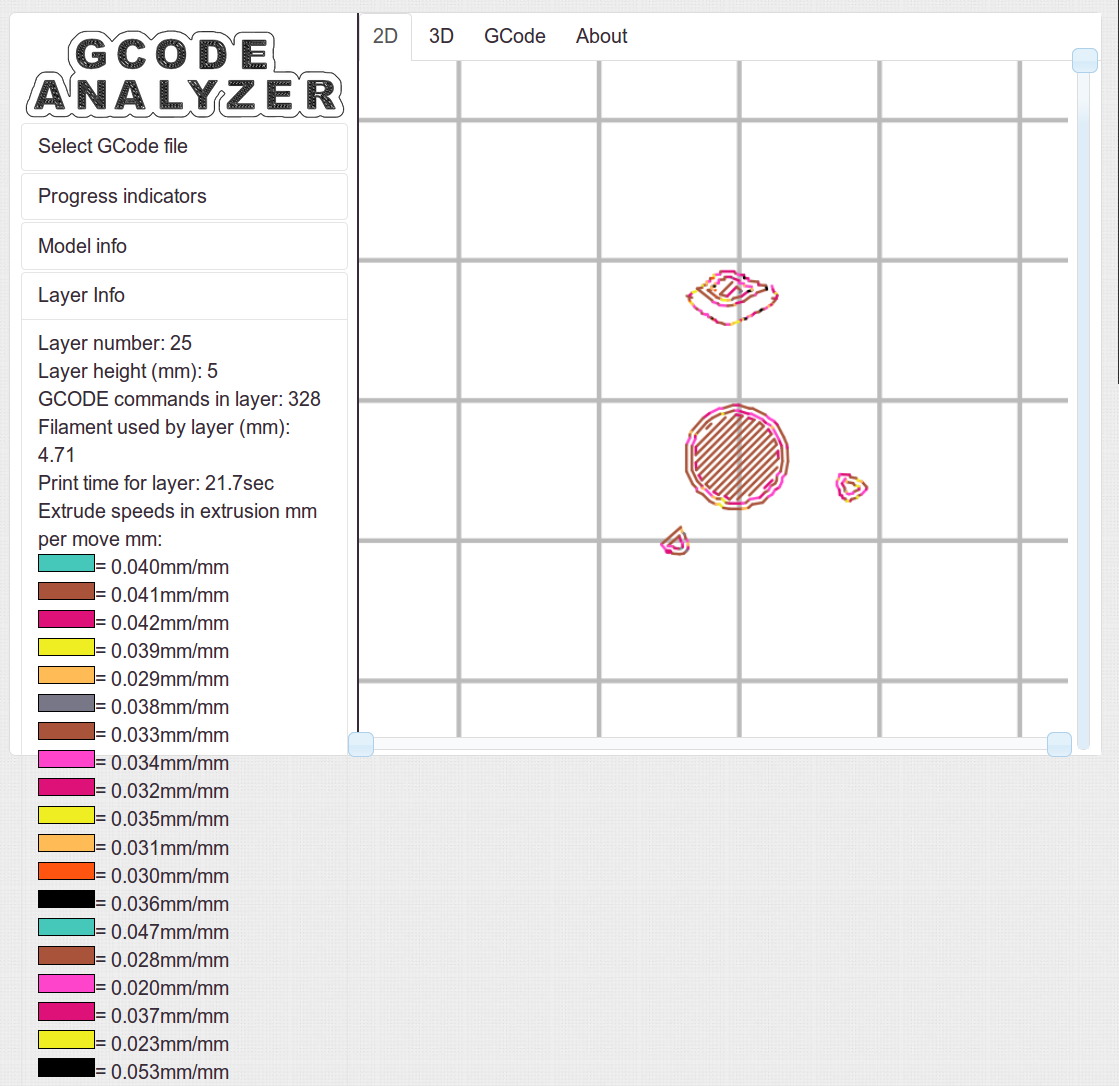
Some pix that serve as a stick in the ground showing that my current Slic3r configuration constellation doesn’t produce thin infill…
All of the layers in the 20 mm calibration cube look just like this:
Solid cube – Slic3r normal infill
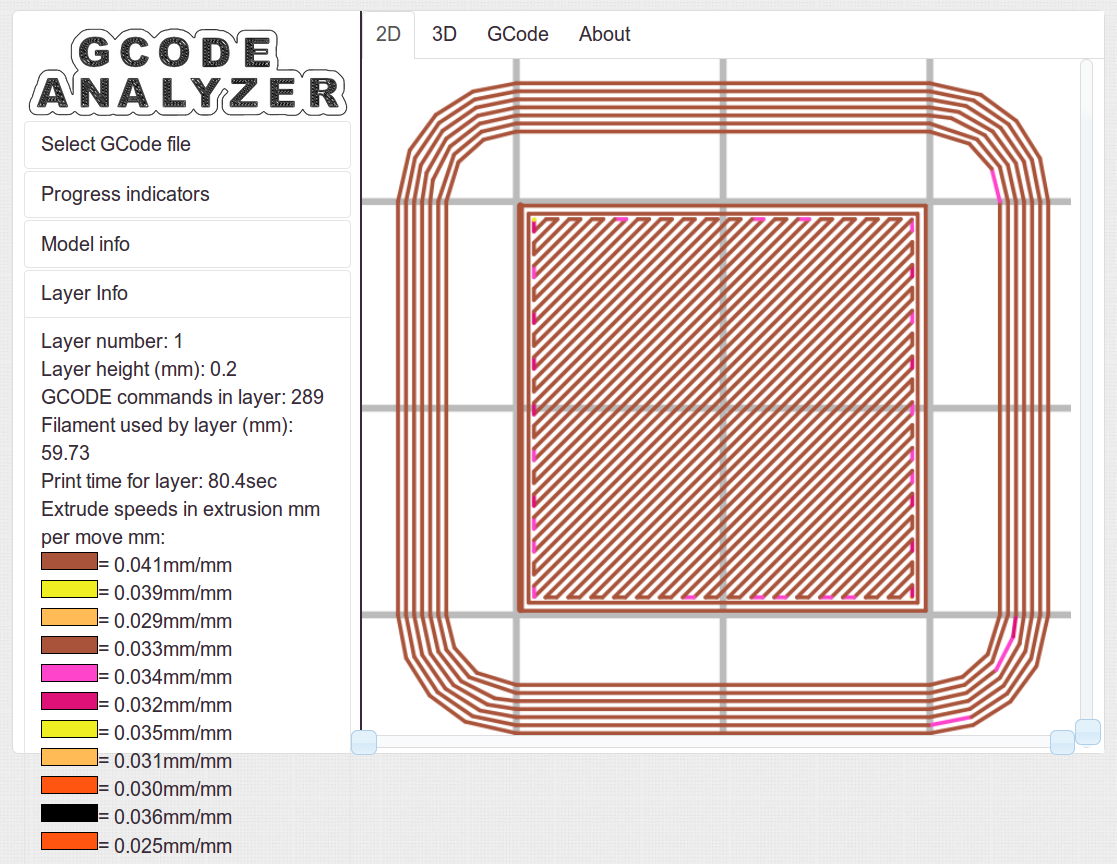
The bottom layer of the Tux mold comes out solid:
Tux thread fill – bottom
As does the top:
Tux thread fill – top
The Gcode Analyzeralgorithm that assigns colors to numeric values tends to produce many aliases, although most of the time you can figure out what’s going on. If somebody wants to dive into the code, I’d like to have unique colors and get the color table sorted in ascending order.
The current Slic3r configuration:
# generated by Slic3r 1.1.1 on Sat May  3 10:31:36 2014
avoid_crossing_perimeters = 0
bed_size = 190,250
bed_temperature = 70
bottom_solid_layers = 3
bridge_acceleration = 0
bridge_fan_speed = 100
bridge_flow_ratio = 1
bridge_speed = 150
brim_width = 0
complete_objects = 0
cooling = 1
default_acceleration = 0
disable_fan_first_layers = 1
duplicate_distance = 6
end_gcode = ;-- Slic3r End G-Code for M2 starts --\n;  Ed Nisley KE4NZU - 15 November 2013\nM104 S0		; drop extruder temperature\nM140 S0		; drop bed temperature\nM106 S0		; bed fan off\nG1 Z180 F2000	; lower bed\nG1 X130 Y125 F30000	; nozzle to right, bed front\nM84     	; disable motors\n;-- Slic3r End G-Code ends --
external_perimeter_speed = 25
external_perimeters_first = 0
extra_perimeters = 1
extruder_clearance_height = 25
extruder_clearance_radius = 15
extruder_offset = 0x0
extrusion_axis = E
extrusion_multiplier = 1.07
extrusion_width = 0.4
fan_always_on = 0
fan_below_layer_time = 30
filament_diameter = 1.79
fill_angle = 45
fill_density = 100%
fill_pattern = rectilinear
first_layer_acceleration = 0
first_layer_bed_temperature = 70
first_layer_extrusion_width = 0.4
first_layer_height = 100%
first_layer_speed = 25
first_layer_temperature = 175
g0 = 0
gap_fill_speed = 50
gcode_arcs = 0
gcode_comments = 0
gcode_flavor = reprap
infill_acceleration = 0
infill_every_layers = 3
infill_extruder = 1
infill_extrusion_width = 0
infill_first = 1
infill_only_where_needed = 0
infill_speed = 150
interface_shells = 0
layer_gcode =
layer_height = 0.2
max_fan_speed = 100
min_fan_speed = 75
min_print_speed = 4
min_skirt_length = 15
notes =
nozzle_diameter = 0.35
only_retract_when_crossing_perimeters = 1
ooze_prevention = 0
output_filename_format = [input_filename_base].gcode
overhangs = 1
perimeter_acceleration = 0
perimeter_extruder = 1
perimeter_extrusion_width = 0.4
perimeter_speed = 150
perimeters = 2
post_process =
print_center = 0,0
raft_layers = 0
randomize_start = 1
resolution = 0.05
retract_before_travel = 1
retract_layer_change = 0
retract_length = 1
retract_length_toolchange = 5
retract_lift = 0
retract_restart_extra = 0
retract_restart_extra_toolchange = 0
retract_speed = 60
skirt_distance = 3
skirt_height = 1
skirts = 3
slowdown_below_layer_time = 20
small_perimeter_speed = 25
solid_fill_pattern = rectilinear
solid_infill_below_area = 5
solid_infill_every_layers = 0
solid_infill_extrusion_width = 0
solid_infill_speed = 150
spiral_vase = 0
standby_temperature_delta = -5
start_gcode = ;-- Slic3r Start G-Code for M2 starts --\n;  Ed Nisley KE4NZU - 15 Nov 2013\n;  28 Feb 2014 - 6 Mar 2014 - tweak Z offset\n; Z-min switch at platform, must move nozzle to X=130 to clear\nM140 S[first_layer_bed_temperature]	; start bed heating\nG90				; absolute coordinates\nG21				; millimeters\nM83				; relative extrusion distance\nG92 Z0			; set Z to zero, wherever it might be now\nG1 Z10 F1000	; move platform downward to clear nozzle; may crash at bottom\nG28 Y0			; home Y to be sure of clearing probe point\nG92 Y-127 		; set origin so 0 = center of plate\nG28 X0			; home X\nG92 X-95		; set origin so 0 = center of plate\nG1 X130 Y0 F30000	; move off platform to right side, center Y\nG28 Z0			; home Z with switch near center of platform\nG92 Z-4.40		; set origin to measured z offset\nG0 Z2.0			; get air under switch\nG0 Y-127 F10000	; set up for priming, zig around corner\nG0 X0			;  center X\nM109 S[first_layer_temperature]	; set extruder temperature and wait\nM190 S[first_layer_bed_temperature]	; wait for bed to finish heating\nG1 Z0.0 F500	; put extruder near plate \nG1 E25 F300		; prime to get pressure, generate blob\nG1 Z5 F2000		; rise above blob\nG1 X15 Y-125 F20000	; jerk away from blob, move over surface\nG1 Z0.0 F1000	; dab nozzle to attach outer snot to platform\nG4 P1			; pause to attach\nG1 X35 F500		; slowly smear snot to clear nozzle\nG1 Z1.0 F2000	; clear bed for travel\n;-- Slic3r Start G-Code ends --
start_perimeters_at_concave_points = 1
start_perimeters_at_non_overhang = 1
support_material = 0
support_material_angle = 0
support_material_enforce_layers = 0
support_material_extruder = 1
support_material_extrusion_width = 0
support_material_interface_extruder = 1
support_material_interface_layers = 0
support_material_interface_spacing = 0
support_material_pattern = honeycomb
support_material_spacing = 2.5
support_material_speed = 150
support_material_threshold = 0
temperature = 175
thin_walls = 1
threads = 2
toolchange_gcode =
top_infill_extrusion_width = 0.4
top_solid_infill_speed = 25
top_solid_layers = 3
travel_speed = 250
use_firmware_retraction = 0
use_relative_e_distances = 0
vibration_limit = 0
wipe = 0
z_offset = 0
Actually, with the advice & consent of my health-care provider (back in the day, we called them “doctors”), I’m titrating melatonin doses to see whether it has any effect on my wake-up-and-toss-and-turn. The pharmacology seems dubious, at best, but the stuff doesn’t appear to have any amusing side effects.
We’re both well aware that you can’t run a blinded experiment on yourself and that the placebo effect confounds null results.
I picked up some 10 mg melatonin in donkey-choking Size 00 capsules, then (lacking a balance with sub-0.1 mg resolution) cut it down using the drug-addict razor-blade-on-glass trick. I can easily do power-of-two divisions, cross-check by eyeballing the capsule fill, and assume the resulting accuracy will be Good Enough.
Useful ratios to get 8 cut-down capsules, starting with the indicated number of 10 mg capsules:
1.25 mg = 1 x 10 mg/8
2.5 mg = 2 x 10 mg/8
3.75 mg = 3 x 10 mg/8
5.0 mg = 4 x 10 mg/8
6.25 mg = 5 x 10 mg/8
7.5 mg = 6 x 10 mg/8
8.75 mg = 7 x 10 mg/8
In principle, those capsules are US-made, kosher, halal, and blah blah blah. They’re a third the price of the local health-food store’s offerings: Size 00, Size 0, and Size 2 (out of stock) capsules. I hope that a bag of 500 isn’t a lifetime supply…
A capsule size chart, swiped directly from one of the eBay suppliers, so I can find it again:
Gelatin Capsule Sizes
Cutting 10 mg retail capsules down to 5 mg shows there’s about 320 mg of powder inside: 5 mg requires 1 + 1/8 Size 4 capsules.
If you’re interested in debating homeopathy, do it somewhere else; it has no physical or clinical basis.
Over the decades, the same local repair shop has performed the annual NYS inspection on our cars; we started there when it was conveniently near to jobs at the IBM plant and continued out of habit. In the last, oh, five years or so, they’ve begun reporting all manner of Things That Need Work, ranging from “dirty fluids” to worn shocks. Oddly, none of those problems recurred from year to year and were never written up on the inspection summary; they were always phoned to Mary, who politely declined the service.
On several occasions, I’d drop off the car and walk to the mall across the road to pick up this-and-that. They’d call Mary (I don’t carry the phone), she’d say she would pass the message to me, and they would never mention the problems when I picked up the car. Huh.
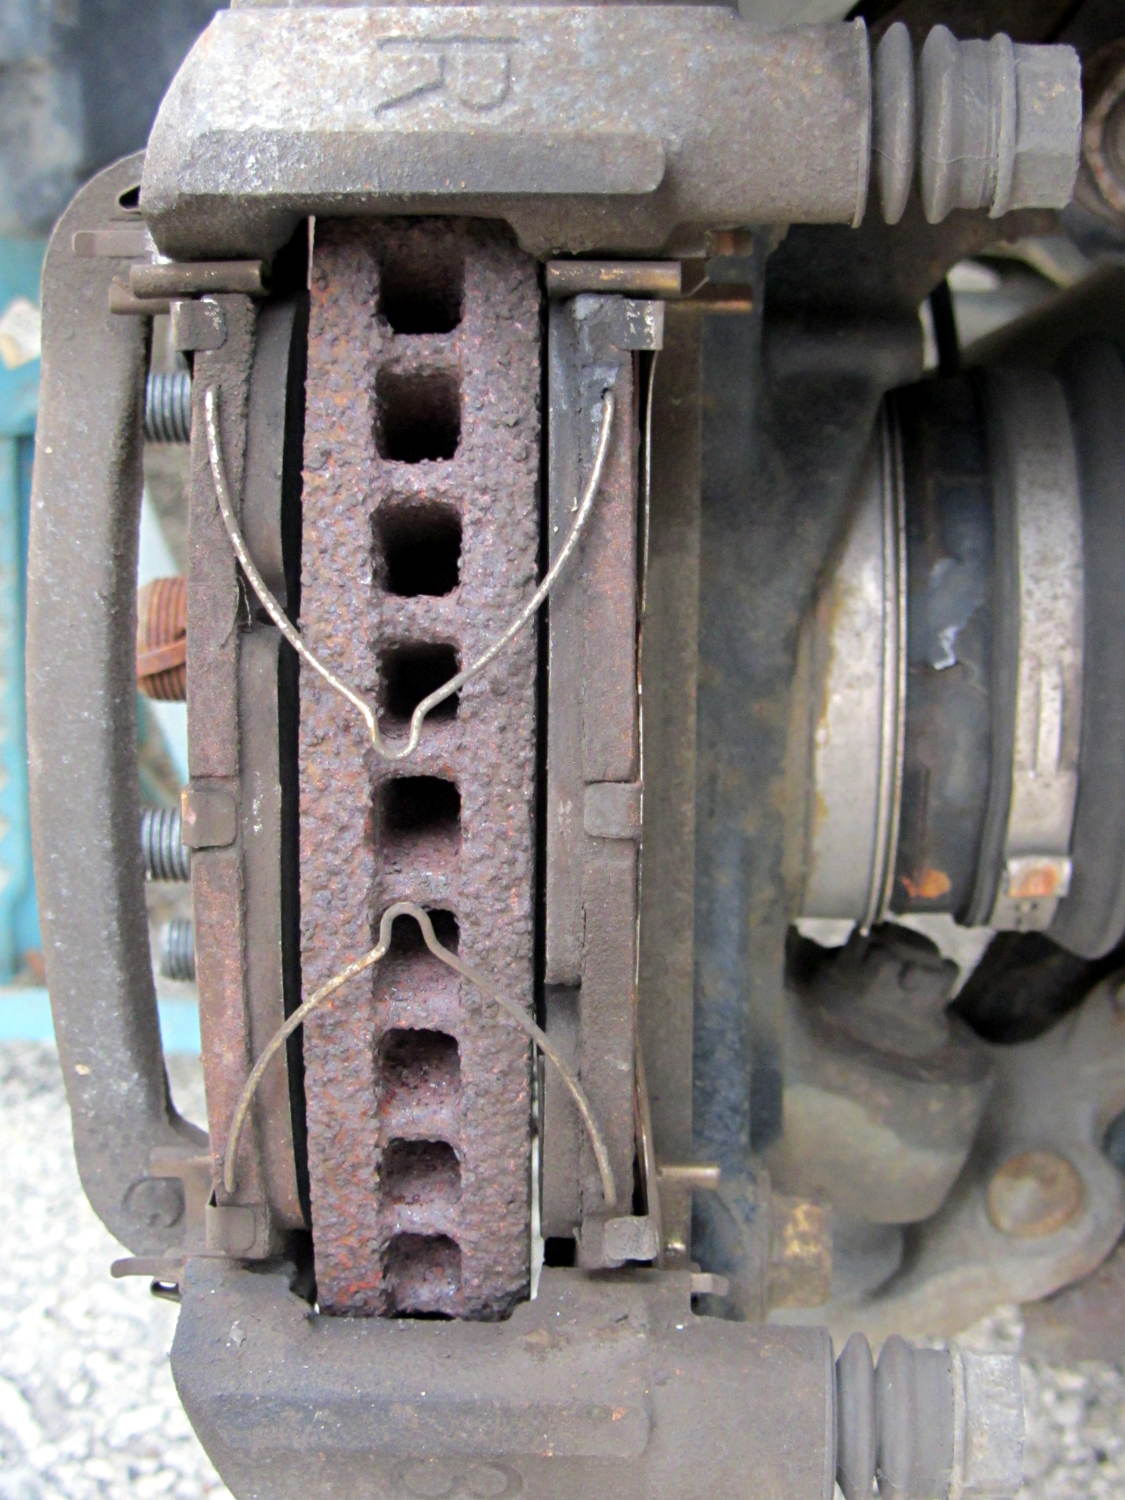
Most recently, they told her the front brakes had “wafer thin” pads and the rotor disks were severely worn. She declined the service, as always. When I change the oil, I do an under-the-car lookaround and the brakes have always looked fine, but, being that type of guy, I pulled the front wheels and took a closer look at the situation:
Right Front Brake
The pads start at 7 mm and wear to a minimum thickness of 1 mm, at which point the cross-pad wear indicating groove will vanish and a little metal tab will touch the rotor and start screaming. These pads have about 2 mm left to the bottom of the grooves and are wearing evenly.
The rotors start at 28 mm thick and wear to 26 mm. These rotors measure 27.73 mm and have no serious grooves or scars.
Just for grins, I pulled the rotors and measured the thickness at the middle of the swept ring, aligned with the bolt holes:
Sienna rotor thickness
Bottom line: the rotors match to within 0.0015 inch = 0.04 mm and have 0.0005 inch = 0.013 mm of variation around the circumference.
With 91 k miles on the OEM pads and rotors, I’d say they’re doing fine and that we don’t use the brakes nearly enough.
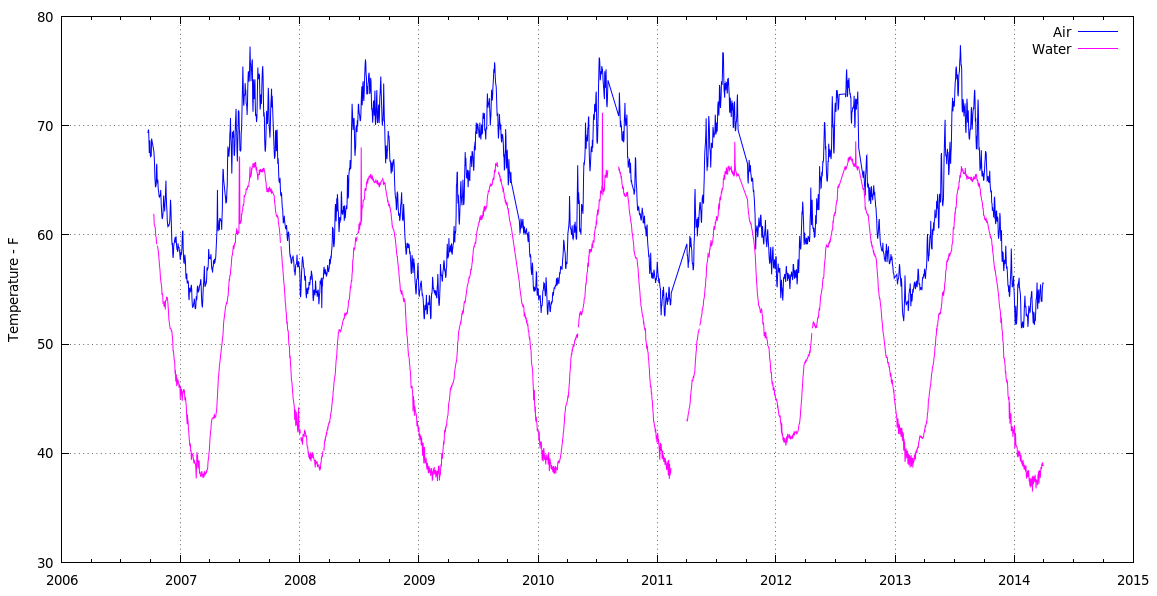
Basement Air Groundwater Minimum Temperatures – 2006-2014
Much as we thought, this past winter was really cold.
The data consists of all 3/4 million data logger records concatenated into one huge CSV file, fed through a Sed pipe to normalize all the dates & suchlike, then passed into a Python script that produces one record for each day (all 2561 of ’em) containing the date, minimum air & water temperatures, and the minimum relative humidity.
This needs (a lot) more work to be pretty, but at least the pieces hang together.
The Python source code:
#!/usr/bin/python3
''' Extract minimum groundwater / air temperatures & humidity from CSV files
'''

import sys
import csv
import datetime
import string

# Columns in Hobo datalogger CSV file

SEQNUM = 0
DATETIME = 1
AIRTEMP = 2
RELHUM = 3
WATERTEMP = 4

datapoints = {}

with open('AllClean.csv',encoding='iso-8859-15') as dbi:
    for row in csv.reader(dbi):
        if (not row[SEQNUM].startswith("#")):            # discard comments
            logdt = datetime.datetime.strptime(row[DATETIME],'%m/%d/%Y %H:%M:%S')
            logdate = datetime.datetime.date(logdt)
            if (logdate in datapoints):             # accumulate minimum temps & RH
                datapoints[logdate][0] = min(datapoints[logdate][0],row[AIRTEMP])
                datapoints[logdate][1] = min(datapoints[logdate][1],row[RELHUM])
                datapoints[logdate][2] = min(datapoints[logdate][2],row[WATERTEMP])
            else:
                datapoints[logdate] = [row[AIRTEMP], row[RELHUM], row[WATERTEMP]]

with open('AllMinData.csv','w',newline='') as csvf:
    dbo = csv.writer(csvf)
    dbo.writerow(('#Date','Min Air T','Min RH','Min Water T'))
    for key,value in sorted(datapoints.items()):
        dbo.writerow([key,value[0],value[1],value[2]])
The encoding='iso-8859-15' for the input file turns out to be absolutely essential, as the Hoboware program generating the CSV files uses a 0xb0 character for the usual degree symbol. Alas, that chokes the default utf-8, ascii, and even cp437codecs. Took a while to figure that out, it did, indeed.
There remain random anomalies in the data, in addition to the glitches produced by unplugging the remote temperature sensor cable. I may simply discard the last few records of each CSV file; right now, the Gnuplot code simply ignores temperatures under 30 °F and over 80 °F.
The Gnuplot script that produced the graph consisted of some hand-fed tweakery based on the guts of the routine that plotted the original records, with the output image bank-shotting off the clipboard into GIMP on its way to becoming a PNG file. Phew!