Ed Nisley's Blog: Shop notes, electronics, firmware, machinery, 3D printing, laser cuttery, and curiosities. Contents: 100% human thinking, 0% AI slop.
That container lives in the garage, where the air temperature pretty much tracks the weather.
When the air in the main compartment heats up, it pushes fluid up into the dispensing compartment. Although both caps were screwed on finger-tight, apparently the smaller cap leaks just enough that the pumped fluid can push the air out through the not-so-good seal.
Another few weeks and it’d be sitting in a puddle!
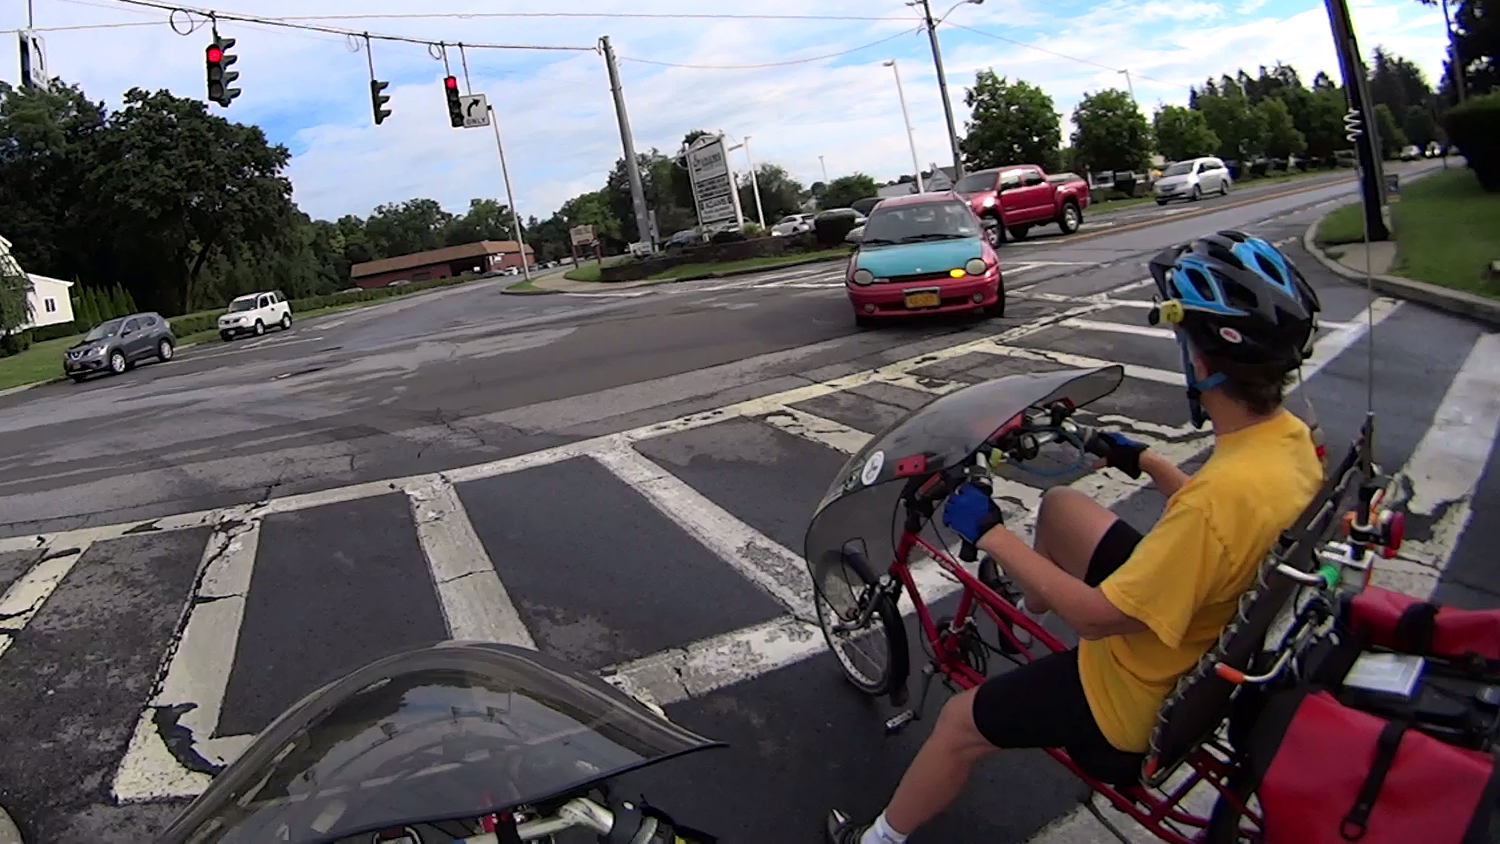
We were in the Arlington Square exit, waiting to cross Rt 44 into Adams:
Rt 44 Plaza Exit – 2016-08-02 – 0
If we both line up on the traffic signal sensor loop, it seems to detect us; Mary’s on the right side of the loop, I’m rolling along the left side. This seems to be an old-school dipole loop, not a quadrupole.
Despite the fact that the mall entrance lane is to our left, across that substantial median strip and exactly where you’d expect it, a driver turned left from Rt 44 into the mall exit:
Rt 44 Plaza Exit – 2016-08-02 – 1
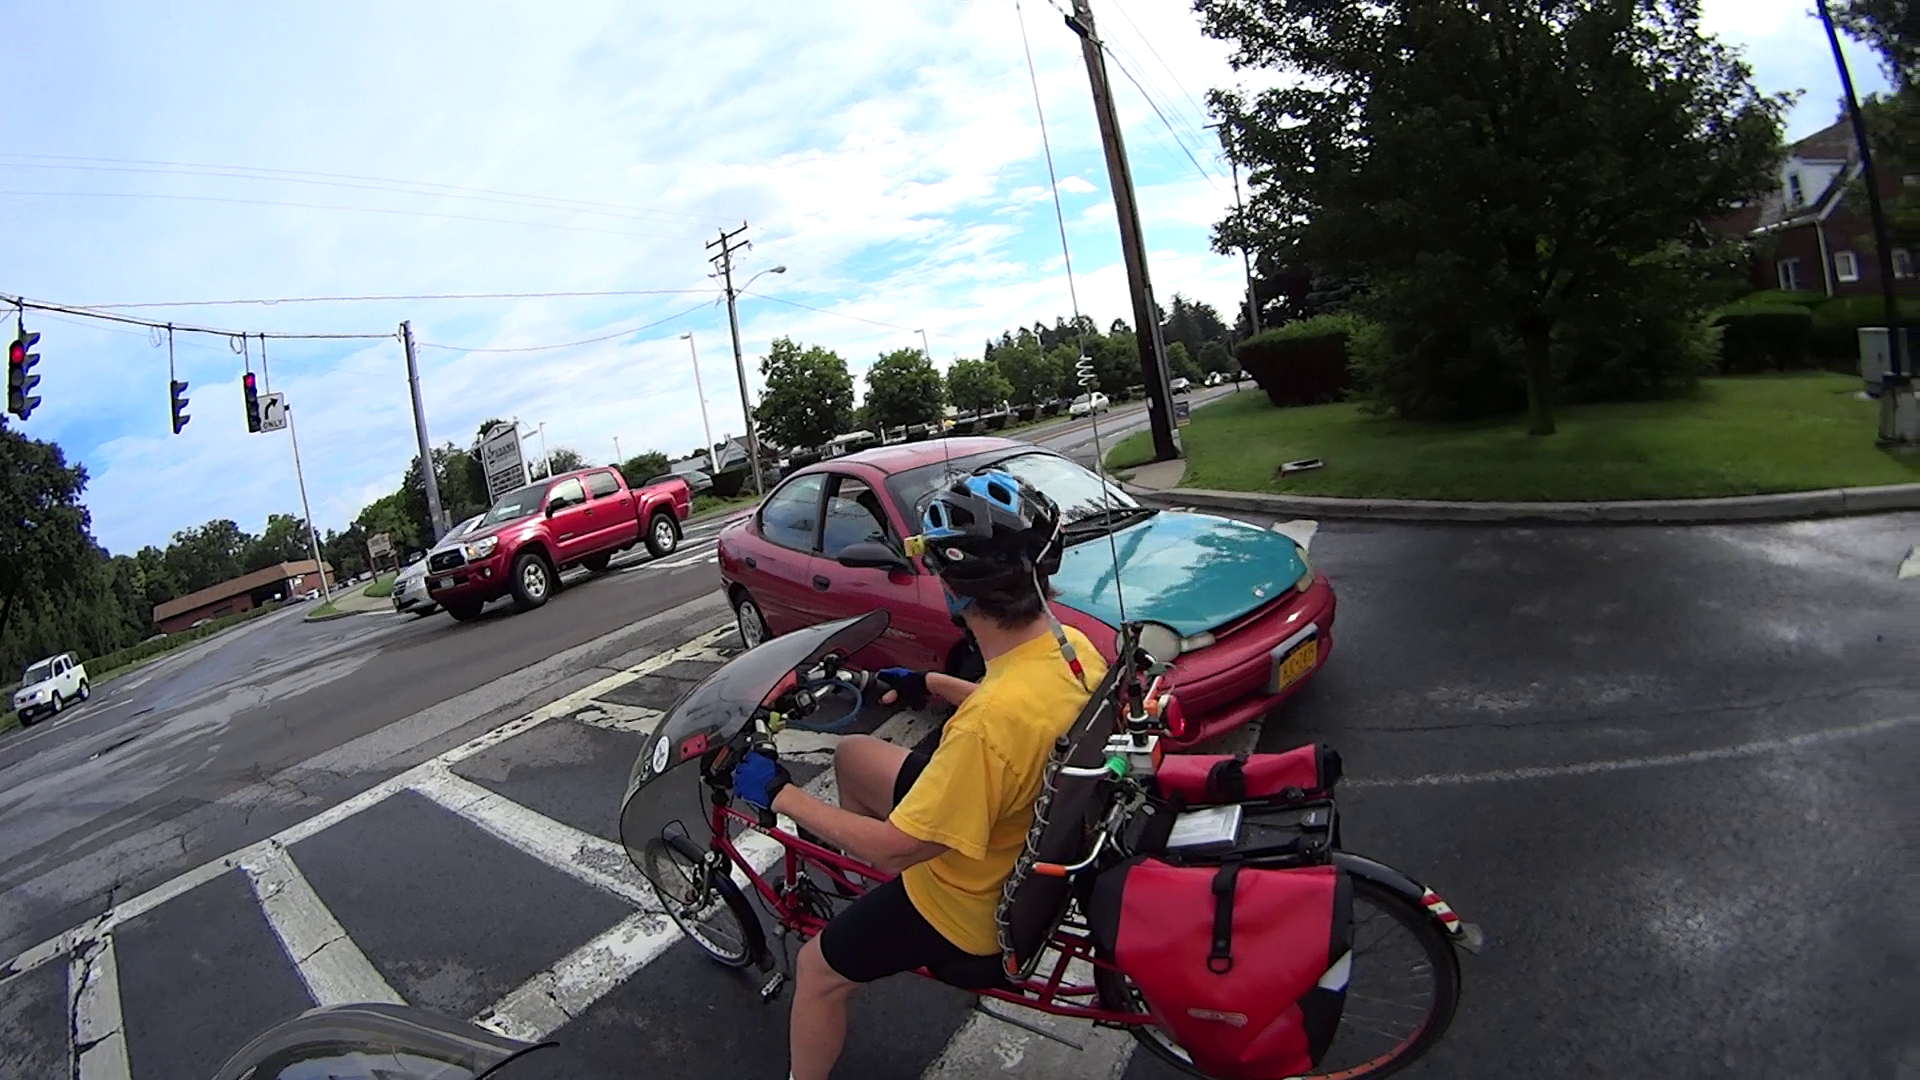
He obviously intended to use the lane we were occupying, because it’s the right-hand lane from his direction (where we were obviously not supposed to be), but veered away at the last moment:
Rt 44 Plaza Exit – 2016-08-02 – 2
Which was a good thing for all parties concerned, including the car approaching us in the proper lane:
Rt 44 Plaza Exit – 2016-08-02 – 3
Elapsed time: five seconds.
The driver then turned right, head-on against cars exiting from the parking lot and parallel-broadside with a pickup entering in the proper lane, and somehow didn’t collide with anybody or anything.
From where we sat, there was absolutely nothing we could do but watch death roll toward us.
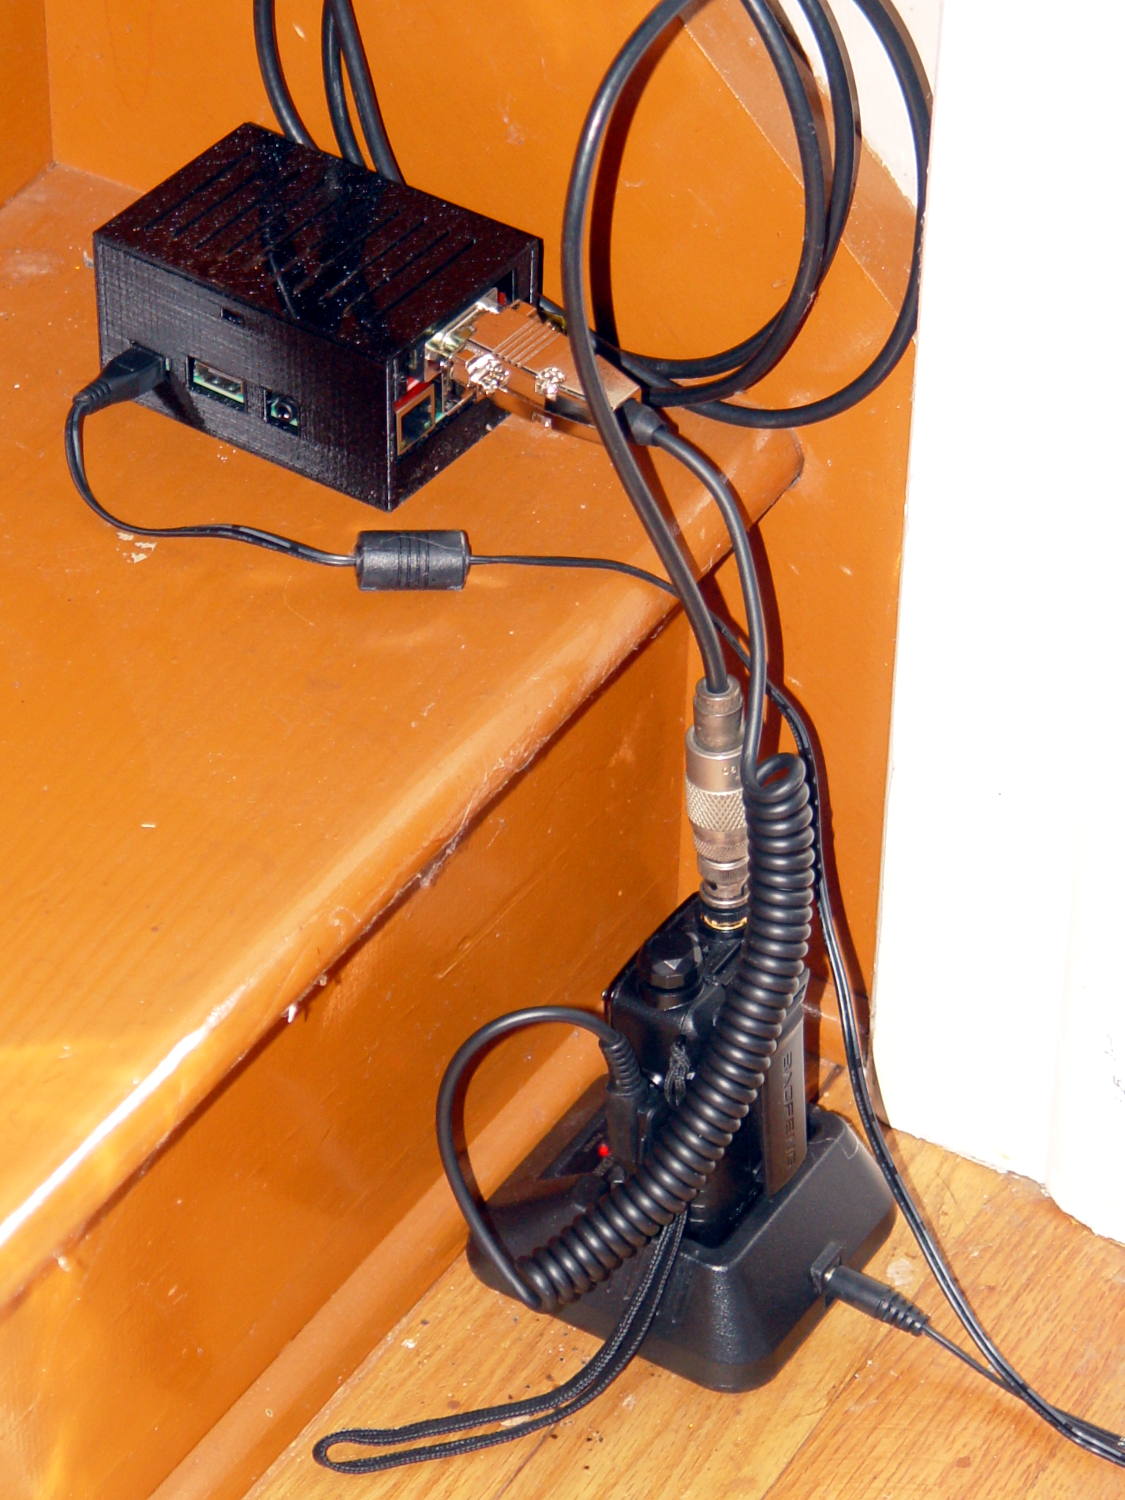
APRS coverage of this part of the Mighty Wappinger Creek Valley isn’t very good, particularly for our bicycle radios (low power, crappy antennas, lousy positions), so I finally got around to setting up a receive-only APRS iGate in the attic.
The whole setup had that lashed-together look:
KE4ZNU-10 APRS iGate – hardware
It’s sitting on the bottom attic stair, at the lower end of a 10 °F/ft gradient, where the Pi 3’s onboard WiFi connects to the router in the basement without any trouble at all.
You must solder the TNC-Pi2 a millimeter or two above the feedthrough header to keep the component leads off the USB jacks. The kit includes a single, slightly too short, aluminum standoff that would be perfectly adequate, but I’m that guy: those are four 18 mm lengths of heatshrink tubing to stabilize the TNC, with the obligatory decorative Kapton tape.
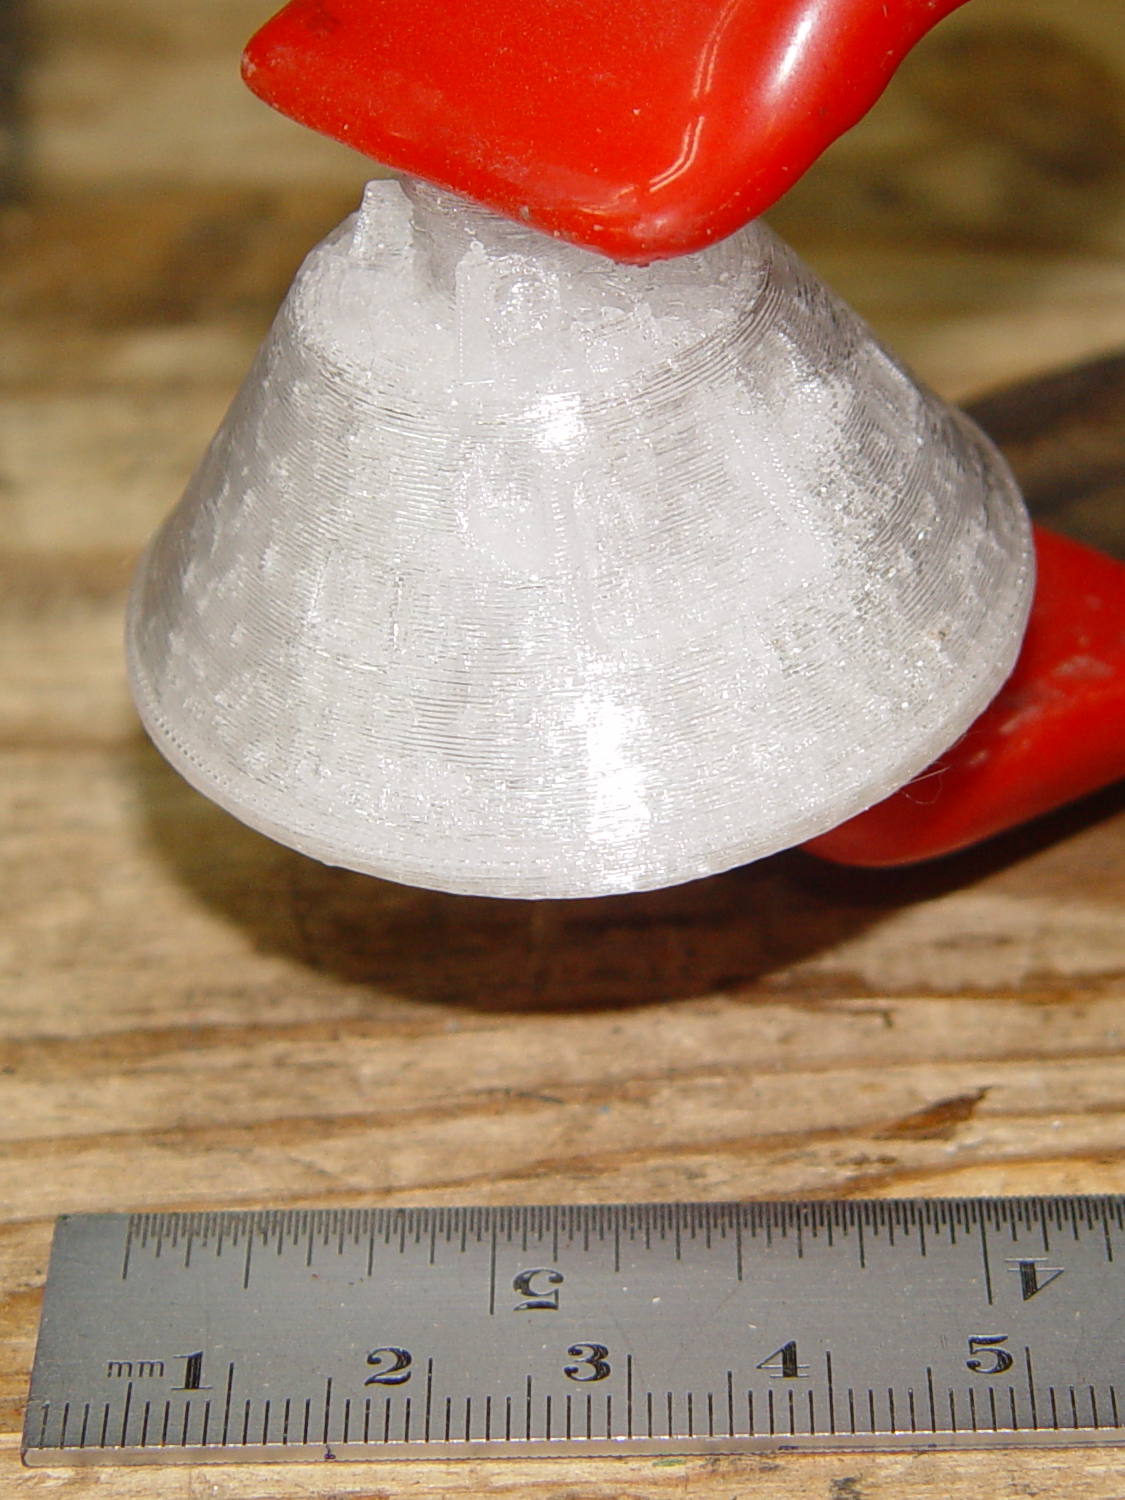
The only misadventure during kit assembly came from a somewhat misshapen 100 nF ceramic cap:
Monolithic cap – 100 nF – QC failure
Oddly, it measured pretty close to the others in the kit package. I swapped in a 100 nF ceramic cap from my heap and continued the mission.
The threaded brass inserts stand in for tiny 4-40 nuts that I don’t have. The case has standoffs with small holes; I drilled-and-tapped 4-40 threads and it’ll be all good.
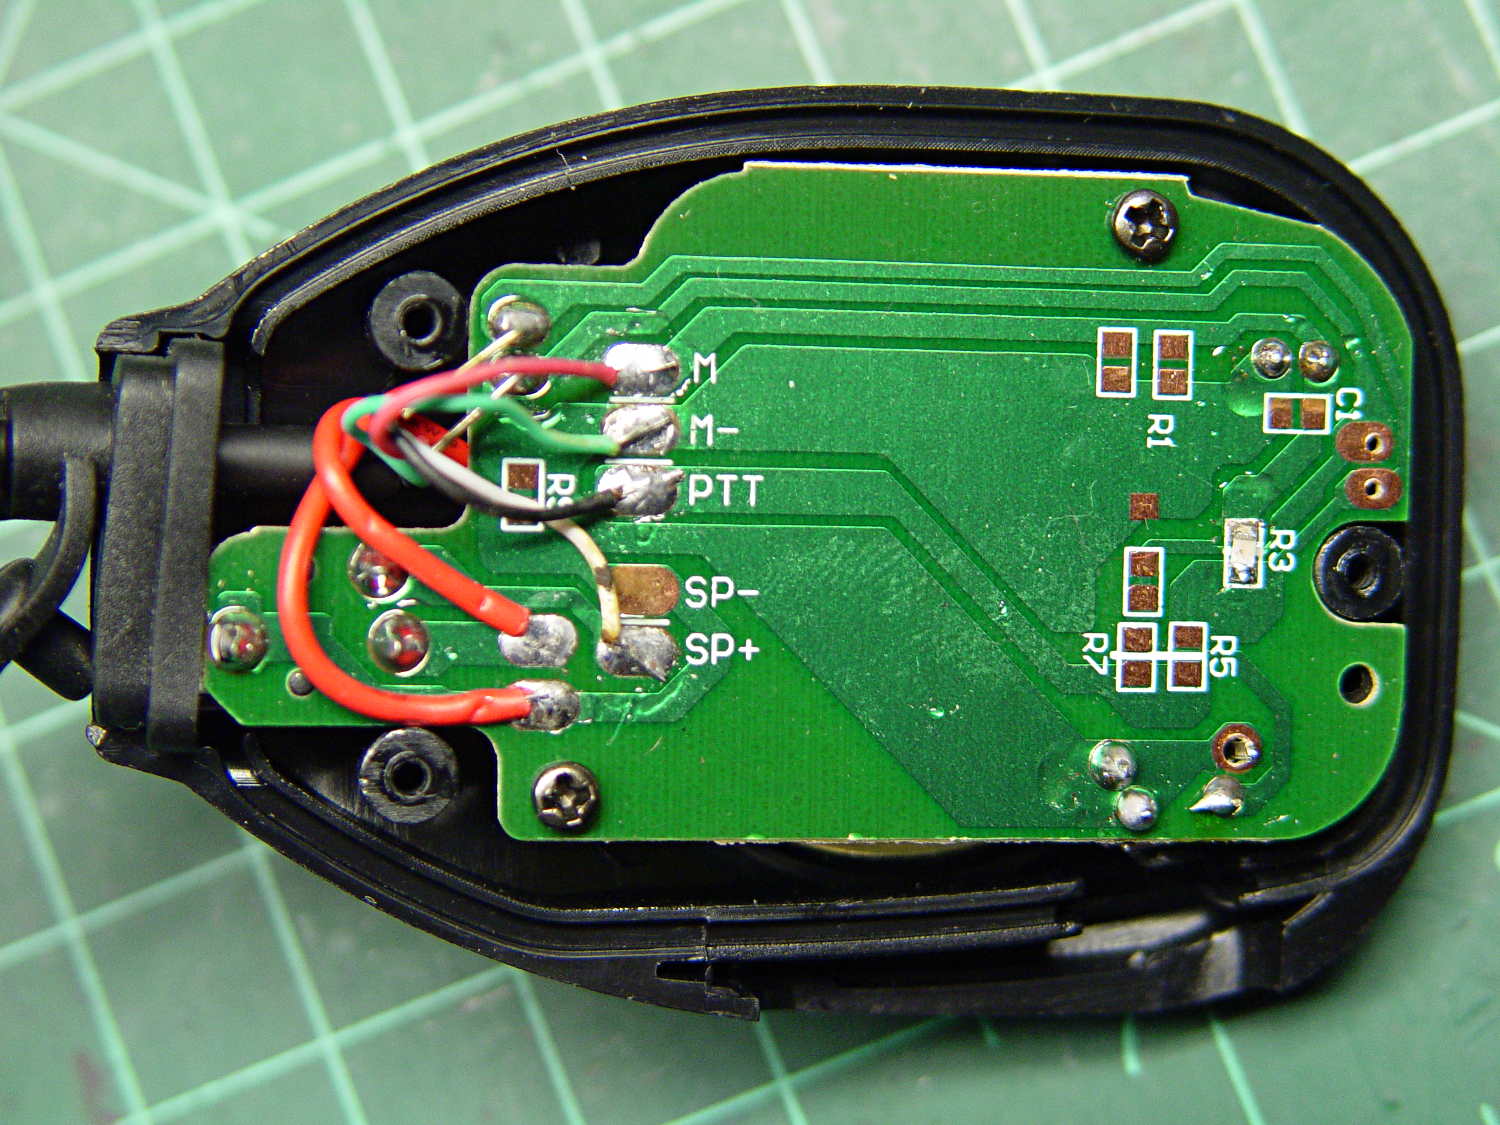
The radio, a craptastic Baofeng UV-5R, has a SMA-RP to UHF adapter screwed to the cable from a mobile 2 meter antenna on a random slab of sheet metal on the attic floor. It has Kenwood jack spacing, but, rather than conjure a custom plug, I got a clue and bought a pair of craptastic Baofeng speaker-mics for seven bucks delivered:
Baofeng speaker-mic wiring
For reference, the connections:
Baofeng speaker-mic cable – pins and colors
Unsoldering the speaker-mic head and replacing it with a DE-9 connector didn’t take long.
The radio sits in the charging cradle, which probably isn’t a good idea for the long term. The available Baofeng “battery eliminators” appear to be even more dangerously craptastic than the radios and speaker-mics; I should just gut the cheapest one and use the shell with a better power supply.
I initially installed Xastir on the Pi, but it’s really too heavyweight for a simple receive-only iGate. APRX omits the fancy map displays and runs perfectly well in a headless installation with a trivial setup configuration.
There are many descriptions of the fiddling required to convert the Pi 3’s serial port device names back to the Pi / Pi 2 “standard”. I did some of that, but in point of fact none’s required for the TNC-Pi2; use the device name /dev/serial0 and it’s all good:
<interface>
serial-device /dev/serial0 19200 8n1 KISS
callsign $mycall # callsign defaults to $mycall
tx-ok false # transmitter enable defaults to false
telem-to-is false # set to 'false' to disable
</interface>
Because the radio looks out over an RF desert, digipeating won’t be productive and I’ve disabled the PTT. All the received packets go to the Great APRS Database in the Cloud:
server noam.aprs2.net
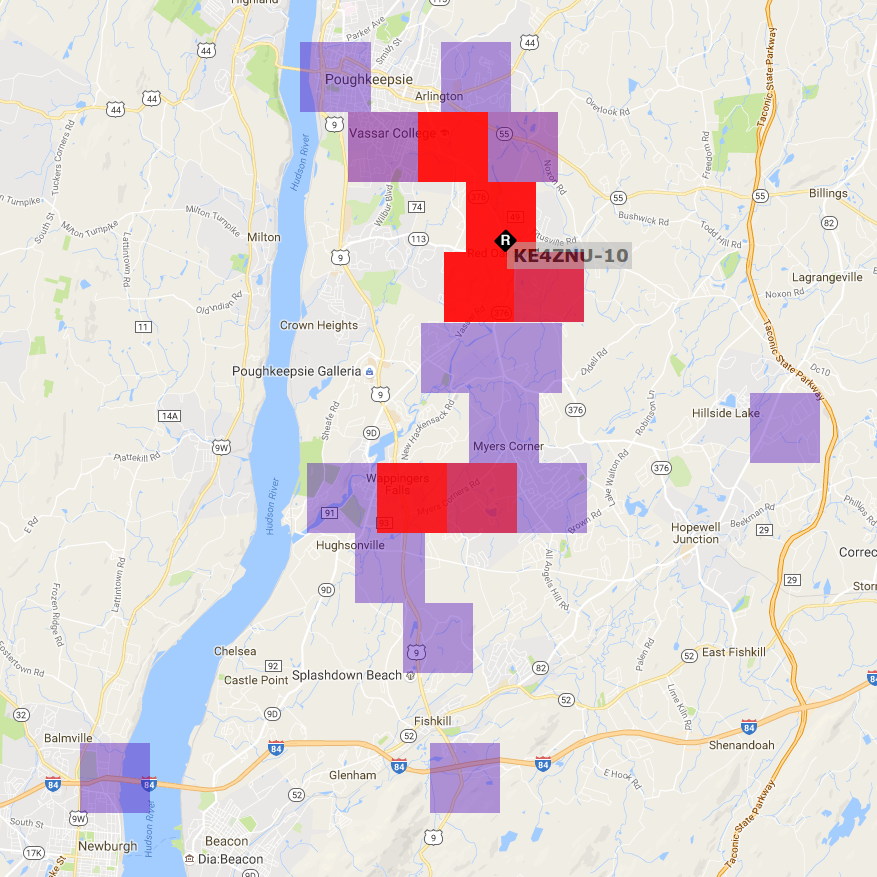
An APRS reception heat map for the last few days in August:
KE4ZNU-10 Reception Map – 2016-08
The hot red square to the upper left reveals a peephole through the valley walls toward Mary’s Vassar Farms garden plot, where her bike spends a few hours every day. The other hotspots show where roads overlap the creek valley; the skinny purple region between the red endcaps covers the vacant land around the Dutchess County Airport. The scattered purple blocks come from those weird propagation effects that Just Happen; one of the local APRS gurus suggests reflections from airplane traffic far overhead.
An RPi 3 is way too much computer for an iGate: all four cores run at 0.00 load all day long. On the other paw, it’s $35 and It Just Works.
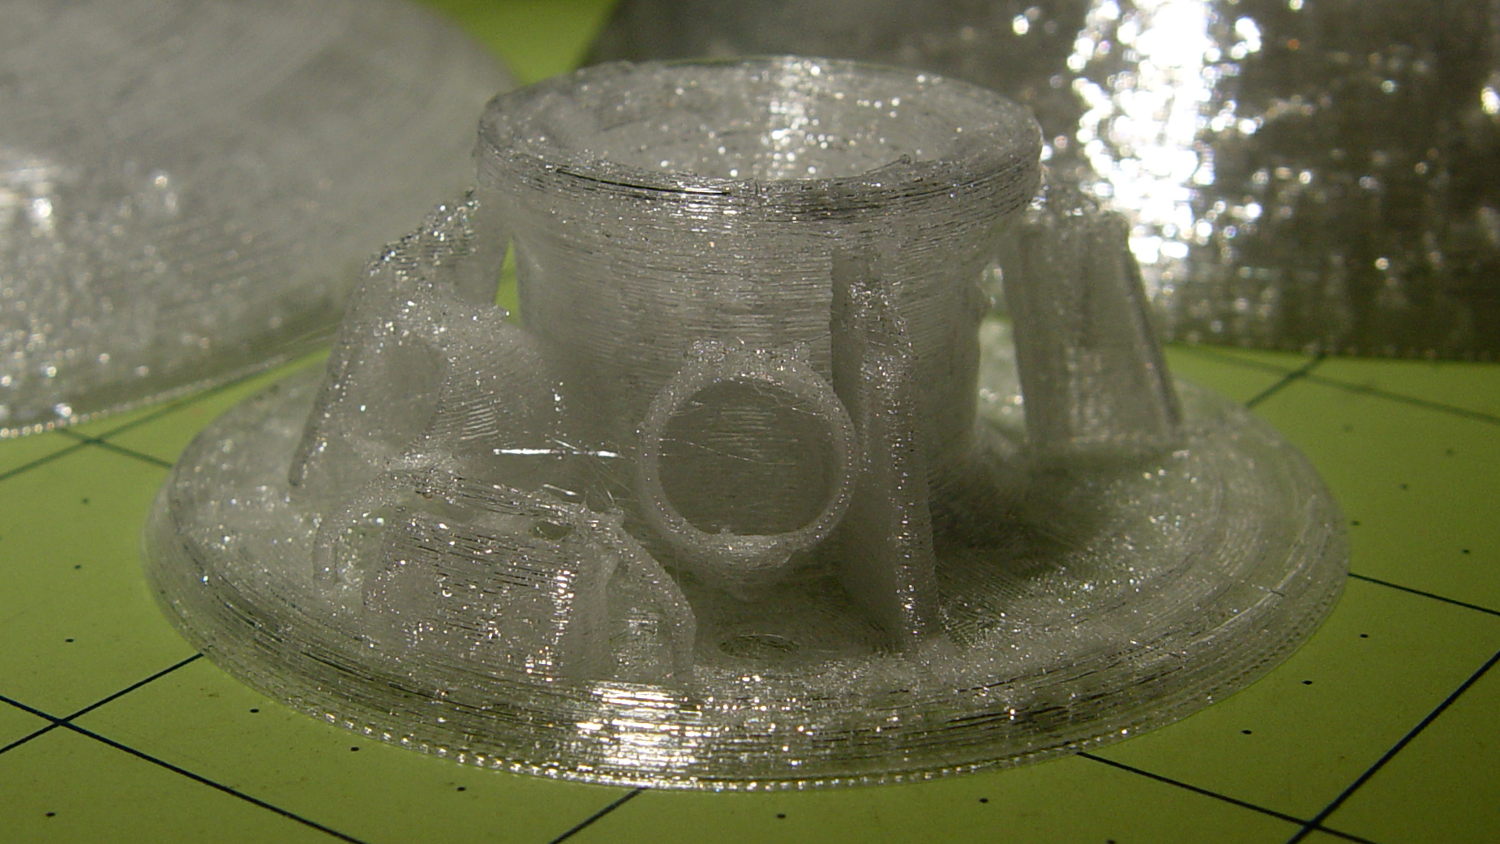
It’s obviously not printable in one piece without a ton of support, so I chopped off the heatsink and printed the parts separately in the obvious orientation:
Apollo 11 CM – 1-80 scale – split – Slic3r preview
And glued them back together:
Apollo 11 CM – clamping
That worked well enough, even without locating pins, to give me confidence that it’d come out all right.
There’s plenty of gimcrackery surrounding the upper airlock:
Apollo 11 CM – 1-40 scale – top – Slic3r preview
Most of which simply vanished at 1:80 scale:
Apollo 11 CM – 1-80 scale – top detail
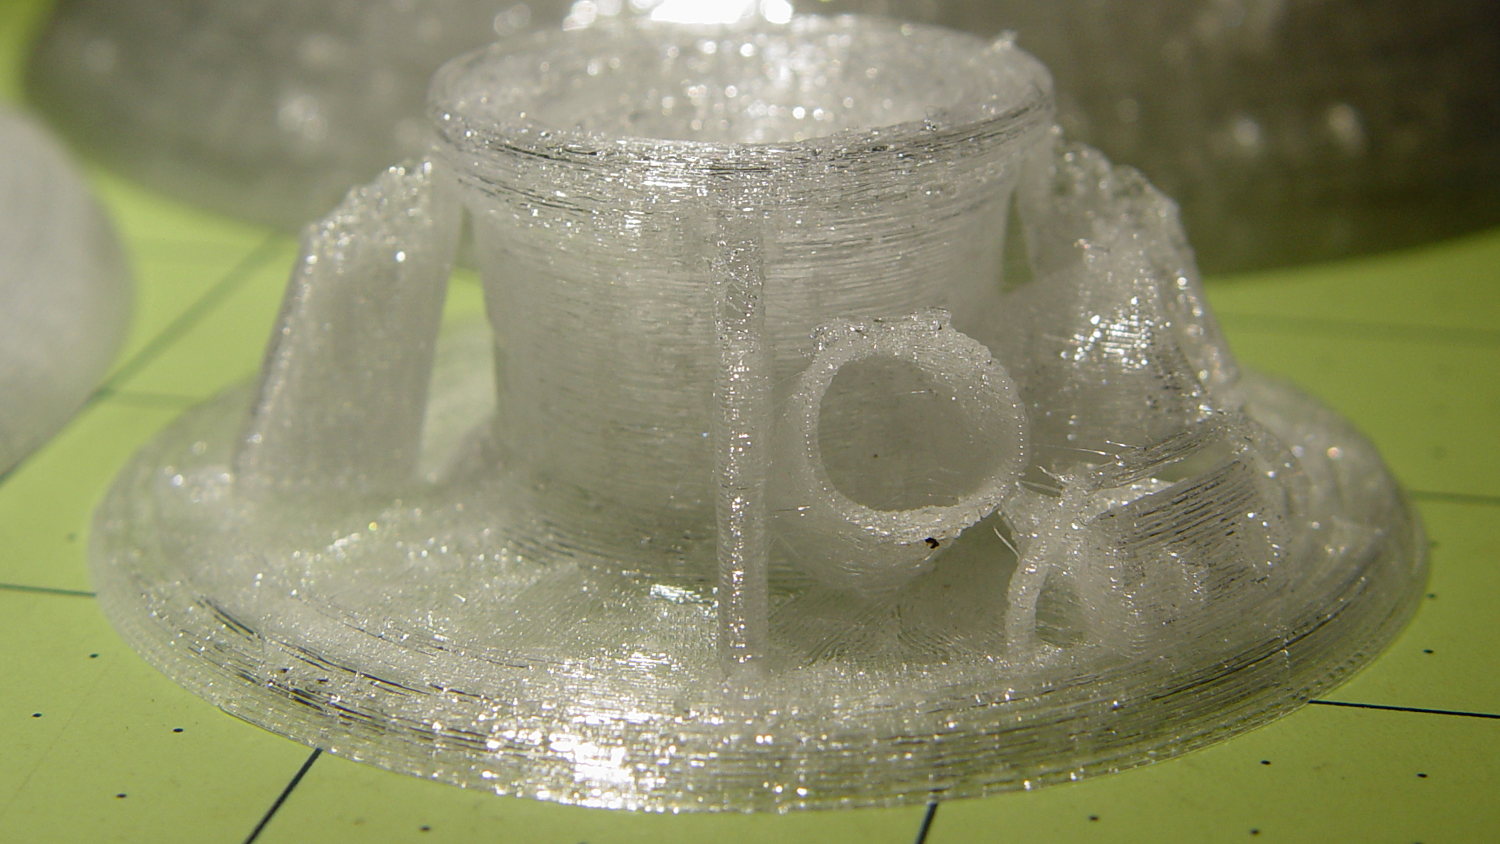
I made another cut just below the top of the capsule and ran off a 1:40 scale version that came out somewhat better, but it was still ugly:
Apollo 11 CM – 1-40 scale – mortar detail
Much to my astonishment, the grab rail over the side hatch, between the two parachute motars, came out well every time.
The giant 1:20 scale version would require something over 24 hours of printing, so I went with 1:30 in three pieces:
Apollo 11 CM – 1-30 scale – sections
The top had pretty good detail:
Apollo 11 CM – 1-30 scale – top section – 1
Another view:
Apollo 11 CM – 1-30 scale – top section – 2
Gluing the parts together made it ready for cleanup / finishing / painting:
Apollo 11 CM – 1-30 scale – assembled
Which he’s better at than I ever will be…
Natural PETG probably isn’t the right plastic for that kind of model, but it’s what I had on hand.
Neither of the kits require advanced assembly skills, but neophytes would definitely benefit from somebody who could guide them through the rough spots. In fact, JYE Tech comped me the acrylic scope case in return for the defects on the function generator PCB: thanks!
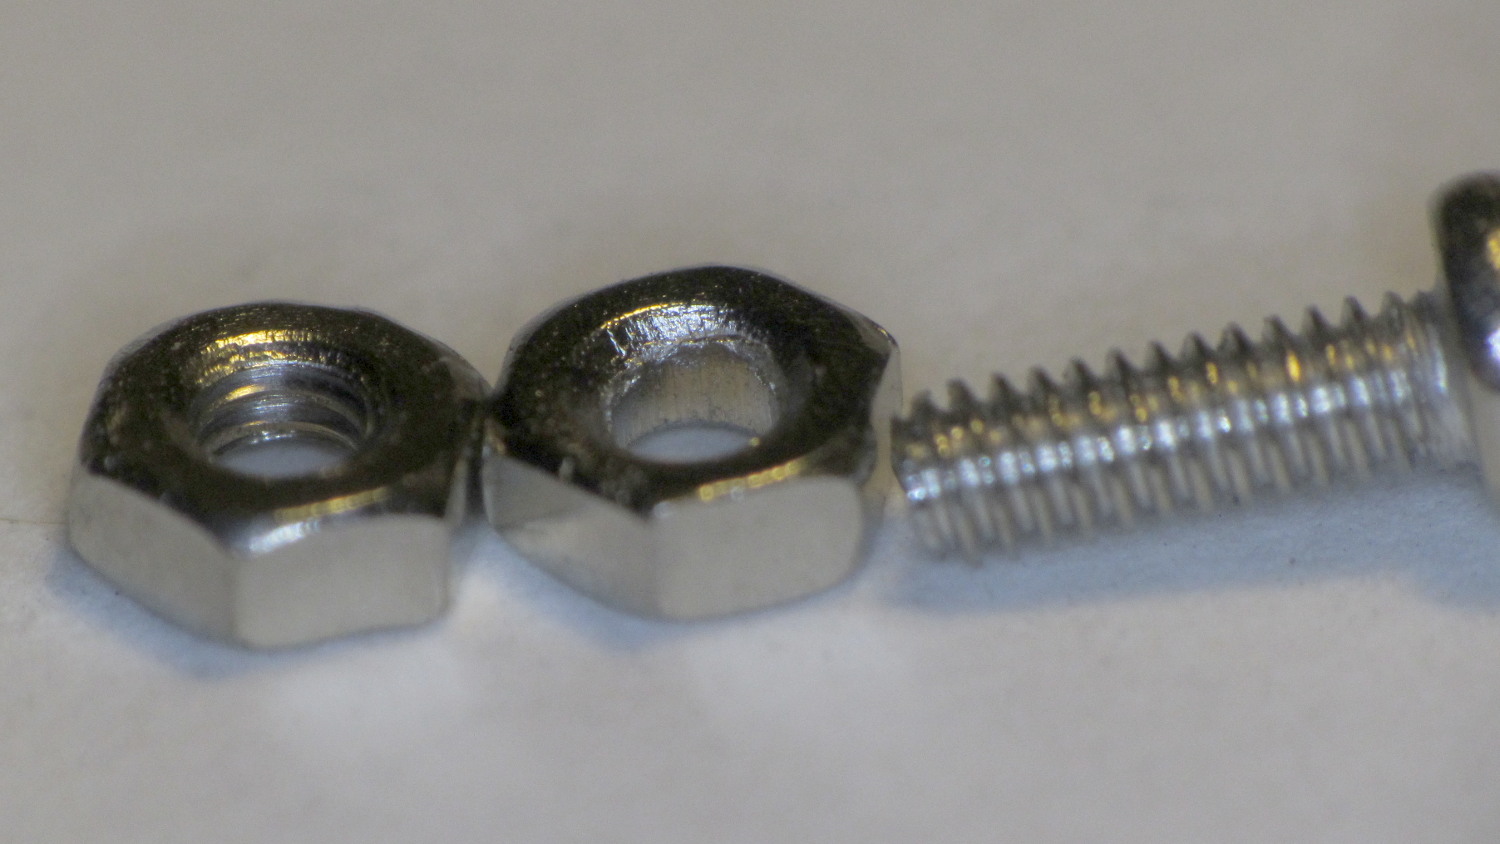
Just to rub it in, I suppose, one of the 2 mm nuts required to assemble the case missed the threading operation:
Unthreaded 2 mm nut
Took me a while to figure out why I couldn’t make the screw work. No big deal if you’ve got stuff, but it’d be a showstopper for a newbie.
Anyhow, the kit went together smoothly and powered right up:
JYE Tech DSO138 oscilloscope – 1 kHz sine
The trace arithmetic functions work well enough:
DSO138 oscilloscope screen – trace data
The triggering seems finicky and setting the level sometimes moves the trace baseline, although that may be due to my fat-fingering the controls.
The front end is noisy, the bandwidth limited, the screen is small, and you can’t capture / export traces to your PC / cloud / whatever.
It’s an OK starter scope and you’ll shortly realize why you need a dual-trace scope…
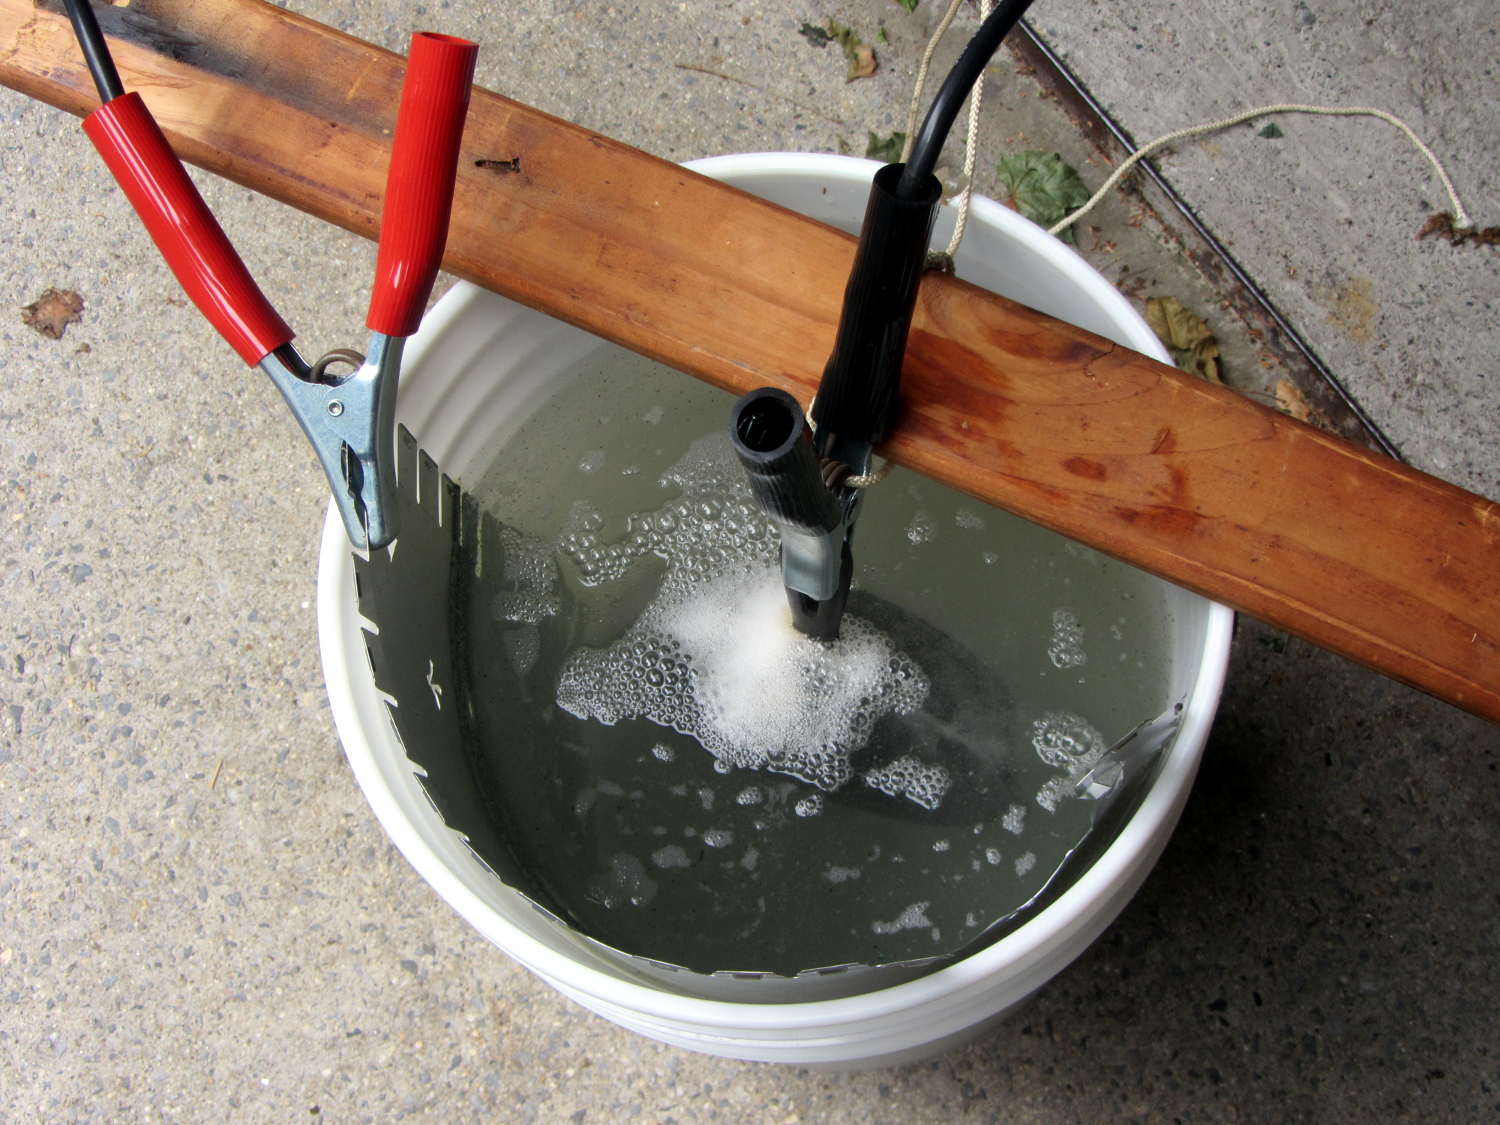
Our cast iron pans need seasoning, so I decided to start with full-metal-jacket electrolysis stripping, rather than soaking them in oven cleaner / smogging the kitchen with the self-cleaning oven / actually doing any work. The electrolysis setup involves the big battery charger and a bucket of sodium carbonate solution:
Cast iron pan electrolysis – setup
Although the charger has a 40 A capacity, the small pan bubbles along merrily at a self-limited 7 A:
Cast iron pan electrolysis – bucket
The anode is a big sheet of steel that was once an EMI shield in a big PC case. The side facing the pan corroded very quickly, but the outside remains in good shape and I think it’ll suffice for the medium and large pans.
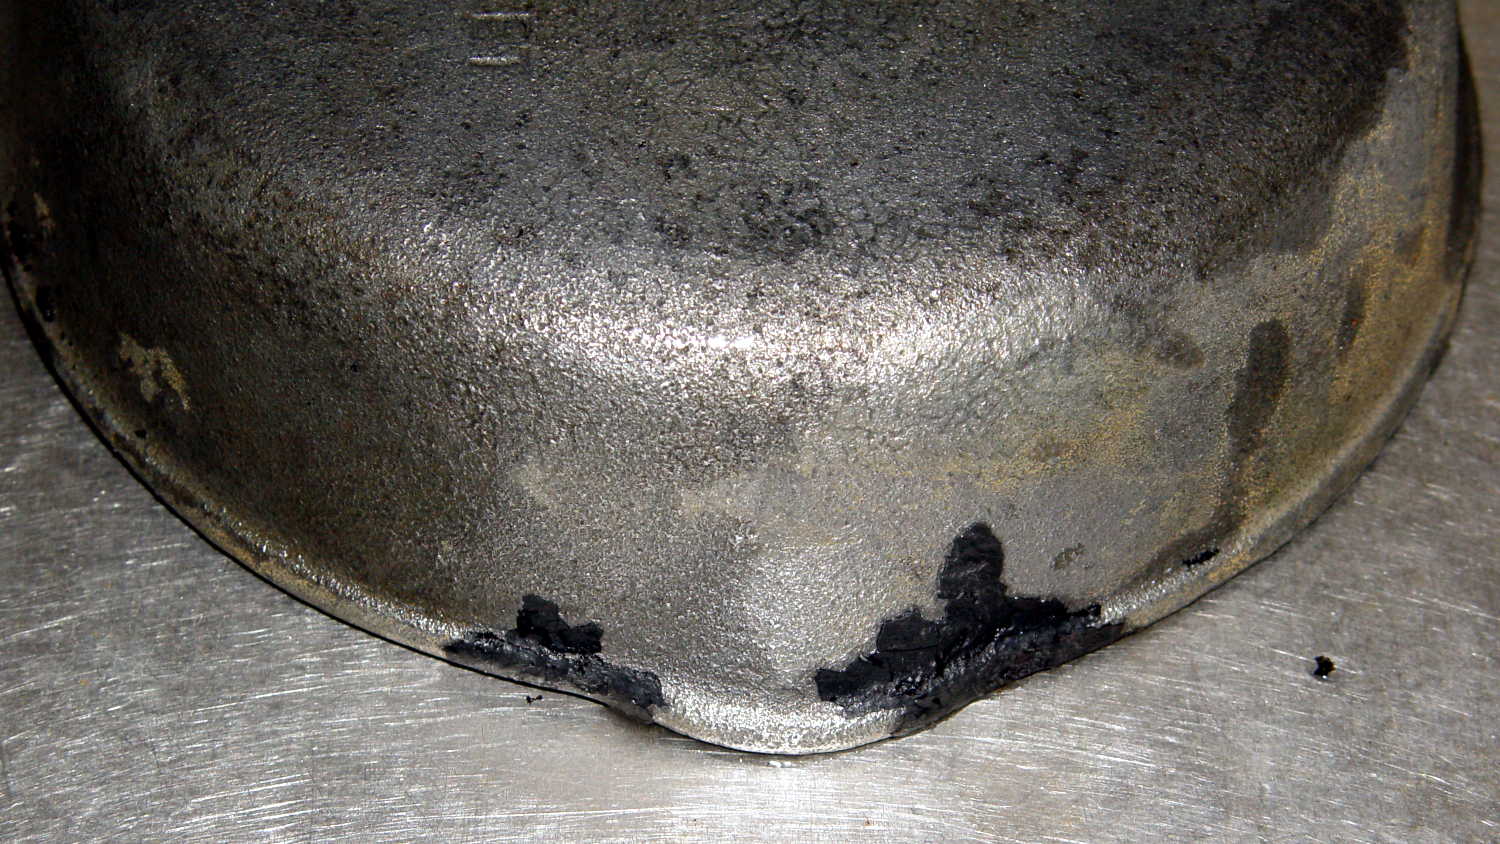
After two hours, only the crustiest bits of the crust remained:
Cast iron pan electrolysis – 2 hours
Those flakes fell right off after a few pokes from my demolition scraper; definite anticlimax, that.
Another hour in the tank cleaned the handle and removed a few other spots; it now sports a layer of flash rust that’ll require another pass after I strip the other two pans…
The camera runs at 60 frame/s, so the entire show spans a bit more than half a second: zzzzzip!
I think it’s a member of the Yellow Jacket wasp family, noted for their in-your-face attitude and repeat-fire stinger. They’re highly capable flying machines, that’s for sure…
We were pulling out of the local “health food” store with fresh-ground nut butters in the packs, nearing the end of a 17 mile loop on a fine Sunday morning.