Ed Nisley's Blog: Shop notes, electronics, firmware, machinery, 3D printing, laser cuttery, and curiosities. Contents: 100% human thinking, 0% AI slop.
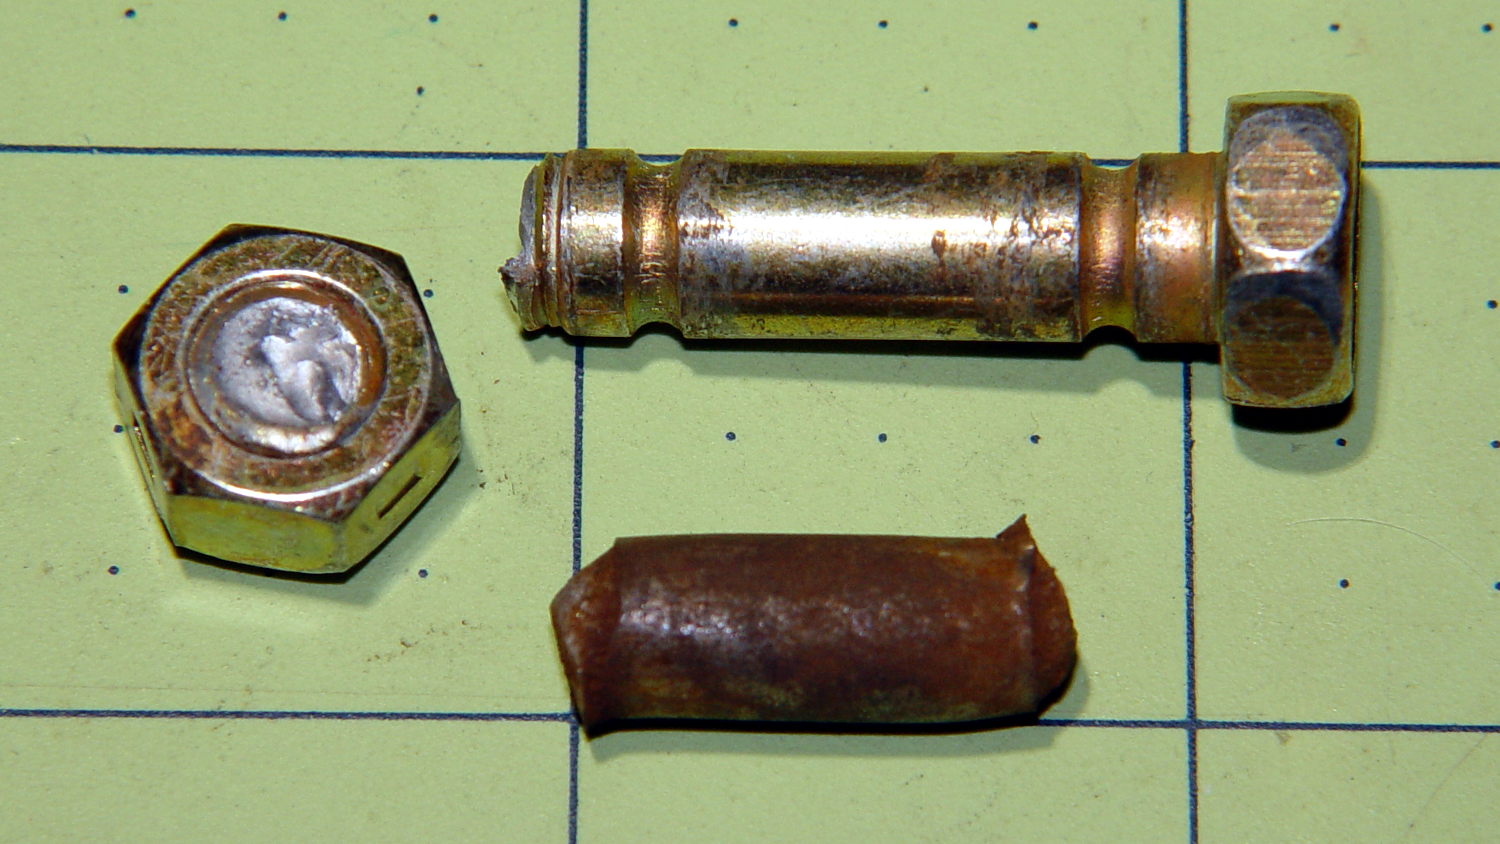
The snowthrower (I’ve always called it a snowblower, but that’s just me) ate a ski pole (*), handle-tether-end first, and the right-side shear bolt worked perfectly when the right-hand auger slammed to a stop. A bit of drift punch rapping extracted the sorry lump at the bottom:
Sheared MTD Snowthrower Bolts
The missing nut and bolt head may eventually surface, but I’m not losing any sleep over them.
I popped a replacement shear bolt from the heap (thank you, Aitch!) and thought the nut went on rather stiffly. The nuts have a crimp in the middle to make them vibration-proof, but this one seemed stiffer than usual and, lo and behold, the bolt snapped just before I thought the nut had gotten far enough.
The nut on the second replacement shear bolt required much less torque, didn’t (let me) snap the bolt, and I finished the mission. That’s the third or fourth shear bolt I’ve used since getting the thrower in 2007, so there’s a package of six in transit.
Part Number 710-0809A, 5/16-18 x 1.5 inch.
(*) One of Mary’s gardening cronies works for a sporting goods store, has access to an unlimited supply of slightly bent ski poles, and shares the bounty for use as garden stakes.
You can use VNC with a headless Raspberry Pi, but, absent a display with which to negotiate the screen resolution, X defaults something uselessly small: 720×480. To force a more reasonable resolution, edit /boot/config.txt and set the framebuffer size:
framebuffer_width=1920
framebuffer_height=1280
You can use a nonstandard resolutions, as with the 1920×1280 that fits neatly on my 2560×1440 landscape monitor, but getting too weird will surely bring its own reward. When you plug in a display, X will ought to negotiate as usual for the highest resolution the display can handle.
The System Configuration dialog has a “Resolution” button offering standard resolutions:
RPi display resolution configuration
The shiny RPi Pixel UI bakes the RealVNC server directly into whatever handles the startup process these days, rendering all previous recommendations about forcing VNC resolutions inoperative. I found the trick of editing the config file on StackExchange after the usual flailing around.
Memo to Self: Remmina (the VNC client I use in XFCE on my desktop PC) doesn’t respond well to having the VNC server shut down while it’s connected. Fire up a command prompt, enter this:
sleep 10 ; sudo reboot
Then, quick like a bunny, disconnect the VNC session.
Recent news about Dropbox removing its Public folder feature reminded me to do my every-other-month blog backup. Wordpress provides a method to “export” the blog’s text and metadata in their XML-ish format, so you can (presumably) import your blog into another WordPress instance on the server of your choice. However, the XML file (actually, ten of ’em, all tucked into a paltry 8 MB ZIP file) does not include the media files referenced in the posts, which makes sense.
Now, being that type of guy, I have the original media files (mostly pictures) tucked away in a wide variety of directories on the file server. The problem is that there’s no easy way to match the original file to the WordPress instance; I do not want to produce a table by hand.
Fortunately, the entry for each blog post labels the URL of each media file with a distinct XML tag:
Note the two leading tabs: it’s prettyprinted XML. (Also, should you see escaped characters instead of < and >, then WordPress has chewed on the source code again.)
While I could gimmick up a script (likely in Python) to process those files, this is simple enough to succumb to a Bash-style BFH:
That fetches 6747 media files = 1.3 GB, tucks them into directories corresponding to their WordPress layout, and maintains their original file dates. I rate-limited the download to an average of 5 s/file in the hope of not being banned as a pest, so the whole backup takes the better part of ten hours.
So I wind up blowing an extra gig of disk space on a neatly arranged set of media files that can (presumably) be readily restored to another WordPress instance, should the occasion arise.
Memo to Self: investigate applying the -r option to the base URL, with the -N option to make it incremental, for future updates.
As a rule of thumb, there’s no point in fussing with smaller shapes when a big one will suffice…
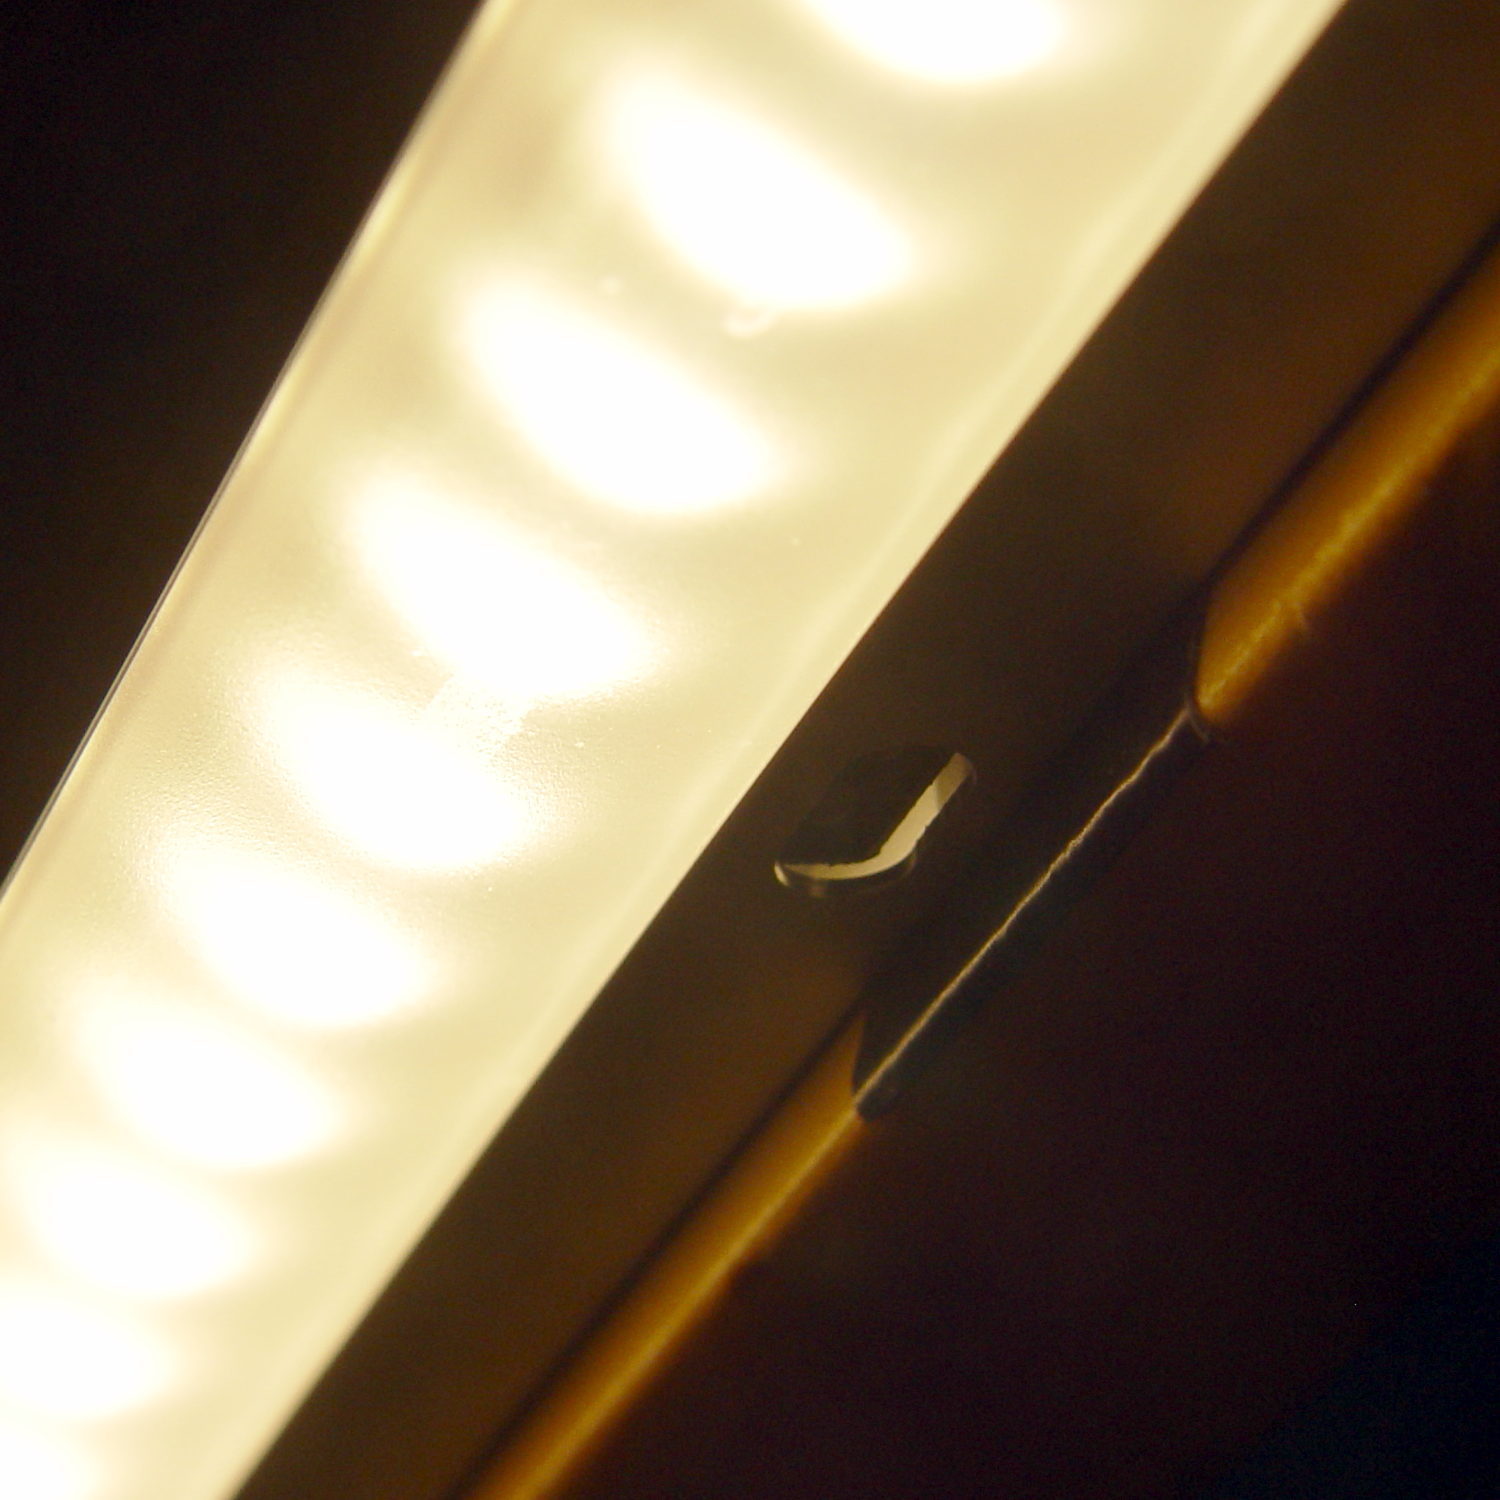
This LED strip fits under the cabinet over the butcher block countertop next to the stove, which turns out to be Just Barely longer than the strip itself:
Under-cabinet light – cramped power plug
The OEM straight-on coaxial plug (near the bottom of the picture) attached to the wall wart cable obviously wouldn’t fit in the available space, so I gimmicked up a right-angle adapter by the simple expedient of shortening the solder lugs of a plug from the heap (which, admittedly, doesn’t quite fully seat in the socket), bending them sideways, soldering a pair of wires, heatshrinking appropriately, then coating wires + plug with JB Kwik epoxy. The other end of the wires gets a coaxial jack that miraculously fits the OEM plug, styled up with more heatshrink tubing. Not pretty, but nobody will ever see it.
Unlike the LED strip under the other cabinet, this IR proximity sensor doesn’t mind having a wood edge next to it and, thus, didn’t need a strip of tape to keep it happy.
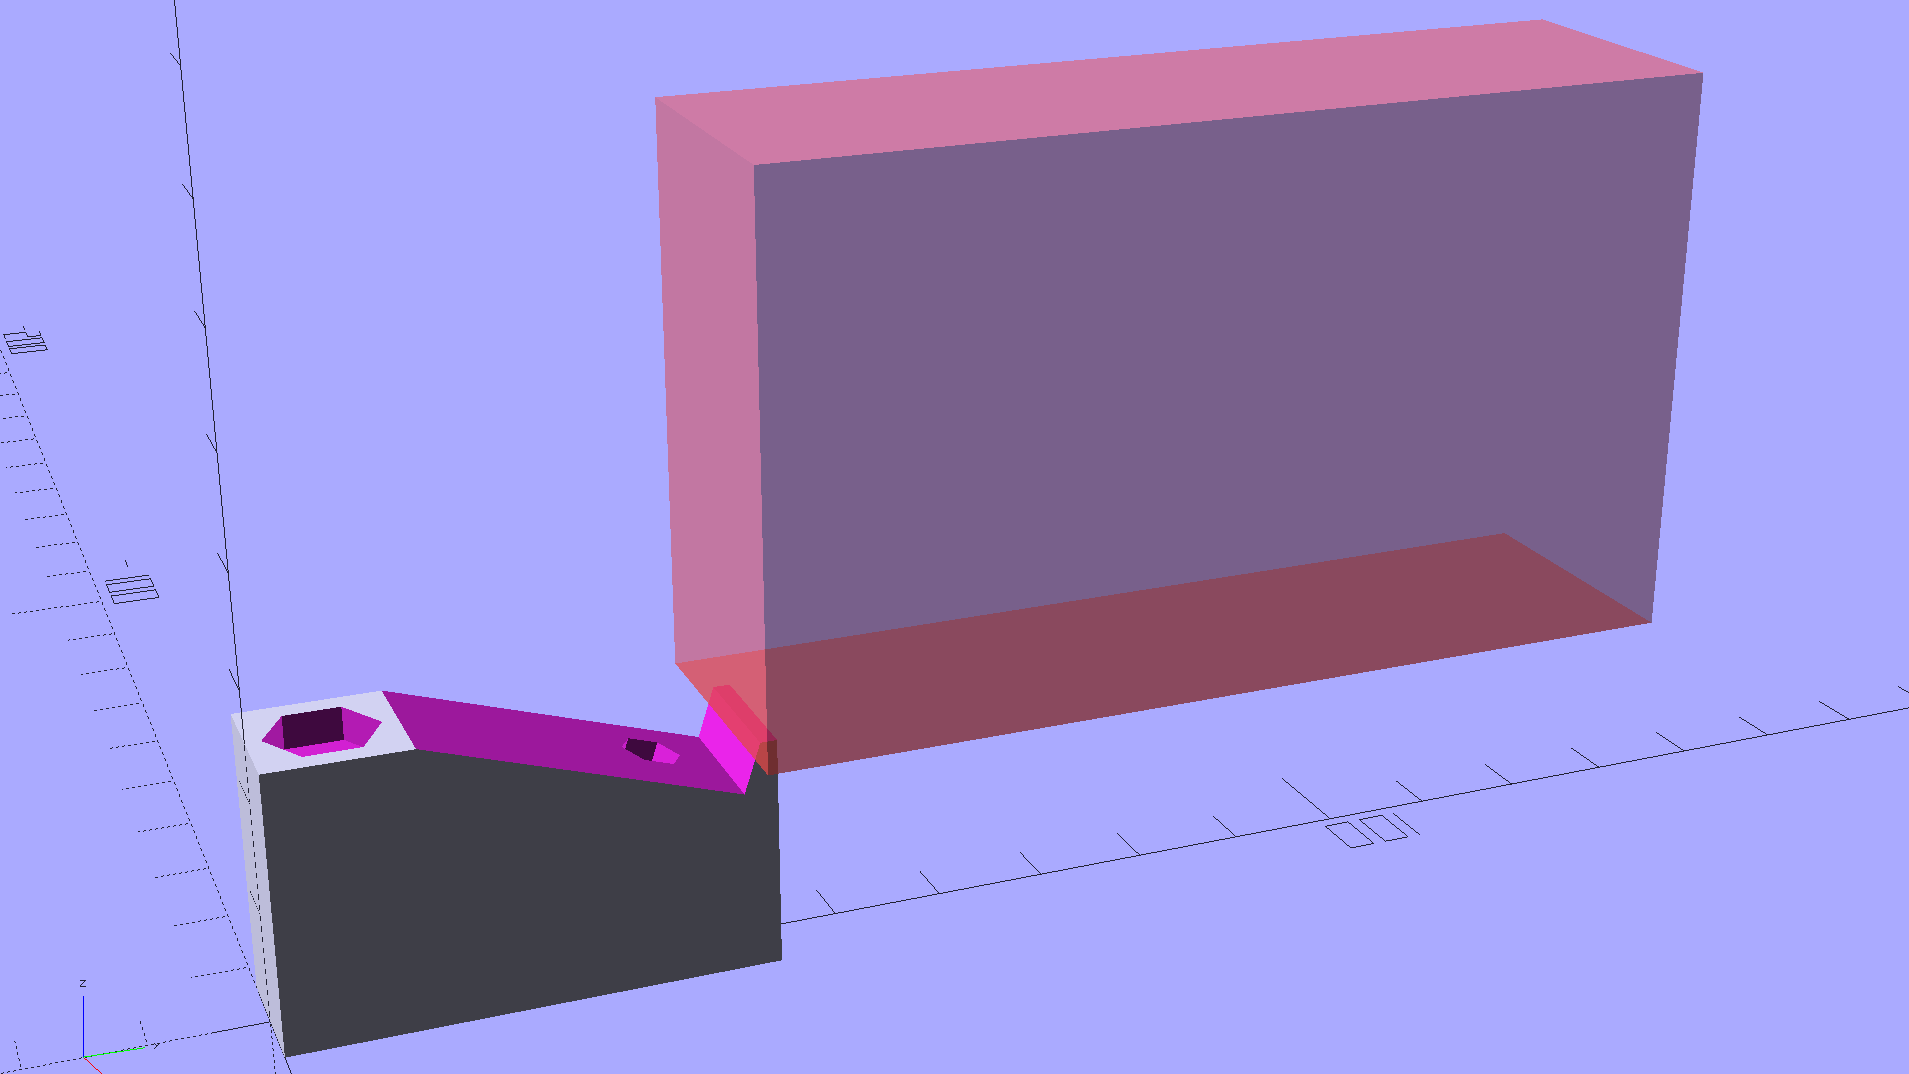
The LED strip lights have a reasonably diffuse pattern with an on-axis bright area that puts more light on the rear of the counter than seems strictly necessary. Revising the original brackets to tilt the strips moves the bright patch half a foot forward:
Kitchen Light Bracket – angled – solid model
For lack of anything smarter, the angle puts the diagonal of the LED strip on the level:
Kitchen Light Bracket – angled – Slic3r preview
The translucent block represents the strip (double-thick and double-wide), with a peg punching a hole for the threaded brass insert.
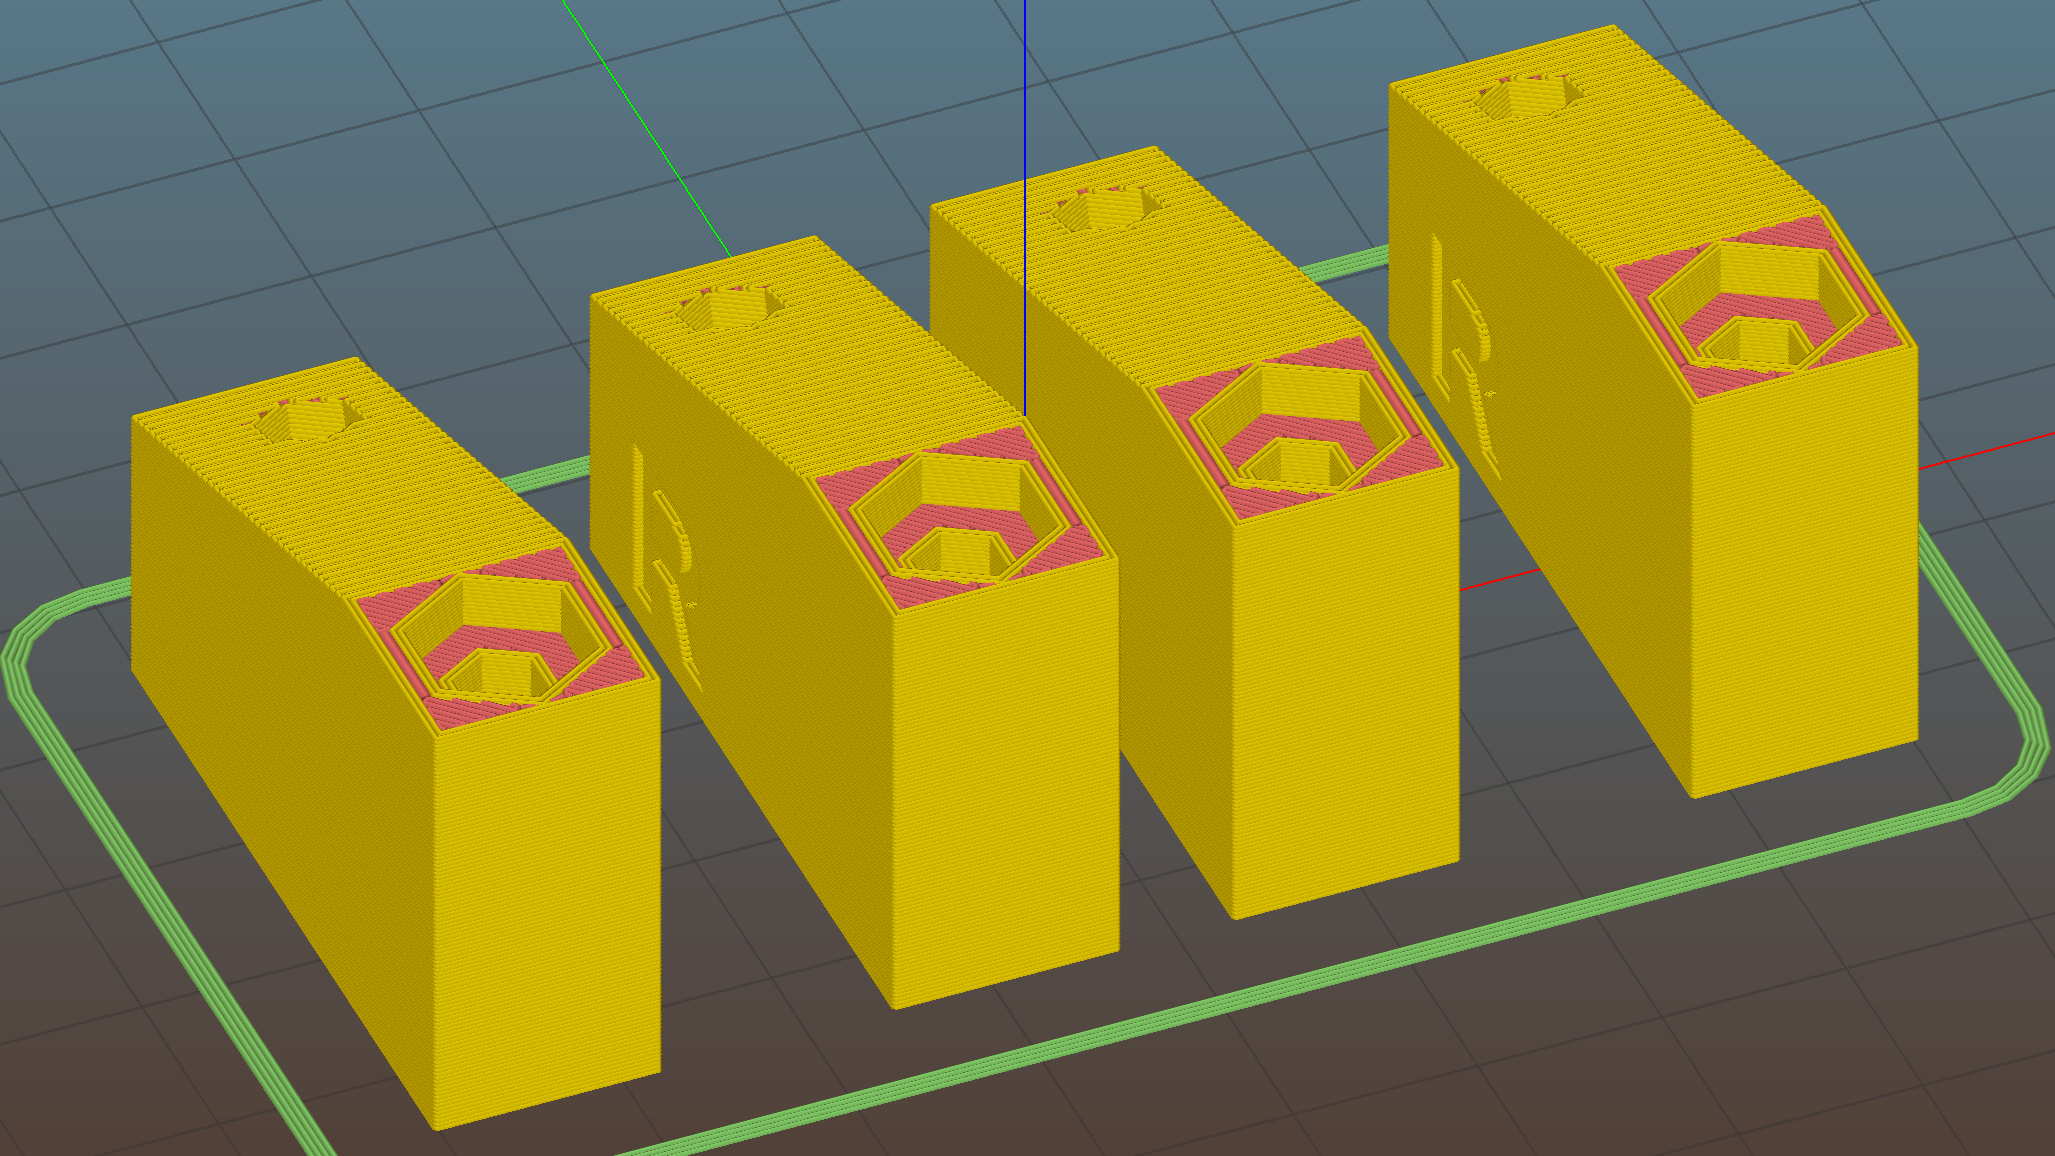
Although the source code has an option to splice the middle blocks together, it can also build them separately:
Kitchen Light Bracket – angled – LED block
Turns out they’re easier to assemble that way; screw ’em to the strips, then screw the strips to the cabinet.
I moved the deck screw holes to the other end of the block, thus putting the strips against the inside of the cabinet face. It turns out the IR sensor responds to the DC level of the reflected light, not short-term changes, which meant the reflection from the adjacent wood blinded it to anything waved below. Adding a strip of black electrical tape killed enough of the reflected light to solve that problem:
Under-cabinet light – IR sensor shield
The tape isn’t quite as far off-center as it looks, but I’m glad nobody will ever see it …
The before-and-after light patterns, as viewed on B-size metric graph paper centered on the left-hand strip and aligned with the belly side of the countertop:
Under-cabinet light – straight vs angled patterns
Those look pretty much the same, don’t they? So much for photography as evidence for anything.
This file contains hidden or bidirectional Unicode text that may be interpreted or compiled differently than what appears below. To review, open the file in an editor that reveals hidden Unicode characters. Learn more about bidirectional Unicode characters
Mary has been working on the Splendid Sampler project, with 56 completed blocks (*) stacked on her sewing table. We agreed that those blocks would make a nice background for our Christmas Letter, but the labor involved to photograph all the fabric squares and turn them into a page seemed daunting.
Turned out it wasn’t all that hard, at least after we eliminated all the photography and hand-editing.
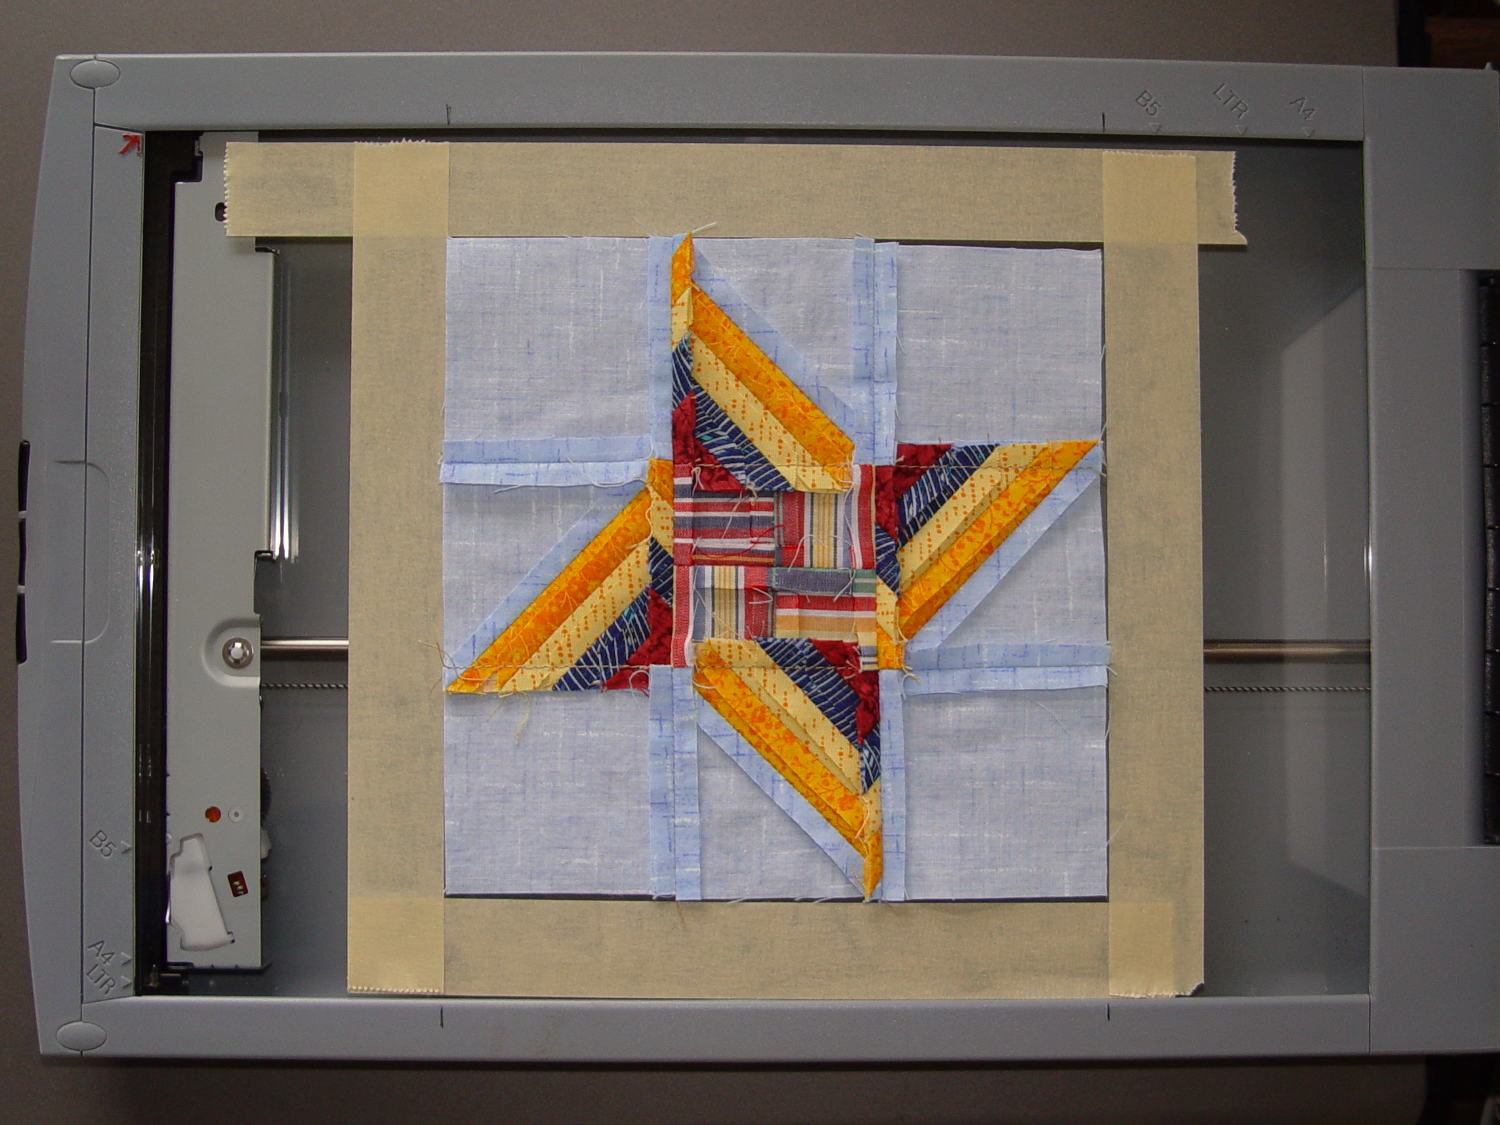
The 6½x6½ inch blocks include a ¼ inch seam allowance on all sides and, Mary being fussy about such things, they’re all just about perfect. I taped a template around one block on the scanner glass:
Quilt block in scanner template
Then set XSane to scan at 150 dpi and save sequentially numbered files, position a square scan area over the middle of the template, and turn off all the image enhancements to preserve a flat color balance.
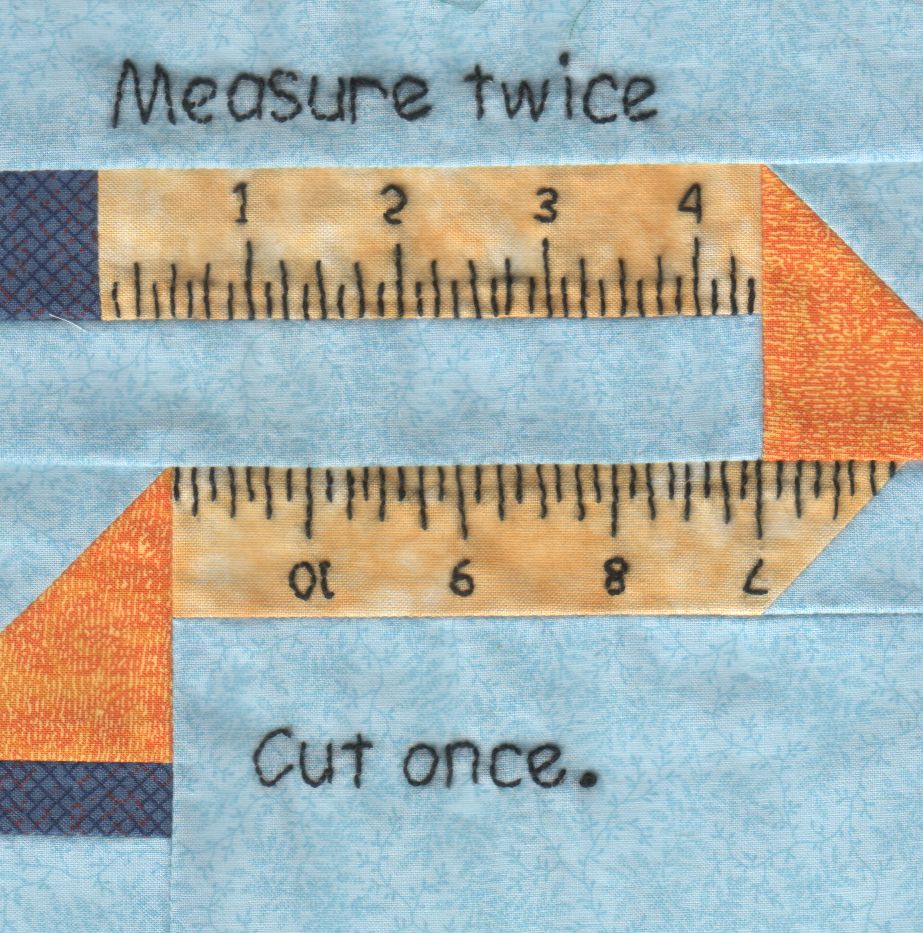
With “picture taking” reduced to laying each square face-down on the glass, closing the lid, and clicking Scan, the scanner’s throughput became the limiting factor. She scanned the blocks in the order of their release, while tinkering the auto-incremented file number across the (few) gaps in her collection, to produce 56 files with unimaginative auto-generated names along the lines of Block 19.jpg, thusly:
Block 19
The “square” images were 923×933 pixels, just slightly larger than the ideal finished size of 6 inch × 150 dpi = 900 pixel you’d expect, because we allowed a wee bit (call it 1/16 inch) on all sides to avoid cutting away the sharp points and, hey, I didn’t get the scan area exactly square.
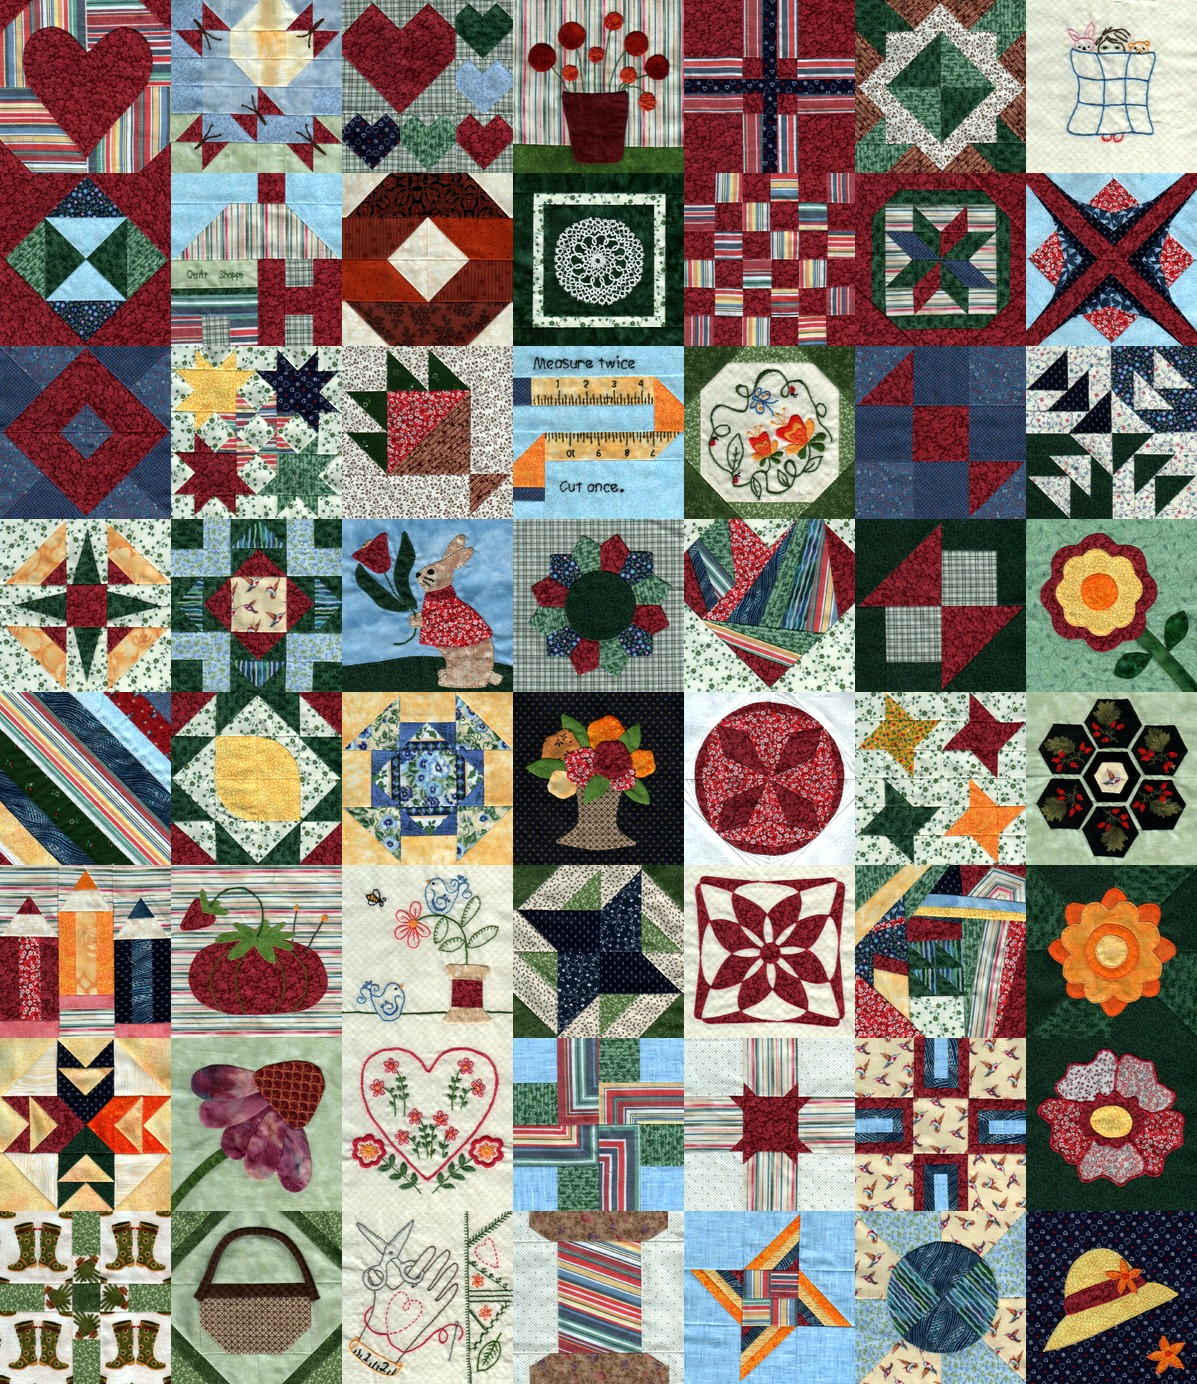
With the files in hand, turning them into a single page background image requires a single Imagemagick incantation:
I figured the -geometry value to fill the 8 inch page width at 150 dpi, which is good enough for a subdued background image: 8 inch × 150 dpi / 7 images = 171 pixels. Imagemagick preserves the aspect ratio of the incoming images during the resize, so, because these images are slightly higher than they are wide, the height must be slightly larger to avoid thin white borders in the unused space. With all that figured, you get a 1197×1384 output image.
Bumping the contrast makes the colors pop, even if they’re not quite photo-realistic:
Quilt block montage – contrast
I’ll lighten that image to make the Christmas Letter text (in the foreground, atop the “quilt”) readable, which is all in the nature of fine tuning.
She has 40-odd blocks to go before she can piece them together and begin quilting, with a few other projects remaining to be finished:
Mary quilting
(*) She’s a bit behind the block schedule, having had a year of gardening, bicycling, and other quilting projects, plus whatever else happens around here. Not a problem, as we see it.
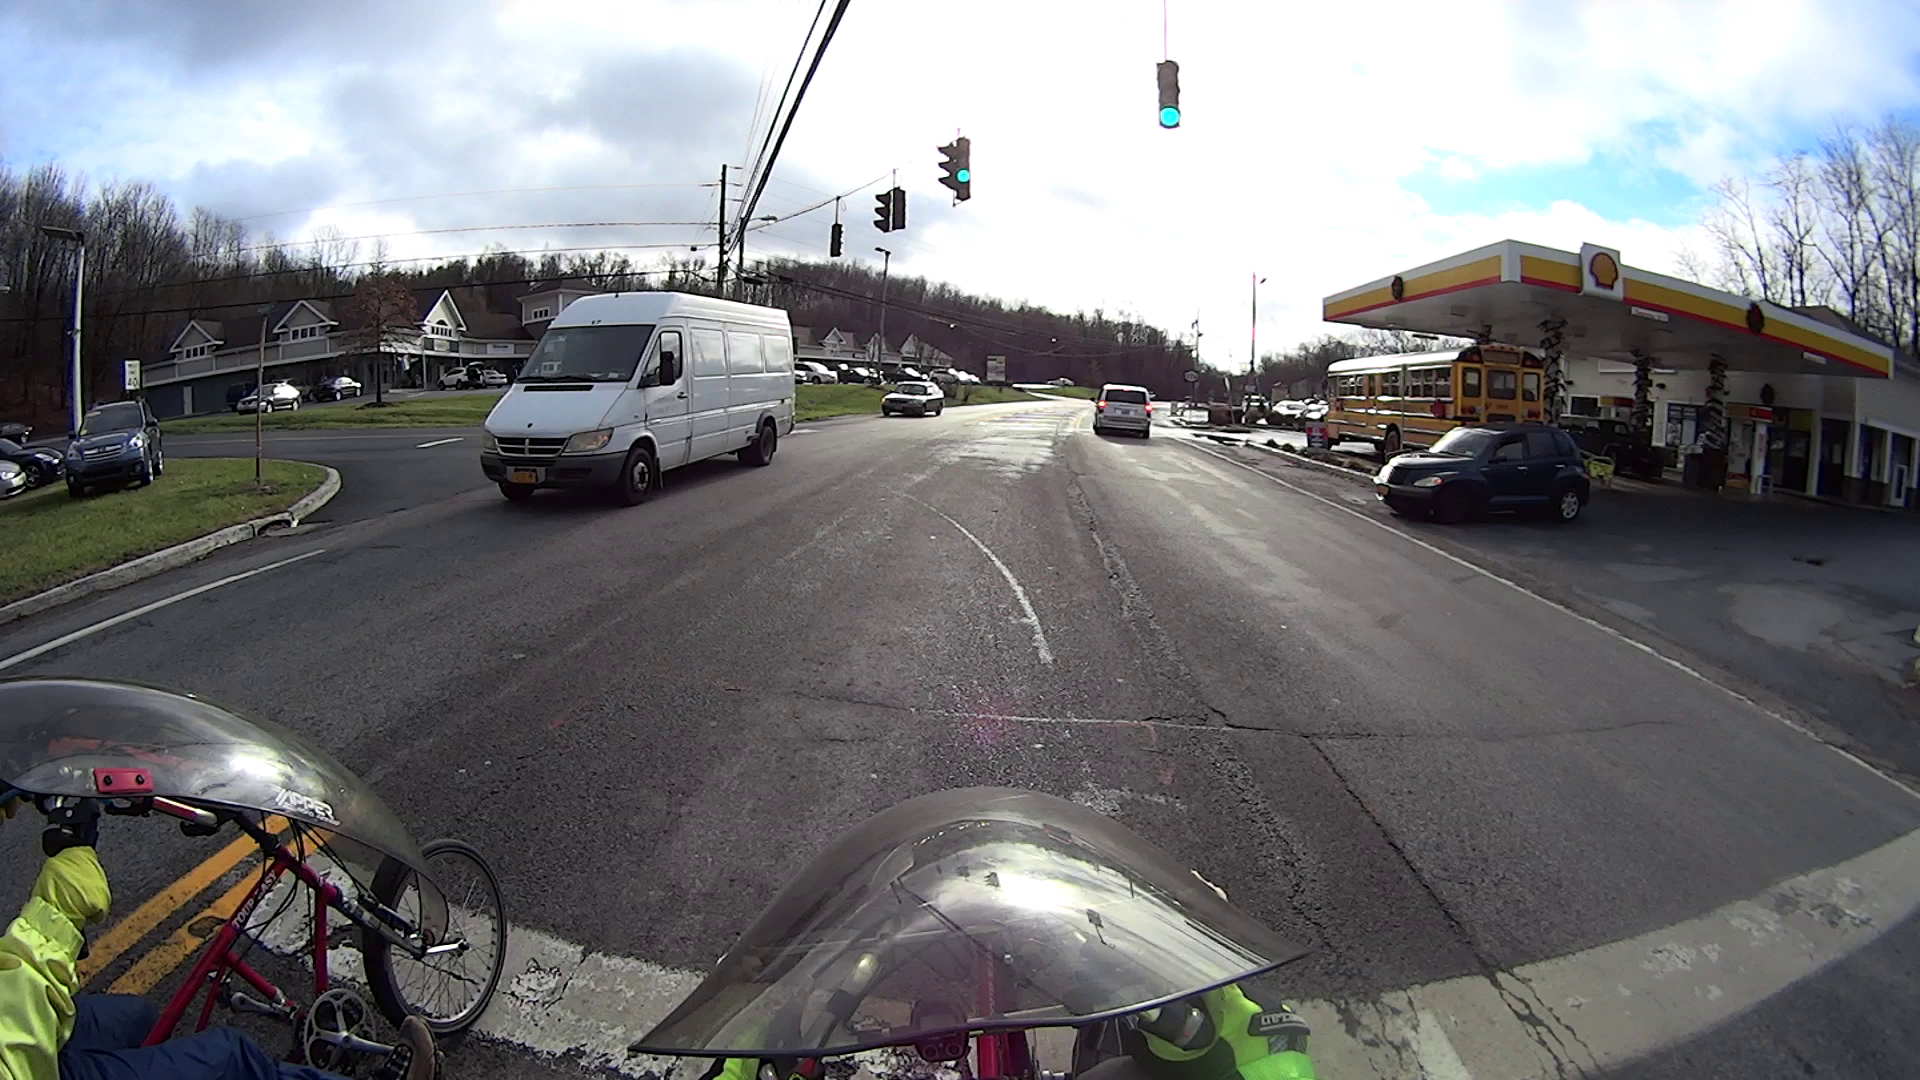
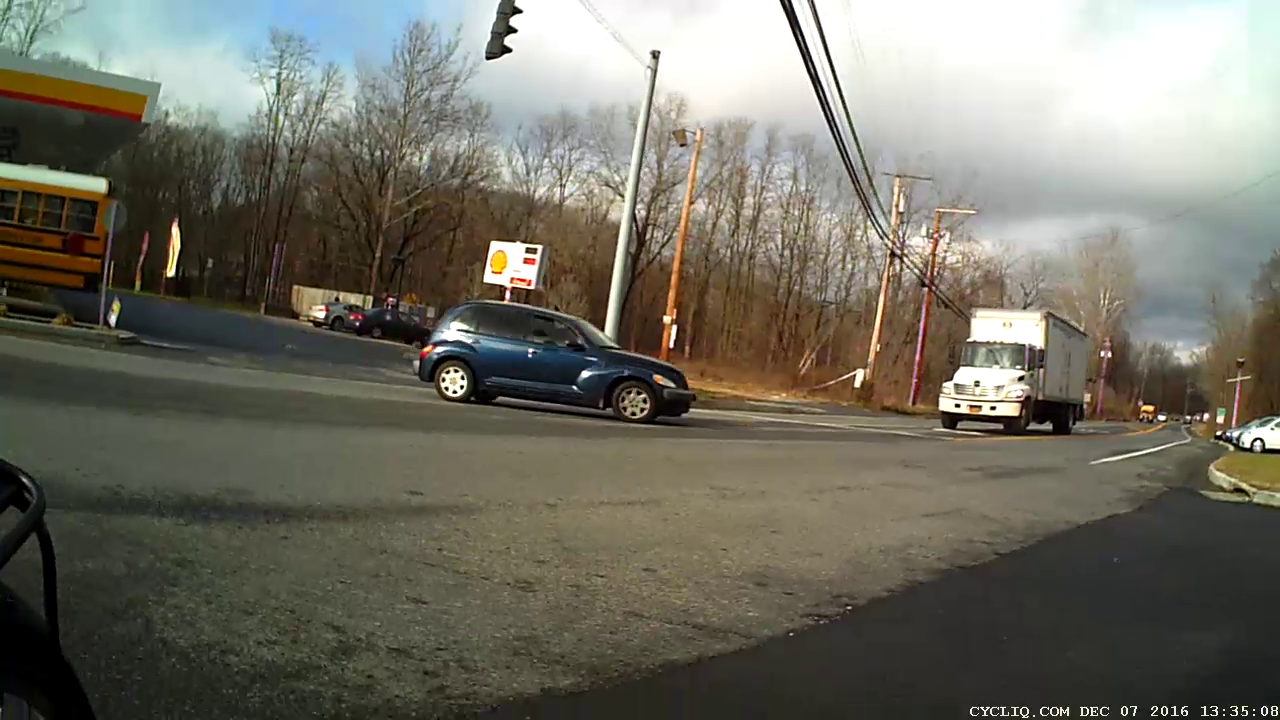
There’s no signal aimed into the gas station, so you must use your best judgement to determine when to enter the intersection. I’m not in enough of a hurry to (try to) ace out a truck, but ya never know …