Being a guy of a certain age with a diagnosis of Low Bone Density, I must increase my calcium intake. Rather than add a few hundred calories a day of calcium-rich food that my waistline does not need, I’ll see what adding 600 mg of calcium citrate can do.
Being a guy of a certain type, I prefer to fill my own capsules, which of course involves Quality Shop Time:
Quite some years ago, for reasons not relevant here, I acquired several of what were called “manual capsule filling machines” from the usual online sources. During the ensuing years, such devices have fallen under the purview of the DEA and vanished from the import market, leaving (AFAICT) one USA-ian supplier.
The key difference between “machines” for different capsule sizes is the plate holding the capsule bodies:
A complete machine includes three other capsule-size-related parts:
- A plate holding the caps
- A plate with conical holes used to shake caps & bodies into their respective plates
- A guide plate helping mate caps with bodies
In normal use, you put the “shake plate” on the body or cap plate, dump a pile into it, and shake until most of the caps / bodies fall into the holes. Then you manually insert the rest, invert any that fell in backwards, and generally mess around until they’re all properly oriented in their sockets. After filling the capsules, you put the cap + guide plates atop the bodies, press down firmly, and (ideally) produce 100 filled and sealed capsules.
It turns out Size 000 capsules are sufficiently chonky that I have no trouble capping the bodies by hand without those other parts, so making just the body plate seemed Good Enough™. The story might be different for Size 1 capsules.
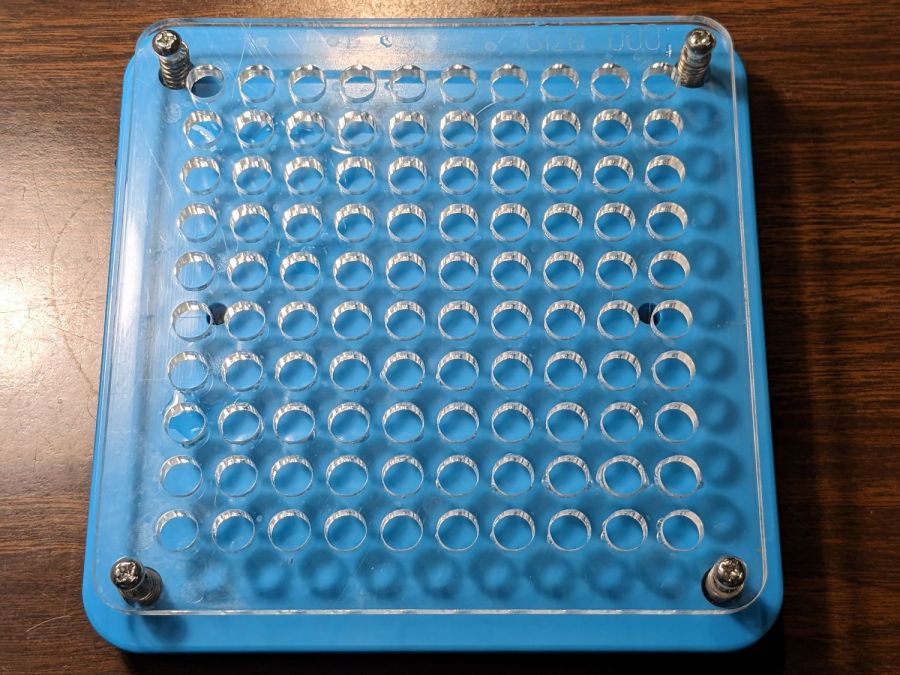
The external dimensions and screw holes match the original plate, so this one fits the same base:

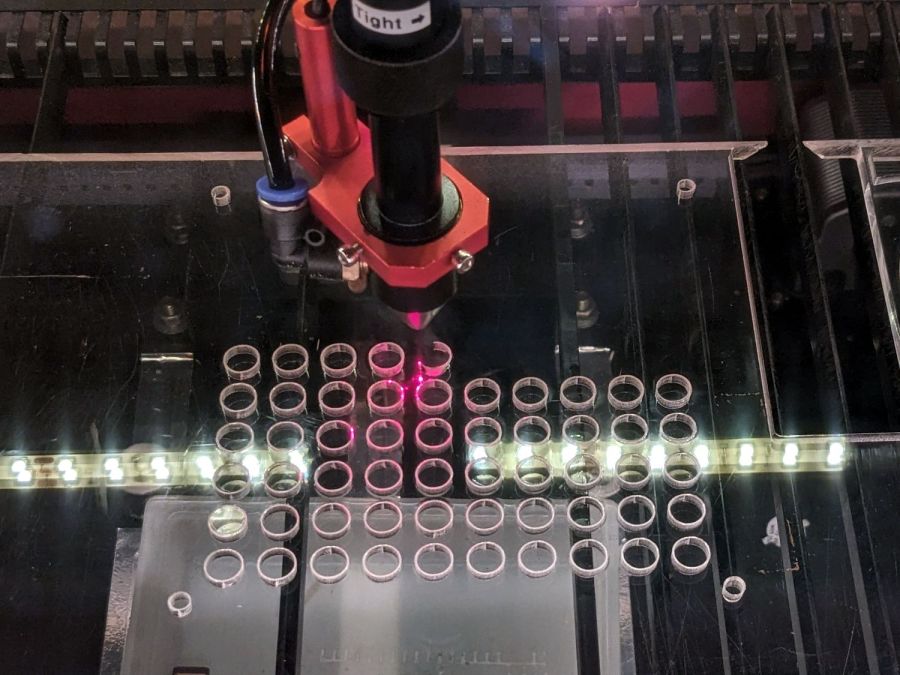
Make one plate and four spacing clips from 6 (-ish) mm acrylic.
If you can think of anything to do with 100 3/8 inch cylinders of 1/4 inch acrylic, clue me in.
Size 000 bodies are close enough to 3/8 inch that I cleaned up the holes with a step drill for a nicer fit. Perhaps making the plate from 3 mm acrylic would produce better results.
Four springs around the screws in the corners support the plate to allow pressing the caps in place. I adjusted the screws to put the top of the plate at exactly the height of the bodies above the blue base place, producing a smooth surface for scraping suspicious white powder into the bodies:
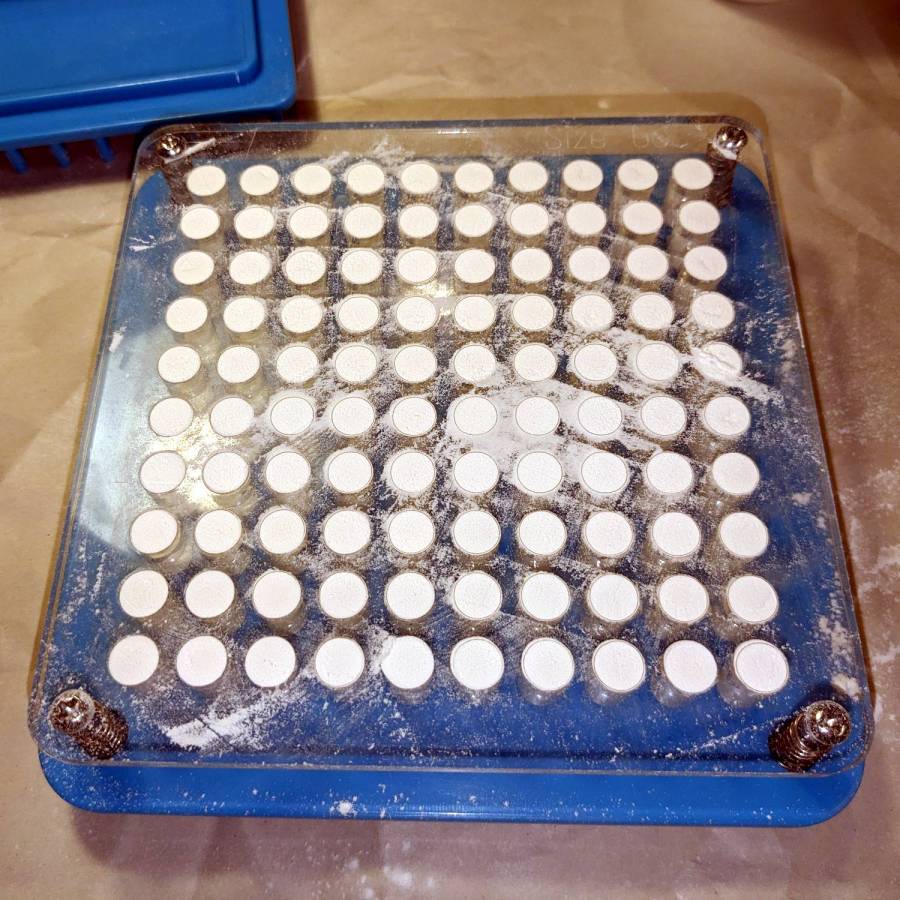
Iterate filling and tamping until the capsule contents are firm-but-not-overstuffed, then press the plate downward and secure it with the spacer clips:
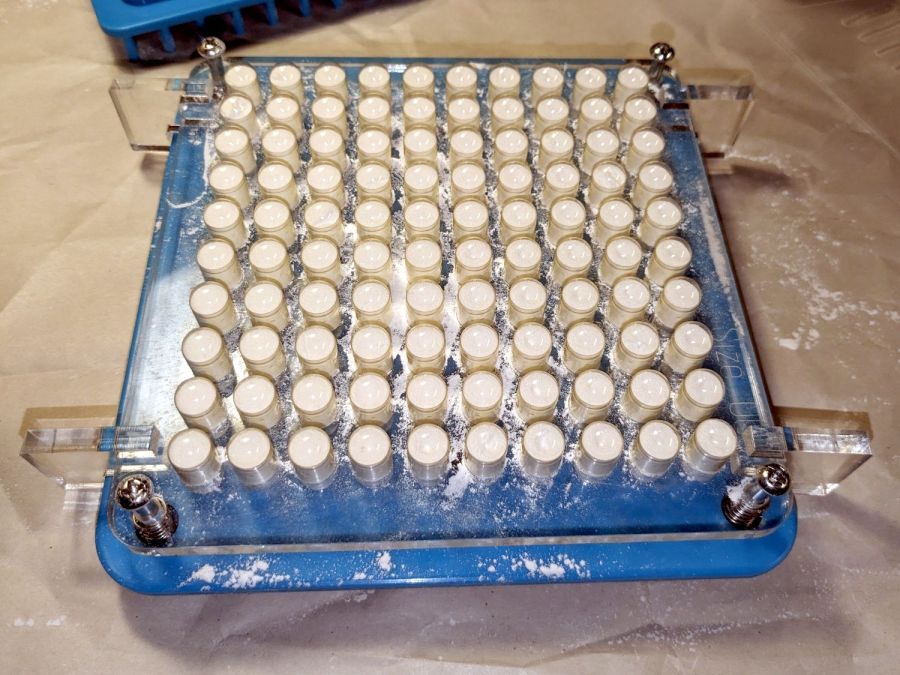
The clips hold the plate at the proper distance to let the caps slip over the bodies and lock in place. This is tedious, but much faster than doing the entire process on individual capsules one-by-one.
With the caps locked in place, flip the whole thing above a bowl, remove the clips, press the plate against the base, and 100 finished capsules shower into the bowl.
You could build a complete filler without having the blue base plate & springs, but I’ll leave that project to your imagination.
The LightBurn layout as a GitHub Gist:
No, I am not making one for you. :grin:

Comments
5 responses to “Gelatin Capsule Filler Plate”
Why not just mix it with your oatmeal?
Why do something the easy way when you can spend a few hours playing with your toys in the shop?
Gack! It isn’t exactly chalk (which is mostly calcium carbonate), but the stuff is thoroughly unappetizing.
As the saying goes: past the lips, past the gums, look out tummy, here it comes!
[…] red earring used up one of the hundred slugs left over from the capsule plate; I’m ready for a surge in […]
[…] can see the blob of glue holding one of the acrylic cylinders left over from the gelatin capsule filler; only 99 more to go! I had to turn it down by about a millimeter, an operation best left to your […]