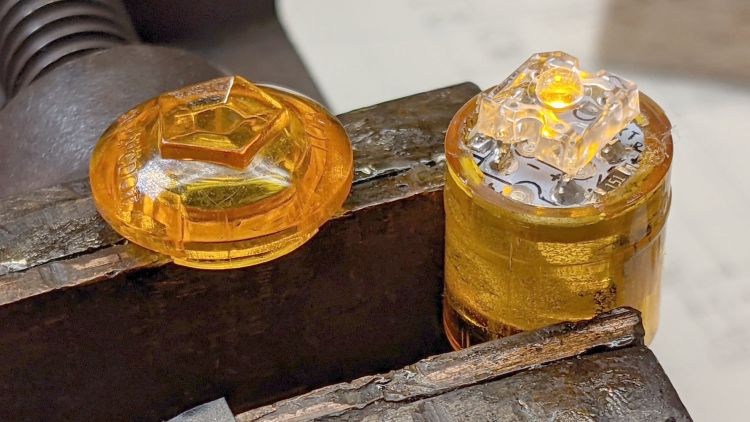
Start with the amber side marker light sporting a cataract and distorted beam:

Part off the lens:

The cut is just in front of the PCB and went slowly to avoid clobbering the SMD resistors very near the edge.
The cataract turned out to be crud adhered to the LED lens:

Brutal surgery removed the LED and installed a replacement:
The PCB had two 150 Ω SMD resistors for use with 12-ish V automotive batteries. While I had the hood up, I removed one and shorted across its pads to make the LED work with the 6 V switched headlight supply from the Bafang motor.
In round numbers, 6 V minus 2.2 V forward drop divided by 150 Ω is about 25 mA. The original LED ran at 35-ish mA, but it’s close enough.
Glue the lens back in place:

The bubbly stuff is solid epoxy from the original assembly, which is why removing the PCB is not an option.
The new LED is no more off-center than any of the others:

It does, however, sit much closer to the lens, due to the ring of plastic I cut away to get inside. As a result, the beam is mostly a single centered lobe with only hints of the five side lobes; there isn’t much waste light from the side of the LED into those facets.
Replace the one I originally put in the new fairing mount:

However, it’s still not much more than a glowworm in the daytime, so we need more firepower …

Comments
9 responses to “Amber Side Marker Light Hackery”
Is there a photo of the new and improved beam pattern?
And does it do the job for increased conspicuity?
No photos, but it’s basically one big blob surrounded by five smaller and much dimmer blobs; the LED turned out to be pretty well centered.
What it definitely is not: conspicuous. The OEM LEDs seem much brighter at 30 mA than this one at 20 mA, but IMO running it hotter won’t make it bright enough.
I want to try better optics in front of a brighter LED to get a larger spot that should be more visible from a distance. There’s a reason why automobile lights must have a minimum area, as well as a minimum brightness!
Lasers!! That’s what’s required. Really show those motorists you mean business. Star Wars (film and Bush era versions) are suitable exemplars. What could possibly go wrong…
The only gotcha would be when they can no longer see me coming around the glare!
A while ago somebody came out with a laser-based hologram projector to “draw” a bike lane behind you, obviously for night riding. Totally impractical, but a clever idea nonetheless.
I wonder if running it at 5x the current for 20ms out of every 100 would be more, ah, conspicuous.
Makes perfect sense to me, but I’ve been trying to avoid adding compute power. Feeding 6 V headlight power into a low dropout Arduino regulator opens up far too many possibilities for me to contemplate right now. [sigh]
Surely a tweaked LM3909 would do the trick, and I know you have some of those on hand. :)
Unless you really want to blink out morse-code profanities — but that seems less your style than mine…
The Basement Warehouse has run out of LM3909 chips!
We’ve seen bike headlights / running lights with attention-getting Morse-like patterns; the most common resemble QRS-style [T S] and [T I] with a looong pause before the pattern repeats. I could stir an Arduino with the Morse code library together with a MOSFET and it’d Just Work.
In a world where one can get a 1 W amber LED on a heatsink plate, a 20 mm total internal reflection optic, and a tiny step-down converter for maybe three bucks all in, I’m still trying to avoid blinkies … [grin]
[…] The LED drops about 2.5 V at 430 mA (1.08 W). The bench supply delivered 6.3 V at 190 mA (1.2 W) to simulate the headlight output of the Bafang motor controller. […]