Ed Nisley's Blog: Shop notes, electronics, firmware, machinery, 3D printing, laser cuttery, and curiosities. Contents: 100% human thinking, 0% AI slop.
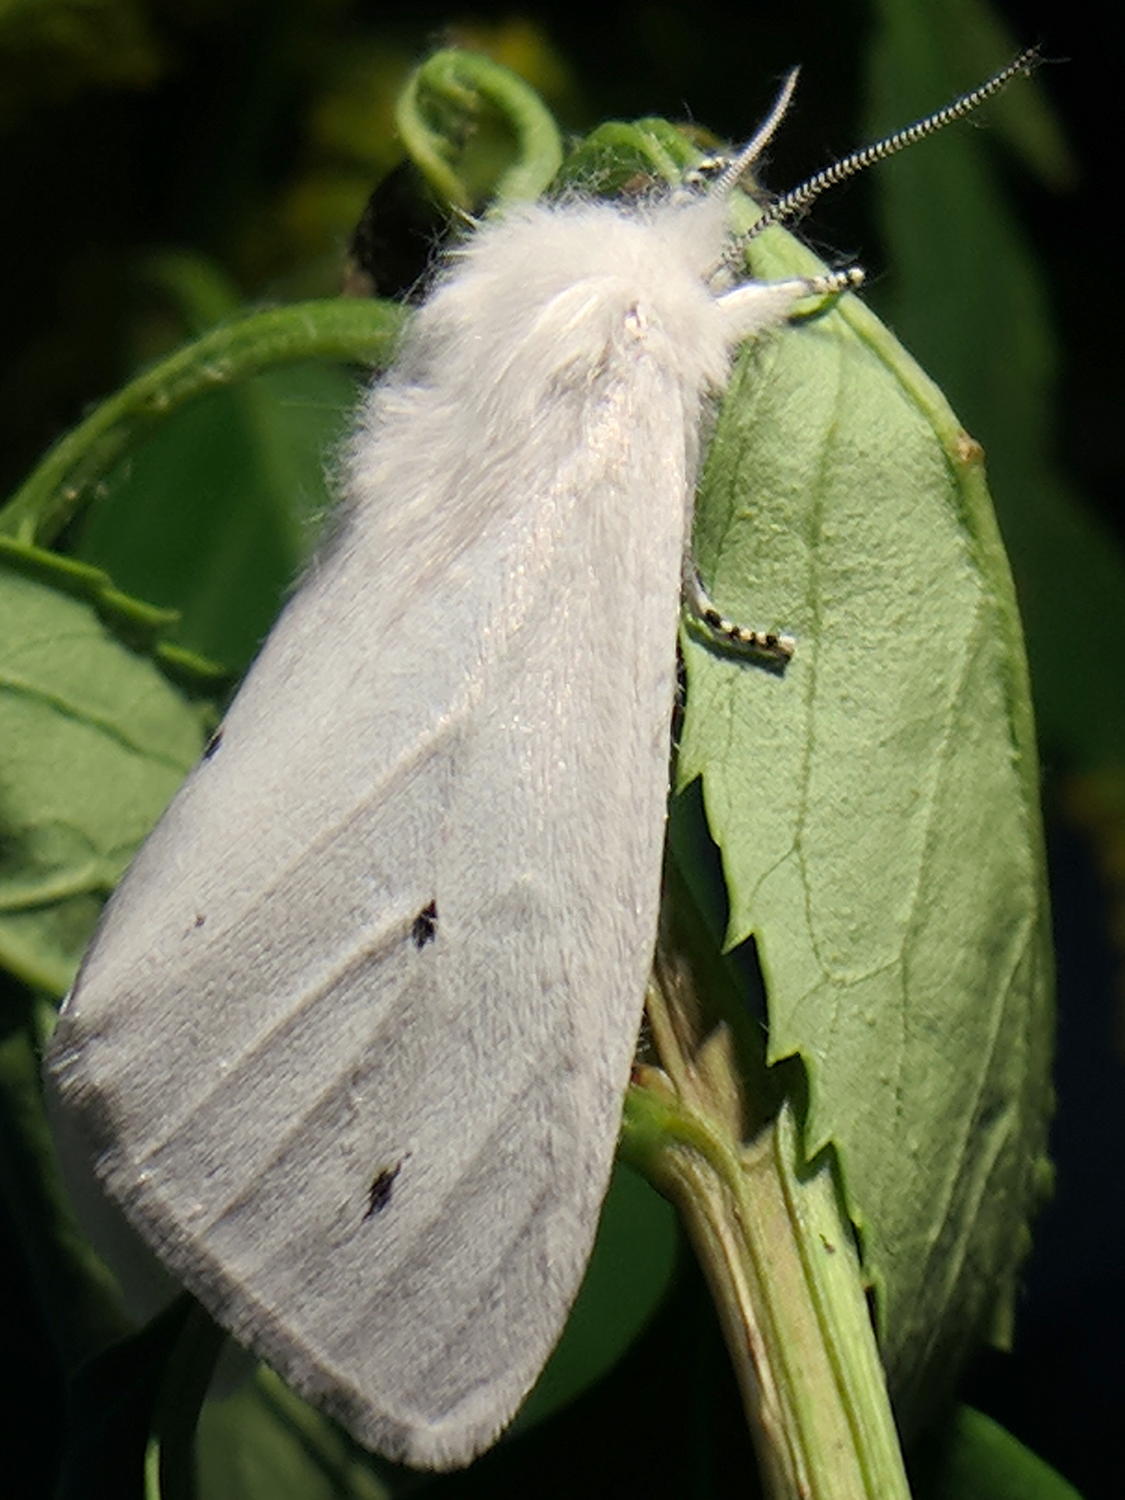
Moth 1, with wonderful antenna fringes identifying him as a male:
Spilosoma virginica 1 – right
Moth 2, a female with smaller antenna:
Spilosoma virginica 2 – right
Moth 3, another male:
Spilosoma virginica 3 – dorsal
The underside is diagnostic (ignore the crud on the aquarium glass):
Spilosoma virginica 3 – ventral
We set each one on the goldenrod plant inside the garden gate, whereupon they charged up in the sun for an hour or so, then flew off about their business. They may eat a few leaves in the garden, but they’re not particularly harmful to anything and entitled to a peaceful life.
I must organize all their pictures into a life history.
Replacing the 22 pF series capacitor with a variable cap went smoothly after I got over having to rip-and-replace the adjacent socket and header, too:
LF Crystal Tester – variable CX
The circuit remains the same, plus a test point to simplify measuring the actual capacitance:
Test Fixture – variable CX
I didn’t add a jumper to disconnect the crystal fixture, because (I think) it would add too much uncontrolled stray capacitance: removing the header would disconnect the socket / header wires.
The little red cap adjusts from (nominally) 3 pF to 28 pF over half a turn, without a stop. The rotor does have a marked side, but basically you’re supposed to tune for best picture and leave it at that.
The AADE L/C meter works fine, but in the low pF range everything affects the reading. The only way to measure the actual capacitance seems to be:
Clip one lead to the top of the 24 Ω terminating resistor
Hold the other within a millimeter of the test point pin
Zero the meter, note any residual offset
Touch clip lead to test pin
Note reading, mentally subtract residual offset
The as-installed range spans 6.5 pF to 28 pF. I think I can measure it to within ±0.05 pF, with a considerable dependence on maintaining the same pressure on the clip lead.
I suppose if you were doing this for real, you’d throw another Teledyne relay at the problem.
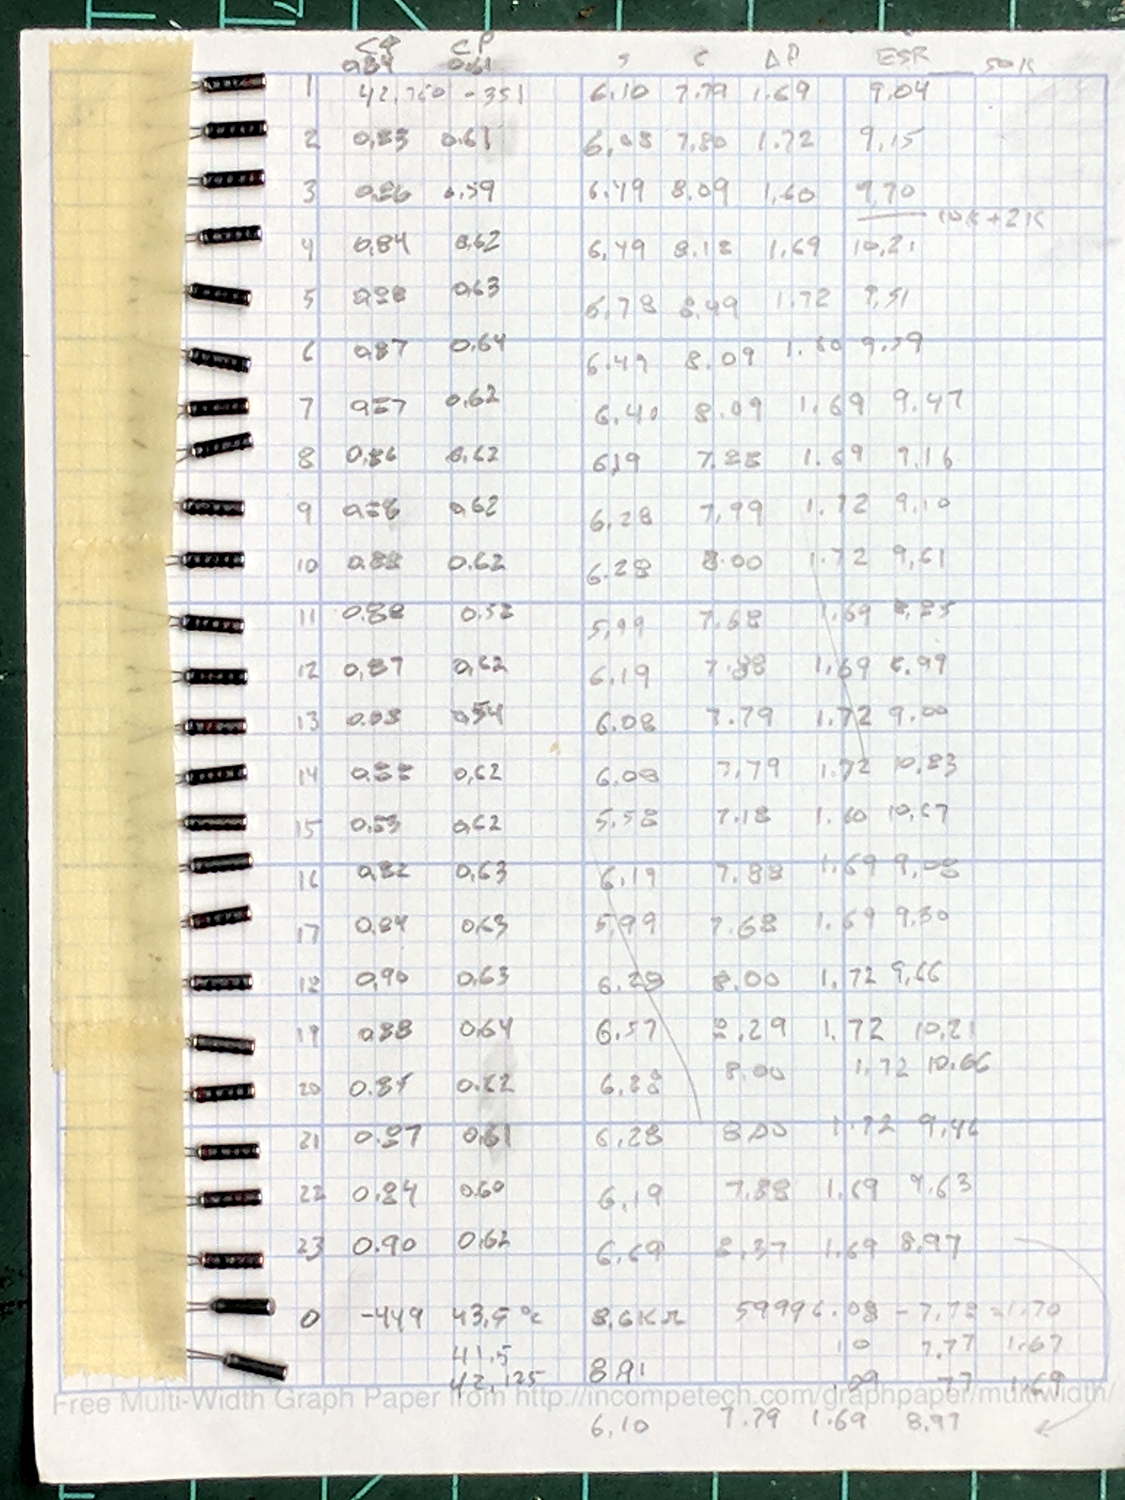
The second batch from the same eBay source arrived a few months later and I finally got around to measuring them:
60 kHz TF26 resonators – Batch 2 data
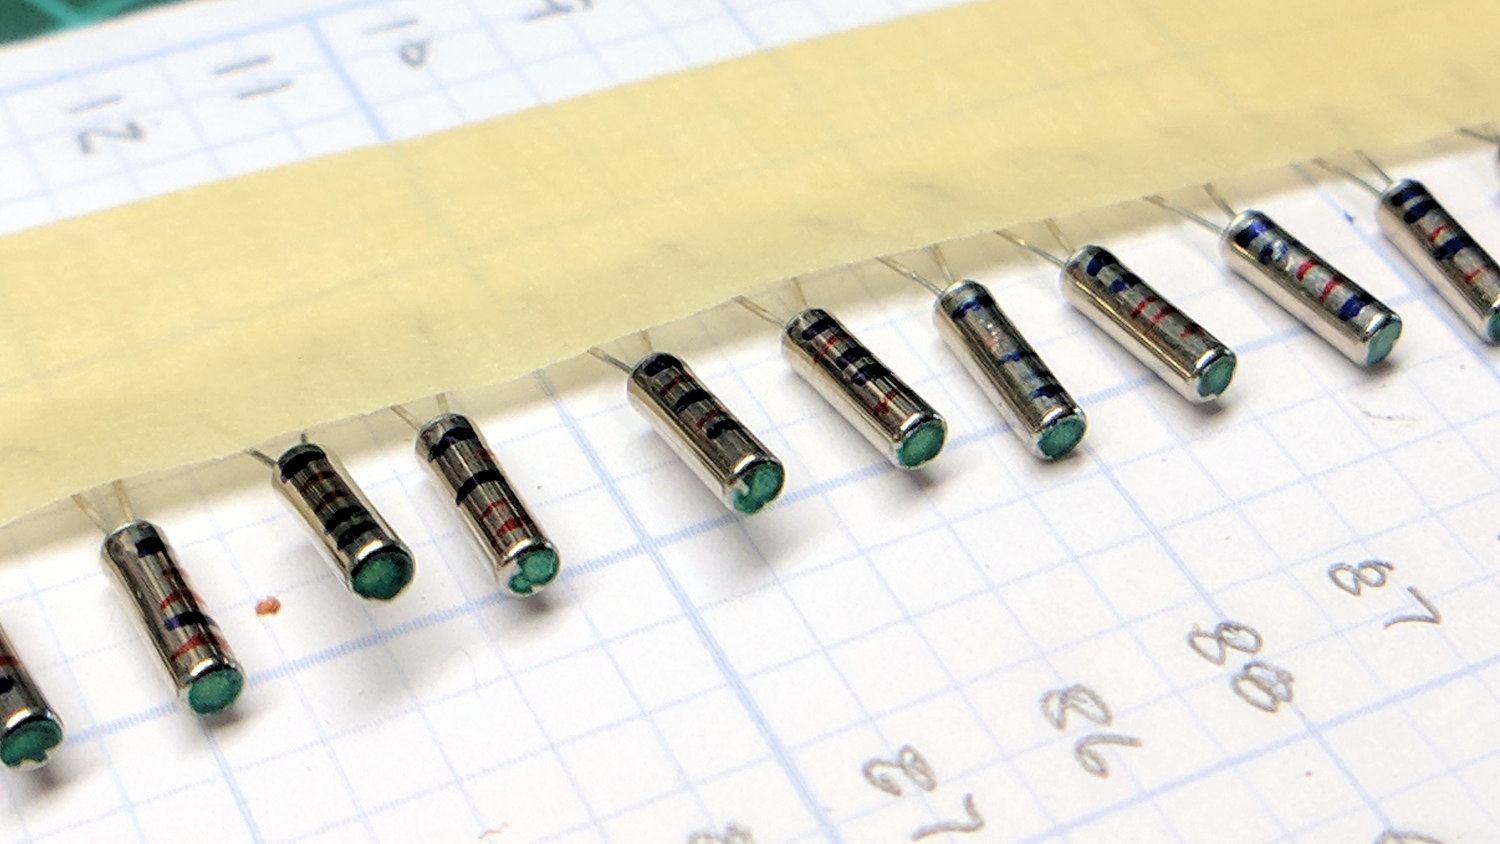
A dot of green Sharpie on the AT26 cans identifies the second batch:
60 kHz TF26 resonators – Batch 2 marking
The alert reader will notice an un-measured 25th resonator at the bottom of the first batch. I dropped one from the second batch under the Electronics Workbench, found it, then also found its long-missing brother; now I have a genuine it’s-never-been-used resonator, just in case the need arises.
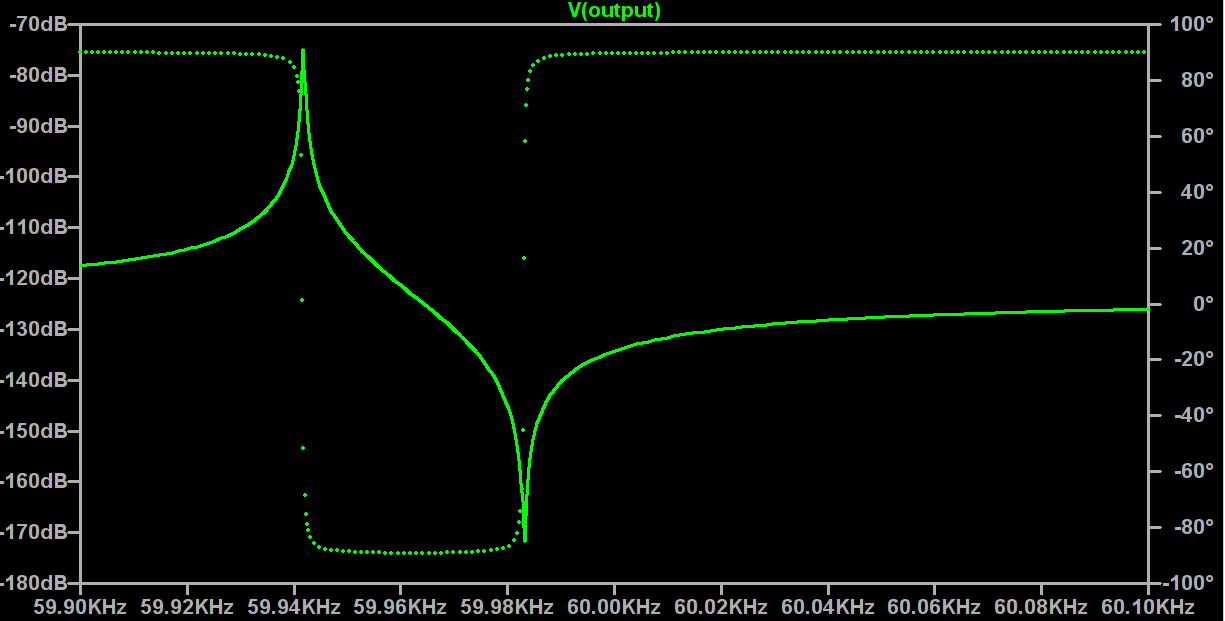
A quick-and-dirty simulation shows the series and parallel resonant peaks come out close, but not dead on, the actual measurements:
Simulation – 60 kHz resonator
The model obviously doesn’t exactly match reality, which isn’t too surprising. However, I don’t understand something about tuning fork resonators, because the parallel resonance shouldn’t shift upward with the series resonant peak when the circuit gains a 24 pF series capacitance:
Resonator 0 Spectrum
Suffice it to say that doesn’t happen with the simulation.
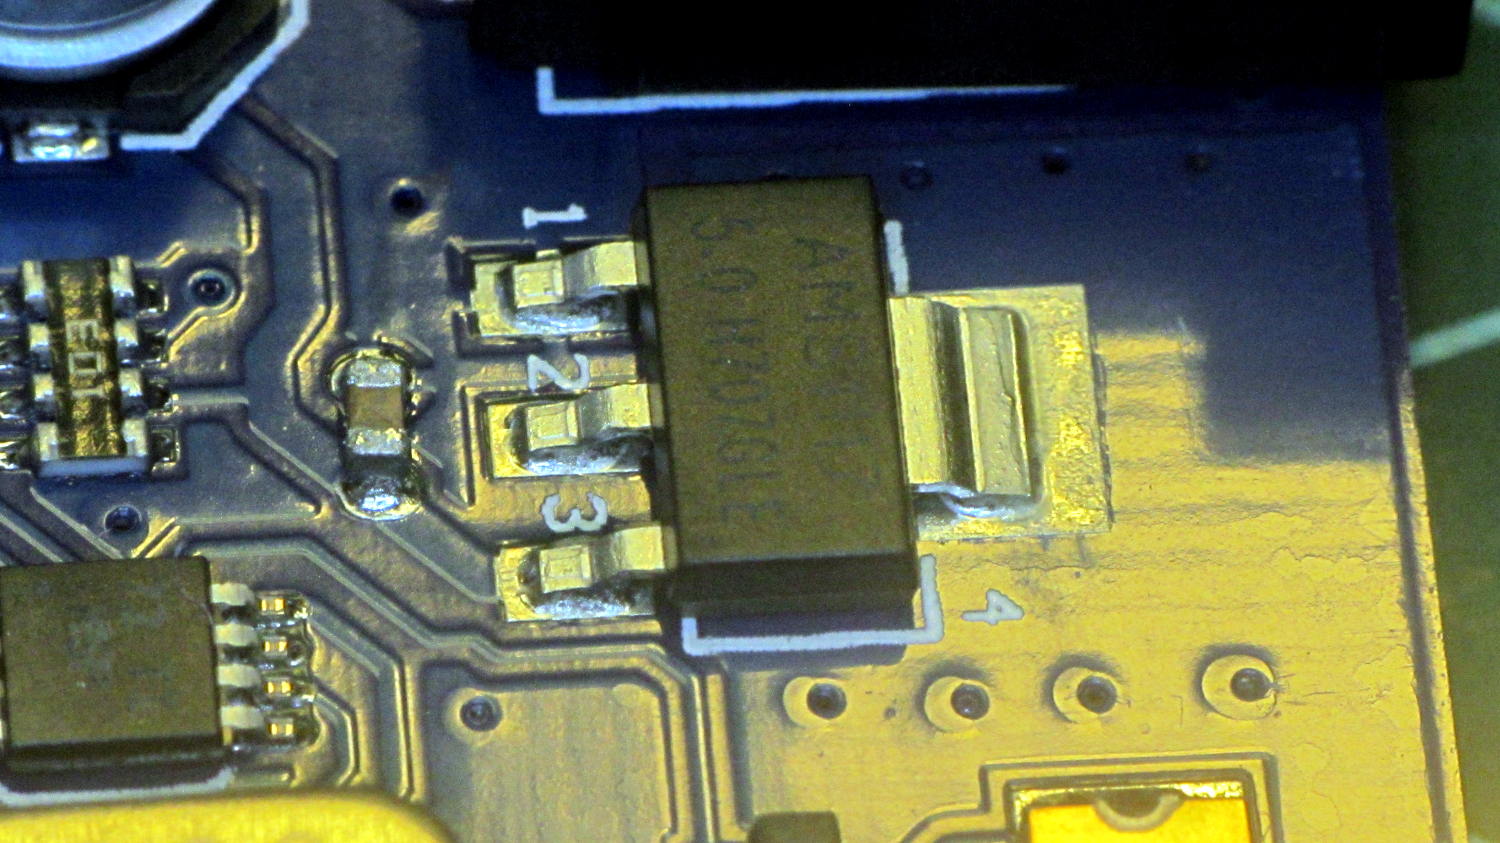
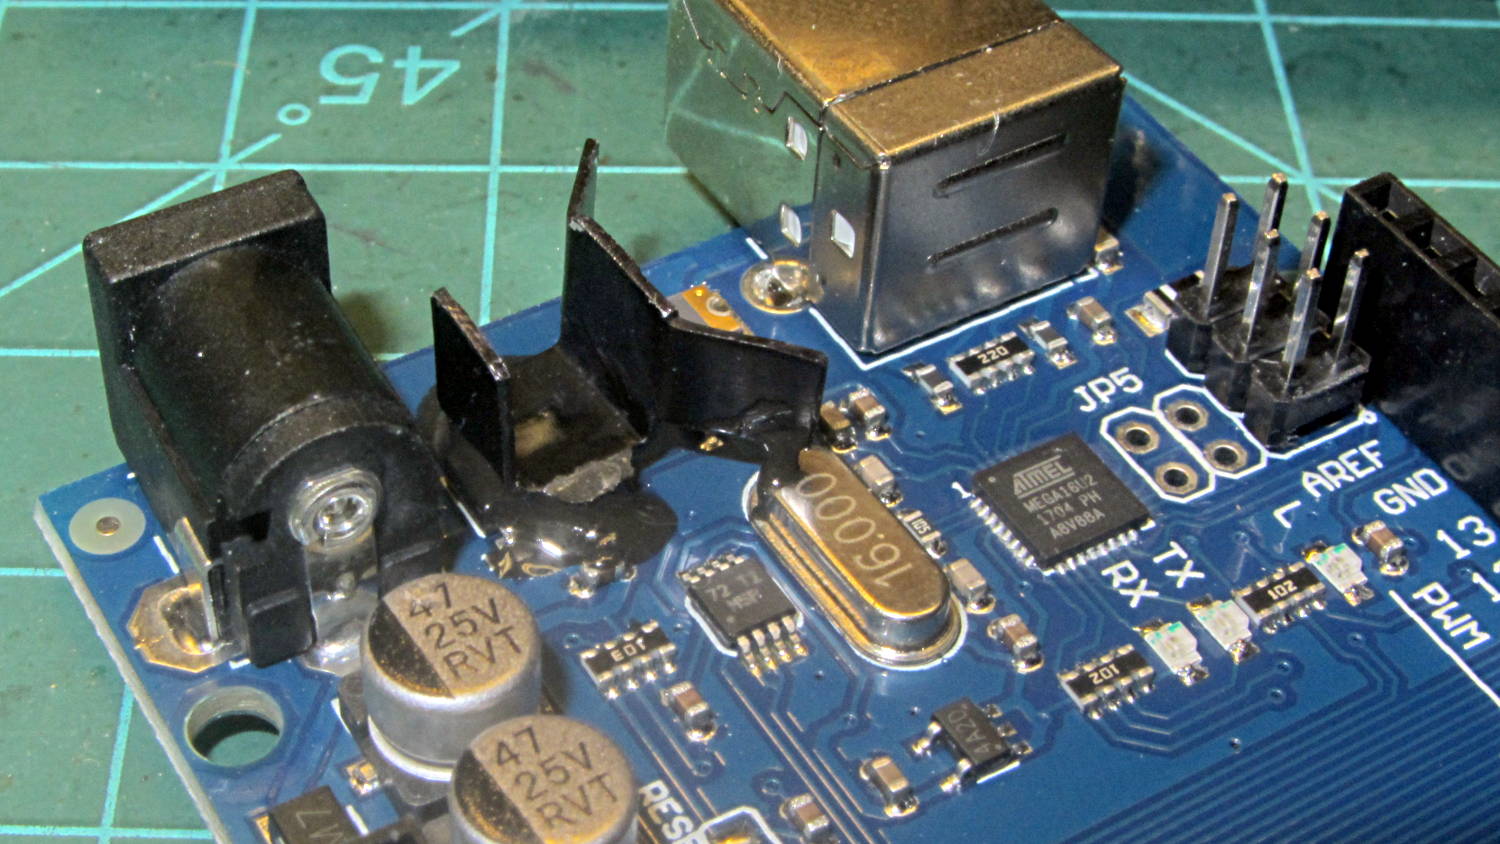
I sawed up a clip-on heatsink originally intended for a 14 pin DIP, bent it a bit, and epoxied it atop the regulator with enough of a blob to contact the copper pour:
RAMPS Mega – regulator heatsink – clamping
That’s metal-filled JB Weld for good thermal conductivity and electrical insulation:
RAMPS Mega – regulator heatsink
The blob affixing the heatsink to the crystal can was an oopsie, but won’t do any harm. It’s not clear the heatsink will do any good in that confined space, but those regulators lead a rough life and need all the help they can get.
I’d rather see a knockoff than a counterfeit, although by now there’s really no way to tell if it’s a counterfeit knockoff. The Kynix datasheet looks like a direct rip from Allegro.
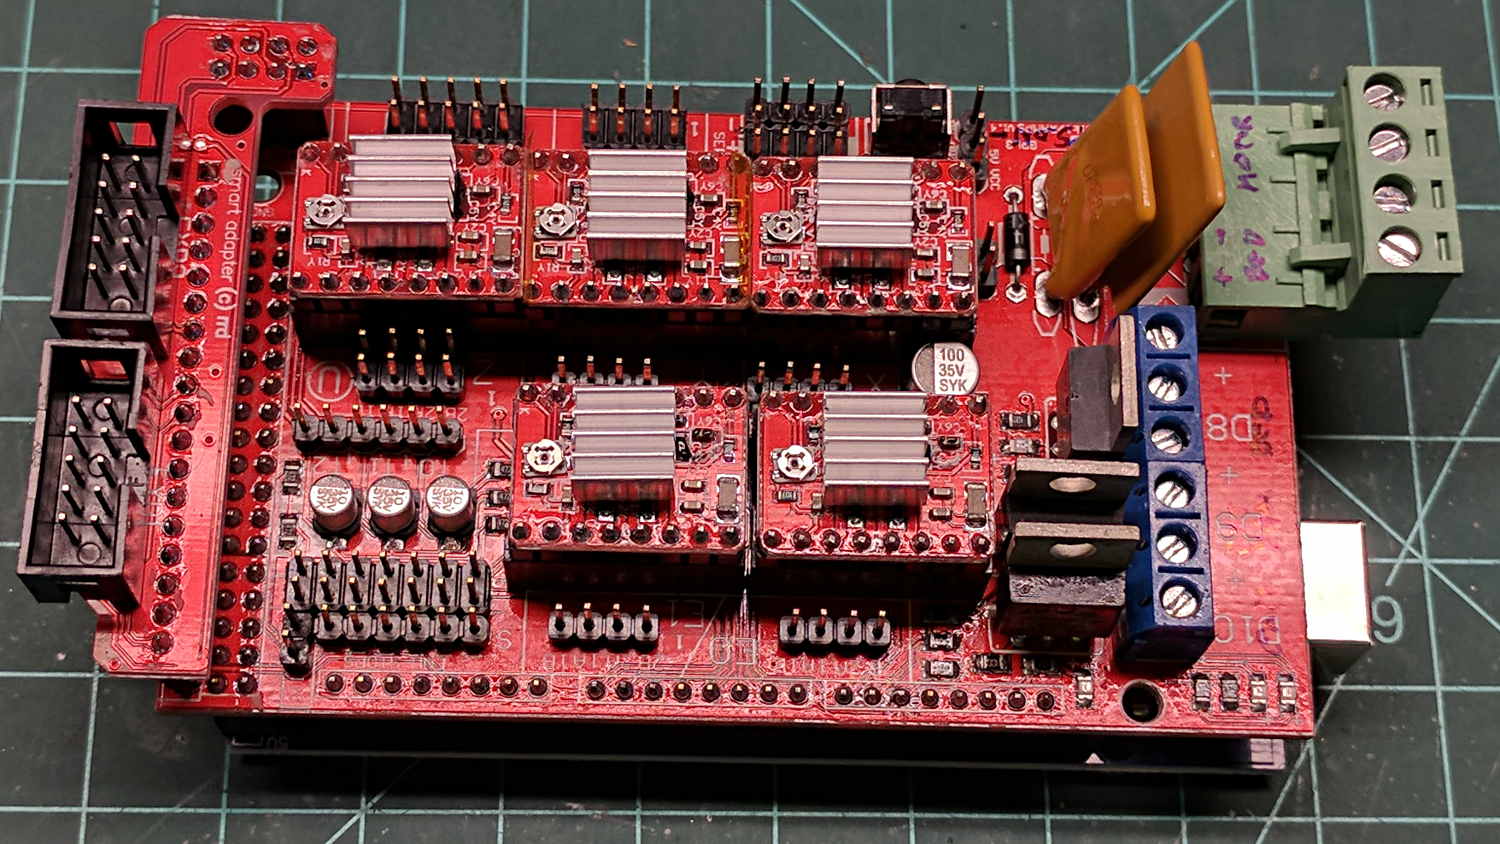
They now sport cute little heatsinks, which, for all I know, might help a bit:
RAMPS shield – stepper heatsinks
The driver boards are slightly longer than the spacing mandated by the continuous socket strips under the three-in-a-row layout:
RAMPS – stepper driver board fit
Introducing them to Mr Disk Sander (turned by hand) knocked off just enough to make ’em fit.
The replacement NP-BX1 batteries arrived and, as I expected, perform just as badly as the previous pair:
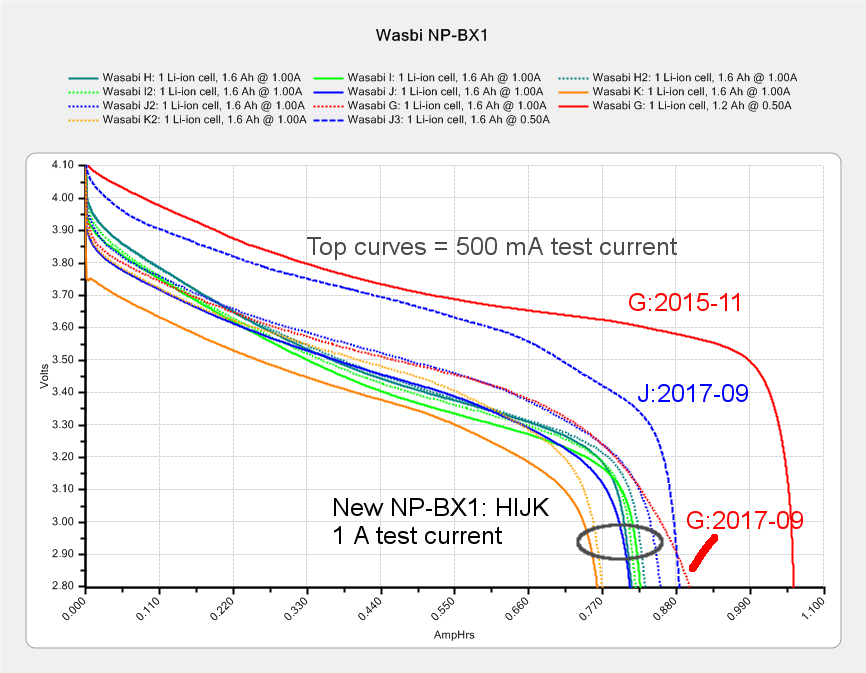
Sony NP-BX1 – Wasabi GHIJK – 2017-09-01 – annotated
The note I sent to Wasabi’s tech support summarizes the details:
The second pair of NP-BX1 batteries are just as bad as the first two. In fact, all four perform worse than the nearly two-year-old Wasabi batteries I’ve been using.
The graph shows the test results from my CBA III analyzer. All batteries were all charged in a Wasabi wall charger.
The top solid red curve shows the as-delivered performance in late 2015 for the battery I labeled “G”, tested at 500 mA. It delivered only 1 Ah, not the claimed 1.6 Ah, even at that relatively low current, but has delivered over one hour of service in the camera.
The top dotted-blue curve shows the as-delivered performance for the NEW battery I labeled “J”, also tested at 500 mA. It delivers only 0.88 Ah, 55% of the claimed 1.6 Ah, at a much lower voltage while discharging.
After two years, OLD battery “G” has more capacity and a higher voltage than the NEW battery “J”!
The lower curves shows the results for the four most recent batteries I labeled H I J K, all tested at 1 A to better match the camera’s actual current; the dotted traces mark the second test of each battery.
The orange traces show battery K has about 0.77 Ah of capacity, less than half of the claimed 1.6 Ah and much worse than the others.
I also re-tested battery old battery G at 1 A, as shown by the dotted red curve labeled “G:2017-09”. It outperforms ALL of the new batteries!
Batteries H and I have date codes BQF22, which I interpret as 2017-06-22: fairly recent stock.
Batteries J and K have date codes BPL28: 2016-12-28. They’ve been sitting around for a while, which may account for the poor performance of battery K.
These Wasabi batteries cost roughly twice (*) as much as they did in late 2015, have /much/ lower capacity, and, to judge from the date codes, they’ve been consistently poor since late last year.
What is going on?
It’s worth noting that Wasabi NP-BX1 batteries are currently $16 for the pair on Amazon and were $9 in late 2015. Allegedly genuine Sony NP-BX1 batteries run $50 MSRP and a suspiciously consistent $37.99 from all the usual big-box sources, including Amazon, where they’re out-of-stock for the next few months. Combining the number of counterfeits in the supply chain with Amazon’s commingled SKU stock bins, I have my doubts about what I’d get by increasing my battery spend by a factor of five.
I think it’s about time to conjure an external 18650 holder / helmet mount for that camera and be done with it.
[(*) Edit: I screwed up the unit of measure: the old invoice had two single batteries. The new order was one pair, so I now pay slightly less for much worse performance. A refund is wending its way through the system.]
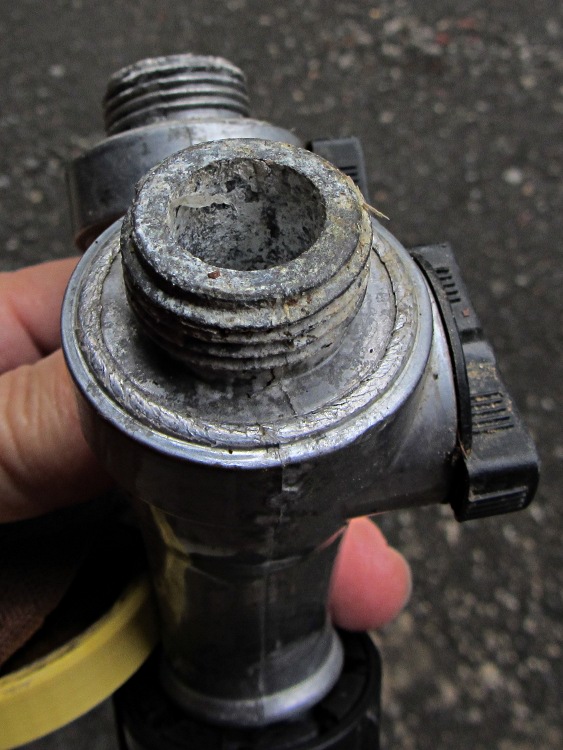
The corroded Y valve, minus another failed hose fitting, recently emerged from a heap o’ stuff on the Basement Laboratory Bench. This old photo gives you an idea of what happens to cheap pot metal in a garden:
Corroded Garden Y Valve
I dropped it Y-end-down into a container of white vinegar for a week, after which a few minutes of scrubbing produced a workable result:
Garden hose Y valve – after vinegar soak
The threads on the left side are pretty much gone. The hose fitting protected the threads on the right, but was corroded firmly in place; a penetrating oil soak and concerted muttering removed it.
All of the garden hoses and fittings out in Mary’s Vassar Farms plot have survived well beyond their best-used-by date. Given that we salvaged many hoses from the Farm’s end-of-season midden heaps, they don’t owe us much …
This eight-pointer was one of two browsing in the back-yard grove:
Eight point buck deer in velvet
The other was a mere four-pointer. In a few weeks they’ll get all feisty and browse the grove in shifts.
The notion of a “suburban hunting license”, perhaps with crossbows, may eventually gain traction.
A few days later, Mary awoke to a great clattering caused by a buck fighting free of the slot between the garden’s mesh “deer fence” and the neighbor’s wood fence, flattening the corner post in the process. A similar encounter a few years ago ended poorly.










 The Smell of Molten Projects in the Morning