From the start, the (second) J5 V2 flashlight had an erratic switch that flickered the LED at the slightest pressure. Not enough to switch modes, as it does with a half press, but enough to show something’s not quite right inside.
Taking it apart requires a pin wrench, which I have, but the deeply recessed ring required more reach than any of the tips I’ve made over the years. Introducing a pair of stainless steel 10-32 screws to Mr Grinder added two more pins to the collection:
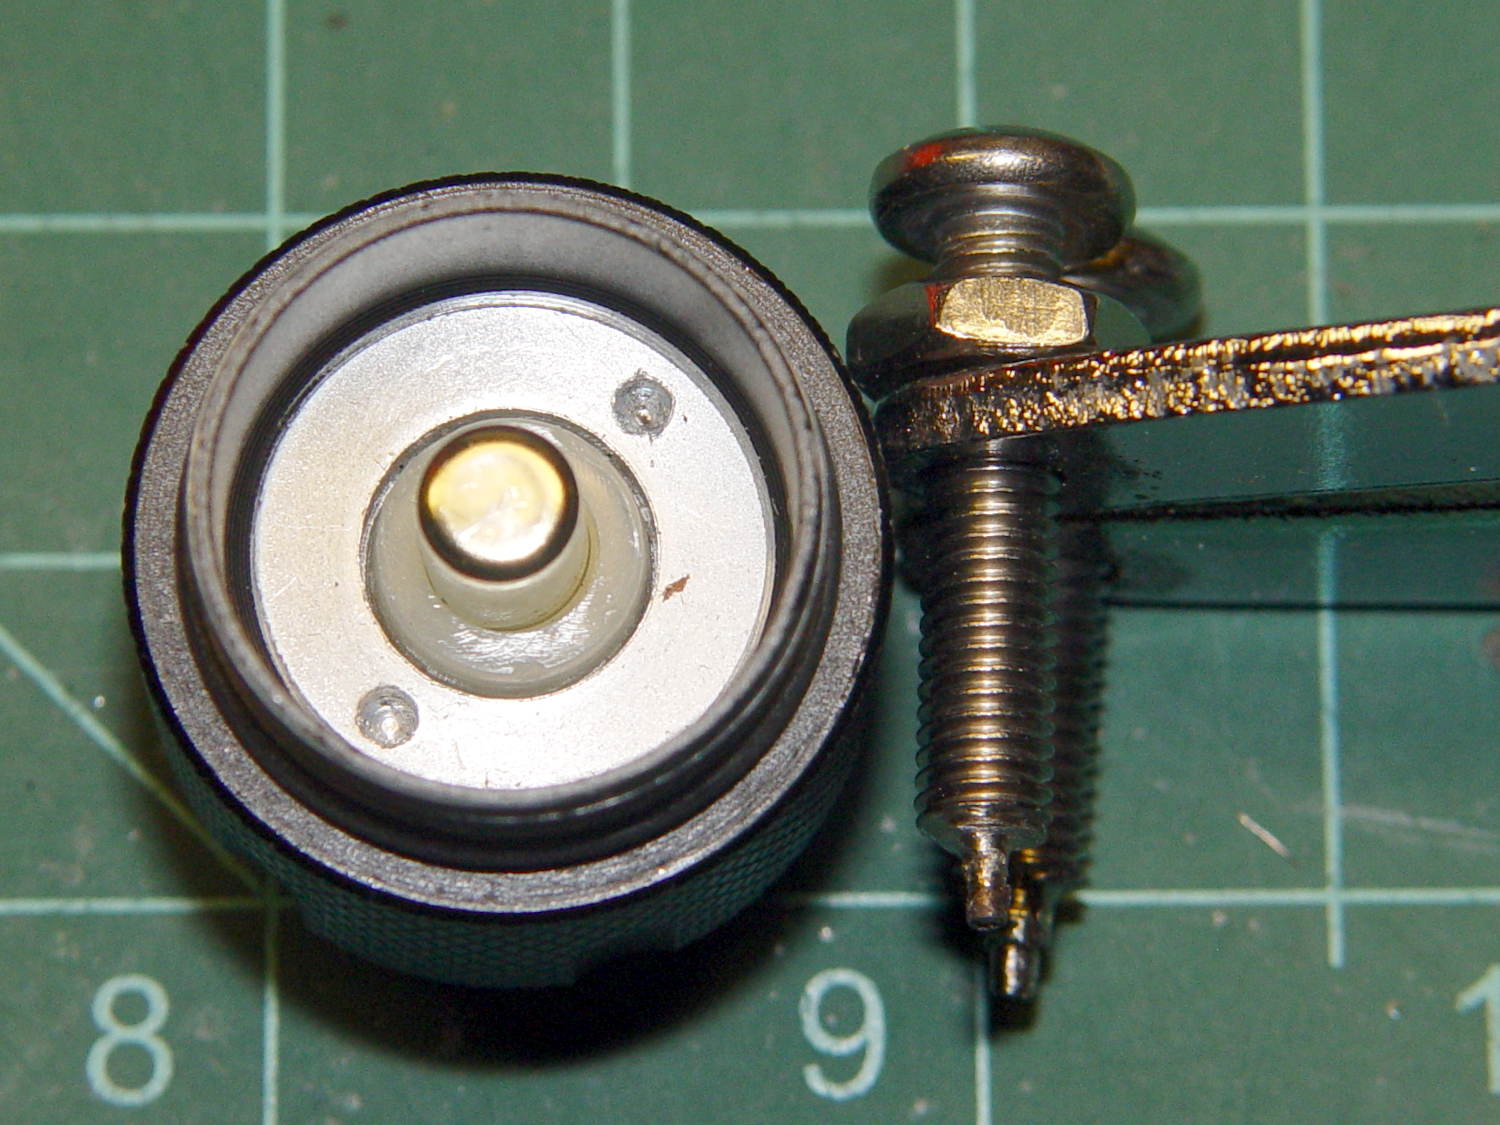
The lock ring in the flashlight cap turned out to be finger-loose, certainly contributing to the problem. Removing the lock ring, peeling the rubber dome out of the cap, and poking with a punch sufficed to drive out the guts of the switch assembly:
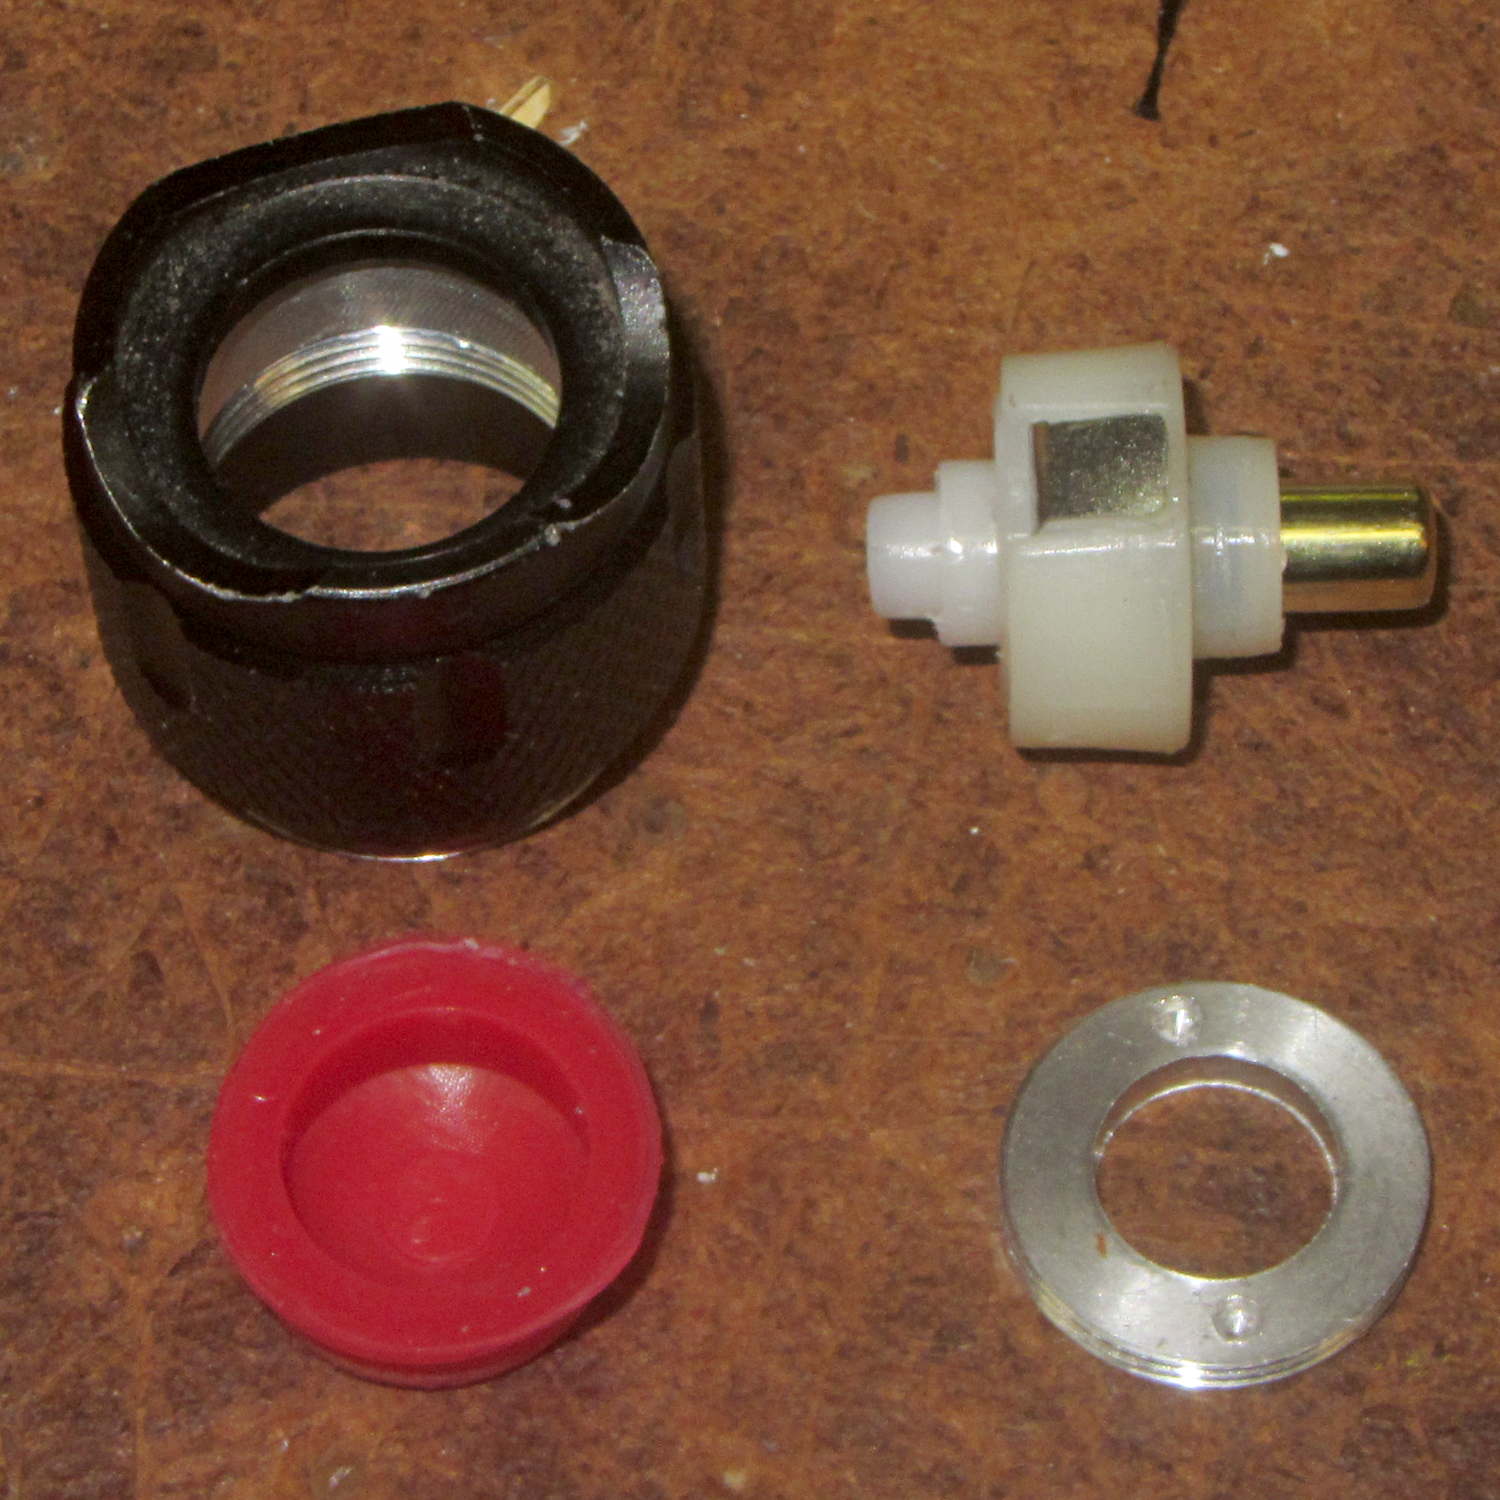
Which consists of, as you’d expect, the cheapest possible parts that don’t immediately fail.
The (steel) tab sticking out of the actual switch (in the upper right) contacts the inside of the (aluminum) cap. I bent it slightly outward, added a trace of DeoxIT Red, reassembled everything in reverse order, and it’s all good for the first time in its brief life.
I’d rate J5’s QC as Below Average, given that the first light arrived with built-in dirt and its replacement (this one) had an alien egg next to the LED, plus this loose switch lock ring + crappy tab contact.
The J5 V2 light claims 750 lumen output, but the spot is nowhere near twice as bright as the LC40 lights on the bikes and much dimmer than the LC90 light (which is too big for the bikes), all tweaked for equivalent-size illuminated areas. Given that lumens measure total output and candela measure lumen/steradian, there’s some wiggle room for misinterpretation.
Won’t buy another, for sure.

Comments
4 responses to “J5 V2 Flashlight: Switch Tightening”
I’ve taken apart a few things that want something like a long-reach pin wrench too. One of the first things I reach for is my snap-ring pliers: they can manage a lot of such situations. They’re reversible, so they can manage dimples near both inner and outer edges of things.
I have also used snap ring pliers for things like this – have about a half dozen assorted pliers of assorted shapes and pin diameters – a few times used a plain pair of rods with a bar of some sort between the rods for leverage and one end of the rods held with a pair of vice-grip pliers and some help from another person – also put pins in the end of a piece of flat stock –
I like your term “the cheapest possible parts that don’t immediately fail” – it’s a keeper!
Well, using low-cost parts isn’t a bad thing in and of itself. The trick involves designing around their frailties, not putting them in series along a direct path to failure …