Given five meters of 40 conductor ribbon cable, the object is to make a 40 turn five foot diameter loop antenna by soldering the ends together with a slight offset. After squaring off, marking, and taping the cable ends, I stripped the wires:
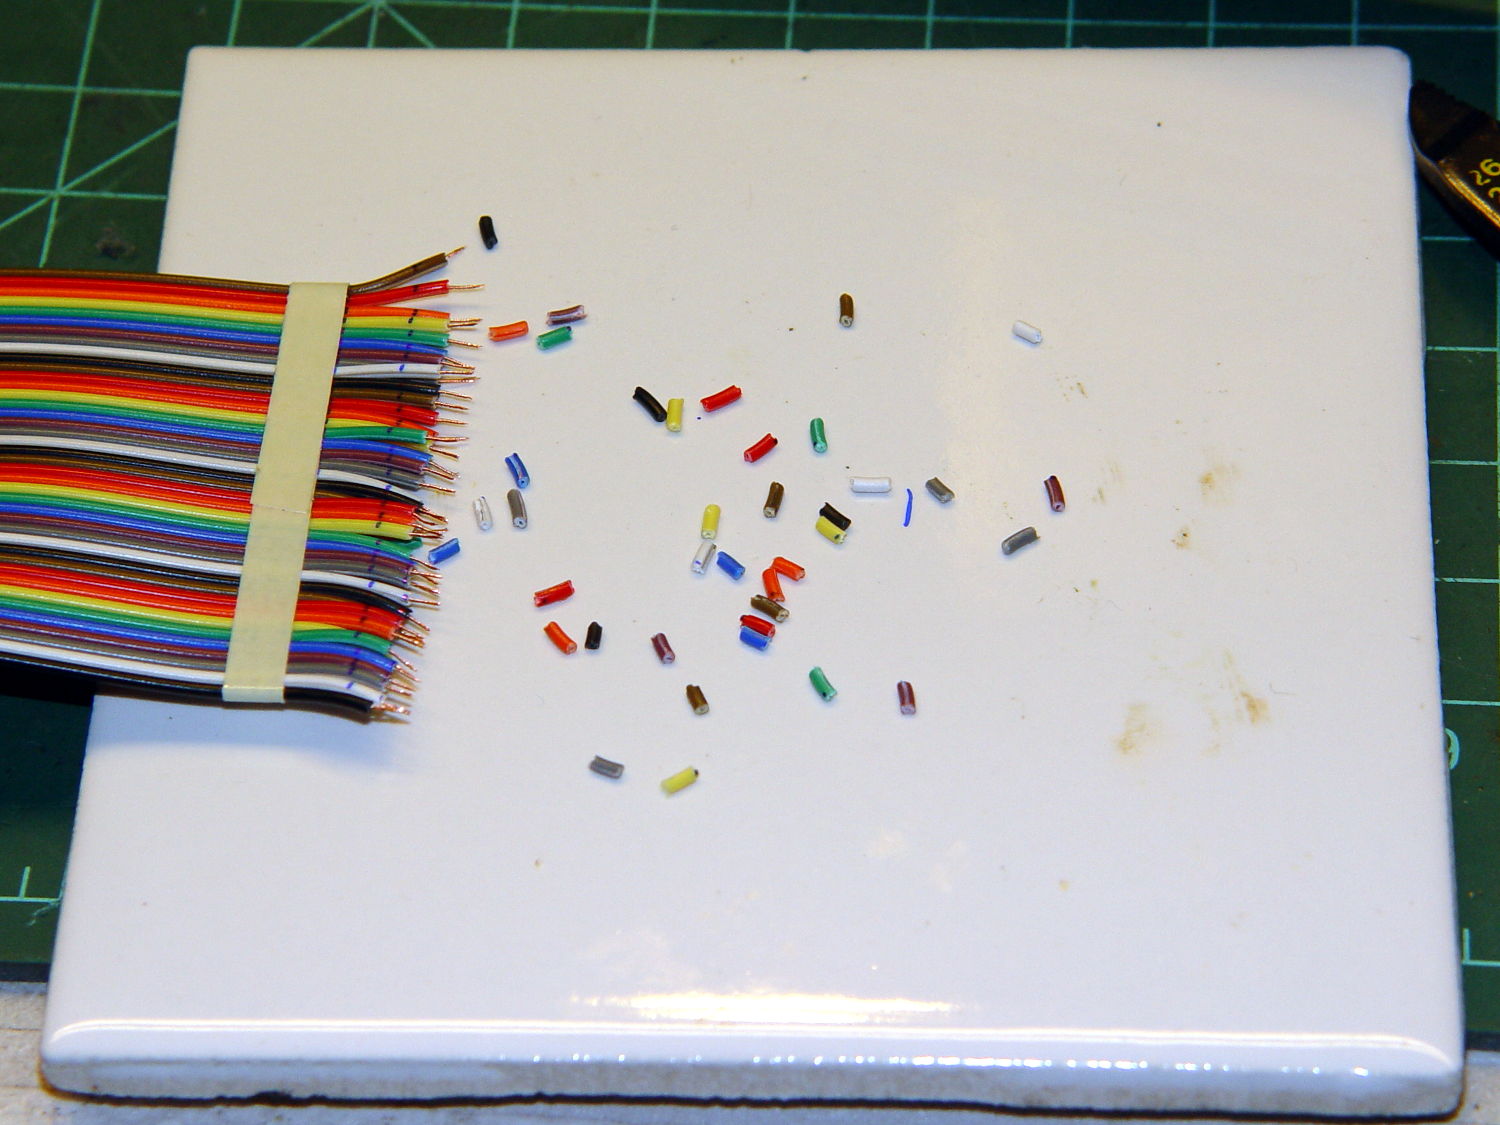
Twirling those little snippets before pulling them off produced nicely twisted wire ends with no few loose strands. Separate the individual wires, wrap with transformer tape to prevent further separation, run a flux pen along the wire ends, tin with solder, repeat on the far end of the cable.
Tape one end to the ceramic tile. Align the other end with a one-wire lateral offset and the stripped sections overlapping, then tape it down. Slide a paper strip between the ends, passing under every other wire, to separate the top pairs from the bottom pairs, then tape the strip in place:

Grab each left wire with a needle point tweezer, forcibly align with the corresponding right wire, touch with the iron, iterate:
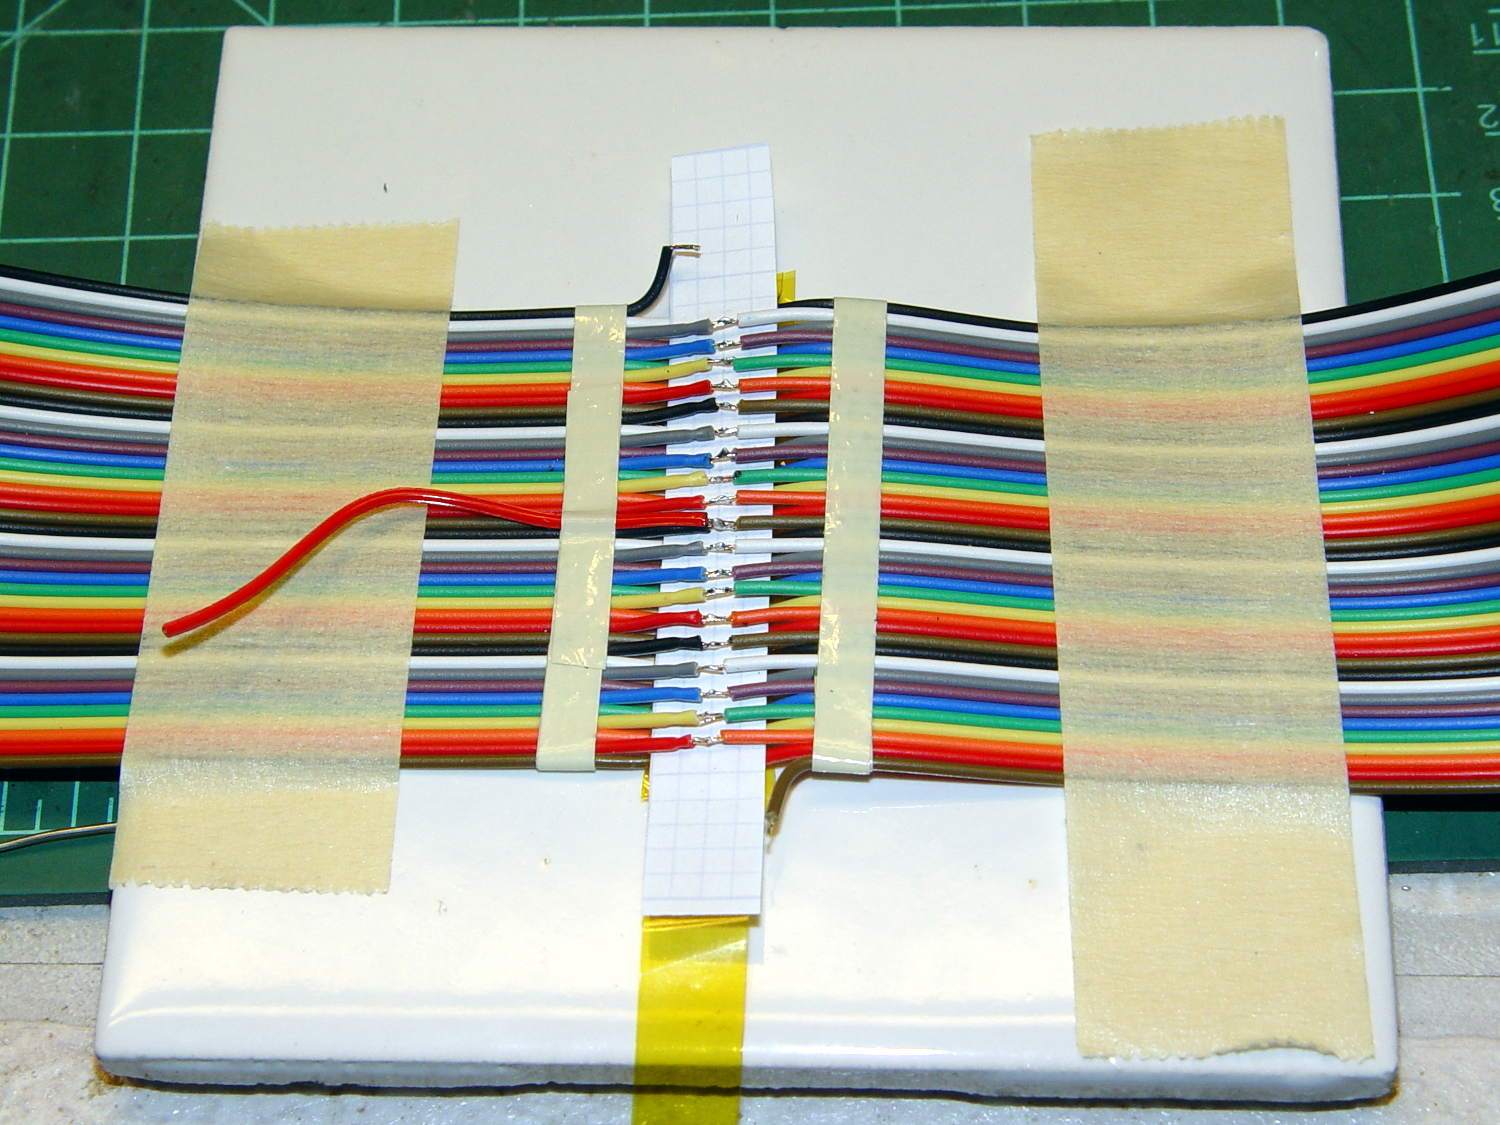
The red wire trailing off to the left will become the center tap.
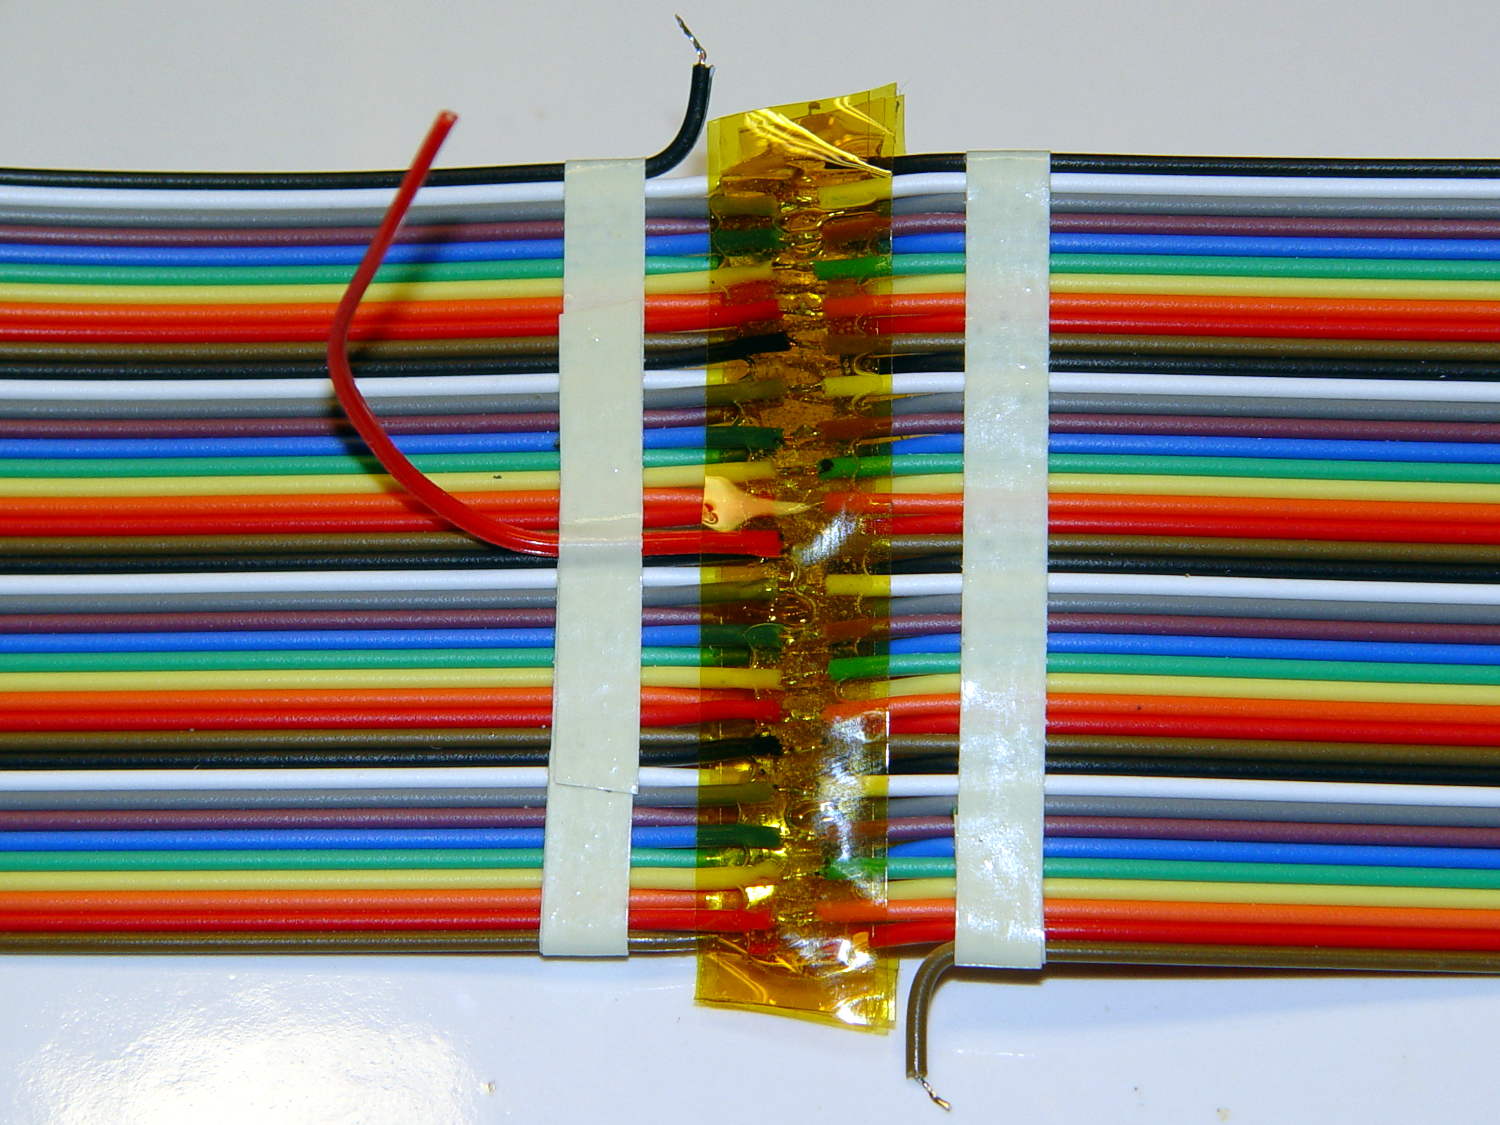
Slide a strip of the obligatory Kapton tape underneath the finished joints, slobber on enough clear epoxy to bond the insulation on both sides of the joints into a solid mass, squish another strip atop the epoxy, smooth down, wait for curing.
Untape from the tile, flip, re-tape, solder the bottom joints similarly, add Kapton / epoxy / Kapton, and that’s that:
Prudence dictates checking for end-to-end continuity after you finish soldering and before you do the Kapton + epoxy thing, which is where I discovered I had 80 Ω of distributed resistance along 200 meters of cable. A quick check showed 40 Ω at the center tap and 20 Ω at the quarters (the black wires on the left mark those points), so it wasn’t a really crappy joint somewhere in the middle.
The joint and its dangly wires cry out for a 3D printed stiffener which shall remain on the to-do list until I see how the loop tunes up.

Comments
4 responses to “LF Loop Antenna: Joint Soldering”
I probably would have done it the lazy way and stomped on a male and female IDC connector, with one offset by one wire. Plug the connectors together and violà!
Oh right, it’s a bizarre pitch. I forgot.
I kept coming up with a “diagonal” jumper between the ends of the 2×20 connectors; it might have been the center tap, though. My doodles on that mess weren’t convincing.
Given that I noticed the weird pitch only after filling the Basement Laboratory with flux fumes, maybe that was a Good Thing.
[…] object of soldering all 40 wires in the 5 m hank of ribbon cable in series is to build a 40 turn loop antenna to receive LF radio […]