A few months ago I fired the Thing-O-Matic, only to have it wake up dead. Not exactly dead, but spitting out checksum errors on simple G-Code files sent from Pronterface, which used to work just fine. Trying a bit of this-and-that to no avail, I proposed to The Mighty Thor that I could loan the carcass to Squidwrench, reanimate it with a less bizarre set of hardware and firmware than the much-hacked Makerbot menagerie under the hood, and use it as an exemplar in my 3D Printing classes.
Fortunately, that particular Thing-O-Matic has the most well-documented hardware evah…
Matt suggested an Azteeg X3 controller, because it has thermocouple inputs that match the existing sensor, Thor ordered one, and I tinkered up a first-pass version of Marlin that could read the inputs and twiddle the motors. The firmware is on Github, not that you’ll need it for anything you’re doing; more on that later.
Here’s the Official Doc for the microstepping jumpers hidden under the driver boards:

That’s XYZE = 16 16 8 4, respectively, with a spare slot (and spare driver, not installed) for the second extruder it’ll never have.
A first pass at setting the motor currents
- X Y =1.2 A
- Z = 350 mA (it’s the original high-resistance MBI stepper)
- E = 1.5 A
The extruder’s Type K thermocouple connects to the TC1 port on the shield, exactly reversed from the way you see the test thermocouple there: the red lead is to the left, the yellow lead is to the right. If you get it backwards, the indicated temperature goes down when you touch the bead. The printer’s thermocouple has some backstory.
The 10 kΩ thermistor bead connects to the BED port on the main board and isn’t polarized. The Heated Build Platform has a bit of backstory, too.
The gutted TOM286 carcass with the MBI hardware off to the side:

After a few sessions, it looked pretty cheerful again:
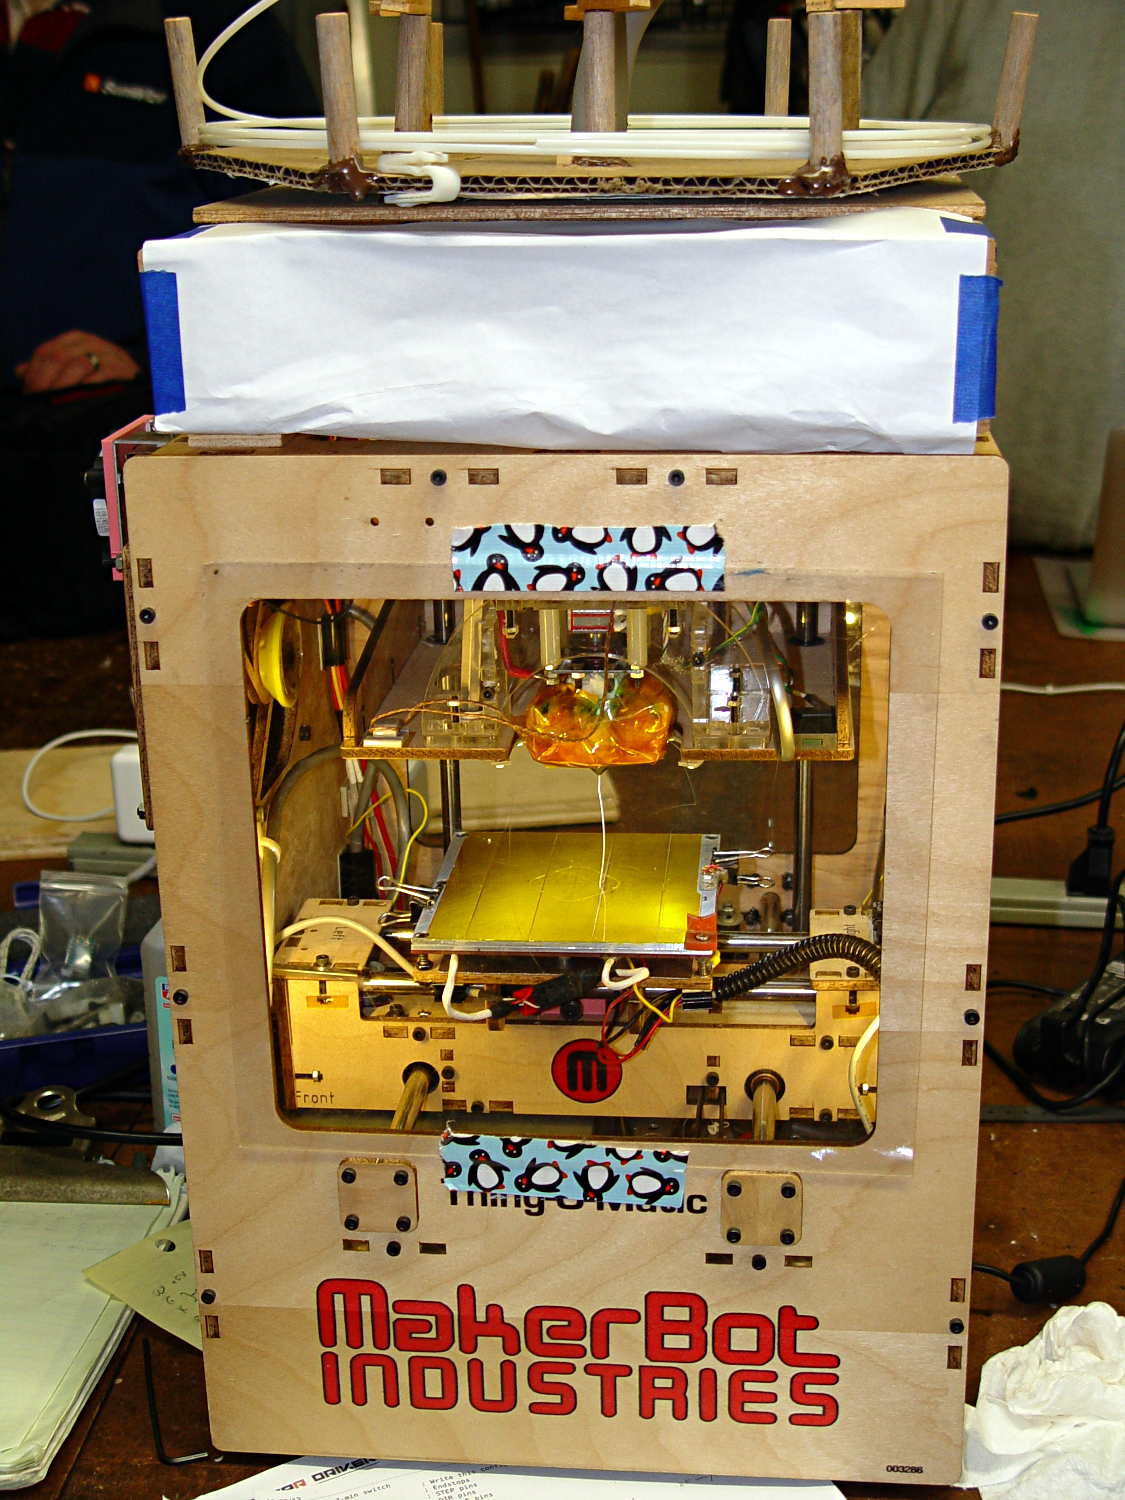
The penguin duct tape adds a festive flair, don’t you agree?
This is what you see when looking down through the acrylic baseplate:

The blurry silver rectangle off to the left is an aluminum channel glommed to bottom of the acrylic baseplate with silicone snot to eliminate a nasty mechanical resonance.
The thermal cutout circuitry isn’t wired in yet; the ATX power supply has its -Power-On pin hotwired to the adjacent ground pin for now. The X3 gets its power directly from the +12 V supply, so there doesn’t seem to be any way to power the X3 from the +5 V Standby ouput, deliver +12 V to the motors, and switch the supply through the X3’s ATX output pin.
The heaters work fine, the motors turn properly, and the extruder feeds molten plastic; all the motor calibrations seem to be pretty close. The first test object was a total botch, of course, but the printer’s parts seem to work OK again.
Next step: calibration!

Comments
3 responses to “Thing-o-Matic 286 Conversion”
About that “nasty resonance”… Is that the guitar-boxing that makes the ToM sing like a kid without a inside voice? Or something serious?
The plywood-and-acrylic box has no damping worth mentioning, making it a great resonator for stepper motor vibrations. The Y axis motor screws directly to that big flat acrylic sheet, so it has a wonderful sounding board; the aluminum strut damps that resonance pretty well.
The original MBI high-resistance steppers jam to a stop for four consecutive microsteps, which means they’re shaking the box like crazy. I think that’s the reason everybody complained about the awful noises; after my tuneup it makes pleasant humming sounds…
[…] to get it working the way it used to with its new controller. […]