Ed Nisley's Blog: Shop notes, electronics, firmware, machinery, 3D printing, laser cuttery, and curiosities. Contents: 100% human thinking, 0% AI slop.
After drilling that PCB, I noticed that the Z axis saddle locking lever (which also functions as the backlash adjustment) had come loose. It turns out that if you don’t tighten the thumbscrew or it works loose, then the locking lever can turn with the leadscrew and, at the very top of the Z axis travel, can walk off the leadscrew thread.
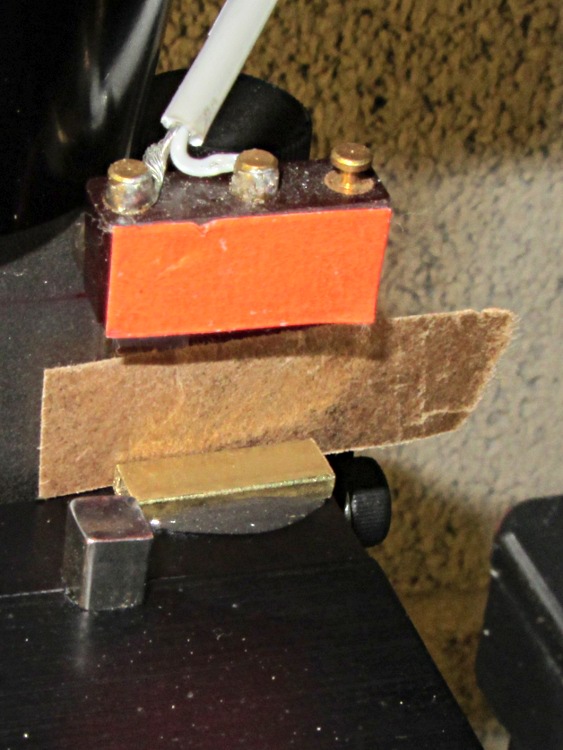
A snippet of rectangular brass tubing epoxied to the top of the Z axis saddle solves that problem by removing 3/32 inch of precious travel. A slip of brown waxed paper (yes, harvested from the new Y axis leadscrew wrapper) kept the epoxy off the dovetail.
Just for consistency, I removed 0.09 inch from the Z axis home offset, but that really won’t make any difference.
HOME_OFFSET = 6.84
HOME = 6.5
Now, I’d put the switch in that position because the saddle jams against the preload nut exactly at the end of the switch button travel. Now I can crush the switch by manually running the Z axis beyond its Home position …
The sloppy hole fit lets the platen align to the tooling plate with the outer two 6-32 screws on the back edge.
Most of the PCB boards I make aren’t nearly as wide as the platen, which means the new SHCS won’t get in the way. The screws require a nut (as a spacer) to keep them from bottoming out on the Sherline’s table underneath the tooling plate and the washers are just because I can’t do it any other way; I should just shorten the screws and store them with the platen.
Masking tape holds small PCBs to the platen reasonably well, probably because I use an unreasonably high 50 mil travel clearance. I have a defunct dehumidifier that might make a dandy low-volume vacuum pump to eliminate any lifting in the middle: a project that has been on the to-do list for far too long…
While I had the tooling plate off, I cleaned the crud out of the tapped holes and ran a handful of 1/4 inch stainless steel 10-32 setscrews just below the surface:
Sherline tooling plate with setscrews
They’re pretty much invisible, of course, but they’re all present. FWIW, you need a 3/32 inch hex wrench for 10-32 setscrews.
In the event that I gouge the aluminum surface (you can see the odd ding and blind hole) through a setscrew, I’ll regret doing this. Not having to remove the plate to dig swarf out of the last clamping hole after carefully aligning a part seems like a win.
Reassembling the mill provided an opportunity to move the Y axis Home switch from the rear of the axis to the front. The key discovery happened during the teardown: I can get the saddle off the Y axis dovetail by removing the gib, without sliding it off the front, which means a front switch can remain firmly glued in place.
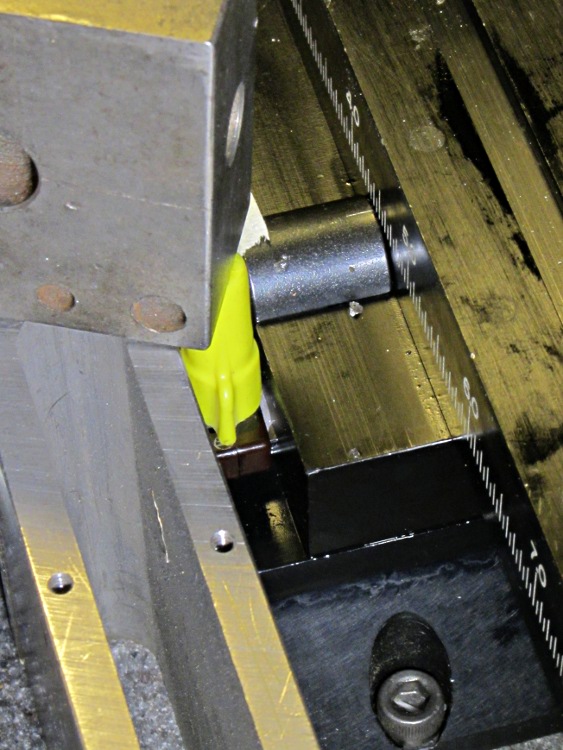
A few random hunks of steel and a wire nut held the switch in position while the epoxy cured:
Mounting Y axis home switch
The switch actuator bottoms out with the saddle just touching the preload nut, so the saddle can’t dislodge the switch: the switch trips just before the saddle hits the nut, at which point all motion stops and the motor stalls.
Moving the switch means I can remove all the gimcrackery that poked the rear switch with the tooling plate in place; I was never happy with that setup. I also removed the small block that trapped the rear end of the Y leadscrew, under the assumption that, as I haven’t yet dropped anything on the leadscrew, I probably won’t. That adds about 1/4 inch to the maximum travel and allows the tooling plate to whack into the column.
The switch wire runs along the stepper cable, a tidy technique that hasn’t introduced any glitches into the shared Home signal from the X axis drivers:
Sherline mill – X and Y axis home switches
The Y axis now seeks the Home switch in the positive Y direction, so that stanza in Sherline.ini looks like this:
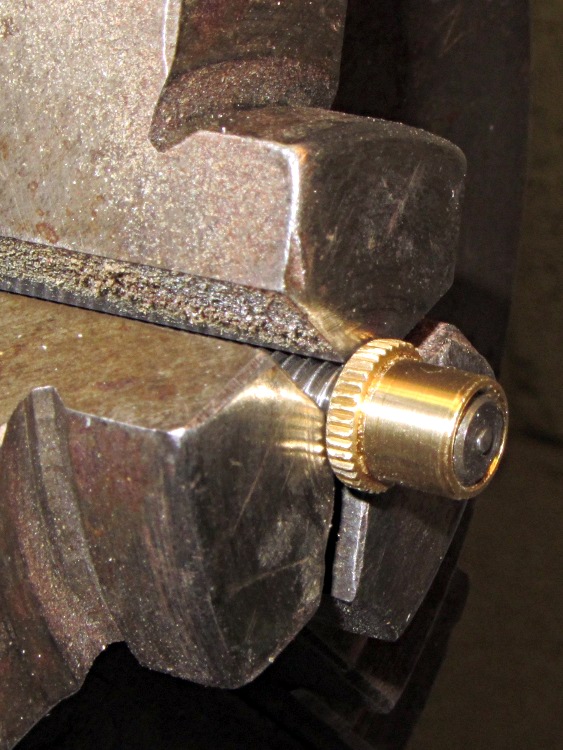
The new Y axis anti-backlash nuts for the Sherline mill have a countersink on the end that fits into the saddle. The nut on the left is as-delivered (I bought two) and the nut on the right is after cleanup:
Sherline Y axis anti-backlash nuts – original vs cleared
The thread was munged enough to jam the leadscrew; it started fine from the knurled end, but wouldn’t emerge from the countersink. This being a left-hand thread, I couldn’t just run a tap through the nut, so clearing the thread required:
Some tedious handwork to clear enough of a path until …
I could force the nut over the old leadscrew, which re-formed the thread enough that …
More tedious handwork could remove the debris and bent brass
After that, the OD of both nuts was slightly oversized: 0.316 inch, which didn’t fit in the 5/16 inch (0.3125) bore. So I mounted the nut on the old leadscrew, took advantage of the fact that a left-hand thread gets tighter with cutting force from the lathe bit[Edit: wrong! See comments], and turned it down just a hair:
Turning down anti-backlash nut OD
Purists will quibble that I should have used the four-jaw chuck. Turns out the three-jaw has under 1 mil of runout, which is as good as one could possibly want in light of the bearings.
The X axis nuts were fine, so I suspect a recent production run had a bit of a tooling problem.
[Update: The mail brings replacement nuts that look just fine. Must have been one of those glitches. No hard feelings!]
The Y axis on my Sherline CNC mill has developed about 8 mils of backlash, a bit more than seems reasonable. Some poking around shows that the anti-backlash nut is loose while in the middle of the leadscrew and snug while at either end, which suggests the leadscrew thread is also worn. That’s no surprise, as I didn’t figure out that having a bellows over the leadscrew was a Good Thing until, let us say, considerably later than I should.
If I must replace the leadscrew, I may as well take the whole XY assembly apart, clean everything, and replace the consumables. So I ordered a sack o’ parts from Sherline; they’re all cheap and readily available. The overall index has the exploded diagrams and the parts list for my mill boiled down to:
54161 Y axis leadscrew (9 inch)
50140 Y axis anti-backlash nut
50200 Y axis nut
50171 X axis leadscrew
50130 X axis anti-backlash nut
40890 X axis nut
50150 anti-backlash lock
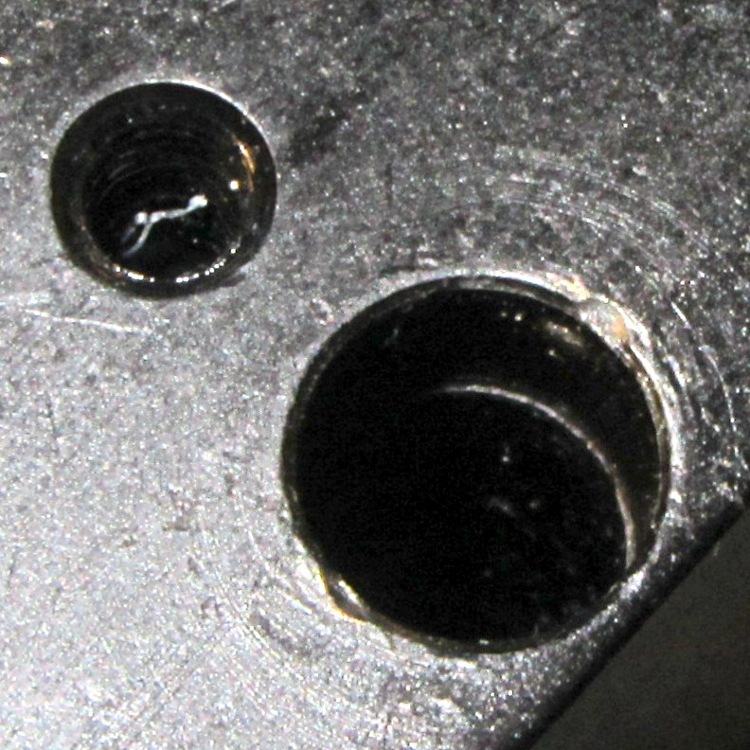
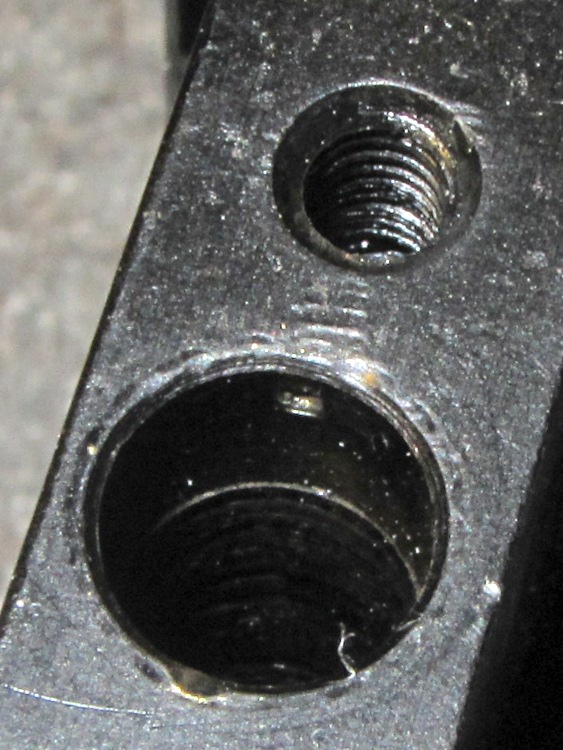
The only gotcha: nowhere (that I can find, anyway) is it written how to get the leadscrew nuts out of the stage. It turns out that the holes through the stage aren’t uniform: the X narrower on the right and the Y on the front, so you must drive the X axis nut out to the left and the Y axis nut out to the rear. The counterbore is visible just behind the anti-backlash nut if you know what to look for, so you’re driving the axis nut away from the backlash nut.
On the X axis:
X axis leadscrew hole counterbore
On the Y axis:
Y axis leadscrew hole counterbore
Trust me on this: you cannot drive a 5/16 inch nut through a 19/64 inch counterbore. If you have a 19/64 inch transfer punch, that’s a dandy way to get the nuts out.
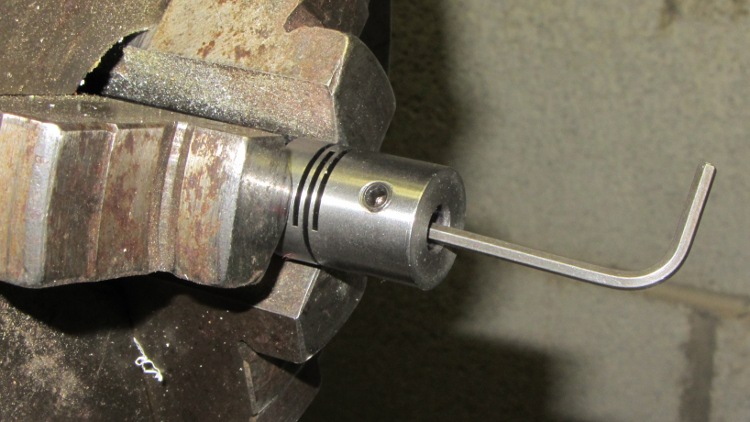
The easiest way to loosen the socket head cap screw holding the flex coupling to the leadscrew is to grab the coupling in a lathe chuck (with the leadscrew protruding into the headstock) and then apply the hex key:
Loosening leadscrew bolt
They used red (high-strength) Loctite on all the leadscrew bolts, as well as on the tapered joint between the leadscrew and the flex coupling, and on the bearing preload nut… so I will, too.
Mary uses an ancient paring knife (that, back in the day, my father had sharpened beyond all reason) to harvest garden veggies, which called for a scabbard to protect the blade, the bike pack, and the fingers.
I snagged a random block of acrylic from the heap, straightened the long sides, milled a channel just wide and thick enough for the blade down the middle, then added small recesses at the right end for the knife’s haft:
Garden knife scabbard – main block
The cover is an acrylic sheet, solvent-glued and clamped in place:
Garden knife scabbard – clamping cover
The cover exposes about 1/4 inch of channel so she can lay the point in place, rather than precisely aligning the point with the slot. I suppose I should have used gray acrylic to provide some contrast; maybe we’ll add a snippet of tape.
Then mill four sides flat, break the edges & corners with a file, and it’s all good (in a blocky kind of way):
Garden knife scabbard
The blade has become sufficiently bent over the years that simple friction holds it in the slot. It’s open on both ends so she can flush out the inevitable dirt.
I was going to engrave her name on the back, but came to my senses just in time…