Ed Nisley's Blog: Shop notes, electronics, firmware, machinery, 3D printing, laser cuttery, and curiosities. Contents: 100% human thinking, 0% AI slop.
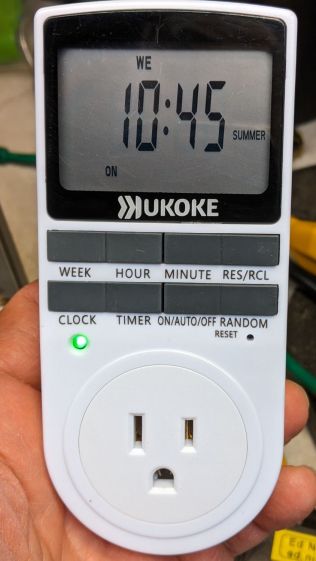
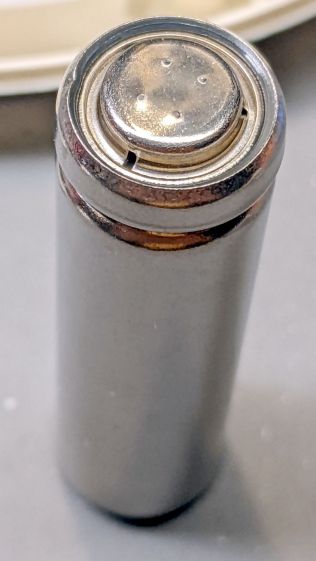
If the title seems familiar, it’s because there’s no visible difference (apart from the “brand name”) between the Enover timer that failed a little over a year ago and the Kuoke timer that recently failed:
Kukoke timer – overview
That’s what it looked like after the repair. Prior to that, it’s just a blank display with no response to any inputs.
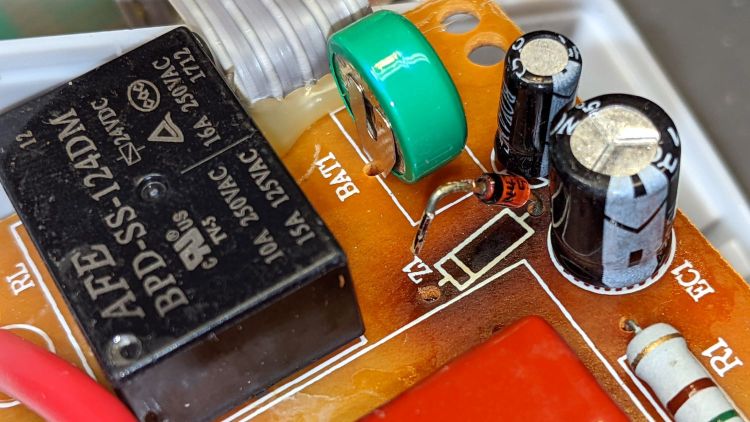
Given identical hardware, the overheated phenolic PCB under the Zener diode came as no surprise:
Kukoke timer – zener heat death
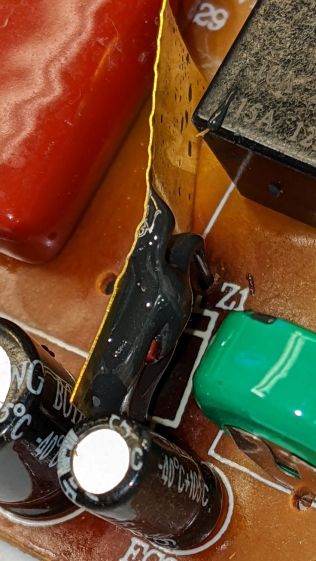
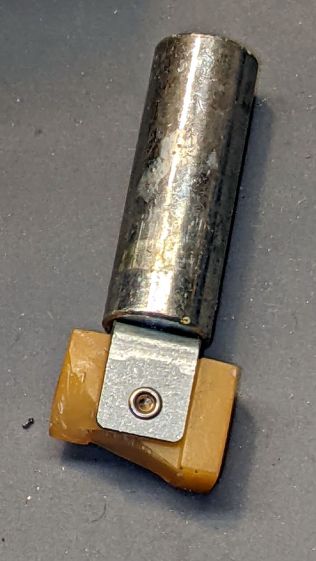
As promised, though, this time I epoxied a brass shim heatsink to the new diode in hopes of cooling it enough to live long and prosper:
Kukoke timer – zener heatsink
I suppose I must now preemptively affix heatsinks in the two surviving timers, because we all know how their stories will end.
The hallway fire detector recently told us it scented carbon monoxide, but we hadn’t been doing any cooking or baking (in the kitchen two rooms away), the furnace (in the basement) hadn’t run for a few hours, and nothing else looked like it was on fire. I had recently replaced the alkaline batteries after a similar false alarm a few weeks earlier; it seems the detector failed after half a dozen years or so.
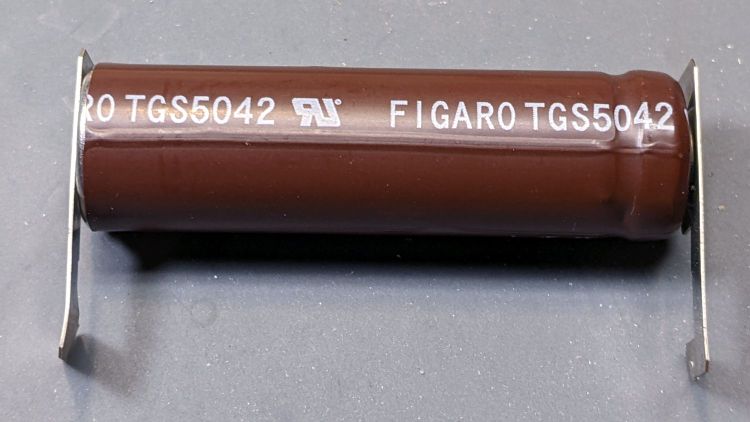
Tearing it apart revealed something resembling an 18650 lithium cell:
Figaro TGS5042 CO sensor – overview
Which made no sense, given the circuitry.
A casual search shows a Figaro TGS5042 is actually a carbon monoxide sensor. I’m mildly surprised enough gas gets through the vents fast enough to produce an early alert:
Figaro TGS5042 CO sensor – vent detail
I tore it apart to reveal a few droplets of whatever the electrolyte might be, so it hadn’t completely dried out.
The Product Information flyer doesn’t define what “long life” might be, but another page says “10 years”, so apparently the rest of the circuitry failed around a not-quite-dead-yet sensor.
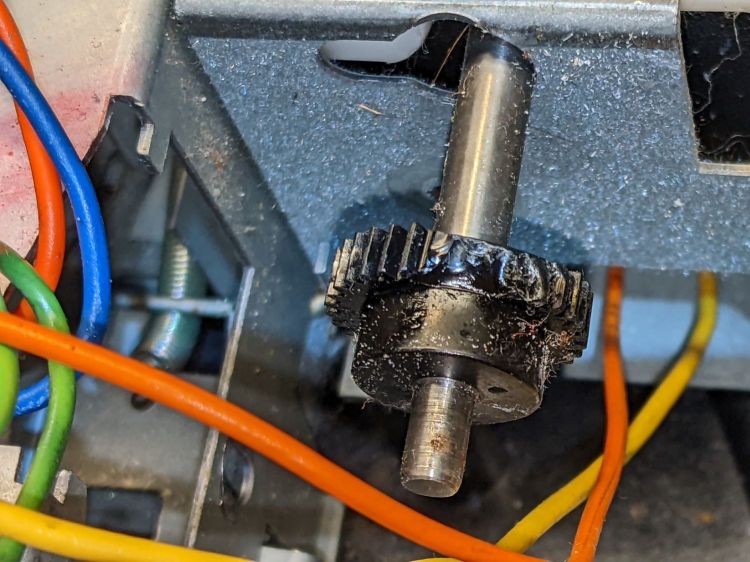
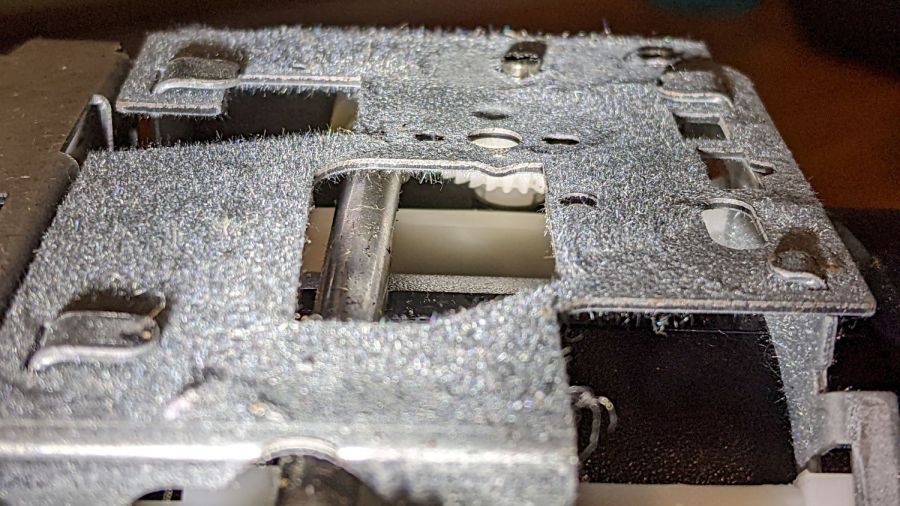
Mary’s folks asked me to figure out why the carousel on their Kodak 750H projector no longer turned. Some initial poking around suggested a problem with the solenoid, which only clunked when the projector was upside-down on the desk. I thought it might just have gummed up after all those years, but disassembling the thing (per the Service Manual and the usual Youtube videos) produced the root cause:
Kodak 750H Projector – broken solenoid link
That explained the yellowish plastic fragments rattling around inside.
As predicted, it’s impossible to remove the solenoid without breaking the equally brittle focus gear in the process:
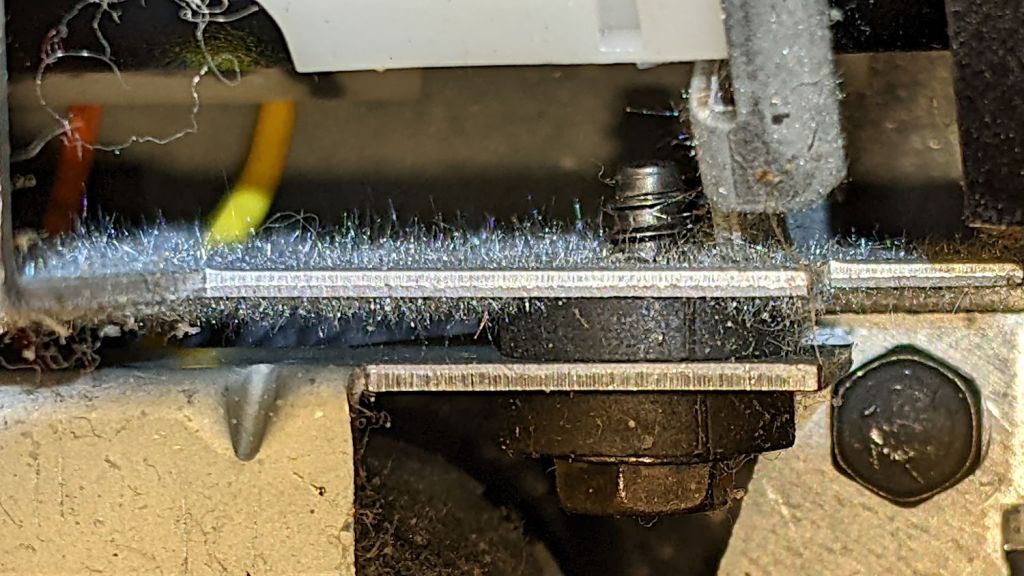
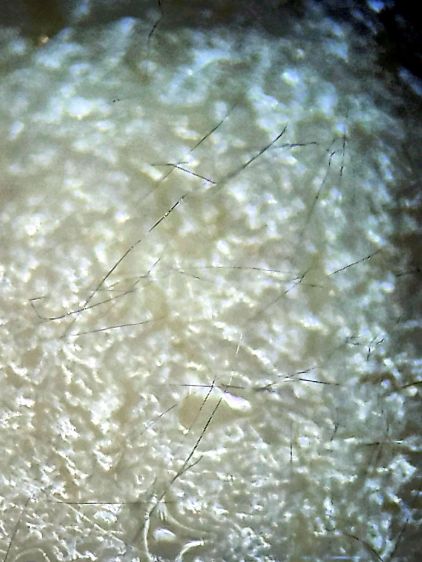
Some of the interior sheet metal has a dark surface, likely heavy tin plating, covered with a thick coat of whiskers:
Kodak 750H Projector – tin whiskers
Kodak 750H Projector – tin whiskers
Kodak 750H Projector – tin whiskers
Kodak 750H Projector – tin whiskers
Touching a whiskered surface with masking tape captures the culprits, whereupon zooming the microscope and camera all the way in makes them just barely visible: they’re a few millimeters long and a few atoms wide:
Kodak 750H Projector – tin whiskers – detail
I have surely contaminated the entire Basement Laboratory with tin whiskers. Makes me itchy just thinking about them …
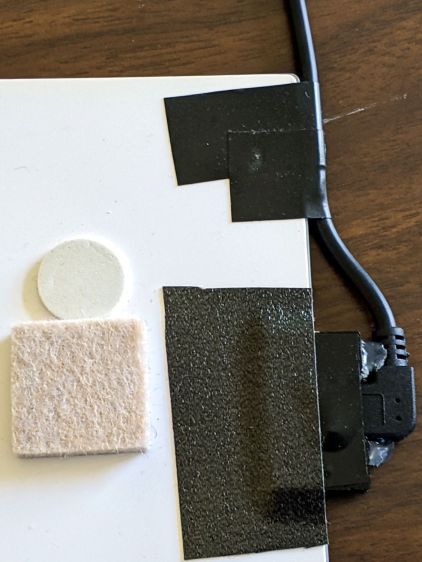
What used to be a “light box” had become a “light pad” powered through a USB Micro-B connector on the side. Unfortunately, the pad’s 5 mm thickness allows for very little mechanical reinforcement around the USB jack, while providing infinite opportunity to apply bending force. Over the course of the last half-dozen years (during which the price has dropped dramatically, despite recent events), the slightest motion flickered the LEDs.
So I squished the jack’s metal shell back into shape, found a short right-angle USB cable, and conjured a reinforcing fixture from the vasty digital deep:
LitUp LED Light Pad
The plate fits under the light pad, where a strip of super-sticky duct tape holds it in place:
LitUp Light Pad USB jack reinforcement – bottom
The USB plug fits between the two blocks with hot-melt glue holding it in place and filling the gap between the plug and the pad.
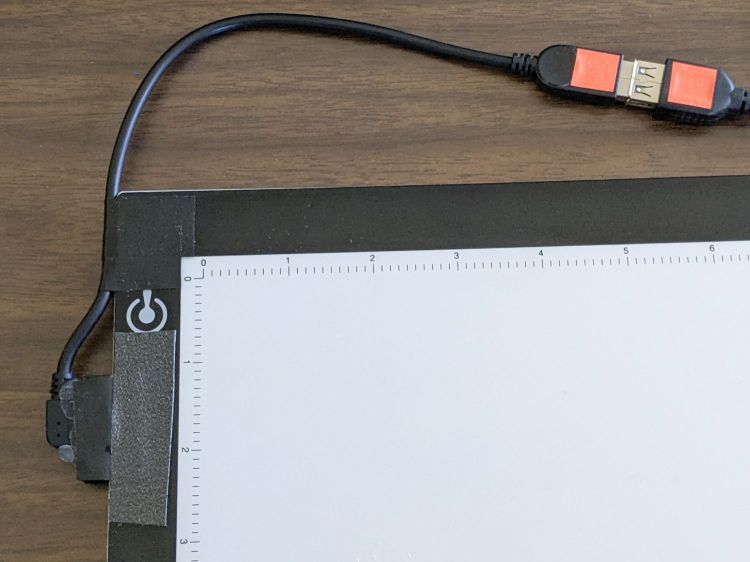
I’d like to say it’s more elegant than the cable redirection for my tablet, but anything involving black electrical tape and hot-melt glue just isn’t in the running for elegant:
LitUp Light Pad USB jack reinforcement – top
On the other paw, that socket ought to last pretty nearly forever, which counts for a whole lot more around here.
The retina-burn orange tape patches on the connector eliminate all the fumbling inherent to an asymmetric connector with invisible surface features. The USB wall wart on the other end of the cable sports similar markings.
This file contains hidden or bidirectional Unicode text that may be interpreted or compiled differently than what appears below. To review, open the file in an editor that reveals hidden Unicode characters.
Learn more about bidirectional Unicode characters
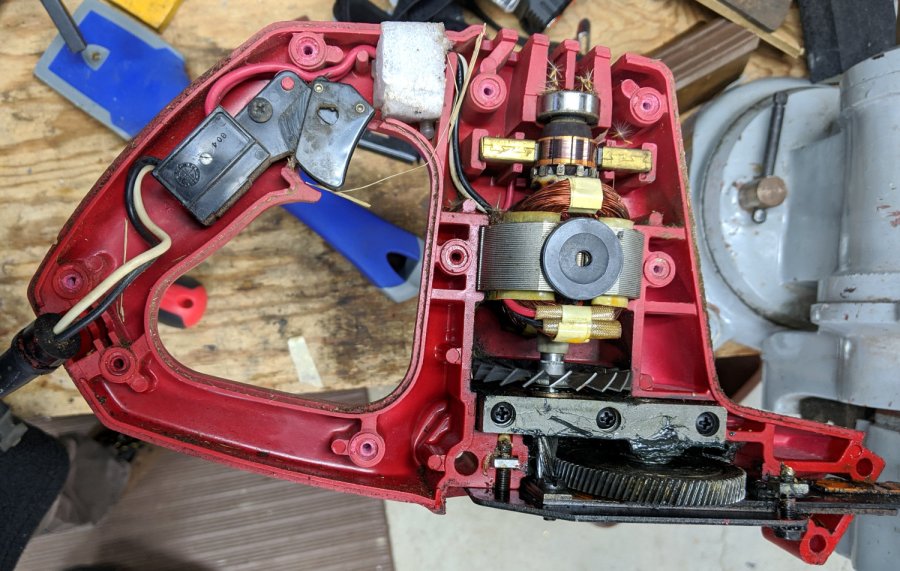
Once again, the hedge trimmer failed to turn on with the switch pressed, so I took it apart, did nothing, and had thing start working again:
Craftsman Hedge Trimmer – innards exposed
It finally penetrated my dim consciousness: perhaps the switch is fine and a carbon brush (or two) has lost contact with the commutator atop a layer of oil and dust.
So a year from now when this happens again, try jamming a screwdriver through a vent slot and moving the motor a few degrees to jostle the crud.
If it works, that would be much easier than taking it apart!