Ed Nisley's Blog: Shop notes, electronics, firmware, machinery, 3D printing, laser cuttery, and curiosities. Contents: 100% human thinking, 0% AI slop.
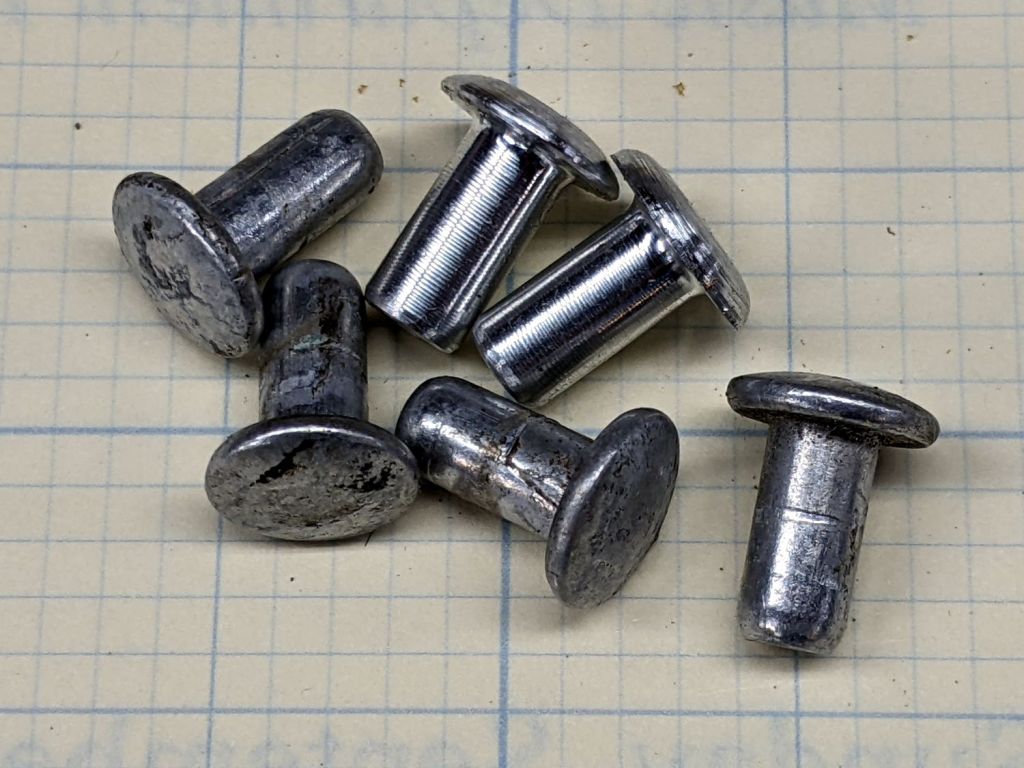
I planned to replace the vinyl straps on our set of (salvaged) lawn / patio chairs and made a pair of rivets for one long-missing strap:
Lawn chair strap rivets
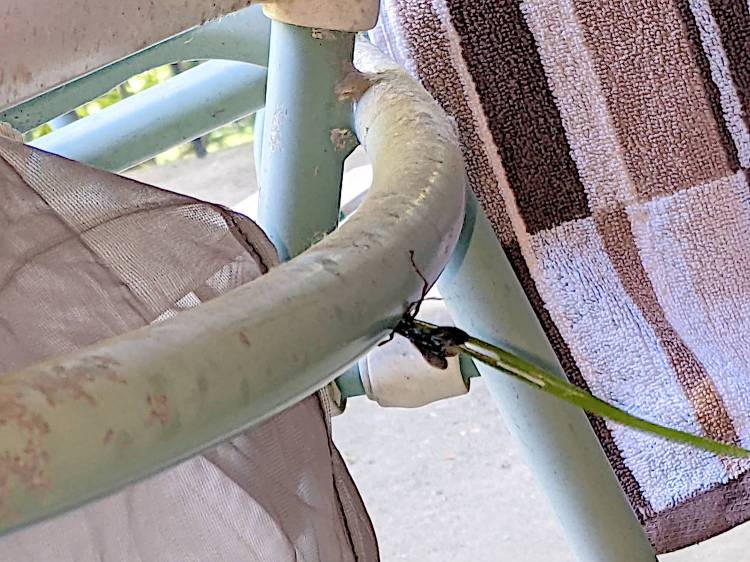
The overall project is on indefinite hold, as a Steel-blue Cricket Hunter (*) has decided at least one of the chairs is an ideal place to start a family:
Lawn chair – wasp nest under construction
The patio under the chair is littered with blades of grass and twigs that didn’t quite fit through the 5 mm vent hole in the tube, but that long stem went in just fine:
Lawn chair – wasp nest grass stem
We have seen the wasp airlifting crickets near the chair, so provisioning has begun. The cricket seemed not only larger than the hole, but also larger than the wasp; we assume the wasp knows what she’s doing.
The new wasp will hatch this year, pupate over the winter, then hatch and emerge next summer, but I plan to replace the straps after the construction season ends.
I have no idea how to clean out whatever’s accumulating in there …
(*) I learned them as Steel-blue Cricket Killer, but the crickets are just paralyzed, not completely dead.
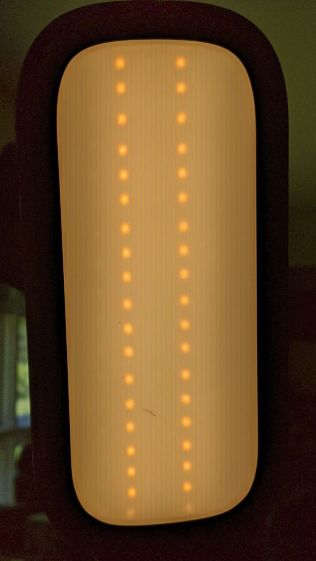
The only LED floor lamp I bought which didn’t require extensive hackery to lower the business end to suit Mary’s preferences failed after two years. The warm white LEDs continued to work fine:
Miroco LED Floor Lamp – warm white LEDs
But the cool white LEDs were permanently on at a very low level and did not respond to any of the brightness controls:
Miroco LED Floor Lamp – cool white LEDs
You can’t tell, but the cool whites are on in the first picture, too.
The symptoms suggested the driver transistor for the cool whites has failed partially on, although I’d expect it to be either a dead short or completely open.
The lamp being a year or more out of warranty and having come from one of the myriad Amazon sellers banned during the Great Paid Review Purge, there’s nothing to do but remove the four screws from the back of the control lump and see what’s inside:
Miroco LED Floor Lamp – PCB packing
How this was assembled I cannot say, because the three wires going to the LED head (on the far right) have less than an inch of slack. Maybe they pulled wire into the head while screwing things together?
I think the HC8T1212 microcontroller sticking out of the foam is a distant descendant of the Motorola (remember Motorola?) MC68HC05 family. I’m mildly surprised they didn’t use a 32-bit ARM / MIPS / whatever micro, with WiFi capability and a strong desire to siphon my private bits.
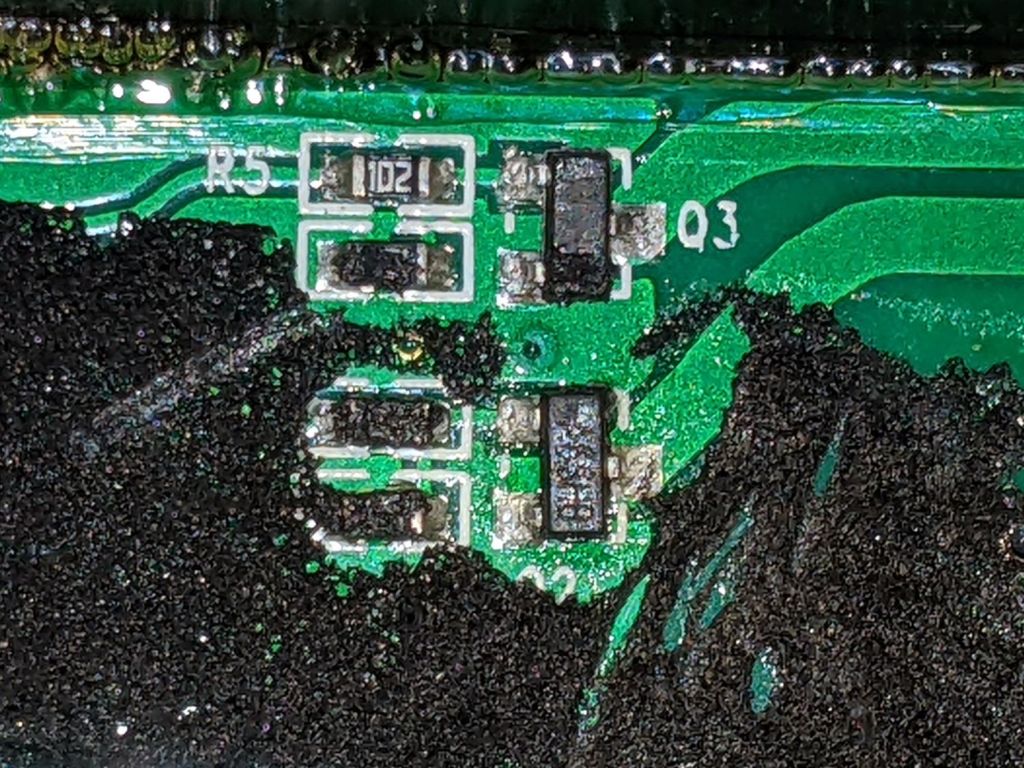
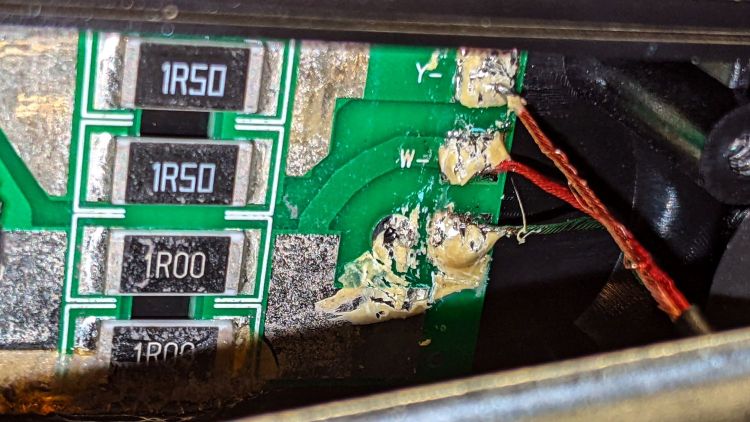
The two pieces of closed-cell foam seemed firmly glued to the PCB, but eventually yielded to brute force. Scraping brittle yellowish goo off the right end revealed the LED ballast resistors and the wire labels:
Miroco LED Floor Lamp – ballast resistors – LED wiring
Note the bar-taut Y- wire going to the warm-white (“yellow”?) LEDs.
The black foam left a mess over most of the PCB, but diligent scraping eventually revealed the driver transistors:
Miroco LED Floor Lamp – A6SHB MOSFETs
You can’t read it, but the topmarks were A6SHB: an old Siliconix (remember Siliconix?) SI2306 30 V / 3 A MOSFET. Turns out you can get new-production SI2306 transistors from the usual Asian foundries through eBay, which I did.
It’s not the neatest soldering job ever, but it’ll suffice:
Miroco LED Floor Lamp – A6SHB MOSFET replaced
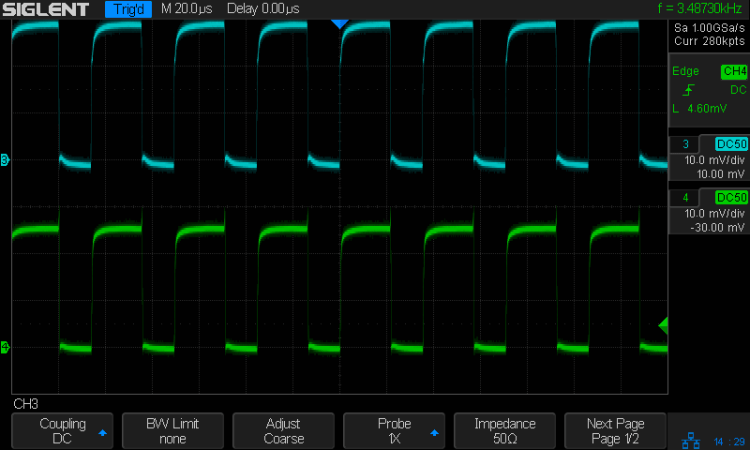
The colorful wires over on the right added enough length for a pair of Tek current probes:
Miroco LED Floor Lamp – 200 mA-div
The top (cyan) trace is the (repaired) cool LEDs, drawing 600 mA from the 10 V supply, so the 0.5 Ω ballast dissipates 180 mW. The bottom (green) trace is the warm LEDs at 500 mA through a 0.75 Ω ballast for 190 mW. That end of the control lump does feel a bit warm after a while, but nothing out of the ordinary.
Stuff the foam back in place, tuck the longer wires around the edges, snap the cover in place, reinstall the screws, and the lamp is at least as good as new.
Unfortunately, reinforcing the USB Micro-B jack on the side of the LitUp LED Light Pad only delayed the inevitable: the light became erratic even without the slightest touch. The pad consists of three acrylic sheets glued together around the entire perimeter, so there’s no way to get access to the no-user-serviceable-parts within. Apparently, you’re supposed to just throw it out.
On the other paw, it’s already dead, so there’s nothing to lose:
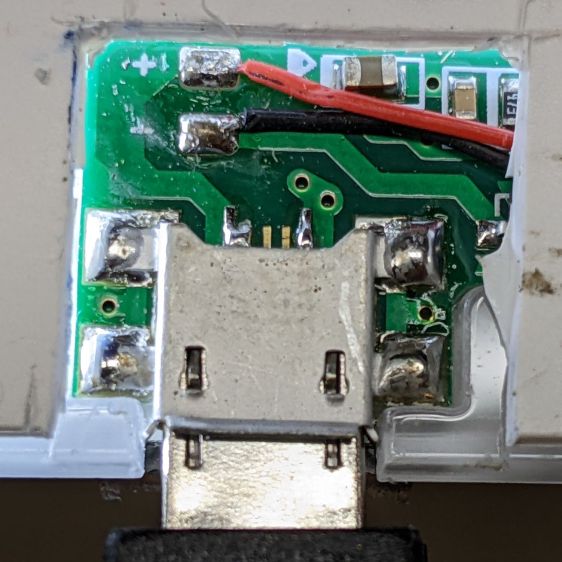
LitUp LED Light Pad – failed USB jack
A little deft razor knife work chopped through the rear sheet without doing any (more) damage to the PCB within. The LEDs can still be convinced to light, but the USB jack is definitely wrecked.
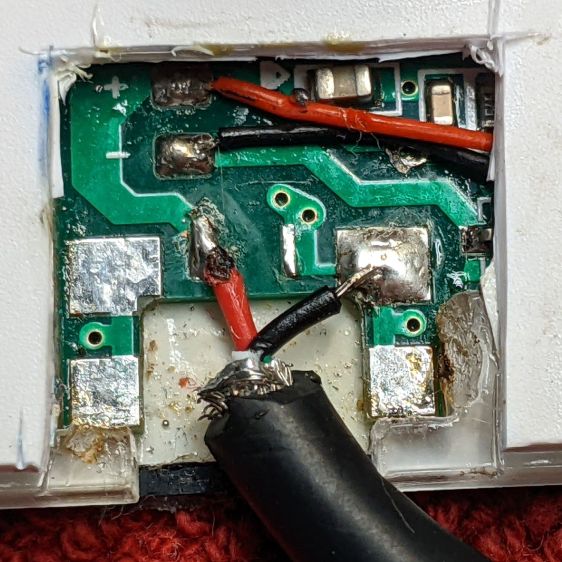
Applying some ChipQuik let me extract the jack without (too much) more damage. Rather than replace it, I just soldered a pigtail USB cable to the obvious PCB pads:
LitUp LED Light Pad – direct power wiring
If I’d noticed that little solder ball, I’d have removed it before filling the cavity with hot melt glue and squishing the cut-out piece of white acrylic in place.
A little black duct tape should keep the wiring stable enough for the foreseeable future:
LitUp LED Light Pad – redirected cable
That was another (relatively) easy zero-dollar repair that should not be necessary.
TIL: Muntin, which I’d always known was called a Mullion.
With that as preface, one of Mary’s quilting cronies lives in a very old house updated with vinyl windows sporting wood muntins arranged in a grille. The wood strips forming the grille end in plastic clips that snap into the sash, thereby holding the grill in place to make the window look more-or-less historically correct, while not being a dead loss as far as winter heating goes.
Time passed, sun-drenched plastic became brittle, and eventually enough clips broke that the grilles fell out. An afternoon quilting bee produced a question about the possibility of making a 3D printed clip, as the original manufacturer is either defunct or no longer offers that particular style of clip as a replacement part.
Well, I can do that:
Window Muntin Clips
The original is (obviously) the transparent injection-molded part in the upper left. The other two come hot off the M2’s platform, with the one on the right showing the support material under the sash pin.
The solid model looks about like you’d expect:
Window Muntin Clip – solid model
There is obviously no way to build it without support material, so I painted the bottom facet of the sash pin with a PrusaSlicer support enforcer:
Window Muntin Clip – PrusaSlicer
The pin comes out slightly elongated top-to-bottom, but it’s still within the tolerances of the original part and ought to pop right into the sash. We’ll know how well it works shortly after the next quilting bee.
The doodle with useful measurements amid some ideas that did not work out:
This file contains hidden or bidirectional Unicode text that may be interpreted or compiled differently than what appears below. To review, open the file in an editor that reveals hidden Unicode characters.
Learn more about bidirectional Unicode characters
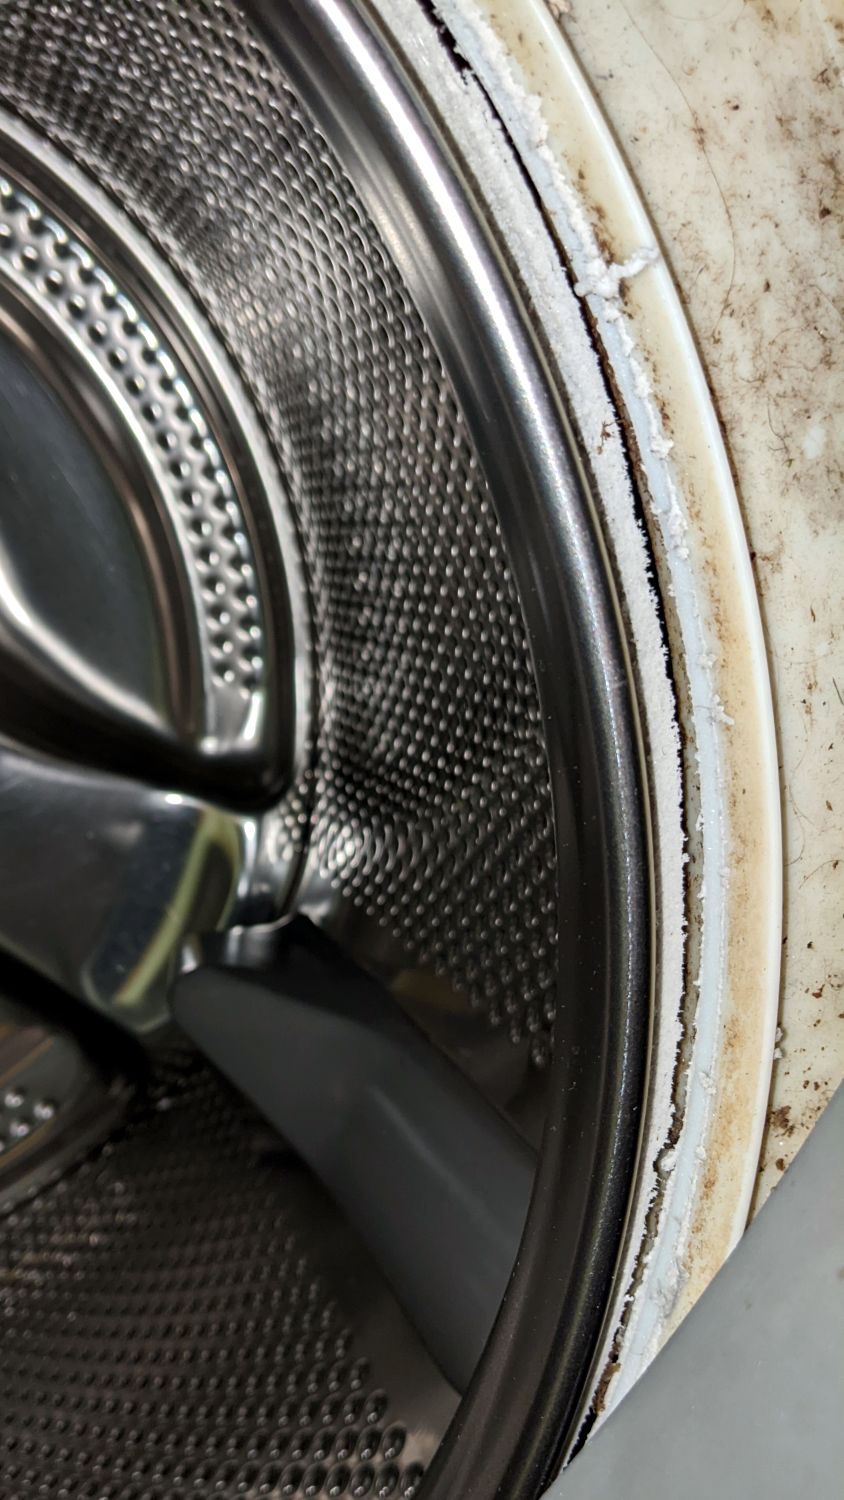
After eighteen years and one basket / tub replacement, our venerable Kenmore HE3 clothes washer has reached End of Life:
Kenmore washer – eroded tub A
Kenmore washer – eroded tub B
Kenmore washer – eroded tub C
I had looked in there (between the door gasket and the tub) to find any foreign objects making the horrible noise and again, perhaps a week later, when I replaced the shock absorbers, after which the corroded spider in the back finally broke enough to let the basket flop around continuously during the spin cycle and erode the tub rim.
In round numbers, we heard the first sign of trouble three weeks ago: a very loud, but only occasional, KLONK due to protrusions on the side of the basket or the fractured part of the spider on its back hitting indentations in the tub. The KLONK remained intermittent during half a dozen loads, until it became pretty much continuous.
We installed the washer in early 2004, replaced the tub and basket in 2010, and it’s now 2022: the first spider failed after six years and its replacement lasted twelve. After nearly two decades, the tub and basket are no longer available from the usual appliance part sources, so (even if I wanted to) I cannot repair the washer.
Another washer, also a front-loader, also highly rated, will arrive shortly. For the first time ever, we bought an Extended Service Plan good for five years. The alert reader will note the difference between the first failure and the length of the plan, but reviews of similar new machines suggest having Lemon Replacement coverage. In this situation, I am willing to pay for the talismanic effect of coverage that may never pay off, if that makes any sense.
As part of diagnosing a Terrible Sound inside our two decade old washer, I replaced the OEM shock absorber struts with cheap knockoffs. Although it didn’t solve the problem (spoiler: another tub spider bites the dust), the experience may come in handy elsewhere.
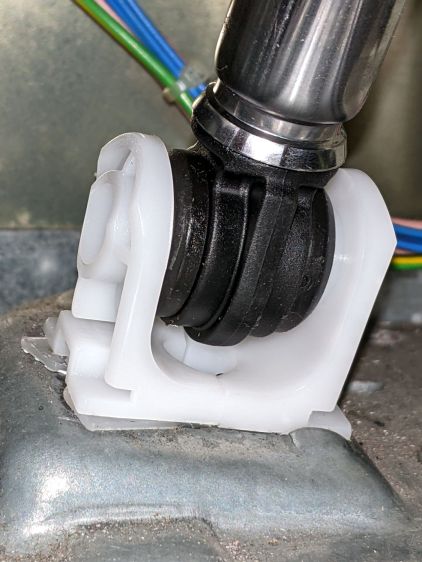
The left rear (as seen from the front) shock stood in a pile of rust on the baseplate that came from a drip in the water feed nozzle to the detergent / bleach / whatever dispenser drawer. The affected parts are no longer available and I have never had any luck finding a replacement O-ring of the proper size, so I just pulled the nozzle out, ran a small bead of acrylic sealant around the O-ring, and squished it back in place:
Kenmore washer – dispenser nozzle seal
It’s the Y connection between the two black hoses, held in place on the dispenser by a relentless little clip. Release the two hose clamps, remove the hoses, pull it out, apply sealant, squish, reinstall in reverse order.
As for the shocks, don a pair of work gloves and turn the upper mount (on the tub) counterclockwise as you look along the shock. The tub has molded-in latches that make turning it the wrong way difficult, but not impossible.
With the shock loose, you can now try to turn the lower mounts counterclockwise as you look along the shock, but I had to deploy the BFW in very cramped quarters to get enough traction. This will likely wreck the little latches holding the mount in place, but you were going to replace it anyway.
The new left-rear latch snapped firmly into place:
Kenmore washer shock – left rear
Yes, that’s after I cleaned off as much of the rust as made sense.
The remaining three latches did not snap firmly into place, so I made shims to soak up the slop:
Kenmore washer shock – shim laser cut
They slip around the central pillar with clearance for the latches, although the thicker shim didn’t leave much engagement:
Kenmore washer shock – shim installed
They ranged from 0.8 mm down to 0.2, based entirely on feel, and I used PETG, LDPE, and polypropylene clamshell of the right thickness.
The left front got the thickest:
Kenmore washer shock – left front
Right front thinnest:
Kenmore washer shock – right front
And right rear in the middle:
Kenmore washer shock – right rear
The shims aren’t precisely lined up with the feet, because I couldn’t make that work out, but they definitely prevented the mounts from shaking in their boots during the spin cycle.
You will inevitably want to take the mounts off the shocks, which will prove surprisingly difficult. The two halves are identical, with triangular latches that snap together with no provision for release:
Kenmore washer shock – foot internals
Brute force applied with a small screwdriver may suffice, but don’t be surprised if strong words are required.