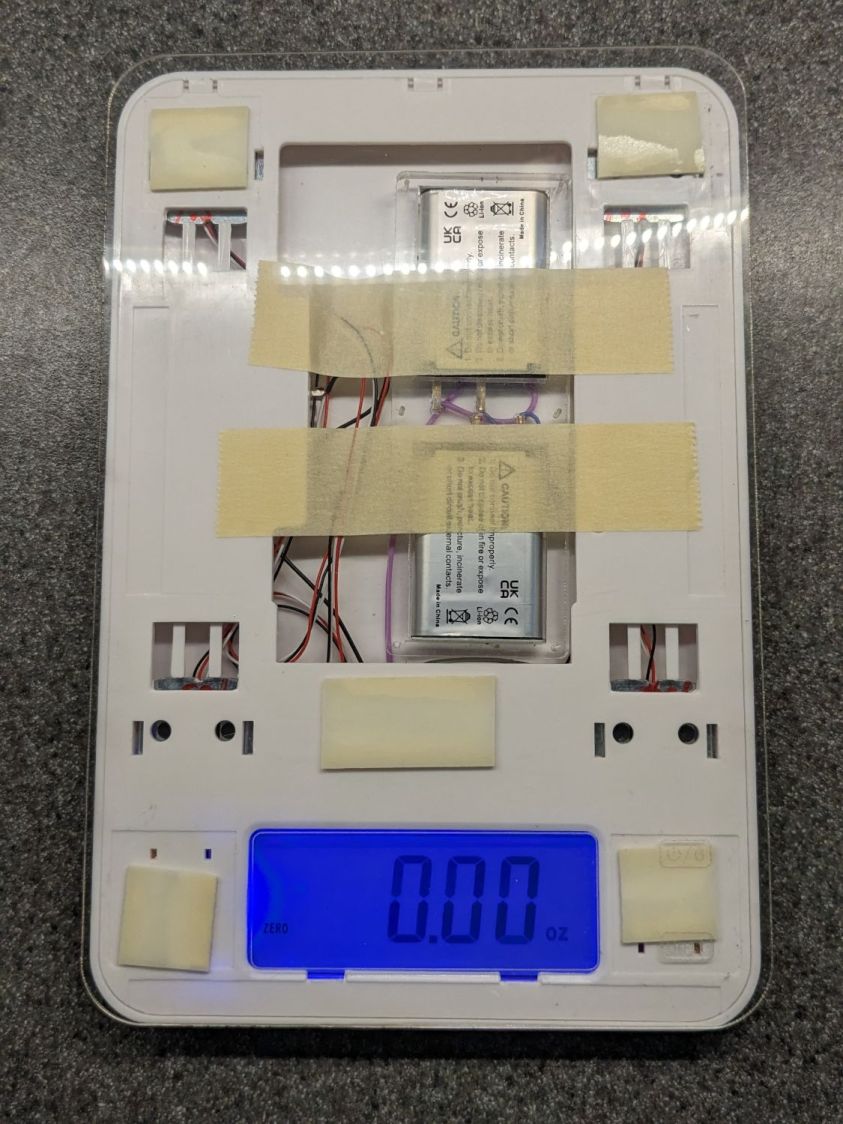
While pondering what to do with the shattered kitchen scale, I got a bottom-dollar replacement touting its rechargeable lithium battery. After giving it the obligatory charge-before-using, I put it in service. Five days later, its battery was dead flat discharged.
So I gutted it to extract the battery:

It’s a cute little thing, isn’t it?
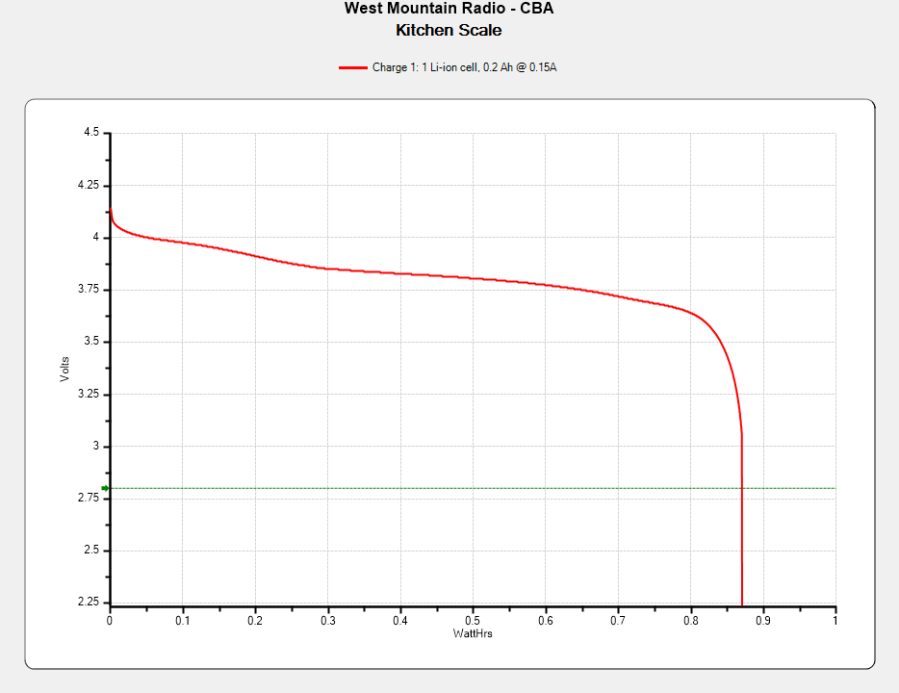
Much to my surprise, the obligatory battery rundown test showed it matches its 0.74 W·hr label:
We all know where this is going, right?
Crunche a connector on the battery, another on the scale, and make up a suitable current tap for a meter:
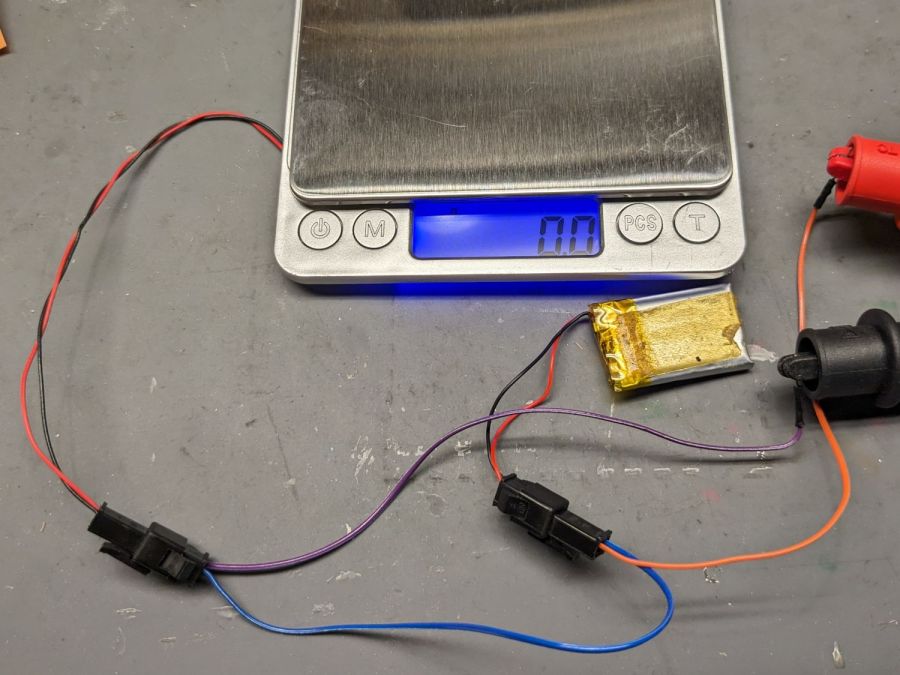
Which looked like this:
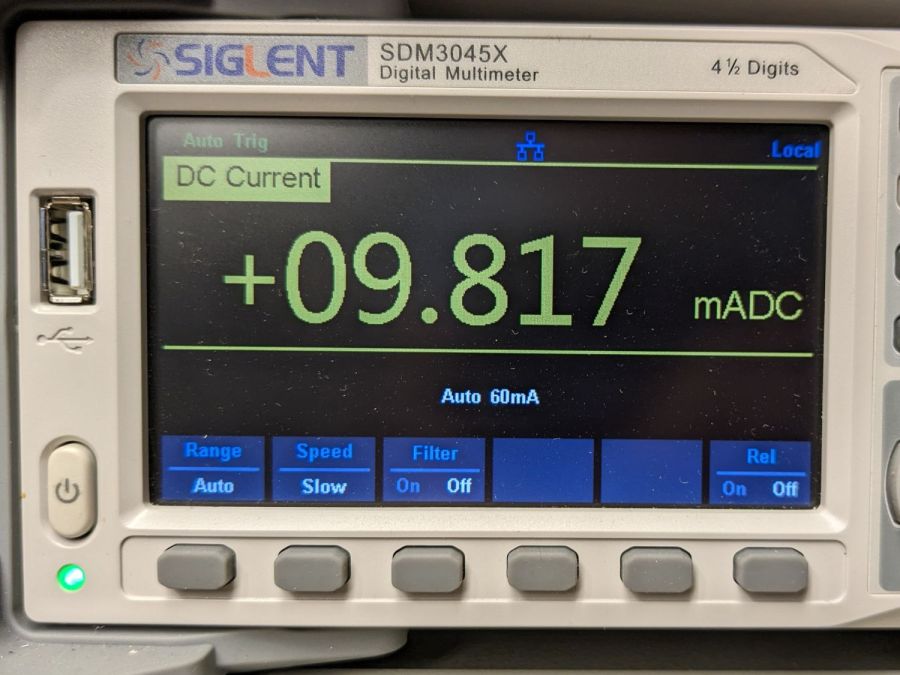
That’s about what I found for the craptastic scale running from a pair of CR2032 primary cells, so it’s not out of line.
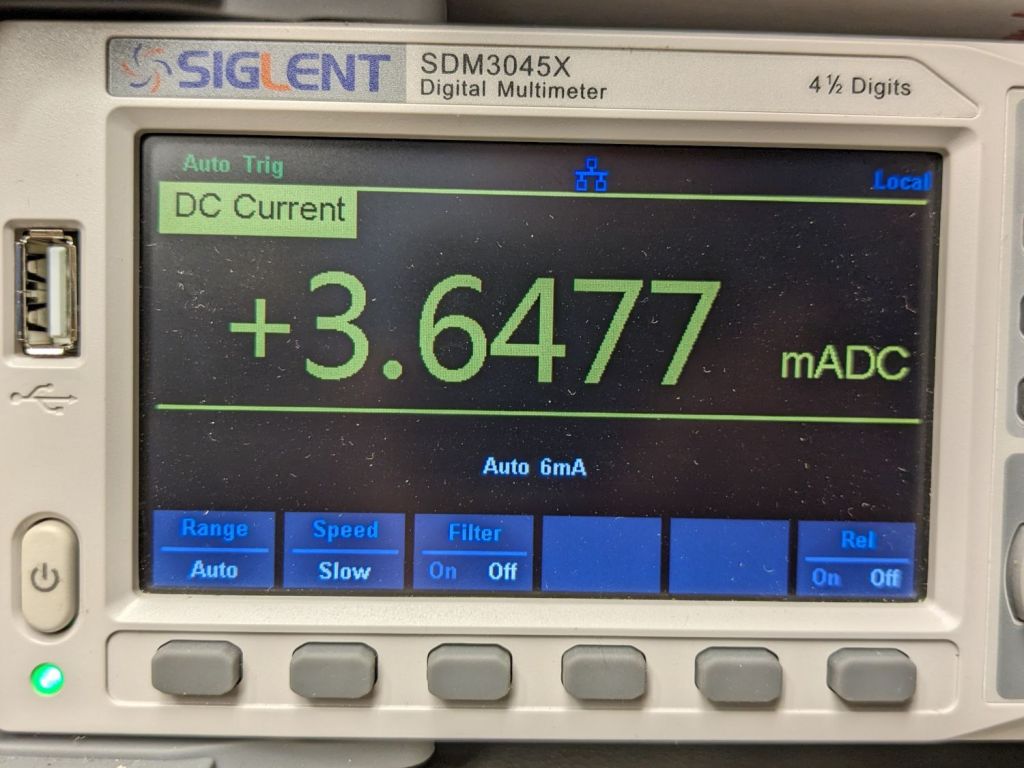
Turn off the scale and measure the idle current:
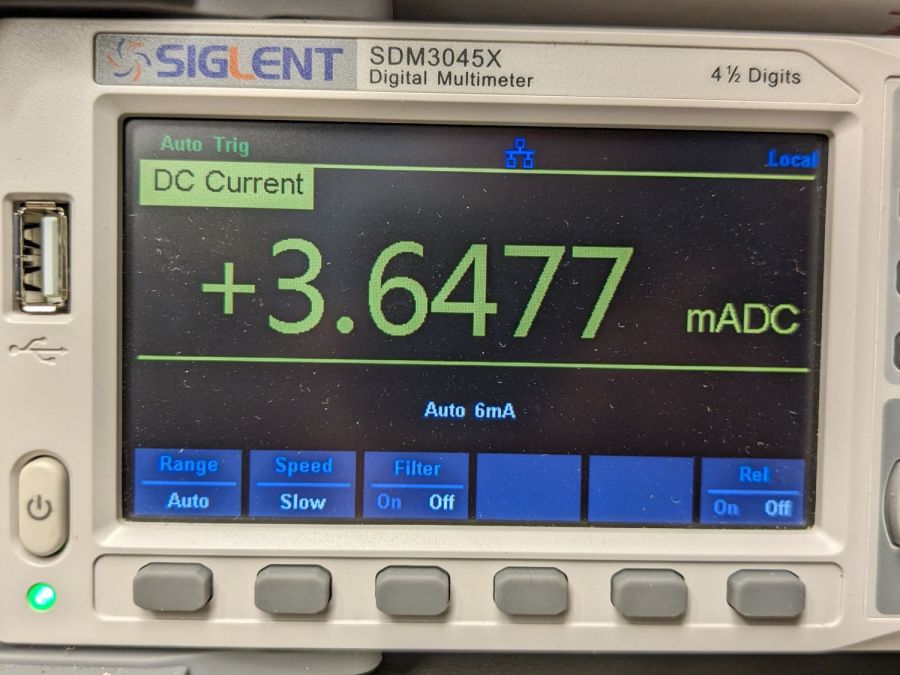
Do you think I got a dud?
For all I know, the little microcontroller under the epoxy blob is running a continuous attack on my WiFi network, with the intent of siphoning off all my sensitive bits. Ya never know.
Dividing the battery’s 200 mA·hr rating by 4 mA says it really should be dead in 50 hours, which is close enough to five days: diagnosis confirmed!
Rather than fight, I switched to a battery with more capacity:

It’s long past its prime, but ought to last for a month, which is about as long as the shattered scale survived on a similar battery.
Sheesh & similar remarks.