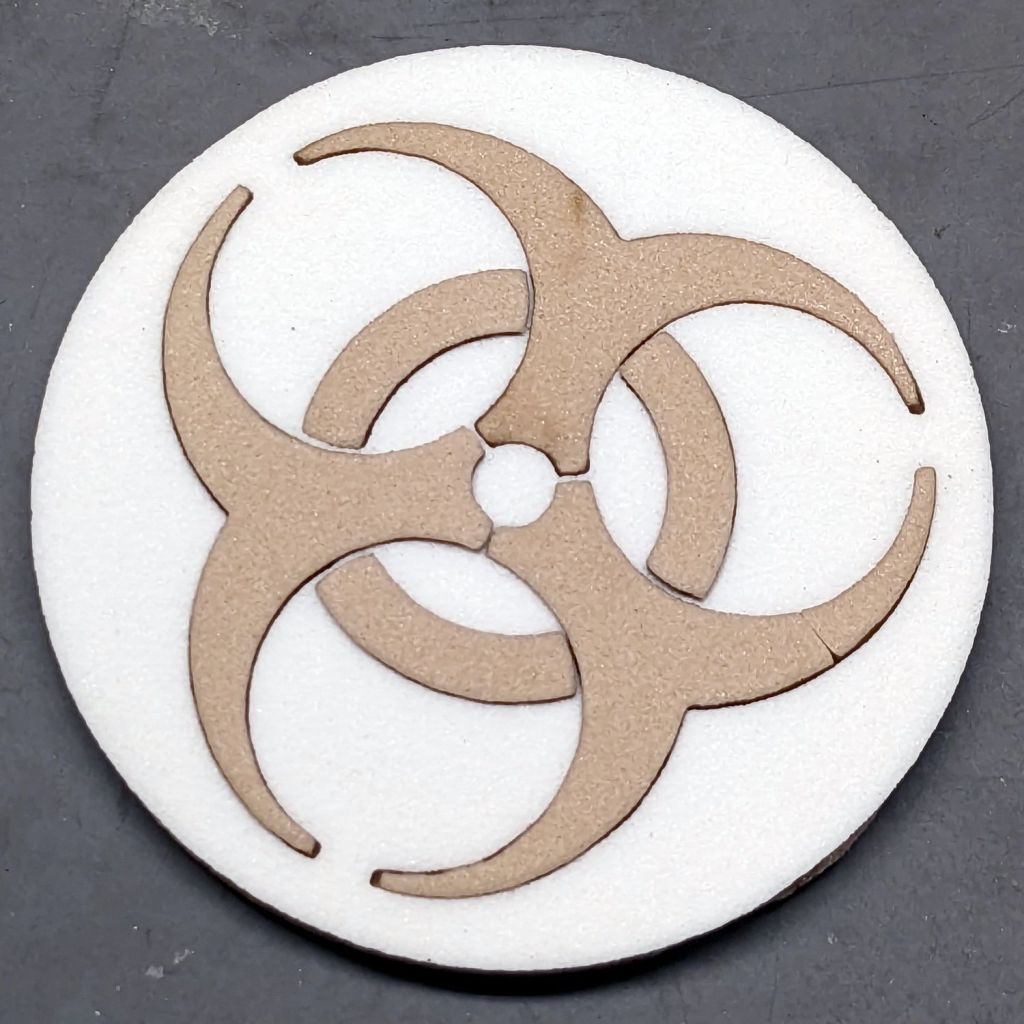
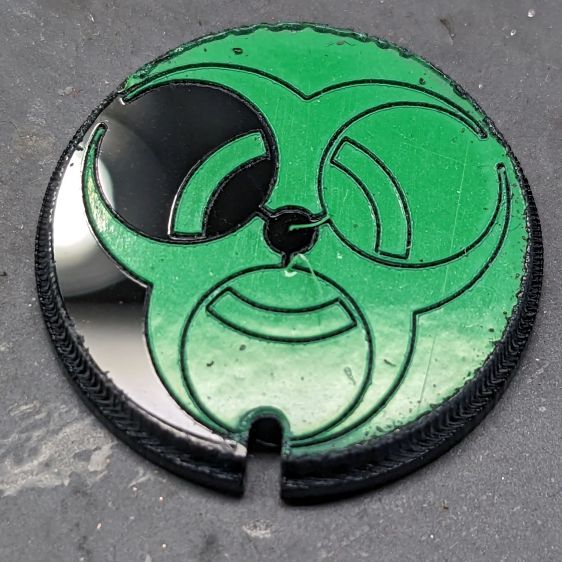
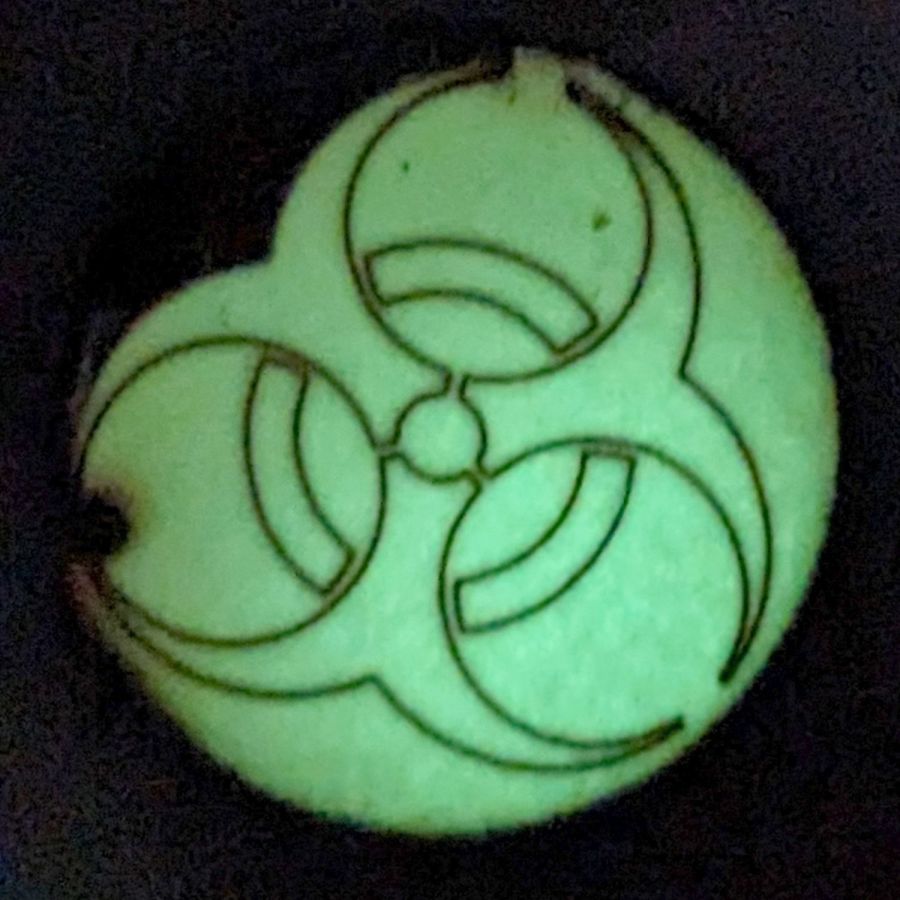
A small coaster laser-cut from scraps of EVA craft foam:
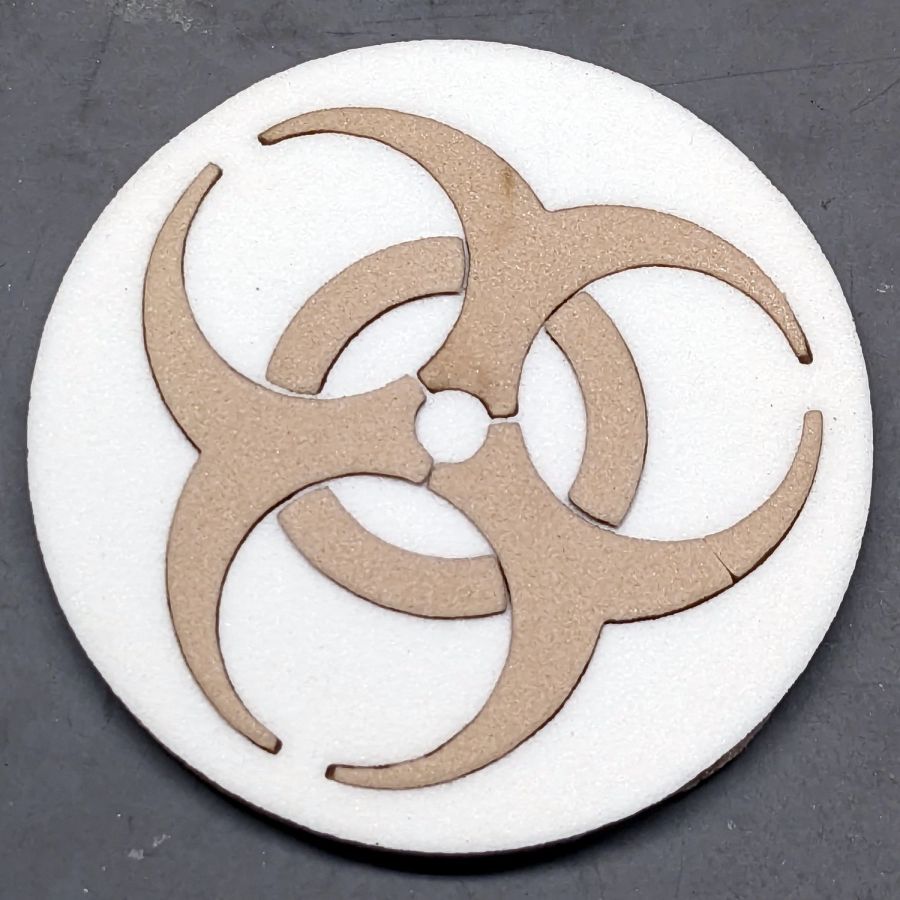
It’s all of 60 mm OD, so not particularly practical, but it (and its predecessor, a complete botch) helped show the laser kerf in EVA foam is an astonishing 0.6 mm, when cut at 125 mm/s with maybe 30 W.
The white outer shape is the nominal size, so holes are 0.3 mm larger on all sides than the pattern. The tan inner shapes get a 0.6 mm outset (!) to make them larger, which definitely squared up the horn tips. The fit is snug, but another 0.1 mm might be even better.
The pieces stick to a 60 mm circle cut from cork with a PSA layer, which makes it entirely too bendy.
If you wanted to do this for real, all the patterns would require tweakage to make the smallest features about 2 mm. The huge kerf ate the 1 mm struts around the central white disk and the tan circles should clear the horn stems by 1 mm, so that’s just barely enough.


