The adapter for an old Electrolux crevice tool (not the dust brush) snapped at the usual stress concentration after about three years:

The lower adapter is the new version, made from a length of 1 inch PVC pipe (that’s the ID, kinda-sorta) epoxied into a revised Kenmore adapter fitting.
The original OpenSCAD model provided the taper dimensions:

The taper isn’t quite as critical as it seems, because the crevice tool is an ancient molded plastic part, but a smidge over half a degree seemed like a good target.
Start by boring out the pipe ID until it’s Big Enough (or, equally, the walls aren’t Scary Thin) at 28 mm:

Alas, the mini-lathe’s craptastic compound has 2° graduations:
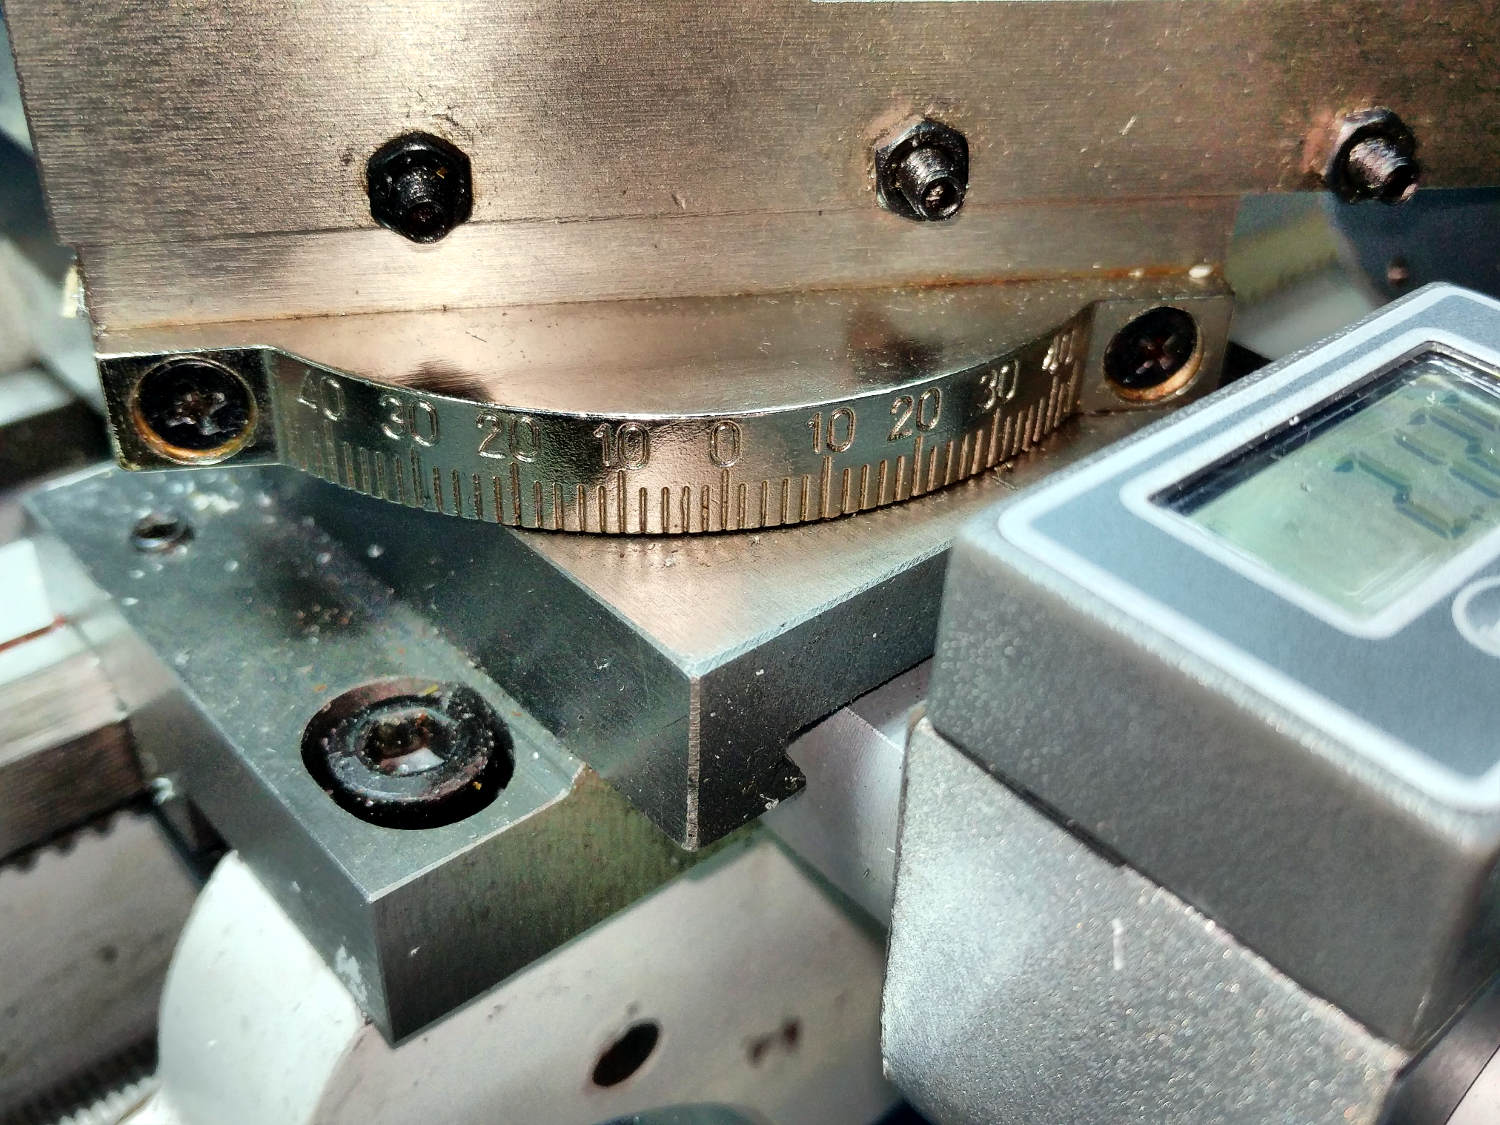
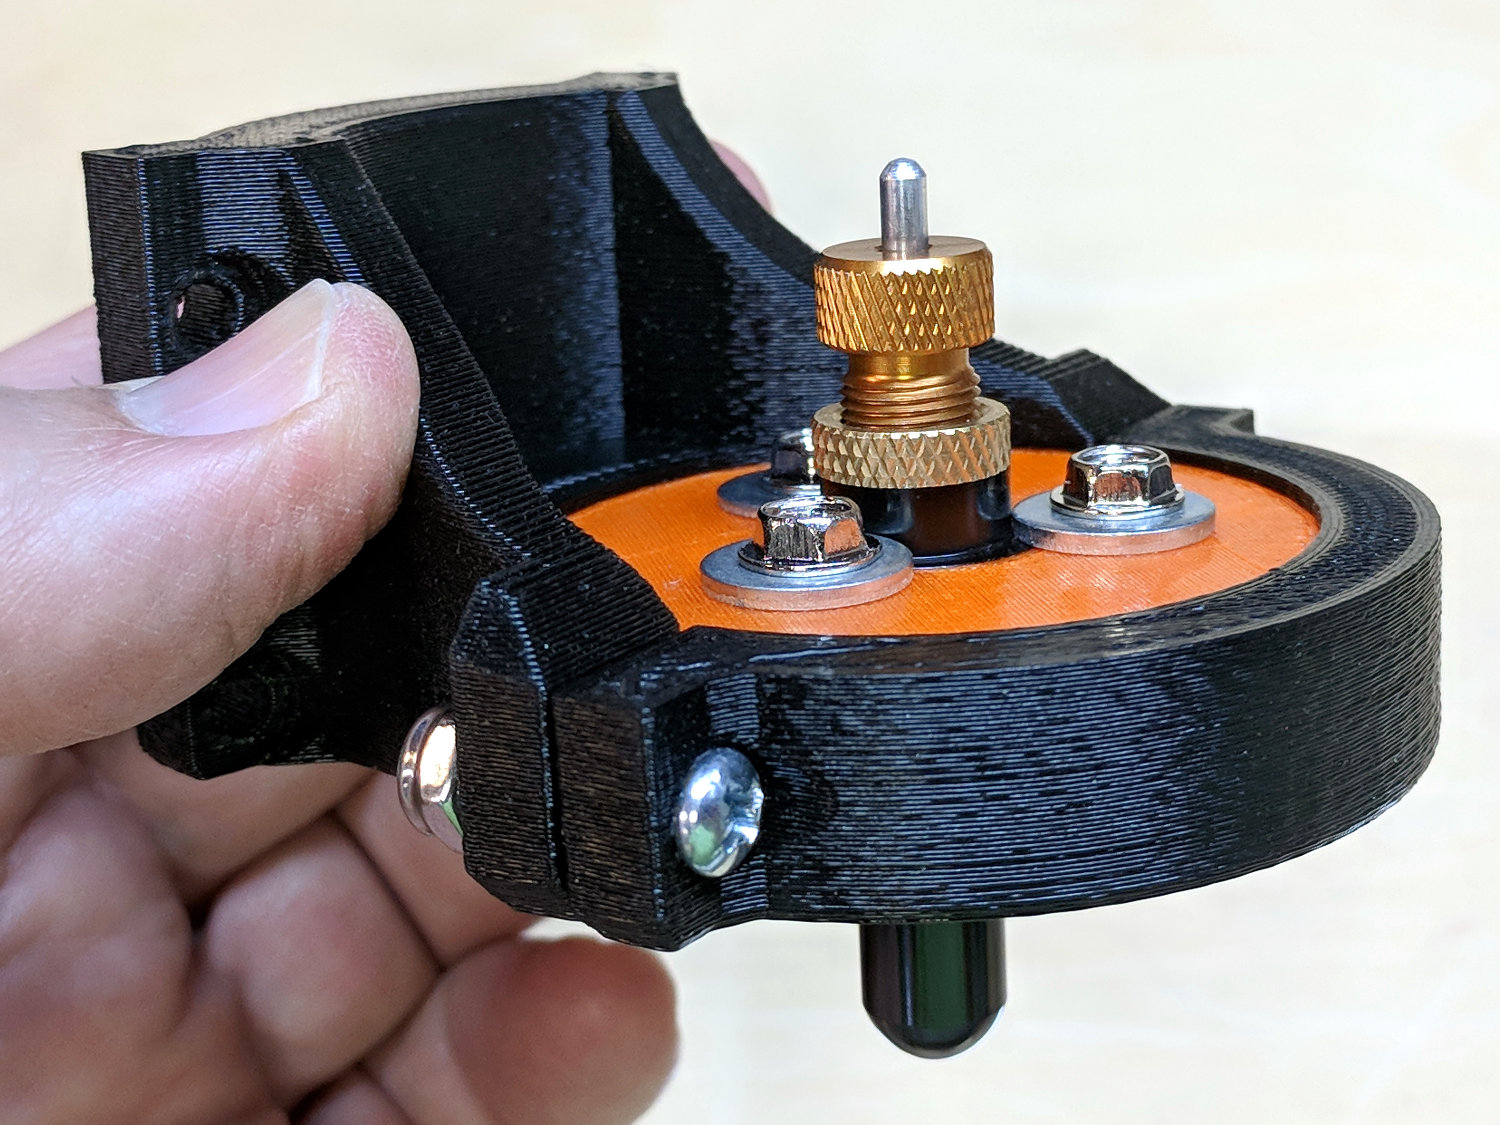
So I set the angle using a somewhat less craptastic protractor and angle gauge:

The little wedge of daylight near the gauge pivot is the difference between the normal perpendicular-to-the-spindle axis setting and half-a-degree-ish.
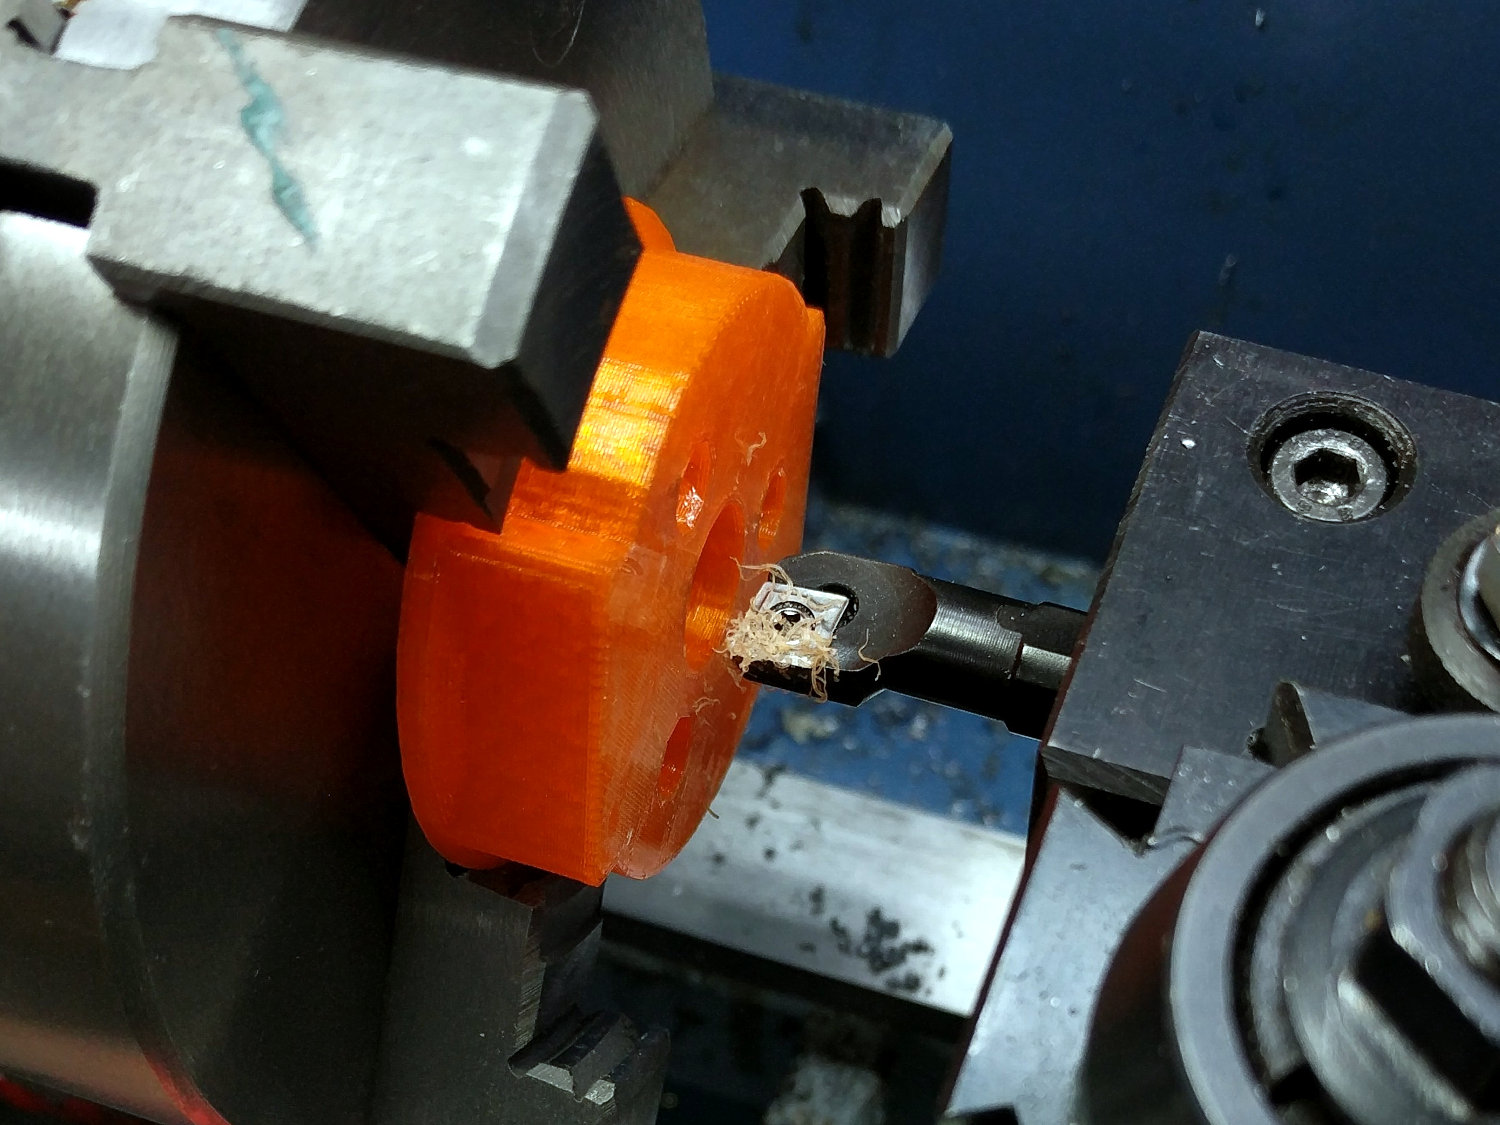
Turning PVC produces remarkably tenacious swarf:
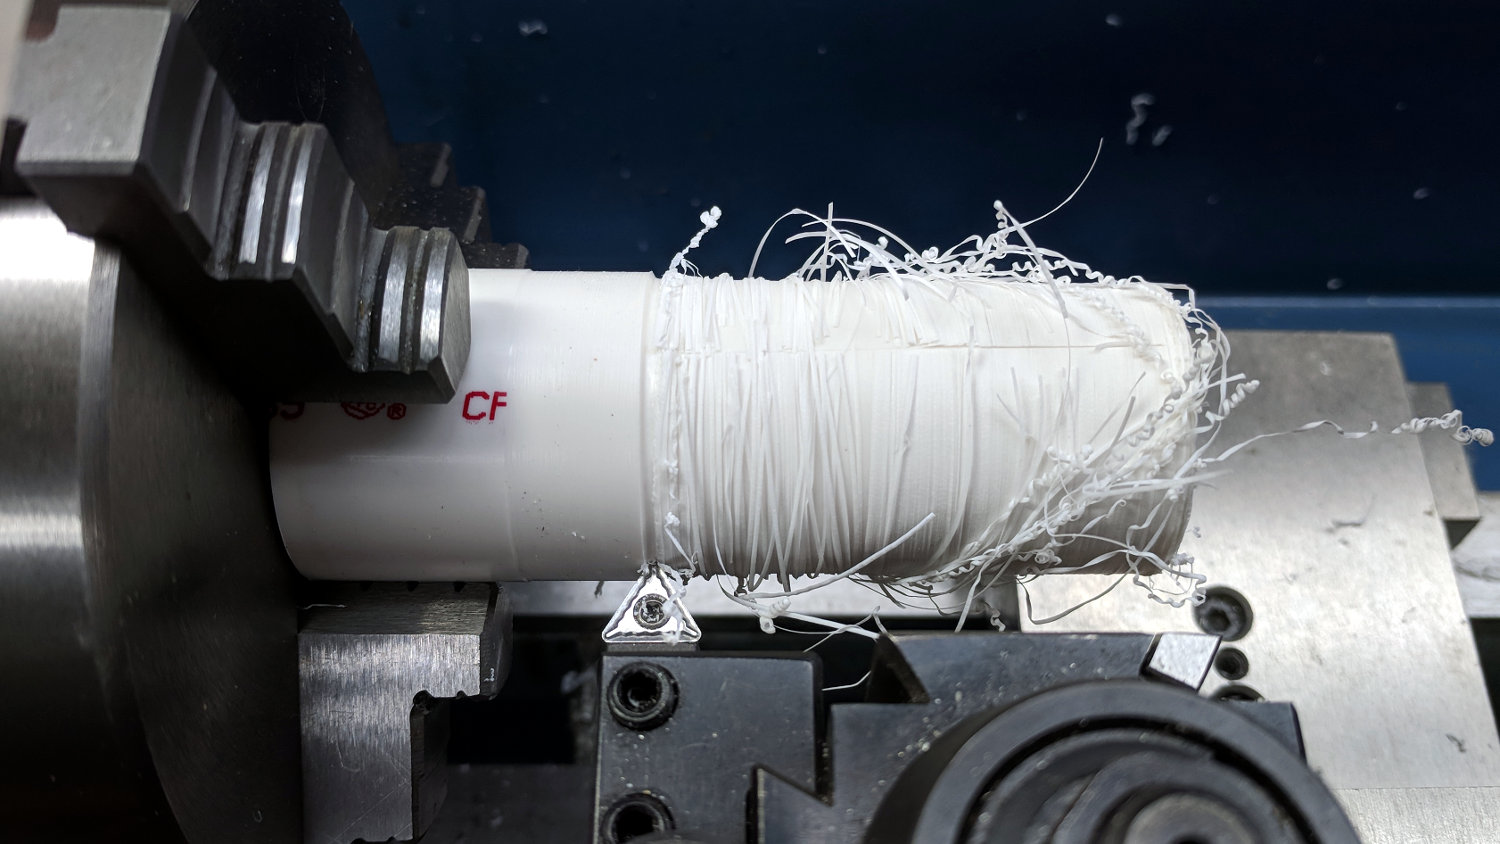
The gash along the top comes from a utility knife; just pulling the swarf off didn’t work well at all.
The column of figures down the right side of the doodles shows successive approximations to the target angle, mostly achieved by percussive adjustment, eventually converging to about the right taper with the proper dimensions.
Cutting off the finished product with the (newly angled) cutoff bit:

And then It Just Worked™.
The OpenSCAD source code for all the adapters as a GitHub Gist:
| // Kenmore vacuum cleaner nozzle adapters | |
| // Ed Nisley KE4ZNU November 2015 and ongoing | |
| // Layout options | |
| Layout = "CrevicePipe"; // MaleFitting CoilWand FloorBrush | |
| // CreviceTool Crevice Pipe ScrubbyTool LuxBrush DustBrush | |
| //- Extrusion parameters must match reality! | |
| // Print with +1 shells and 3 solid layers | |
| ThreadThick = 0.25; | |
| ThreadWidth = 0.40; | |
| HoleWindage = 0.2; | |
| function IntegerMultiple(Size,Unit) = Unit * ceil(Size / Unit); | |
| Protrusion = 0.1; // make holes end cleanly | |
| //———————- | |
| // Dimensions | |
| ID1 = 0; // for tapered tubes | |
| ID2 = 1; | |
| OD1 = 2; | |
| OD2 = 3; | |
| LENGTH = 4; | |
| OEMTube = [35.0,35.0,41.7,40.5,30.0]; // main fitting tube | |
| EndStop = [OEMTube[ID1],OEMTube[ID2],47.5,47.5,6.5]; // flange at end of main tube | |
| FittingOAL = OEMTube[LENGTH] + EndStop[LENGTH]; | |
| $fn = 12*4; | |
| //———————- | |
| // Useful routines | |
| module PolyCyl(Dia,Height,ForceSides=0) { // based on nophead's polyholes | |
| Sides = (ForceSides != 0) ? ForceSides : (ceil(Dia) + 2); | |
| FixDia = Dia / cos(180/Sides); | |
| cylinder(r=(FixDia + HoleWindage)/2,h=Height,$fn=Sides); | |
| } | |
| //——————- | |
| // Male fitting on end of Kenmore tools | |
| // This slides into the end of the handle or wand and latches firmly in place | |
| module MaleFitting() { | |
| Latch = [40,11.5,5.0]; // rectangle latch opening | |
| EntryAngle = 45; // latch entry ramp | |
| EntrySides = 16; | |
| EntryHeight = 15.0; // lower edge on *inside* of fitting | |
| KeyRadius = 1.0; | |
| translate([0,0,6.5]) | |
| difference() { | |
| union() { | |
| cylinder(d1=OEMTube[OD1],d2=OEMTube[OD2],h=OEMTube[LENGTH]); // main tube | |
| hull() // insertion guide | |
| for (i=[-(6.0/2 – KeyRadius),(6.0/2 – KeyRadius)], | |
| j=[-(28.0/2 – KeyRadius),(28.0/2 – KeyRadius)], | |
| k=[-(26.0/2 – KeyRadius),(26.0/2 – KeyRadius)]) | |
| translate([(i – (OEMTube[ID1]/2 + OEMTube[OD1]/2)/2 + 6.0/2),j,(k + 26.0/2 – 1.0)]) | |
| sphere(r=KeyRadius,$fn=8); | |
| translate([0,0,-EndStop[LENGTH]]) // wand tube butts against this | |
| cylinder(d=EndStop[OD1],h=EndStop[LENGTH] + Protrusion); | |
| } | |
| translate([0,0,-OEMTube[LENGTH]]) // main bore | |
| cylinder(d=OEMTube[ID1],h=2*OEMTube[LENGTH] + 2*Protrusion); | |
| translate([0,-11.5/2,23.0 – 5.0]) // latch opening | |
| cube(Latch); | |
| translate([OEMTube[ID1]/2 + EntryHeight/tan(90-EntryAngle),0,0]) // latch ramp | |
| translate([(Latch[1]/cos(180/EntrySides))*cos(EntryAngle)/2,0,(Latch[1]/cos(180/EntrySides))*sin(EntryAngle)/2]) | |
| rotate([0,-EntryAngle,0]) | |
| intersection() { | |
| rotate(180/EntrySides) | |
| PolyCyl(Latch[1],Latch[0],EntrySides); | |
| translate([-(2*Latch[0])/2,0,-Protrusion]) | |
| cube(2*Latch[0],center=true); | |
| } | |
| } | |
| } | |
| //——————- | |
| // Refrigerator evaporator coil wand | |
| module CoilWand() { | |
| union() { | |
| translate([0,0,50.0]) | |
| rotate([180,0,0]) | |
| difference() { | |
| cylinder(d1=EndStop[OD1],d2=42.0,h=50.0); | |
| translate([0,0,-Protrusion]) | |
| cylinder(d1=35.0,d2=35.8,h=100); | |
| } | |
| translate([0,0,50.0 – Protrusion]) | |
| MaleFitting(); | |
| } | |
| } | |
| //——————- | |
| // Samsung floor brush | |
| module FloorBrush() { | |
| union() { | |
| translate([0,0,60.0]) | |
| rotate([180,0,0]) | |
| difference() { | |
| union() { | |
| cylinder(d1=EndStop[OD1],d2=32.4,h=10.0); | |
| translate([0,0,10.0 – Protrusion]) | |
| cylinder(d1=32.4,d2=30.7,h=50.0 + Protrusion); | |
| } | |
| translate([0,0,-Protrusion]) | |
| cylinder(d1=28.0,d2=24.0,h=100); | |
| } | |
| translate([0,0,60.0 – Protrusion]) | |
| MaleFitting(); | |
| } | |
| } | |
| //——————- | |
| // Crevice tool | |
| module CreviceTool() { | |
| union() { | |
| translate([0,0,60.0]) | |
| rotate([180,0,0]) | |
| difference() { | |
| union() { | |
| cylinder(d1=EndStop[OD1],d2=32.0,h=10.0); | |
| translate([0,0,10.0 – Protrusion]) | |
| cylinder(d1=32.0,d2=30.4,h=50.0 + Protrusion); | |
| } | |
| translate([0,0,-Protrusion]) | |
| cylinder(d1=28.0,d2=24.0,h=100); | |
| } | |
| translate([0,0,60.0 – Protrusion]) | |
| MaleFitting(); | |
| } | |
| } | |
| //——————- | |
| // Crevice tool | |
| // Hacked for 1 inch Schedule 40 PVC pipe stiffening tube | |
| module CrevicePipe() { | |
| PipeOD = 33.5; | |
| union() { | |
| translate([0,0,10.0]) | |
| rotate([180,0,0]) | |
| difference() { | |
| cylinder(d1=EndStop[OD1],d2=PipeOD+2*8*ThreadWidth,h=10.0); | |
| translate([0,0,-Protrusion]) | |
| cylinder(d=PipeOD,h=100); | |
| } | |
| translate([0,0,10.0]) | |
| MaleFitting(); | |
| } | |
| } | |
| //——————- | |
| // Mystery brush | |
| module ScrubbyTool() { | |
| union() { | |
| translate([0,0,60.0]) | |
| rotate([180,0,0]) | |
| difference() { | |
| union() { | |
| cylinder(d1=EndStop[OD1],d2=31.8,h=10.0); | |
| translate([0,0,10.0 – Protrusion]) | |
| cylinder(d1=31.8,d2=31.0,h=50.0 + Protrusion); | |
| } | |
| translate([0,0,-Protrusion]) | |
| cylinder(d1=26.0,d2=24.0,h=100); | |
| } | |
| translate([0,0,60.0 – Protrusion]) | |
| MaleFitting(); | |
| } | |
| } | |
| //——————- | |
| // eBay horsehair dusting brush | |
| // Hacked for 3/4" Schedule 40 PVC stiffening tube | |
| // eBay: 30.0 32.0 30.0 | |
| // Shopvac: 30.3 31.0 25.0 | |
| // Must build snout down with brim to avoid support | |
| module DustBrush() { | |
| PipeOD = 27.0; // stiffening pipe | |
| Snout = [0,0, 31.0, 30.3, 25.0]; | |
| TaperLength = 10.0; // transition cone from fitting to snout | |
| union() { | |
| translate([0,0,Snout[LENGTH] + TaperLength]) | |
| rotate([180,0,0]) | |
| difference() { | |
| union() { | |
| cylinder(d1=EndStop[OD1],d2=Snout[OD1],h=TaperLength); | |
| translate([0,0,TaperLength – Protrusion]) | |
| cylinder(d1=Snout[OD1],d2=Snout[OD2],h=Snout[LENGTH] + Protrusion); | |
| } | |
| translate([0,0,-Protrusion]) // 3/4 inch Sch 40 PVC | |
| PolyCyl(PipeOD,100); | |
| } | |
| translate([0,0,Snout[LENGTH] + TaperLength – Protrusion]) | |
| MaleFitting(); | |
| } | |
| } | |
| //——————- | |
| // Electrolux brush ball | |
| module LuxBrush() { | |
| union() { | |
| translate([0,0,30.0]) | |
| rotate([180,0,0]) | |
| difference() { | |
| union() { | |
| cylinder(d1=EndStop[OD1],d2=30.8,h=10.0); | |
| translate([0,0,10.0 – Protrusion]) | |
| cylinder(d1=30.8,d2=30.0,h=20.0 + Protrusion); | |
| } | |
| translate([0,0,-Protrusion]) | |
| cylinder(d1=25.0,d2=23.0,h=30 + 2*Protrusion); | |
| } | |
| translate([0,0,30.0 – Protrusion]) | |
| MaleFitting(); | |
| } | |
| } | |
| //———————- | |
| // Build it! | |
| if (Layout == "MaleFitting") | |
| MaleFitting(); | |
| if (Layout == "CoilWand") | |
| CoilWand(); | |
| if (Layout == "FloorBrush") | |
| FloorBrush(); | |
| if (Layout == "CreviceTool") | |
| CreviceTool(); | |
| if (Layout == "CrevicePipe") | |
| CrevicePipe(); | |
| if (Layout == "DustBrush") | |
| DustBrush(); | |
| if (Layout == "ScrubbyTool") | |
| ScrubbyTool(); | |
| if (Layout == "LuxBrush") | |
| LuxBrush(); |