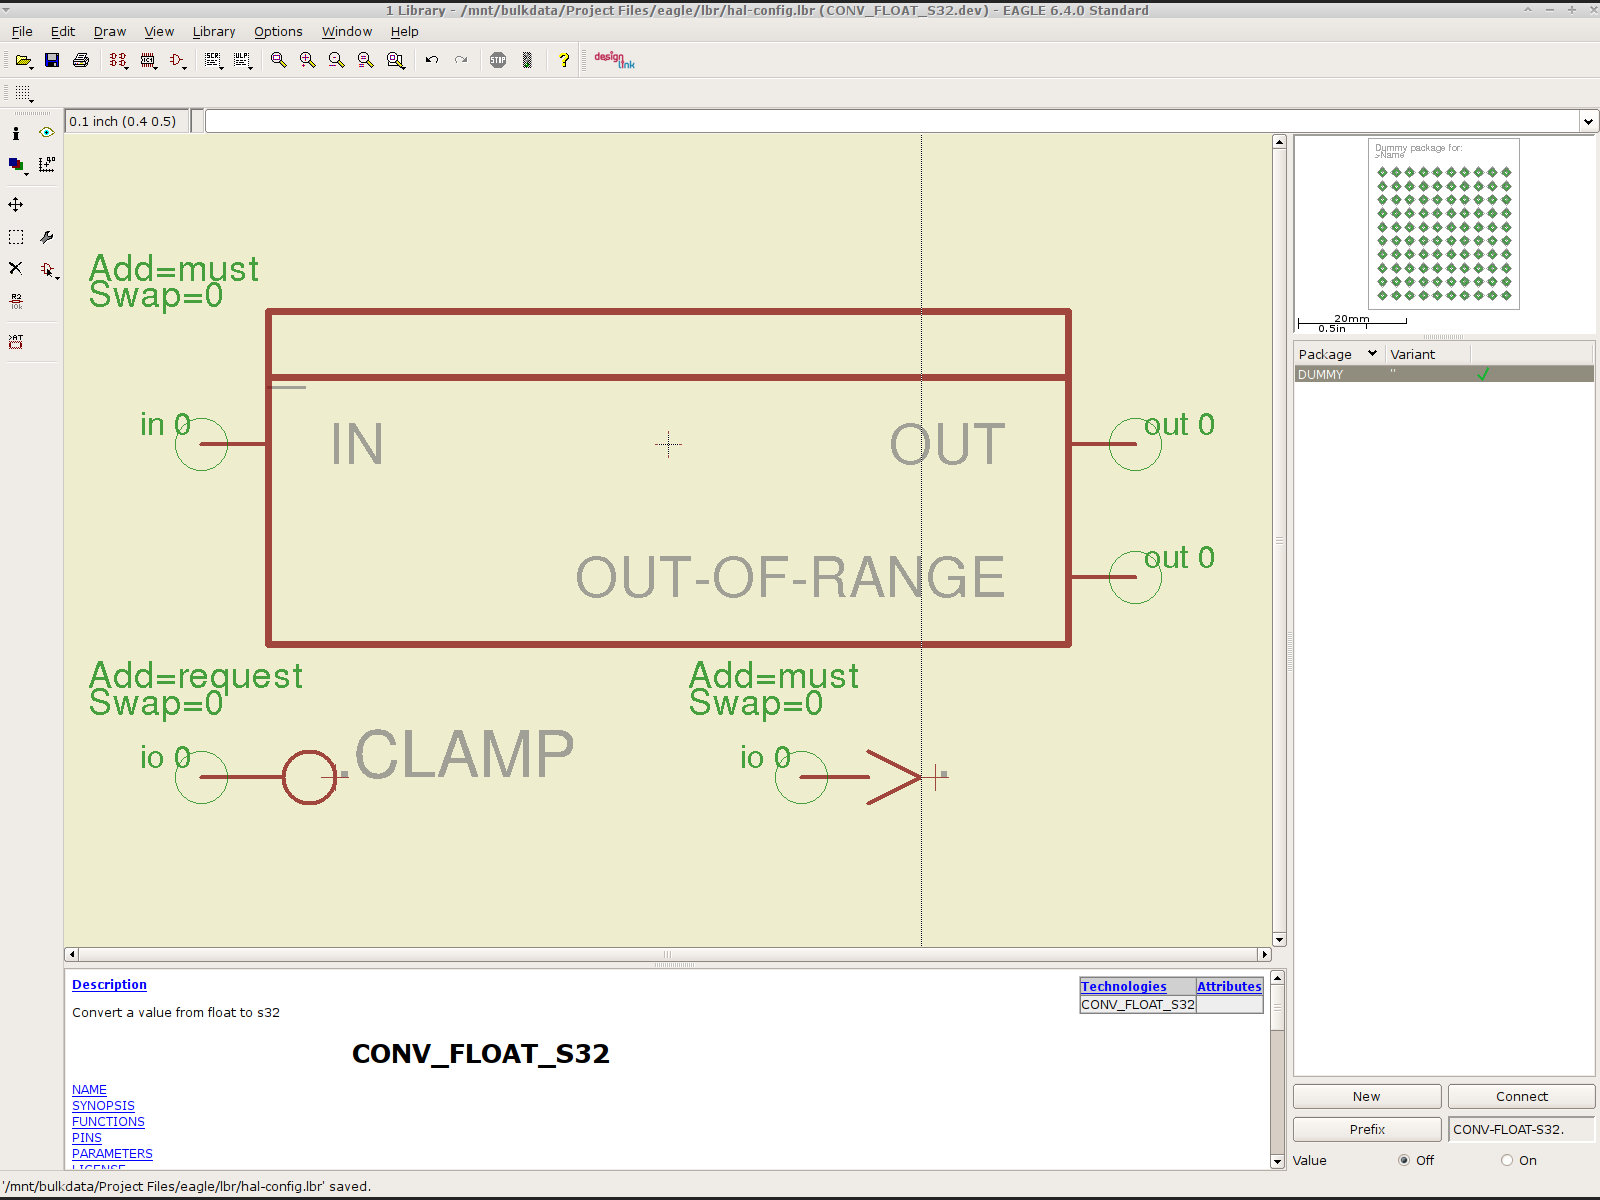
More hal-config.lbr tweakage produced enough HAL blocks to completely define the Sherline CNC mill’s HAL connections, all wired up in a multi-page schematic (Eagle-LinuxCNC-Sherline.zip.odt) that completely replaces all the disparate *.hal files I’d been using, plus a new iteration of the hal-write-2.5.ulp Eagle-to-HAL conversion script.
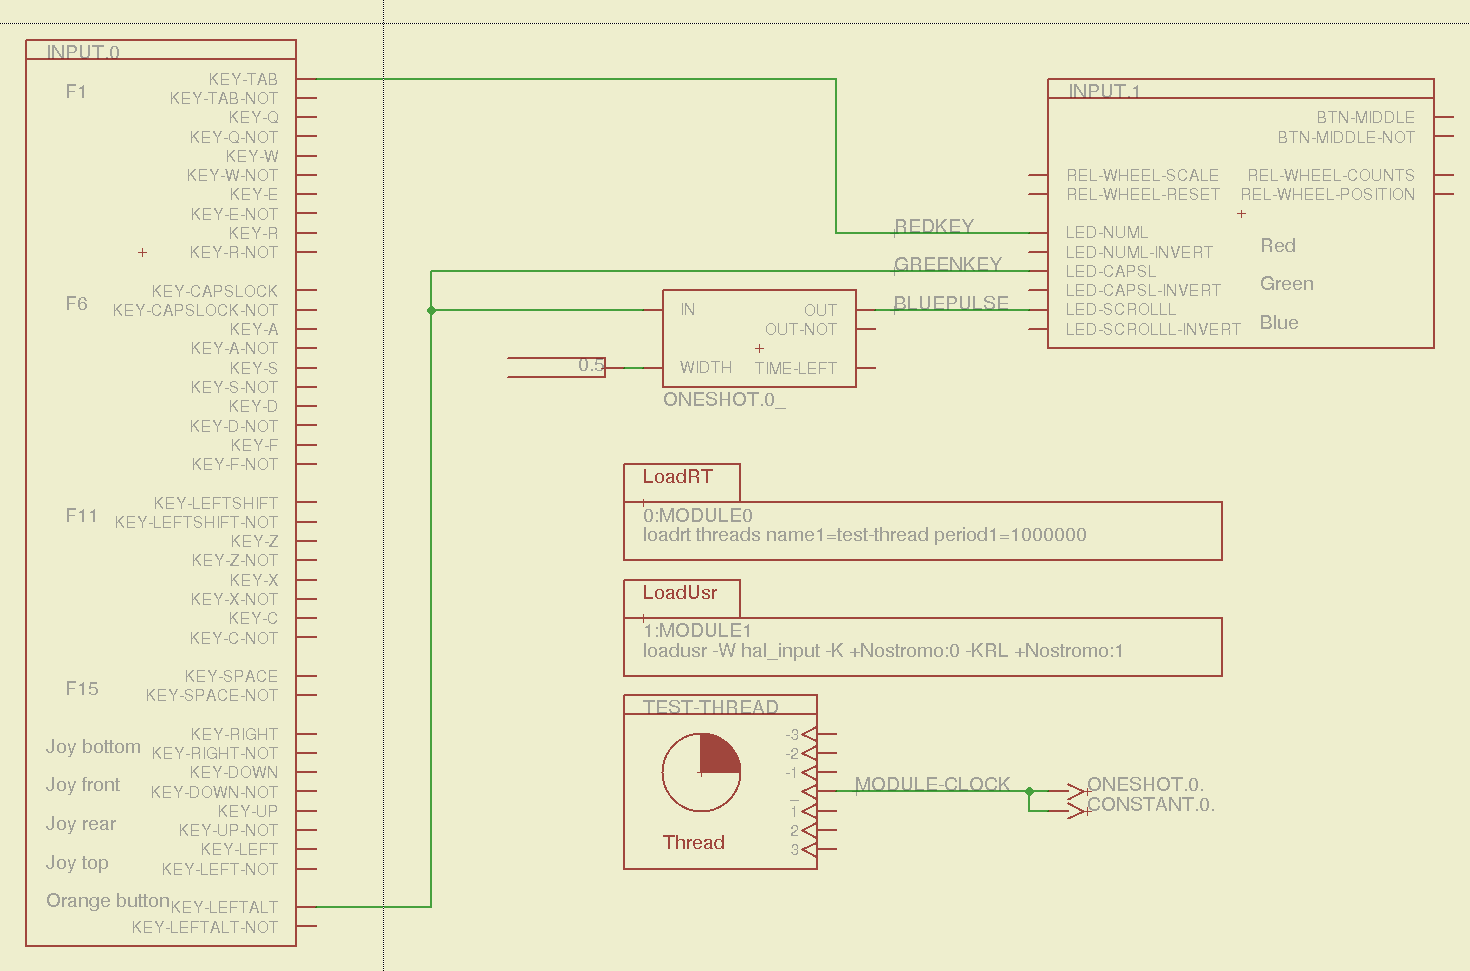
The first sheet (clicky for more dots) defines the manually configured userspace and realtime modules:

That sheet has three types of Eagle devices:
- Generalized LoadRT – devices like
trivkinsthat require only a loadrt line - Dedicated LoadRT – devices like
motionthat require functions connected to a realtime thread - Generalized LoadUsr – devices like hal_input with a HAL device, but no function pins
The device’s NAME field contains either the module name (for the specialized devices with functions) or a generic MODULE for everything else, preceded by an optional index that imposes an ordering on the output lines. The device’s VALUE field contains the text that will become the loadrt or loadusr line in the HAL file. Trailing underscores act as separators, but are discarded by the conversion script.
The immensely long line is the VALUE field that plugs a bunch of variables from the Sherline.ini file into the motion controller.
The conversion script doesn’t do anything special for those devices, other than transfer the VALUE field to the HAL file. Ordinary HAL devices, the ones with functions that don’t require any special setup, must appear in the conversion script’s list of device names, so that it can recognize them and deal with their connections.
That sheet produces this part of the HAL file:
####################################################
# Load realtime and userspace modules
loadrt trivkins
loadrt [EMCMOT]EMCMOT key=[EMCMOT]SHMEM_KEY num_joints=[TRAJ]AXES base_period_nsec=[EMCMOT]BASE_PERIOD servo_period_nsec=[EMCMOT]SERVO_PERIOD traj_period_nsec=[EMCMOT]SERVO_PERIOD
loadrt probe_parport
loadrt hal_parport cfg="[PARPORT]ADDRESS out"
loadrt stepgen step_type=0,0,0,0
loadrt pwmgen output_type=0
loadusr -W hal_manualtoolchange
loadusr -W hal_input -KA Dual
loadrt logic count=1 personality=0x104
The conversion script counts the other schematic devices and automagically produces these lines to load their corresponding modules:
loadrt constant		count=13
loadrt and2		count=17
loadrt conv_float_s32		count=1
loadrt flipflop		count=4
loadrt mux2		count=5
loadrt mux4		count=1
loadrt not		count=8
loadrt or2		count=14
loadrt scale		count=7
loadrt timedelay		count=1
loadrt toggle		count=1
Next, the parallel port configuration, which uses the D525’s system board hardware:

The stepconf configuration utility buries the parallel port configuration values in the default HAL file as magic numbers. I moved them to a new stanza in the INI file, although the syntax may not be robust enough to support multiple cards, ports, and configurations. This, however, works for now:
[PARPORT]
ADDRESS = 0x378
RESET_TIME = 10000
STEPLEN = 25000
STEPSPACE = 25000
DIRSETUP = 50000
DIRHOLD = 50000
That LOGIC block is new and serves as an AND gate that produces a combined enable signal for the parallel port. The stepconf utility uses the X axis enable signal, but, seeing as how the Sherline controller doesn’t use the result, none of that matters on my system.
The tool height probe and manual tool change wiring:
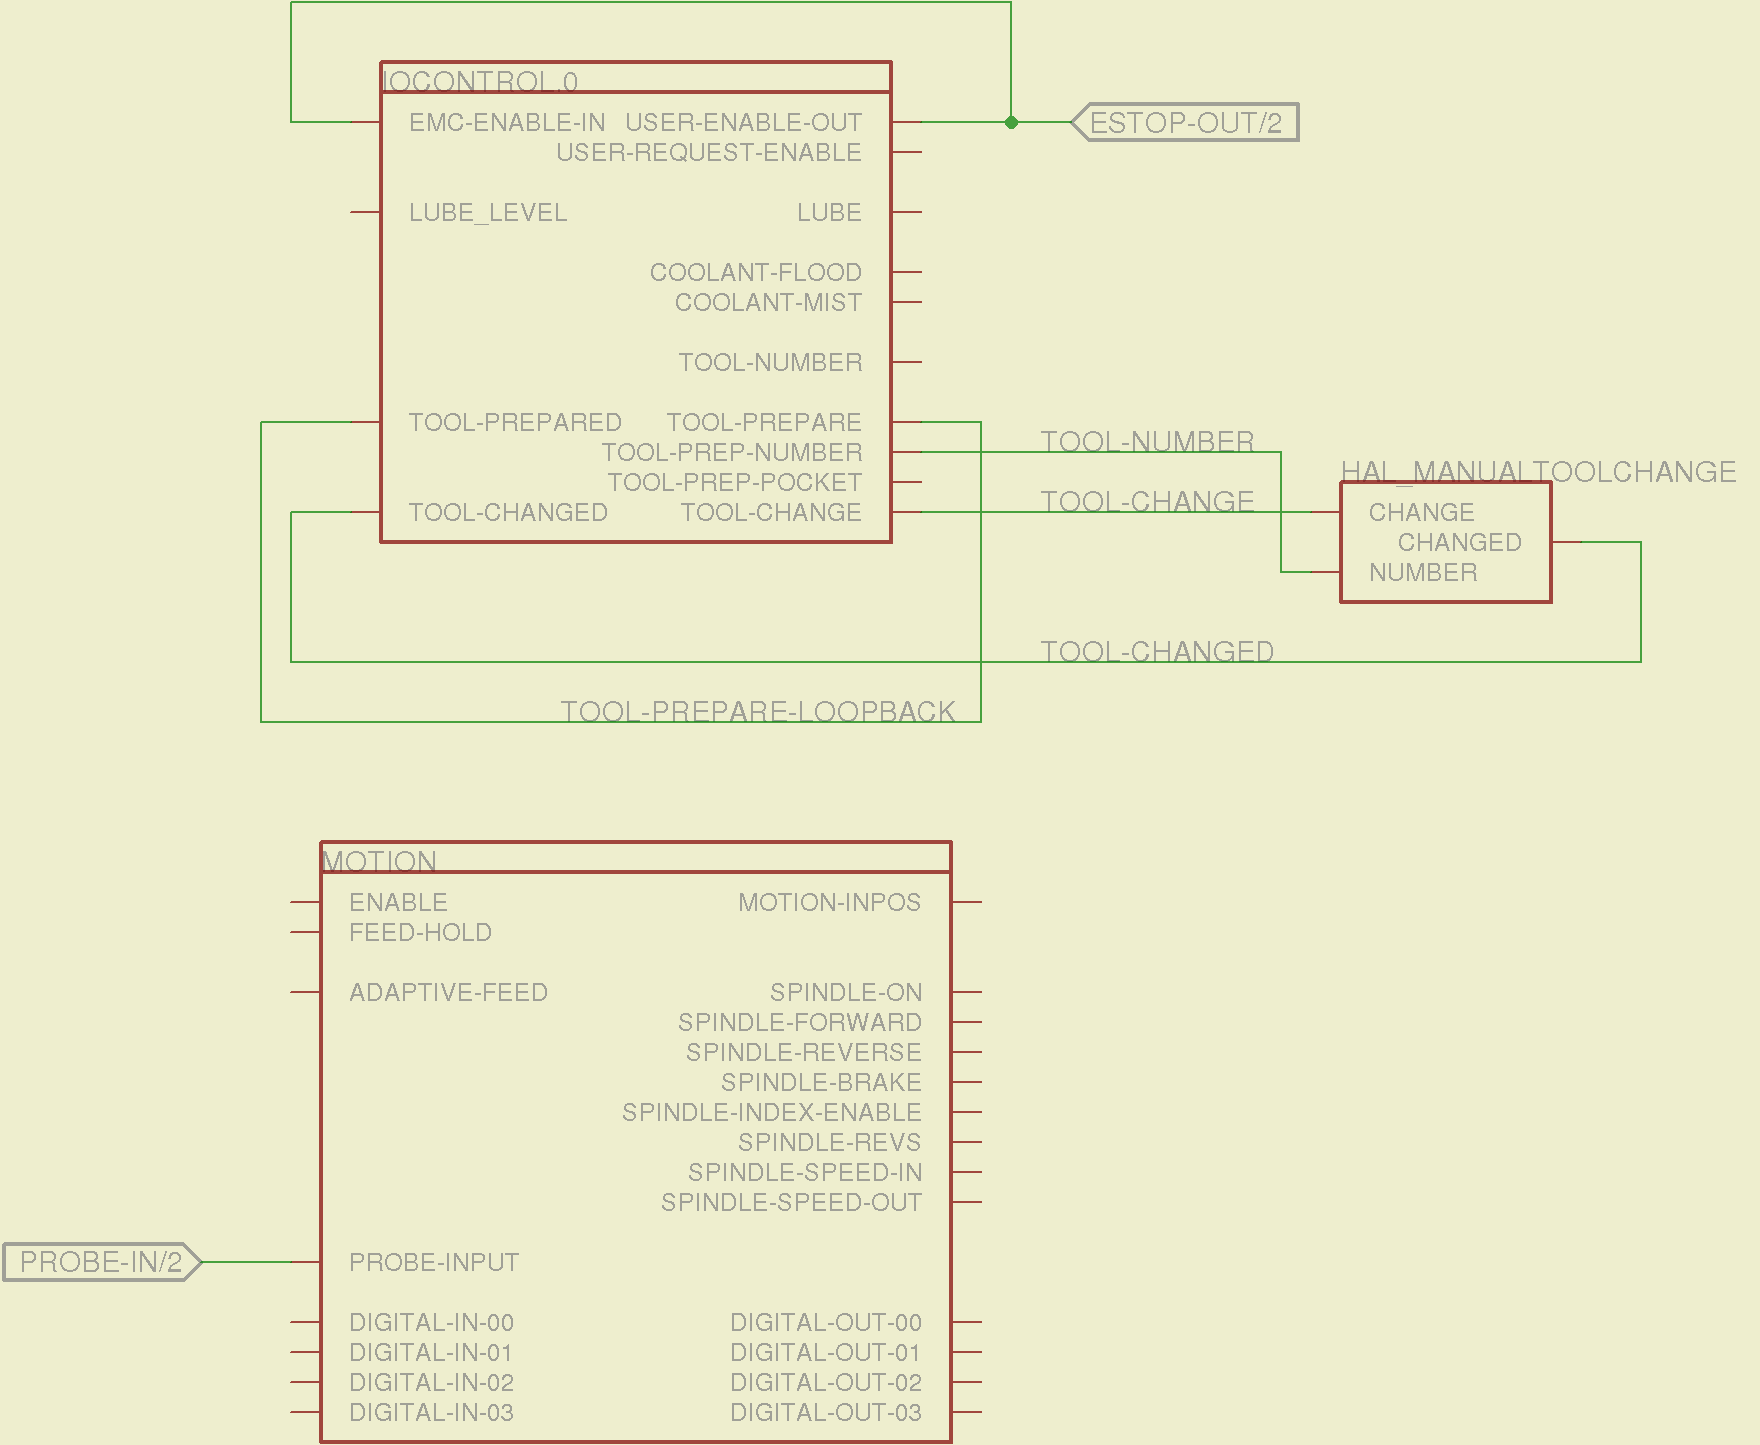
I’m not convinced the Emergency Stop polarity is correct, but it matches what was in the original HAL file. As before, the Sherline driver box ignores that output, so none of that matters right now.
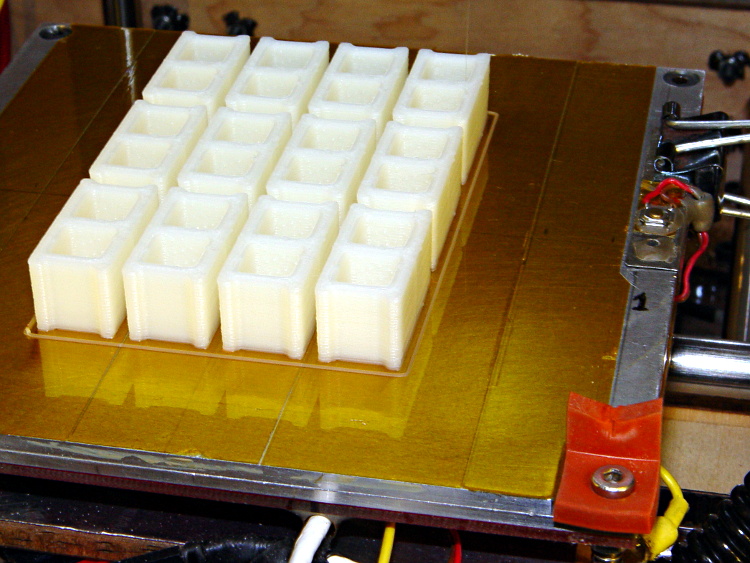
Four very similar pages define the XYZA step-and-direction generators. This is the X axis driver:

You can imagine what the next three pages for the YZA logic look like, right? There are also a few blank pages in the schematic, so the numbers jump abruptly.
The magic part of this is having Eagle manage all the tedious renumbering and counting. If you remember to adjust the name of the first module from, say, AXIS.1 to AXIS.0, then the rest get the proper numbers as you go along.
The remainder of the schematic implements the Joggy Thing’s logic, much as described there. I discovered, quite the hard way, that copy-and-pasting an entire schematic from elsewhere does horrible things to the device numbering, but I’m not sure how to combine two schematics to limit the damage. In any event, manually adjusting a few pages wasn’t the worst thing I’ve ever had to do; starting with a unified schematic should eliminate that task in the future.
The miscellaneous buttons:
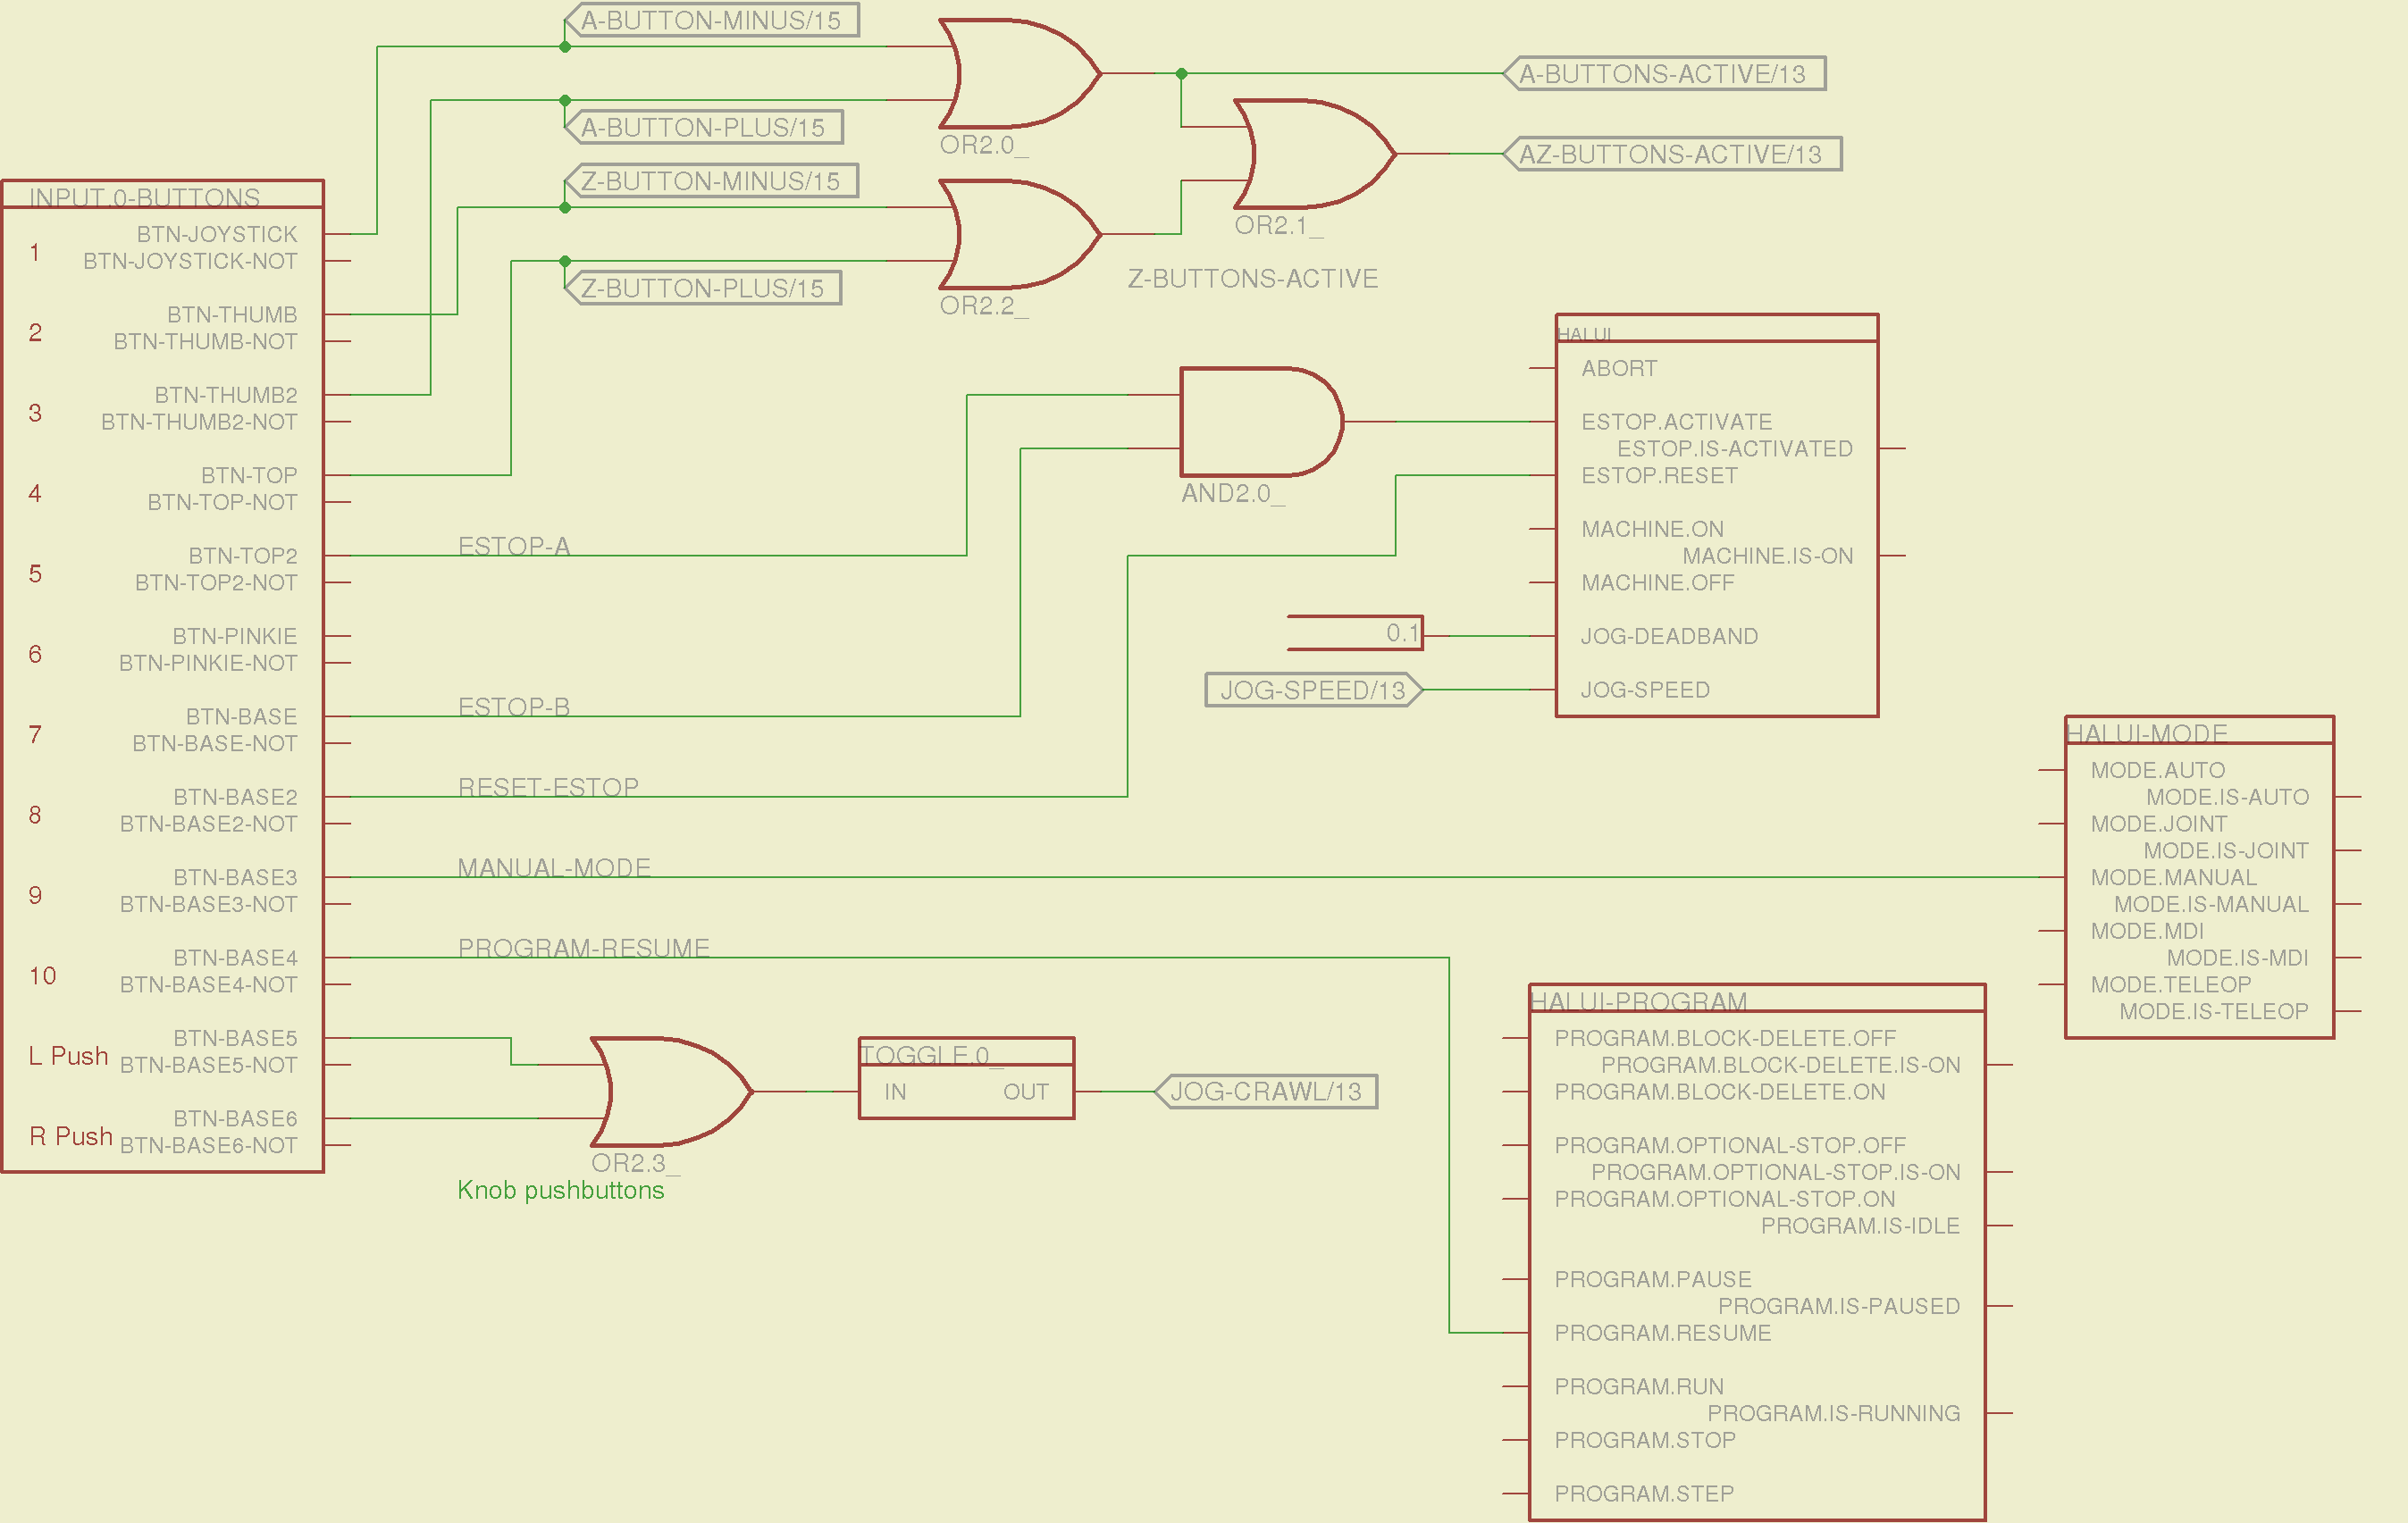
The joystick and hat values:

The joystick deadband logic now uses the (new with HAL 2.5, I think) input.n.abs-x-flat pins, which eliminated a tangle of window comparator logic.
The jog speed adjustment logic that sets the fast and crawl speeds:
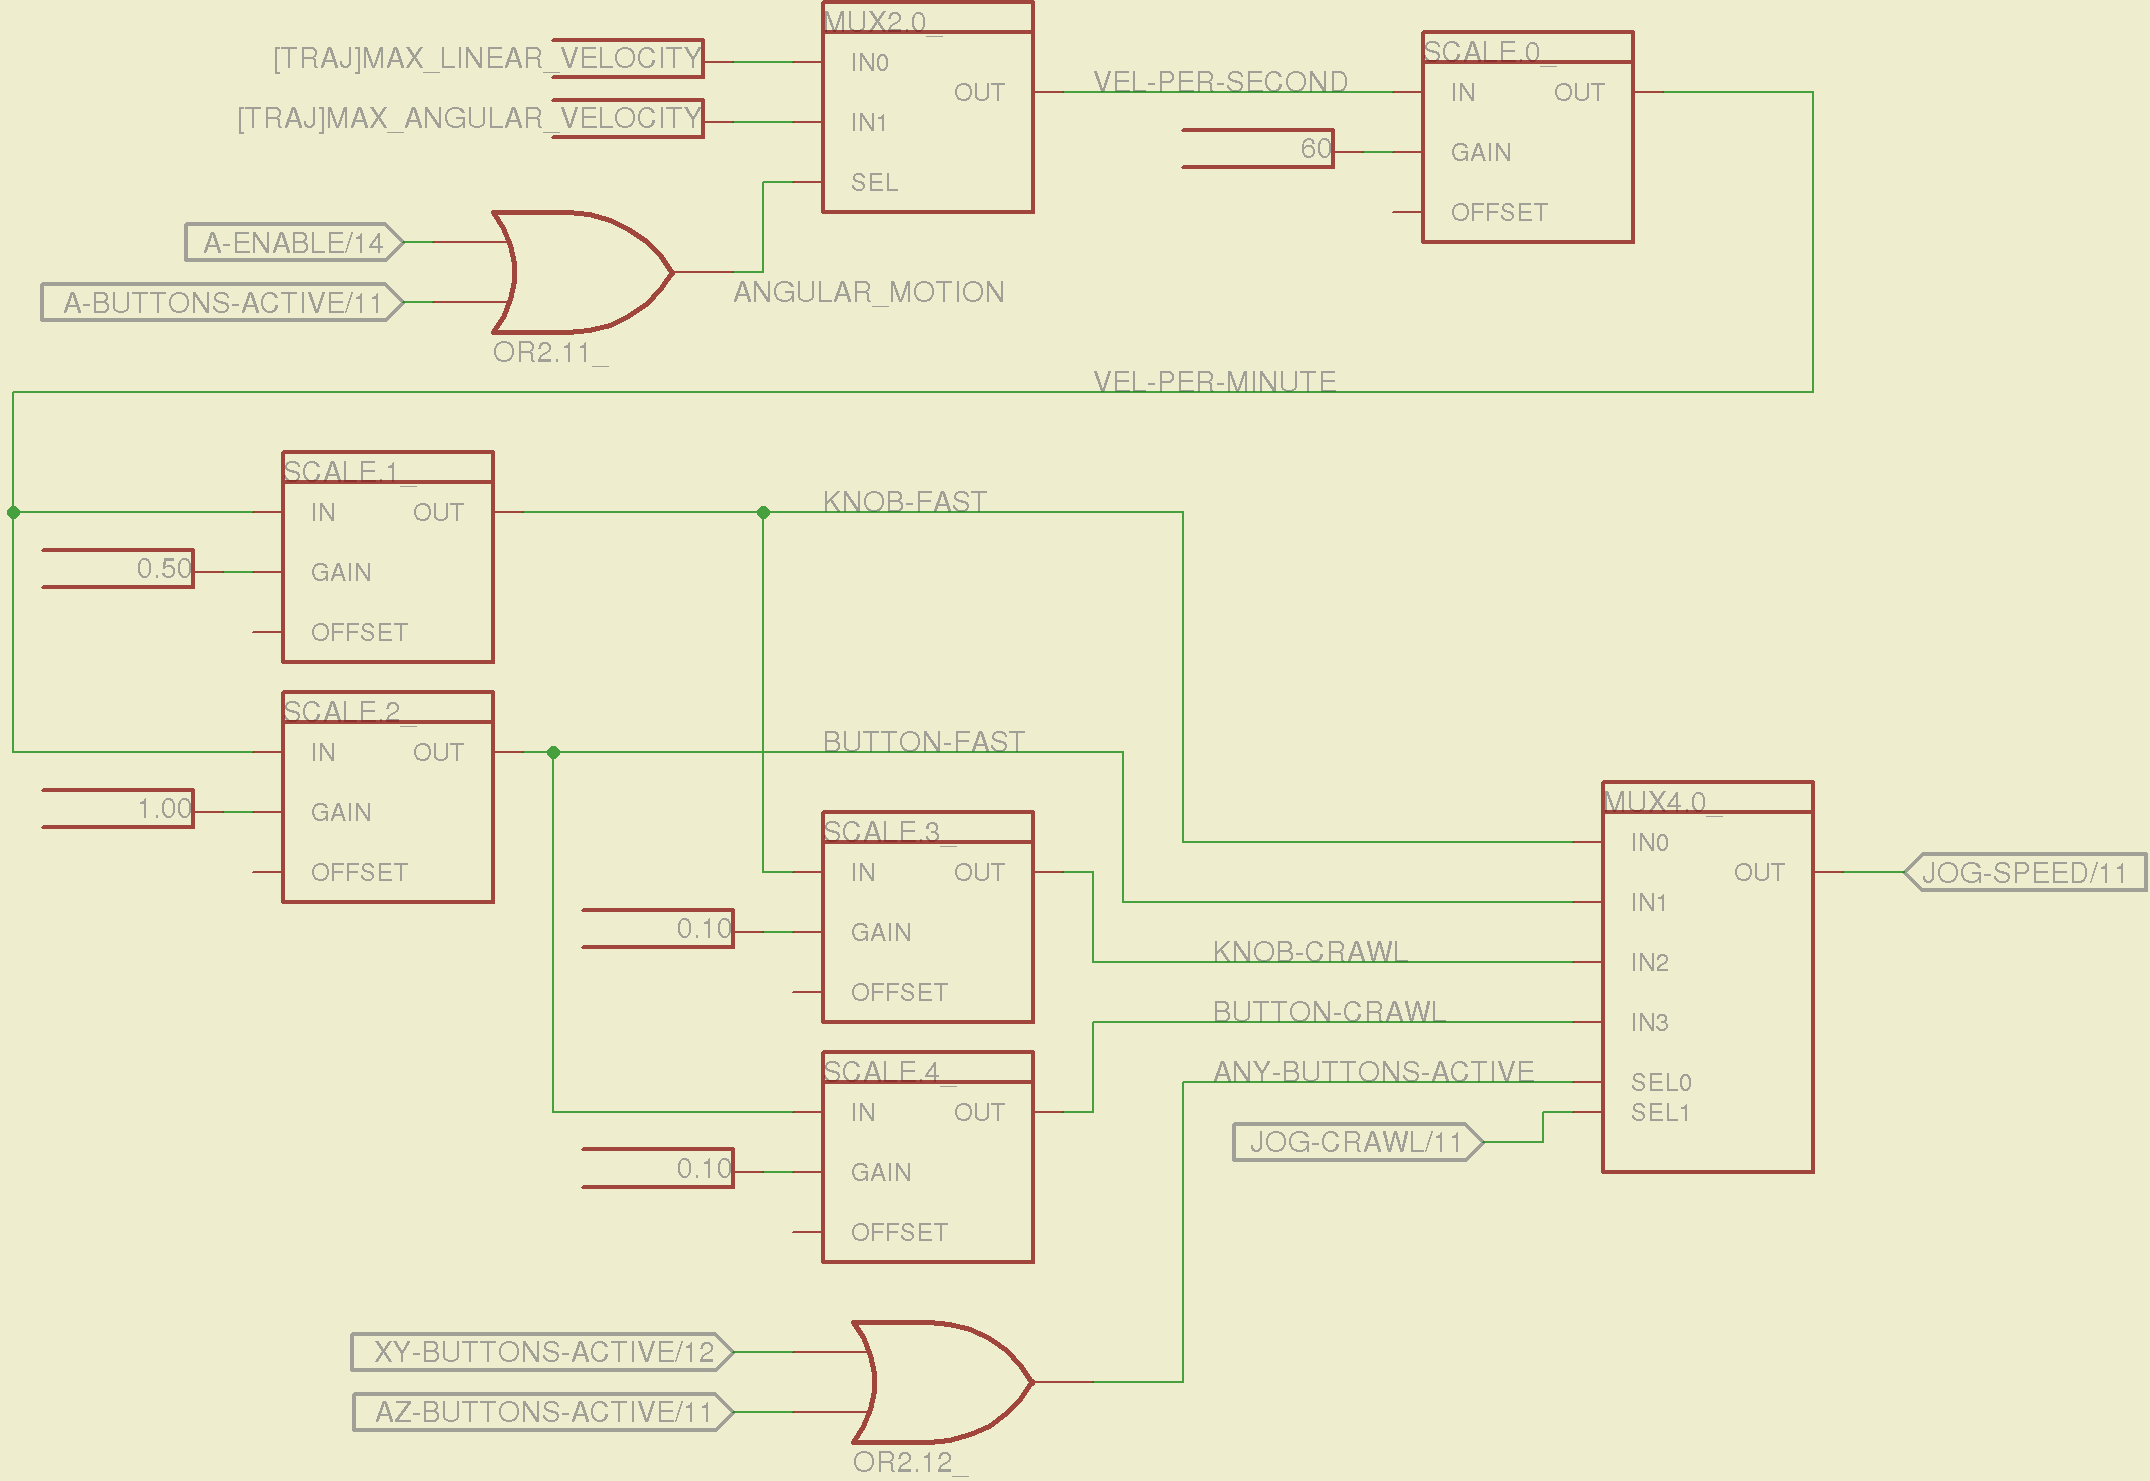
I should probably put the speed ratios in the INI file, but that’s in the nature of fine tuning.
The lockout logic that remembers which axis started moving first on a given joystick and locks out the other axis, which greatly simplifies jogging up to an edge without bashing into something else:

Combine all those signals into values that actually tell HAL to jog the axes:

The last page connects all the realtime function pins to the appropriate threads:

The LinuxCNC documentation diverges slightly from the implementation, but a few iterations resolved all the conflicts and had the additional benefit that I had to carefully think through what was actually going on.
A deep and sincere tip o’ the cycling helmet to the folks making LinuxCNC happen!
Although the Sherline mill doesn’t have more than a few minutes of power-on time with the new HAL file, the Joggy Thing behaves as it used to and the axes move correctly, so I think the schematic came out pretty close to the original HAL file.
The next step: draw a new schematic to bring up and exercise a different set of steppers…