It seems 390/389 alkaline button cells can power the mini-lathe’s DROs for about a year:
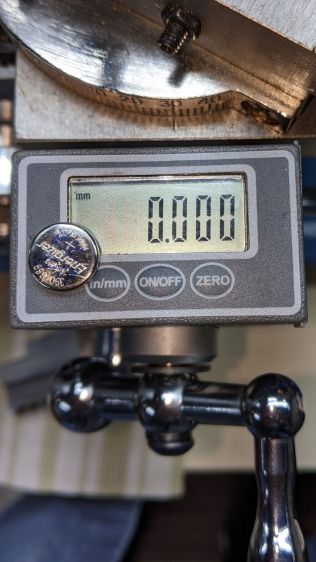
Given that the replacement cells all come from the same batch, they’re aging on the shelf as well as in the DROs.
Once again, I replaced both of them.
The Smell of Molten Projects in the Morning
Ed Nisley's Blog: Shop notes, electronics, firmware, machinery, 3D printing, laser cuttery, and curiosities. Contents: 100% human thinking, 0% AI slop.
If you measure something often enough, it becomes science

It seems 390/389 alkaline button cells can power the mini-lathe’s DROs for about a year:
Given that the replacement cells all come from the same batch, they’re aging on the shelf as well as in the DROs.
Once again, I replaced both of them.

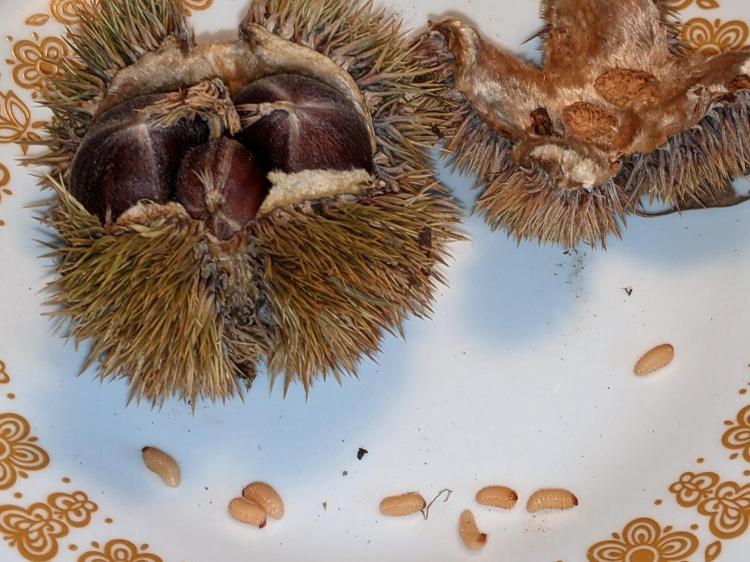
The dried chestnuts looked undamaged in their husk, but three groups of weevil grubs surely left some damage behind:
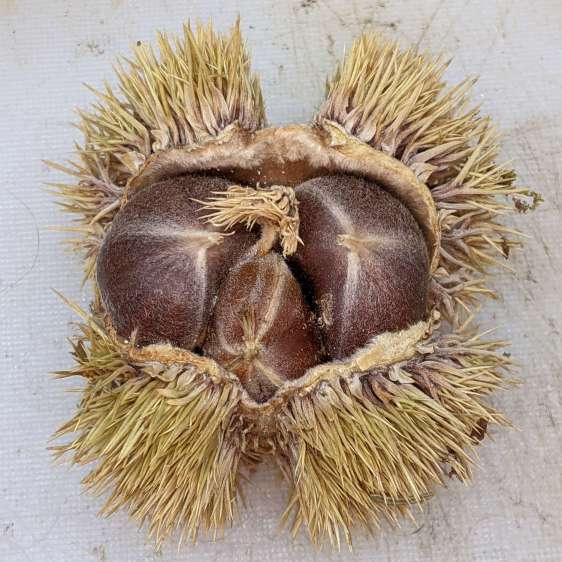
Gingerly prying the seeds out revealed holes in all three:

The weevils converted the nut meat into what looks like solid frass:

Having eaten themselves out of house and home, they moved on to the next plane of existence.
For most of them, that would be bird food.

Having replaced our disintegrating Brita pitcher a few years ago, I finally got around to opening a used filter to see what’s inside. Start by cutting off the flexible rim (intended as a seal against the pitcher) to reveal the joint, then pry the lid off:
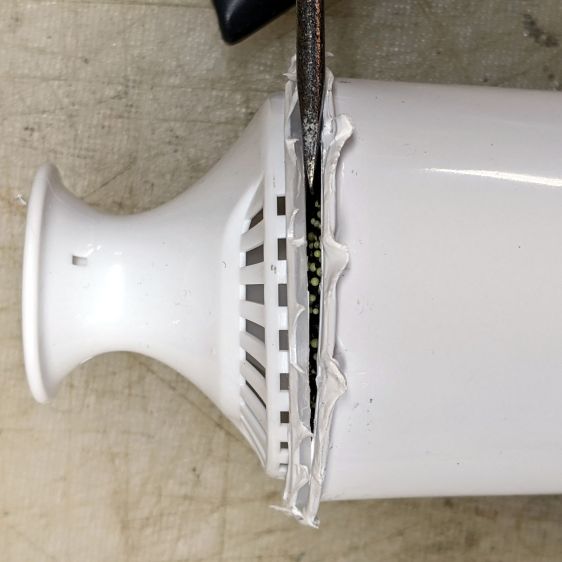
Stand it upright before getting the lid off, because the filter contains a zillion charcoal granules and two zillion ion-exchange resin beads:

The inside of the lid has mesh screens to keep the innards in place while distributing the raw water:
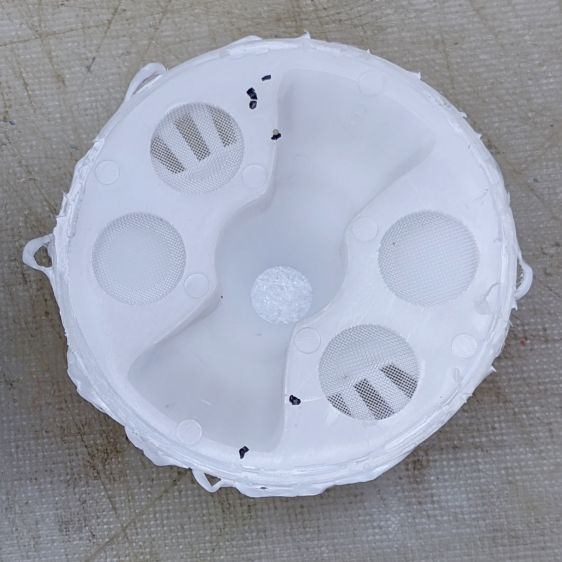
Similarly, mesh on the bottom drains let the filtered water out:

No surprises, but now we all know what’s in there.

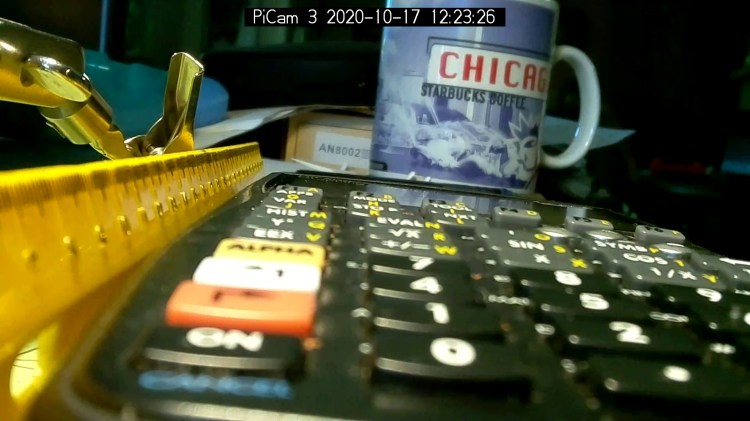
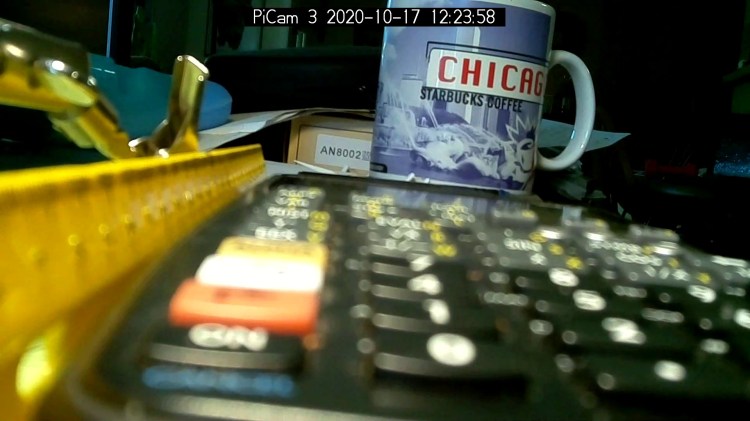
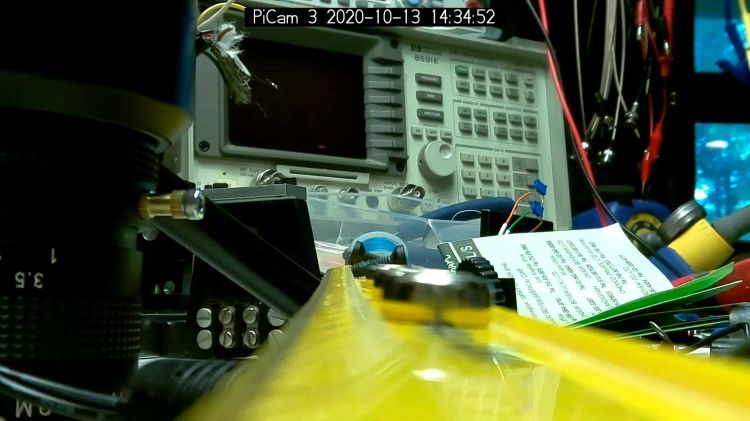
According to the Arducam doc, their Motorized Focus Camera has a 54°×41° field of view, (roughly) equivalent to an old-school wide(-ish) angle 35 mm lens on a 35 mm still camera. For my simple purposes, the camera will be focused on objects within maybe 200 mm:
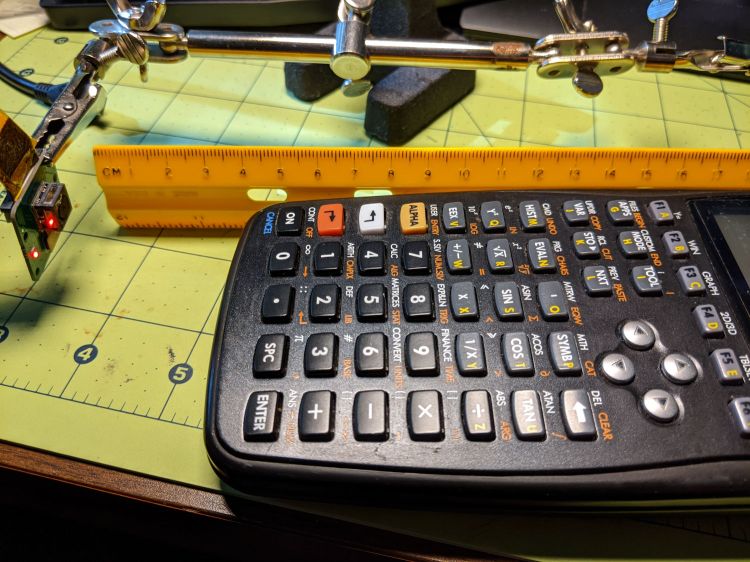
The numeric keys are 6.36 mm = ¼ inch tall, the function keys are 5.3 mm tall, and the rows are 10 to 11 mm apart.
The focusing equation converting distance to lens DAC values depends critically on my crude measurements, so the focus distance accuracy isn’t spot on. Bonus: there’s plenty of room for discussion about where the zero origin should be, but given the tune-for-best-picture nature of focusing, it’s good enough.
I set the CANCEL legend at 50 mm and it’s in good focus with the lens set to that distance:
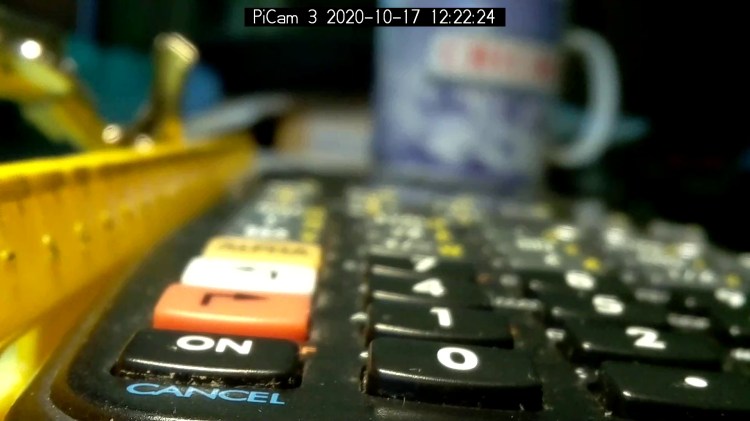
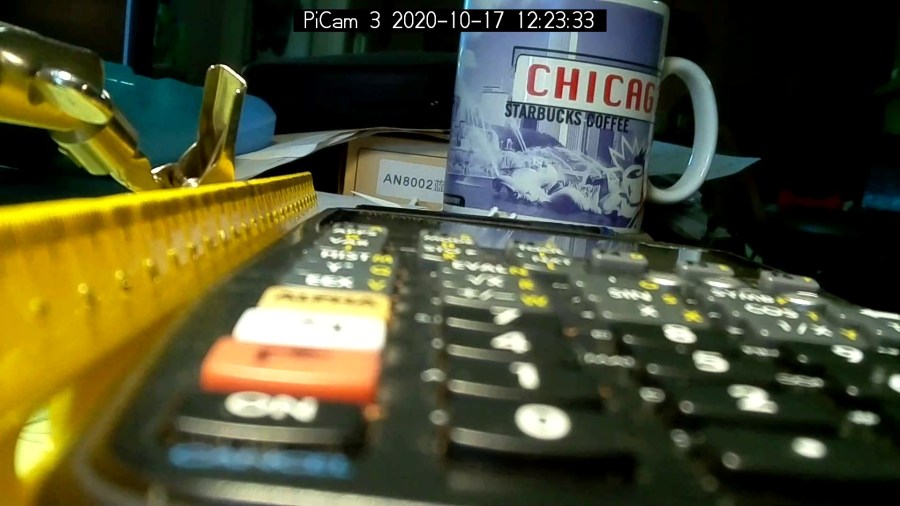
Focusing at 55 mm sharpens the ON key legend, while the CANCEL legend remains reasonably crisp:
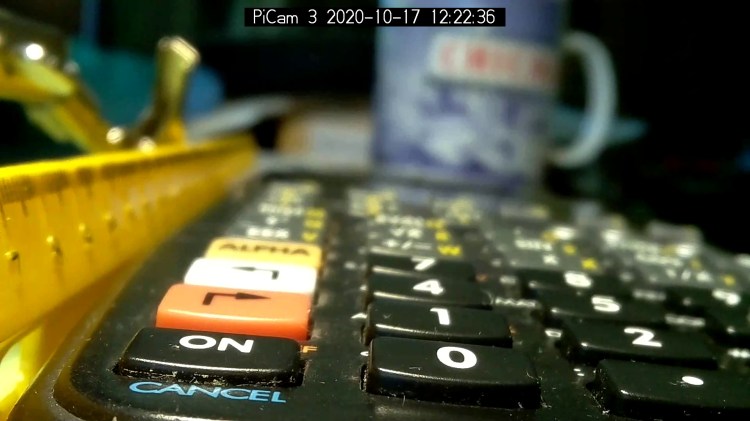
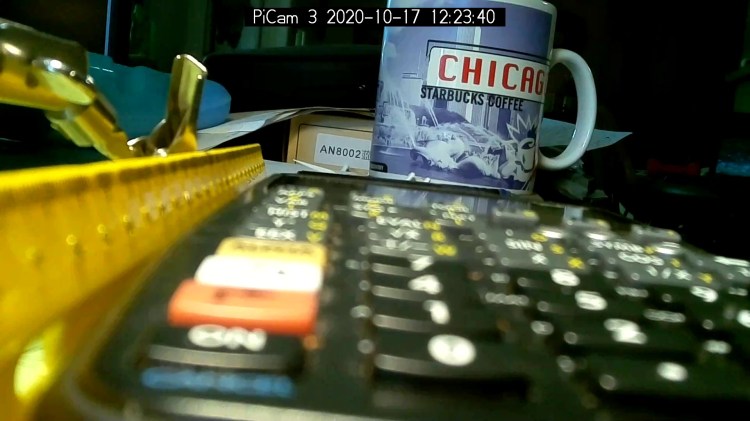
Adding another 5 mm to focus at 60 mm near the front of the second row shows the DoF is maybe 15 mm total:
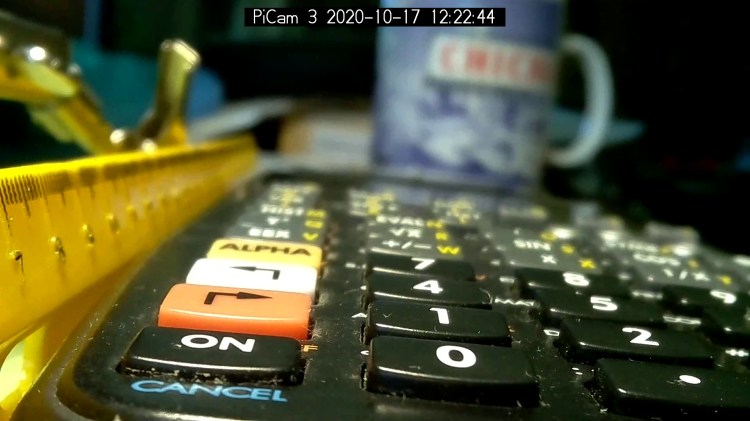
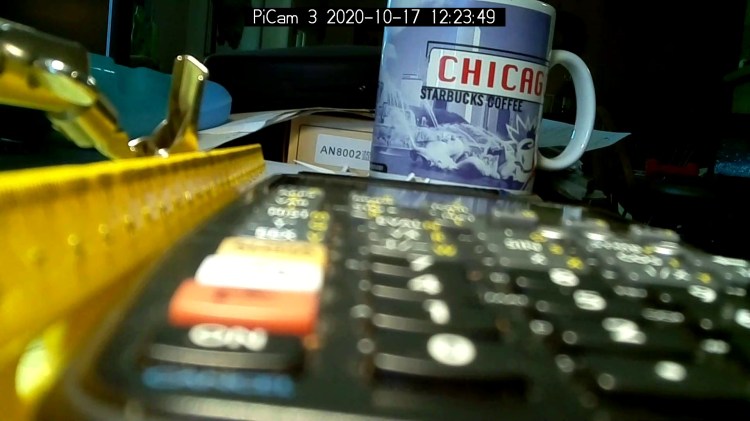
Focusing at 65 mm, near the middle of the second row, softens the first and fourth rows. Both of the middle two rows seem OK, making the DoF about 20 mm overall:

Jumping to 100 mm, near the top of the first function row:

At 150 mm, about the top of the far row just under the display:

I think 200 mm may be the far limit of useful detail for a 5 MP camera:
At 300 mm the DoF includes the mug at 600 mm, but the calculator keyboard is uselessly fuzzy:
At 500 mm, the mug becomes as crisp as it’ll get and the text on the box at 750 mm is entirely legible:
At 1000 mm, which is basically the edge of the desk all this junk sits atop, the mug and text become slightly fuzzy, so the DoF doesn’t quite reach them:
I limited the focus range to 1500 mm, which doesn’t much change the results:
I could focus-stack a set of still images along the entire range to get one of those unnatural everything-in-focus pictures.
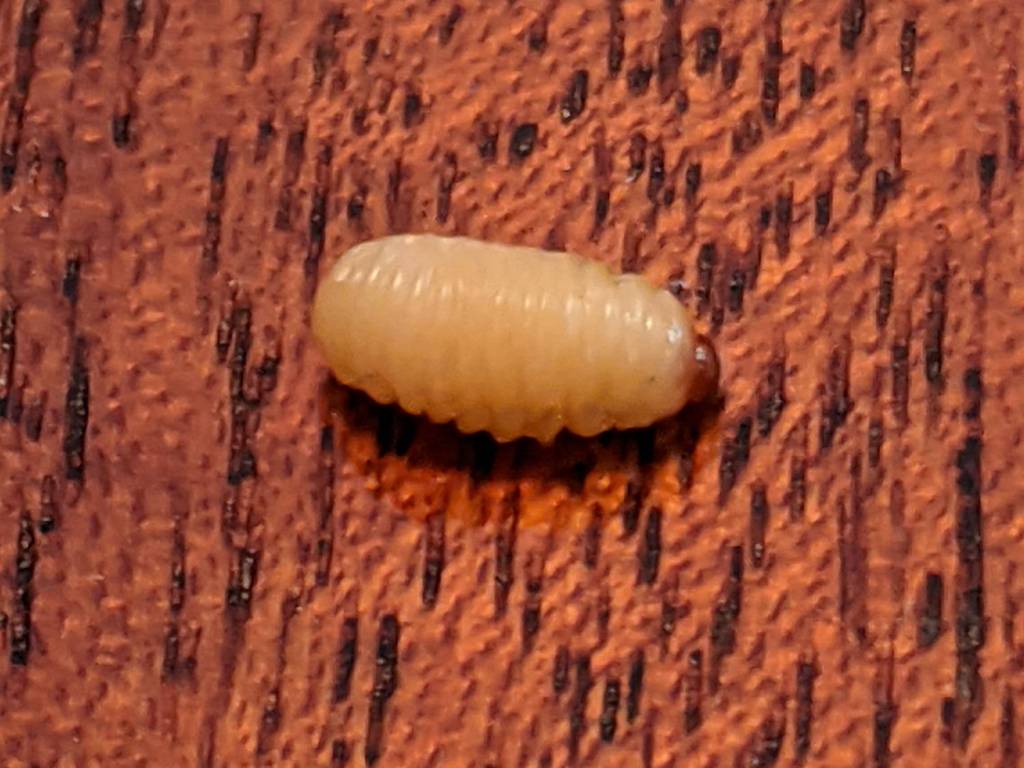
I spotted this little gadget chugging steadily across a table in the living room:
Nearby, two of its friends / siblings / clones remained near their landing craft:

They’re about 5 mm long and, although there are no larva-size holes visible in the chestnuts tucked inside the burr, that’s definitely where they started their journey.
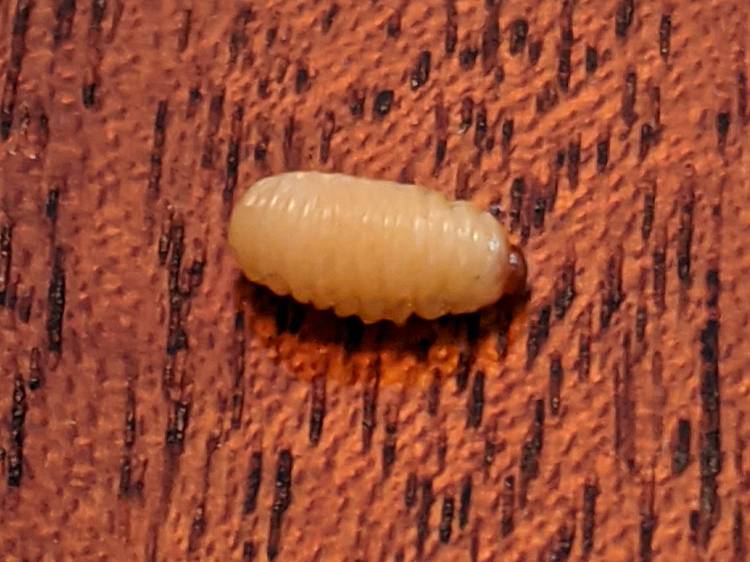
A few hours later, the rest of the crew bailed out:
The exit hole must be on a nut under the curve of the husk, but they’re sufficiently squishy to wriggle their way out. The little brown dot over on the left belongs to the top larva of a pair queued in the exit corridor:

I lost count at 18. There’s surely more where they came from, so I replaced the plate with a bowl to reduce the quantum tunneling probability.
In an ideal world, they’d grow up to be chestnut weevils, but I put them out near the suet feeder and, a few hours later, my offering was accepted.

The values written to the I²C register controlling the Arducam Motorized Focus Camera lens position are strongly nonlinear with distance, so a simple linear increment / decrement isn’t particularly useful. If one had an equation for the focus value given the distance, one could step linearly by distance.
So, we begin.
Set up a lens focus test range amid the benchtop clutter with found objects marking distances:

Fire up the video loopback arrangement to see through the camera:

The camera defaults to a focus at infinity (or, perhaps, a bit beyond), corresponding to 0 in its I²C DAC (or whatever). The blue-green scenery visible through the window over on the right is as crisp as it’ll get through a 5 MP camera, the HP spectrum analyzer is slightly defocused at 80 cm, and everything closer is fuzzy.
Experimentally, the low byte of the I²C word written to the DAC doesn’t change the focus much at all, so what you see below comes from writing a focus value to the high byte and zero to the low byte.
For example, to write 18 (decimal) to the camera:
i2cset -y 0 0x0c 18 0That’s I²C bus 0 (through the RPi camera ribbon cable), camera lens controller address 0x0c (you could use 12 decimal), focus value 18 * 256 + 0 = 0x12 + 0x00 = 4608 decimal.
Which yanks the focus inward to 30 cm, near the end of the ruler:
The window is now blurry, the analyzer becomes better focused, and the screws at the far end of the yellow ruler look good. Obviously, the depth of field spans quite a range at that distance, but iterating a few values at each distance gives a good idea of the center point.
A Bash one-liner steps the focus inward from infinity while you arrange those doodads on the ruler:
for i in {0..31} ; do let h=i*2 ; echo "high: " $h ; let rc=1 ; until (( rc < 1 )) ; do i2cset -y 0 0x0c $h 0 ; let rc=$? ; echo "rc: " $rc ; done ; sleep 1 ; doneWrite 33 to set the focus at 10 cm:

Then write 55 for 5 cm:

The tick marks show the depth of field might be 10 mm.
Although the camera doesn’t have a “thin lens” in the optical sense, for my simple purposes the ideal thin lens equation gives some idea of what’s happening. I think the DAC value moves the lens more-or-less linearly with respect to the sensor, so it should be more-or-less inversely related to the focus distance.
Take a few data points, reciprocate & scale, plot on a doodle pad:

Dang, I loves me some good straight-as-a-ruler plotting action!
The hook at the upper right covers the last few millimeters of lens travel where the object distance is comparable to the sensor distance, so I’ll give the curve a pass.
Feed the points into a calculator and curve-fit to get an equation you could publish:
DAC MSB = 10.8 + 218 / (distance in cm)
        = 10.8 + 2180 / distance in mm)
Given the rather casual test setup, the straight-line section definitely doesn’t support three significant figures for the slope and we could quibble about exactly where the focus origin sits with respect to the camera.
So this seems close enough:
DAC MSB = 11 + 2200 / (distance in mm)Anyhow, I can now tweak a “distance” value in a linear-ish manner (perhaps with a knob, but through evdev), run the equation, send the corresponding DAC value to the camera lens controller, and have the focus come out pretty close to where it should be.
Now, to renew my acquaintance with evdev …

Much to our utter astonishment, this appeared on the driveway:
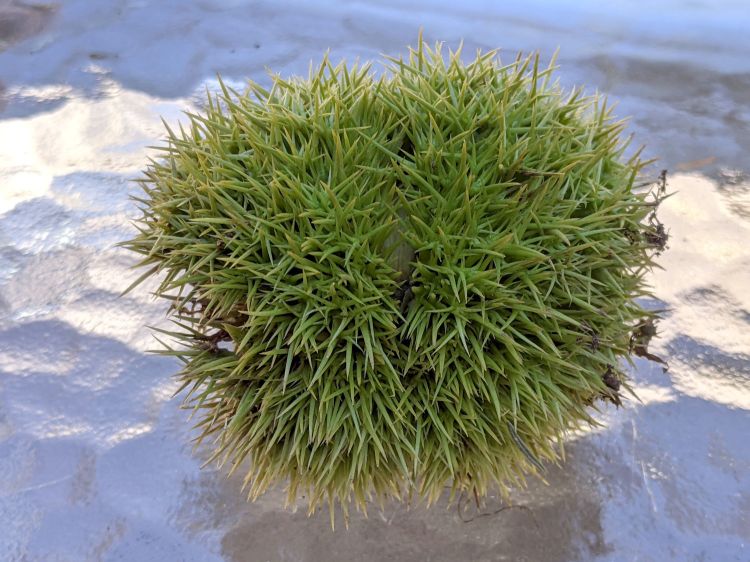
We’ve since found half a dozen chestnut burrs in the yard, which means at least two trees (it takes two to cross-fertilize) are growing in the immediate area.
We originally thought they were American Chestnuts, but Mary (being a Master Gardener) found enough references including comparative burr pictures to convince us they’re Chinese Chestnuts.
We’ve seen squirrels carrying the burrs in their mouths from the trees to wherever they bury their food supply, as shown by this gnawed spot on the other side of the burr:
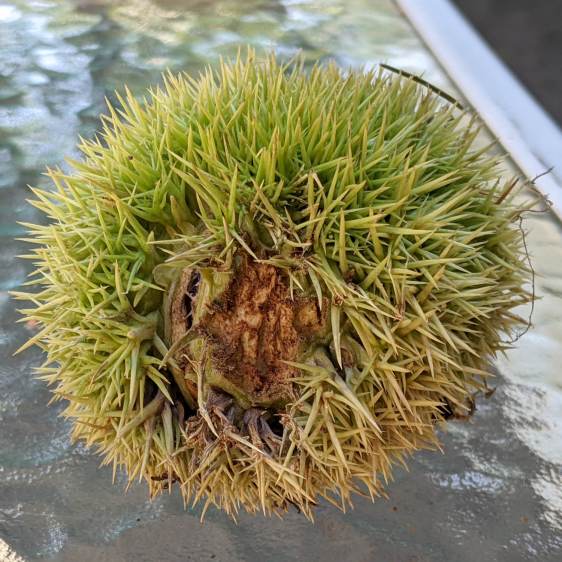
I regard this as conclusive proof that squirrels either have no sense of pain or no lips, because I can’t imagine carrying that thing in my hand, let alone gnawing through it to extract the nuts inside.
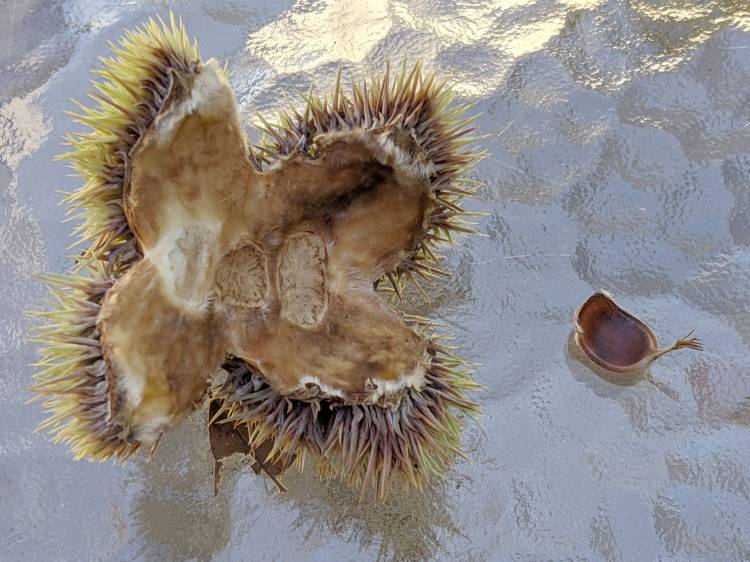
Each burr contains three nuts, although this empty husk shows some nuts can fail to fill out:
We don’t know where the trees are, but the squirrels seem to carry the burrs across our yard from north to south, so they can’t be too far from us or each other.
Despite our conclusion, it’s faintly possible they’re American Chestnuts, in which case they’re definitely survivors!
