Ed Nisley's Blog: Shop notes, electronics, firmware, machinery, 3D printing, laser cuttery, and curiosities. Contents: 100% human thinking, 0% AI slop.
Category: Science
If you measure something often enough, it becomes science
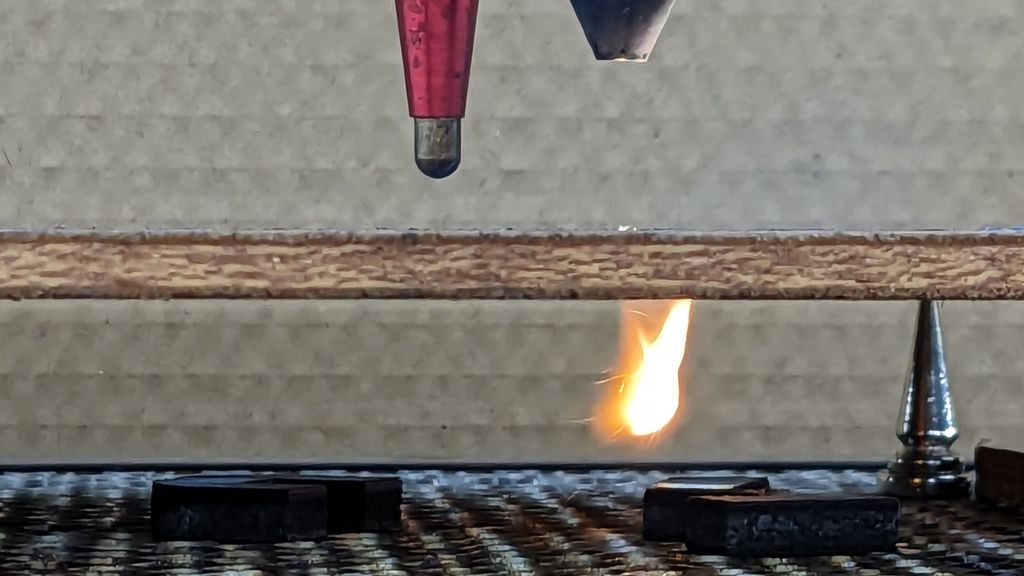
While cutting some oak plywood, I managed to get some interesting (to me, anyhow) pictures of how the assist air interacts with the laser kerf:
Laser cut plywood flames – C
The air flow is about 12 l/min from the pump in the bottom of the laser cabinet and is pushing most of the fumes through the kerf, where they ignite and burn merrily.
The plywood is up on magnetic punk spikes to give the fumes plenty of room to disperse without making too much of a mess on the bottom surface. Unfortunately, the flame can blowtorch the cut parts after they fall through onto the honeycomb.
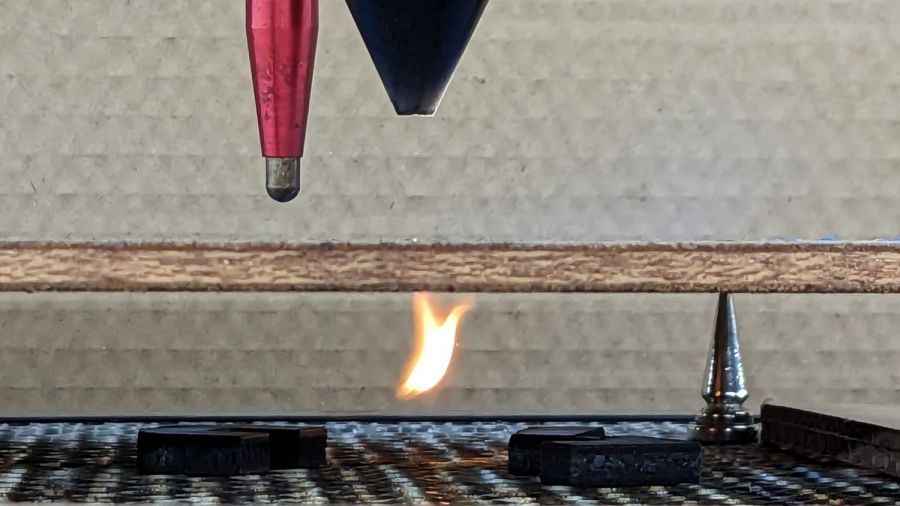
Another view shows some smoke doesn’t make it through the kerf:
Laser cut plywood flames – B
The bulk of the flame seems to trail behind the beam as it cuts through the wood, which isn’t surprising:
While pondering what to do with the shattered kitchen scale, I got a bottom-dollar replacement touting its rechargeable lithium battery. After giving it the obligatory charge-before-using, I put it in service. Five days later, its battery was dead flat discharged.
So I gutted it to extract the battery:
Cheap digital scale – lithium cell
It’s a cute little thing, isn’t it?
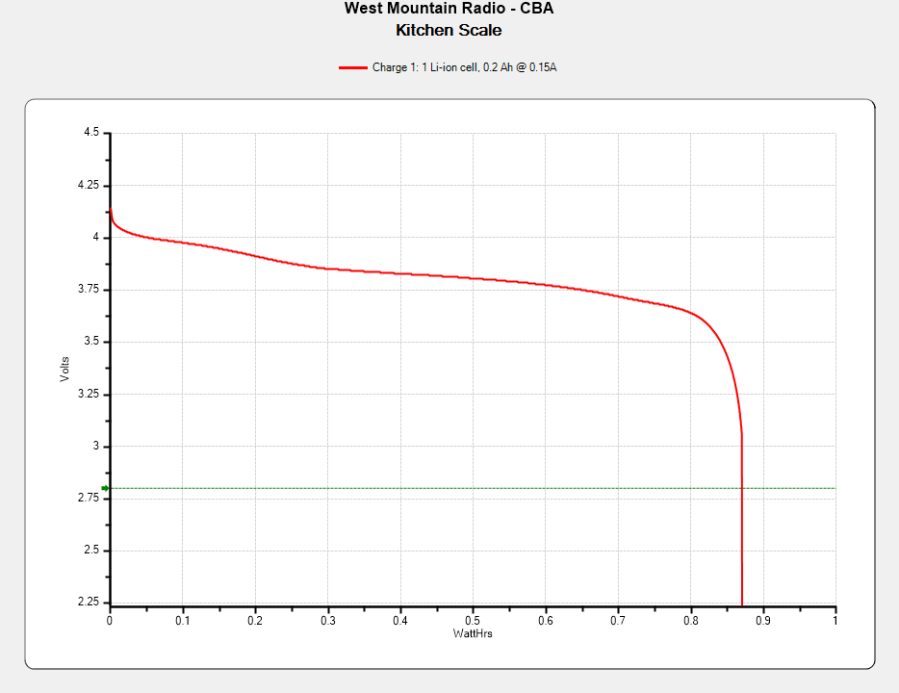
Much to my surprise, the obligatory battery rundown test showed it matches its 0.74 W·hr label:
Kitchen Scale – Charge1
We all know where this is going, right?
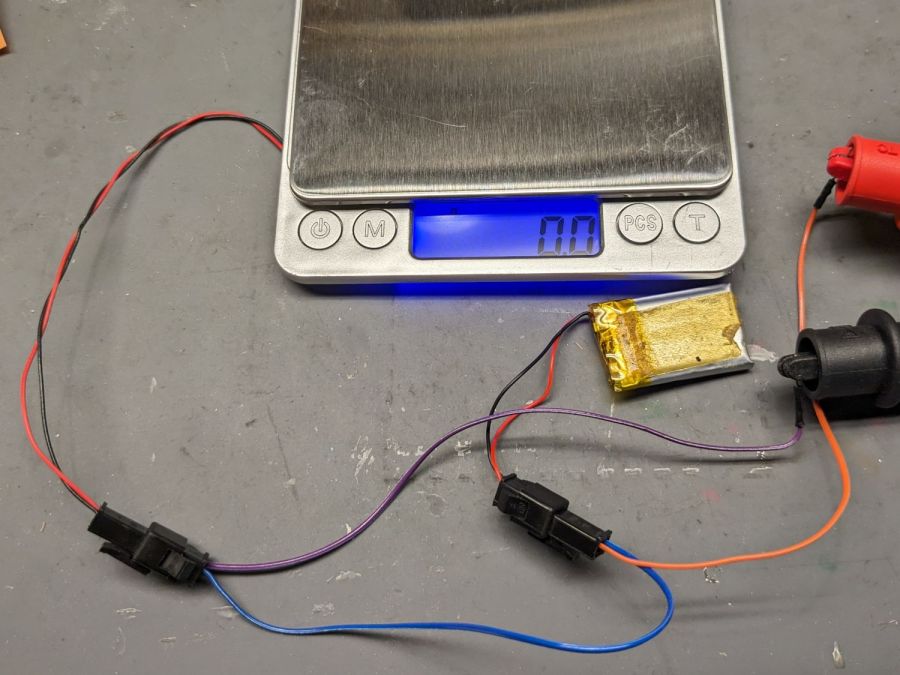
Crunche a connector on the battery, another on the scale, and make up a suitable current tap for a meter:
Cheap digital scale – current measurement setup
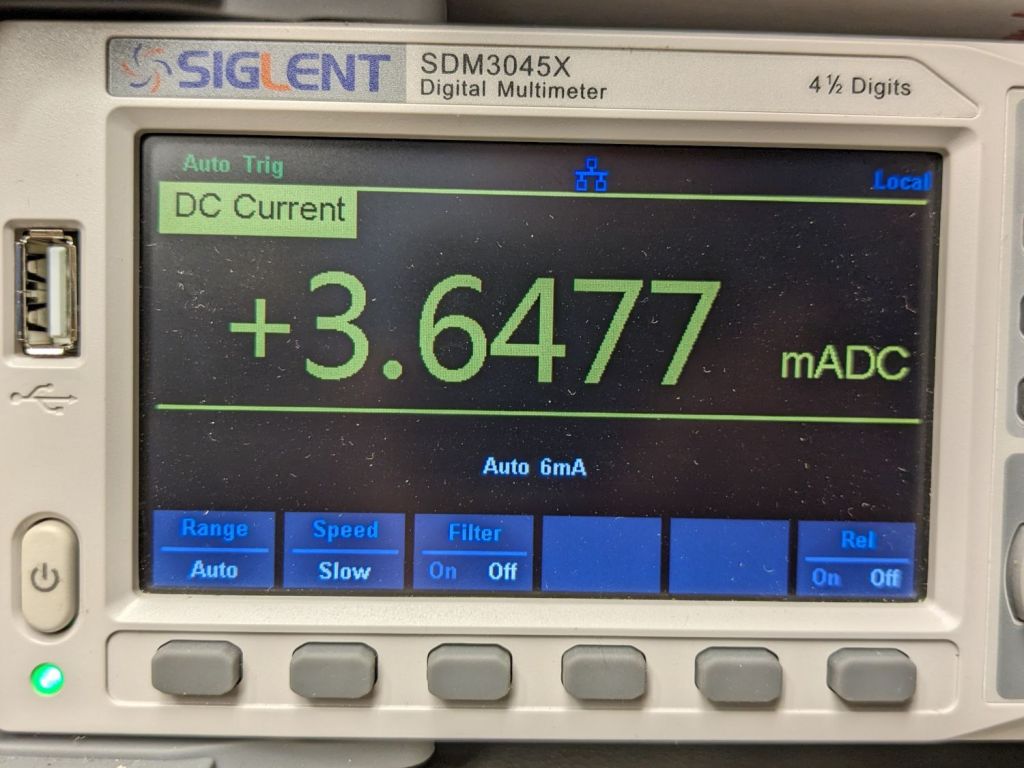
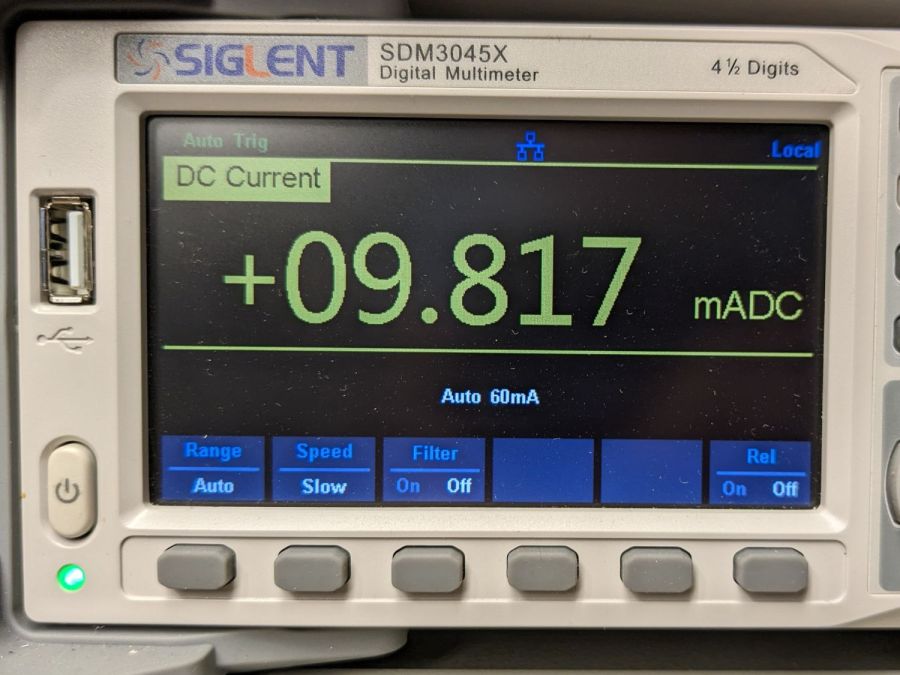
Which looked like this:
Cheap digital scale – active current
That’s about what I found for the craptastic scale running from a pair of CR2032 primary cells, so it’s not out of line.
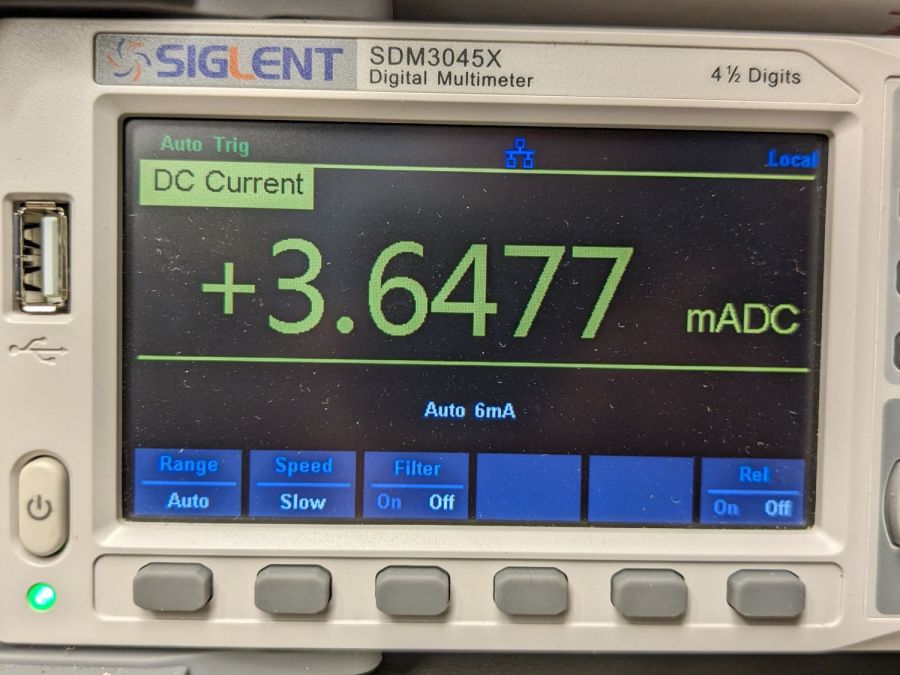
Turn off the scale and measure the idle current:
Cheap digital scale – inactive current
Do you think I got a dud?
For all I know, the little microcontroller under the epoxy blob is running a continuous attack on my WiFi network, with the intent of siphoning off all my sensitive bits. Ya never know.
Dividing the battery’s 200 mA·hr rating by 4 mA says it really should be dead in 50 hours, which is close enough to five days: diagnosis confirmed!
Rather than fight, I switched to a battery with more capacity:
Cheap digital scale – NP-BX1 replacement
It’s long past its prime, but ought to last for a month, which is about as long as the shattered scale survived on a similar battery.
A backlash test found on the LightBurn forum puts the machine through a series of difficult maneuvers:
Backlash test
That’s burned on the back of a paperboard box at 400 mm/s @ 15%/10% power, which is slightly too intense for the smaller patterns.
The key point is that the machine has no detectable trace of backlash, with all the opposing lines matching up and equal spacing regardless of the approach direction.
The larger targets on the right let the machine reach a speed closer to the nominal 400 mm/s around the arc, so the cut along the tape tab after the right-angle turn comes out a bit wobbly; the smaller targets are fine. The red lines are just under 0.5 mm wide and the wobble is on the same order, so it’s pretty close to being OK.
If that isn’t a smug smile, I don’t know what one might look like.
When she related this tale at a Master Gardener meeting, one of her cronies said a similar frog commandeered a shoe and refused all offers of a new home, so apparently tree frogs and shoes just go together.
Anybody that persistent deserves whatever it wants; Mary will get a new pair of shoes and keep them indoors.
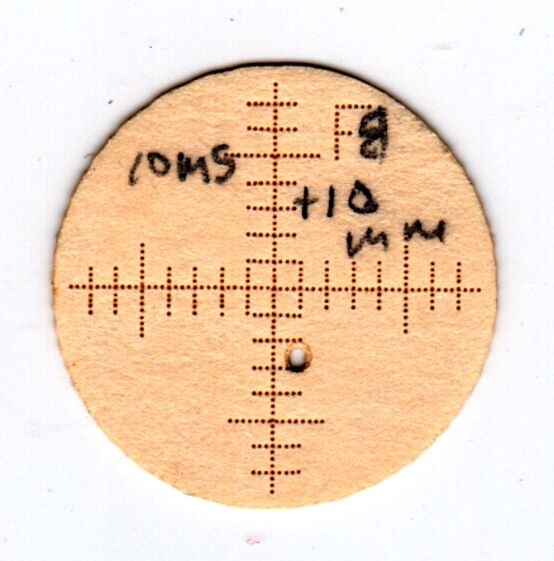
The smaller targets fit neatly into the hole perpendicular to the beam:
OMTech CO2 Mirror 2 mount – Y Z screws
The larger ones sit flush on the mirrors at 45° to the beam, so stretching the horizontal scale by 1.414 = √2 makes each tick mark correspond to 1 mm of perpendicular beam offset.
All of which worked surprisingly well, with some caveats.
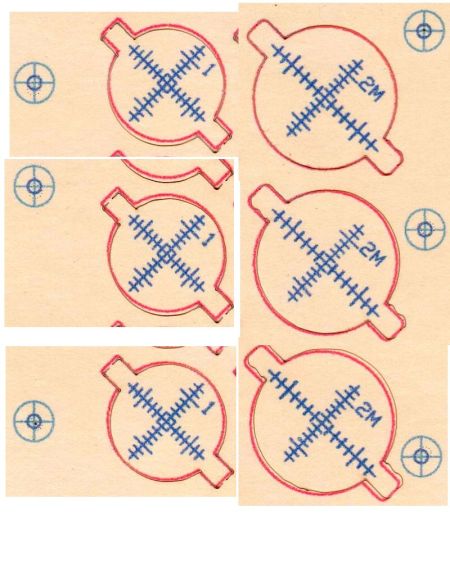
The first gotcha: ordinary consumer-grade inkjet printers do not have CNC accuracy. The corner targets are on 150 mm horizontal centers and 240 mm vertical centers in the LightBurn layout, but my Epson ET-3830 printer put them on 150×241.3 mm centers. This isn’t unexpected, particularly for laser printers, but it means you must use LightBurn’s scaled version of the P-n-Cut alignment.
I used the upper-right and lower-left targets for the P-n-Cut alignment step, confirming the positioning with a laser pulse putting a tiny hole in the paper:
Print-and-Cut – target accuracy
The lines are 0.5 mm wide and the inner circle is 2 mm in diameter, so my alignment at the upper right is as good as it’s gonna get and the lower left is off by maybe 0.3 mm. While it may be possible to be more accurate, I think half a millimeter is a reasonable error budget for targeting accuracy.
The laser-perforated circles should overlay the inner printed circles after LightBurn applies the P-n-C corrections. That they obviously do not indicates the effect of the small target errors. In any event, the maximum error seems to be 1 mm, which gives you an idea of just how precise P-n-C might be.
The perimeter laser cuts are off by about the same amount & direction as the dotted circle in the adjacent target:
Print-and-Cut – perimeter matching
Overall, errors around 1 mm seem possible with careful attention to detail, but expecting anything better than a few millimeters is probably unreasonable, particularly for layouts larger than a Letter size page.
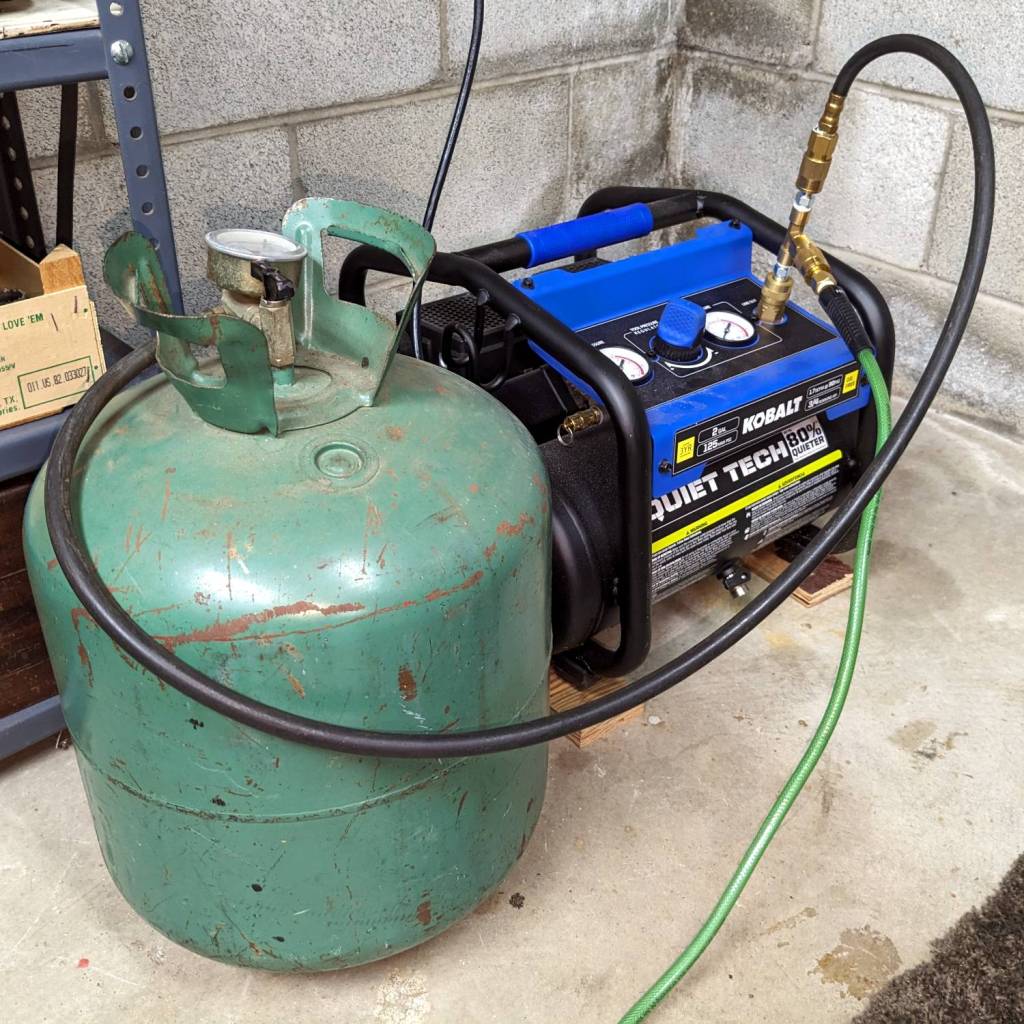
The normal dual-flow assist air setup has a flow control valve (the knob sticking up on the right) normally set for 2 l/min from the air pump:
OMTech Laser – air assist – plumbing
I cranked that valve completely open to allow unrestricted flow with the solenoid (block in the middle) closed and varied the compressor’s output pressure while measuring the air flow.
Without further ado, the assist air flow rate as a function of the inlet air pressure just upstream of the Y fitting on the left:
Assist Air flow vs inlet pressure
Fairly obviously, the flow is not 5.5 l/min at 0 psi inlet pressure and the long & skinny air hose limits the flow above 15 l/min. The eyeballometric line looks pretty good in the middle, though.
Other measurements not shown here suggested the outlet pressure, as measured just downstream of all the plumbing / upstream of the flowmeter & hose to the laser head, is about 1 psi at 10 to 12 l/min flow, with 0.2 psi at 8 l/min. My pressure gauges have terrible accuracy at such low pressures, so I don’t trust those numbers, but the plumbing definitely accounts for most of the inlet-to-outlet pressure drop.
The nozzle on the laser head is 4.1 mm ID → 13.2 mm²:
Magnetic Honeycomb Spikes – MDF
A flow of 10 l/min produces a 13 m/s = 28 mile/hr wind through the nozzle, which seems adequate to blow the fumes out of the kerf, and the low-flow default of 2 l/min might be a 5 mph breeze.
More air pressure would produce more wind, but it’s not clear how much better the resulting cuts would be.


