Ed Nisley's Blog: Shop notes, electronics, firmware, machinery, 3D printing, laser cuttery, and curiosities. Contents: 100% human thinking, 0% AI slop.
It turns out either of the two middle slots should work, but the crimps look better in the smaller one.
Admittedly, the instructions are thin on technique, but I only wrecked four pins while retraining my crimping hand. The key trick is indexing the insulation fingers on the step inside the jaw, thus putting the socket box or the male pin outside where it won’t get smashed flat. Squishing those fingers from their normal splayed condition into a rectangular shape helps fit them into the jaw against the step.
Living in the future where the right crimping tool doesn’t cost five Benjamins is great …
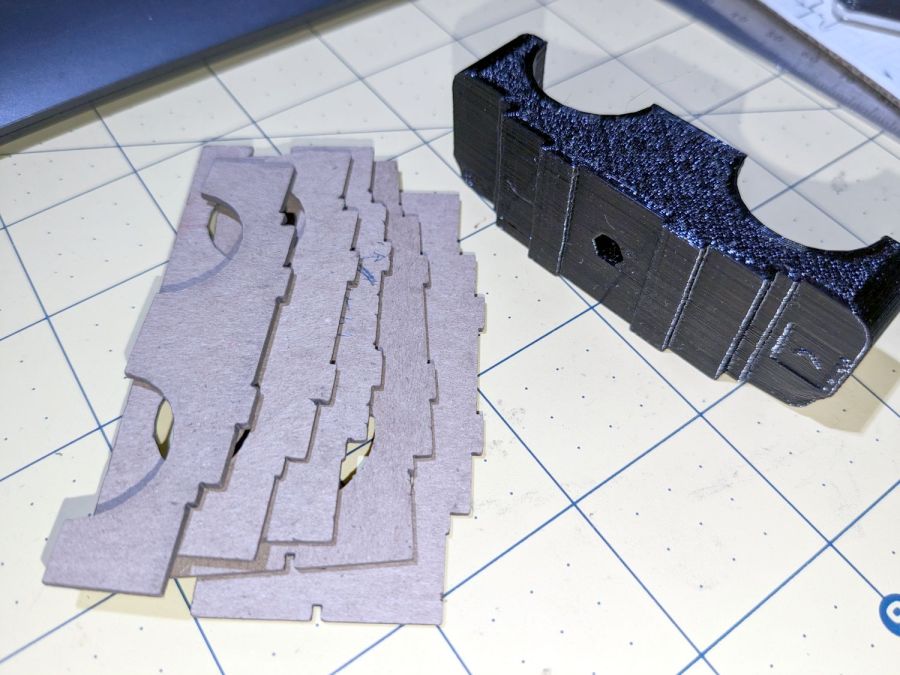
The top profile fits snugly into the battery mounting plate, with clearance on the sides for the latches:
UPP Battery Mount – trial fit
However, I had enough trouble measuring those recesses that I broke down and added a projection() view to the OpenSCAD code:
UPP Battery Mount – profile
Exporting that as an SVG image and importing it into LightBurn let me cut it out of chipboard:
UPP Battery Mount – laser cut profiles
Obviously, it took several iterations to fit the top profile to the baseplate, particularly after finding slightly different measurements at each block position. On the other paw, laser cutting the profiles proceeded much more quickly than 3D printing just a few millimeters of the block, so it was a net win.
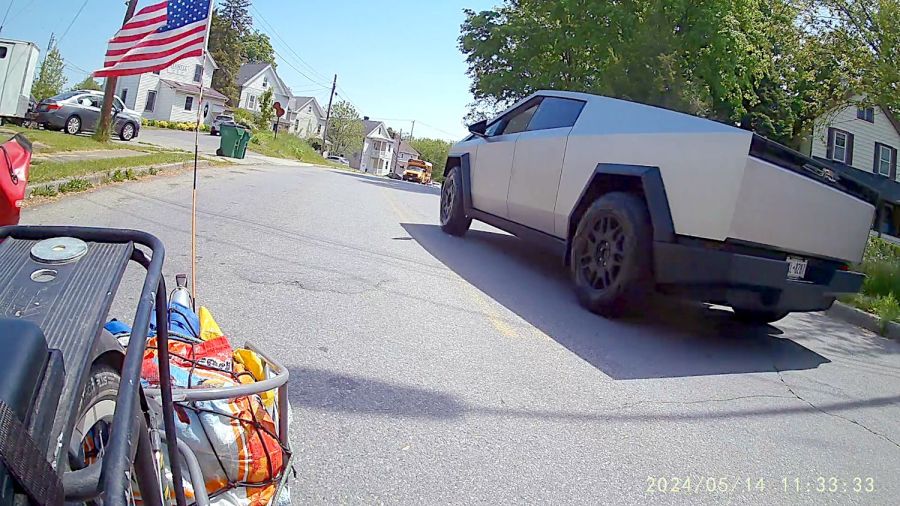
What I do not understand is the lack of a license plate on that front bumper, here in New York State where front license plates are mandatory. I’ve noticed several Tesla vehicles (in their S3XY automotive series, among which I cannot distinguish) without front plates, so it must be a Tesla owner thing.
The WordPress AI image for this post gets the angular aspect right, along with the missing plate:
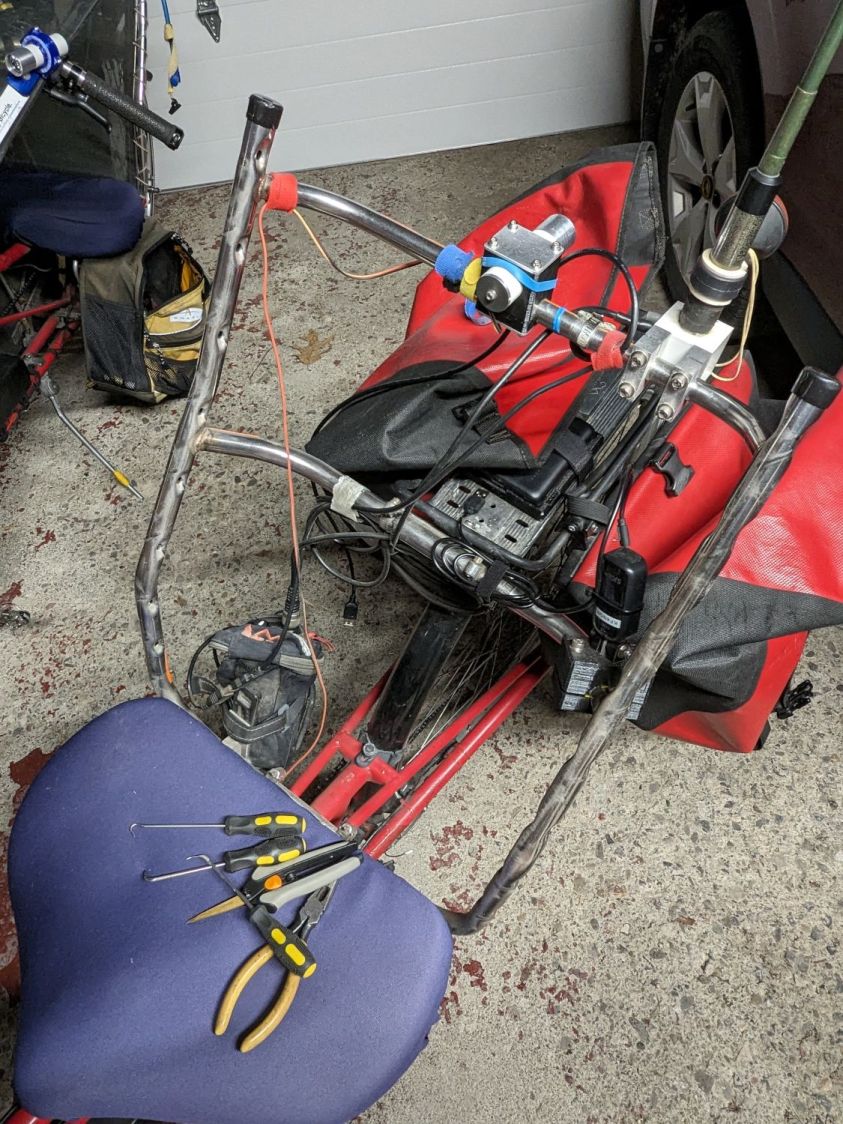
The cord path isn’t at all obvious, even given the smudges on the seat struts:
Tour Easy – seat mesh removed
Pictures of the original cord as installed at the Easy Racers “factory” served as guidance:
Tour Easy – seat cord – front viewTour Easy – seat cord – side viewTour Easy – seat cord – rear viewTour Easy – seat cord – bottom detail
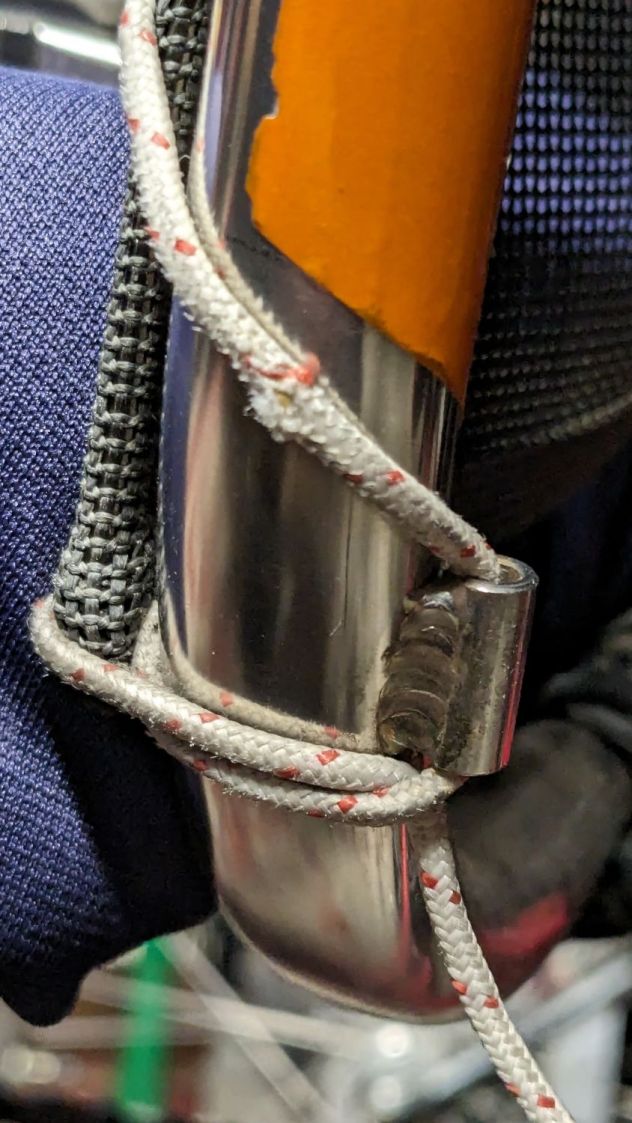
The knots joining the cord at the top, taken juuust before I pulled the right knot apart:
Tour Easy – seat cord – knots
Those are in addition to my Tour Easy a few feet away, but you can never have enough pictures.
A 3.5 meter cord will be plenty long enough and marking the midpoint simplifies equalizing the two sides. The cord crosses the seat frame at the bottom from the lower guides, although I’m reasonably sure it wouldn’t matter if you ran separate lengths up the two sides with a knot in the lower guide.
The new cord claims to be 1000 pound test (200 pound working), but the vital dimension is its 2.6 mm diameter to match the OEM cord. It does not claim to be UV stabilized, which may turn out to be a problem over the course of a few years.
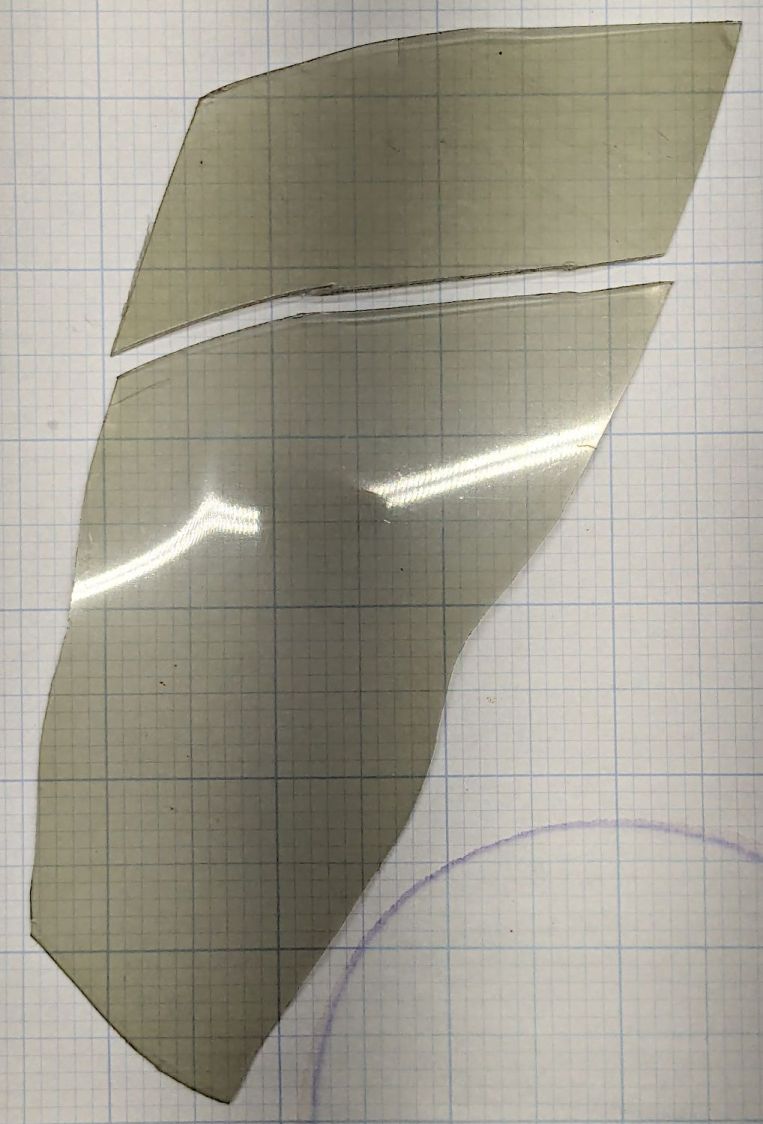
A fairing fragment provided an excuse to practice plastic polishing:
Fairing polish – start
That’s from a EZR-SZ Zzipper fairing ridden about 2000 miles a year since 2001, so it’s spent far too much time in the sun and definitely not gotten all the finicky care it deserves. It’s tinted 60 mil polycarbonate, vacuum-molded into the bubble shape required to fit on a Tour Easy recumbent.
Fairing Flashlight Mount – Mary approaching
On the other paw, Karl Abbe (the guy behind Zzipper) says the typical fairing survives maybe half a decade, so it doesn’t owe us anything.
I applied all three bottles of Novus Plastic Polish in descending numeric order, using snippets of Official Polish Mates (which could be a Krakow escort service) with a vigorous circular motion, ending up with a reasonable result:
Fairing polish – transmission
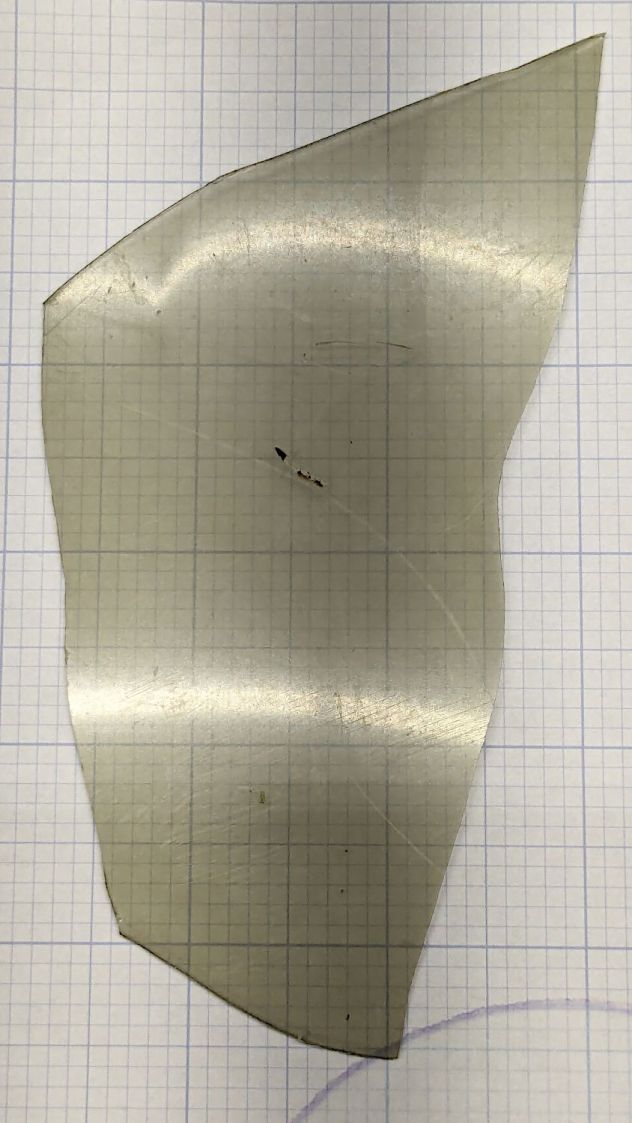
I cut the smaller chunk from the fairing for comparison. It’s been washed to dislodge loose crud, but is otherwise as-ridden.
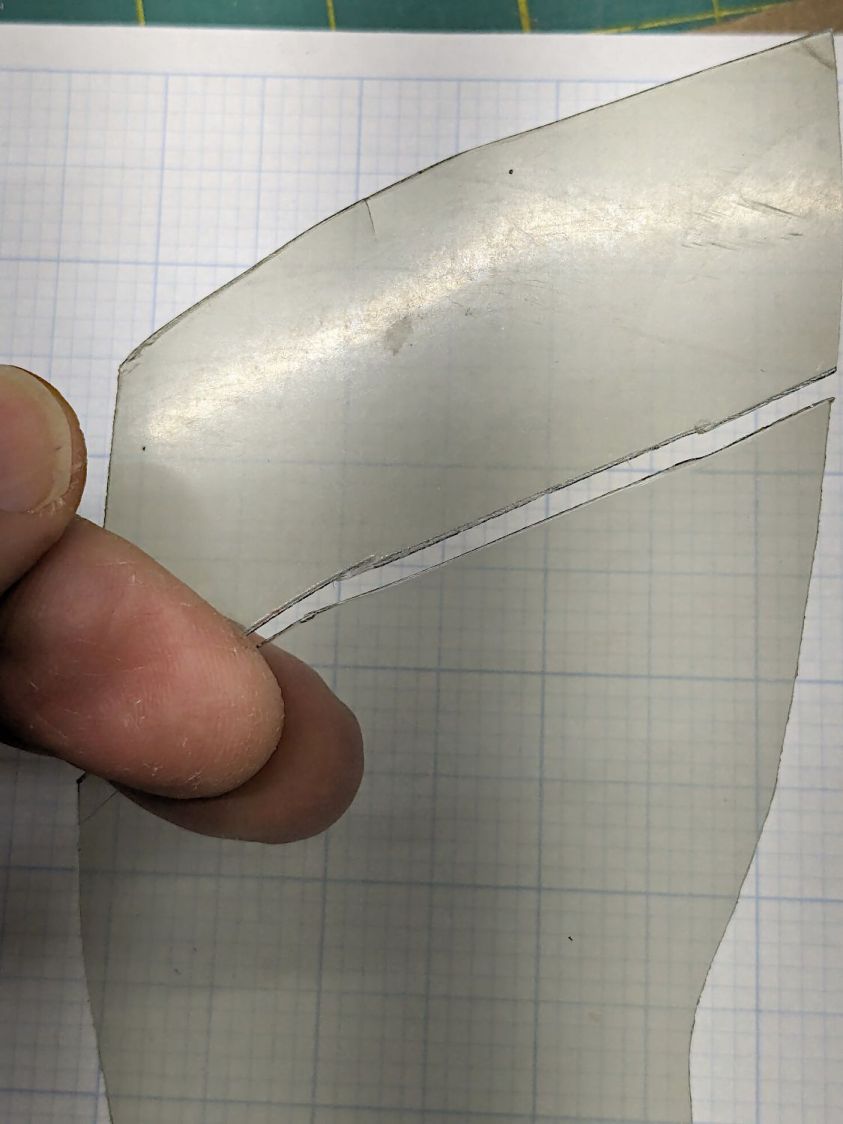
The fairing has deeper scratches than Novus can buff out, but removing the surface scuffs and haze definitely improves the clarity:
Fairing polish – clarity
The view from father away:
Fairing polish – clarity
Eks describes this sort of thing as a “Used Car Finish” = high polish over deep scratches:
Fairing polish – surface finish
All in all, a nice result from very little effort.
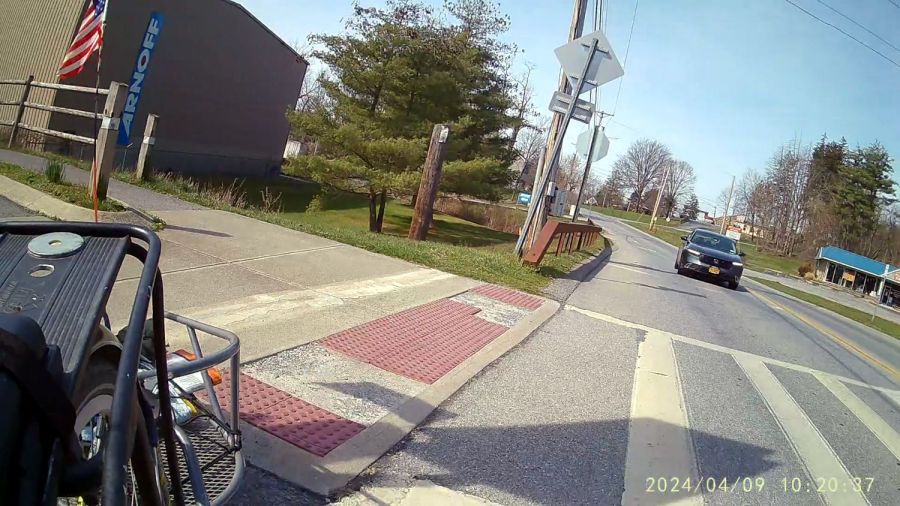
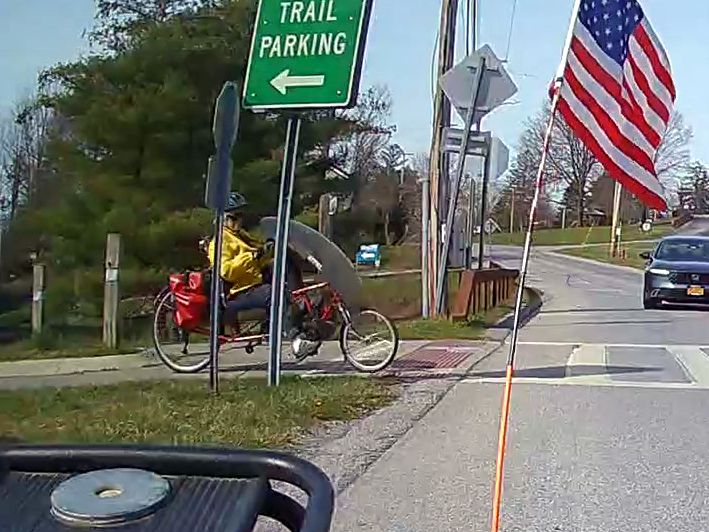
The decaying ADA bump (a.k.a. detectable warning) strips at the Dutchess Rail Trail’s Overocker Road Trailhead require cyclists to carefully pick their line. We’re on our way for groceries, so I’m towing the BOB Yak trailer and have just jounced over the edge of the concrete “ramp” while making a right-angle turn to the right:
Rollover 2024-04-09 – 0020
The four-digit frame numbers tick along at 60 FPS.
The car remained stopped at the crossing during this whole affair.
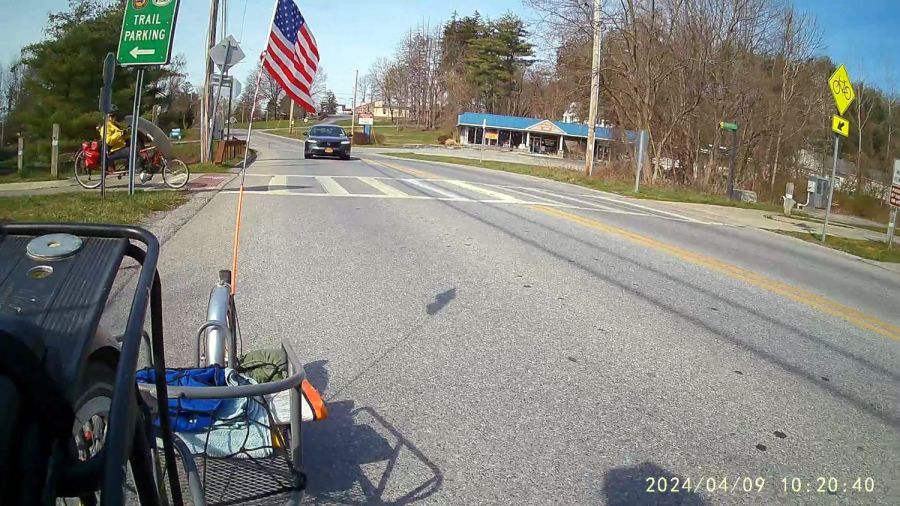
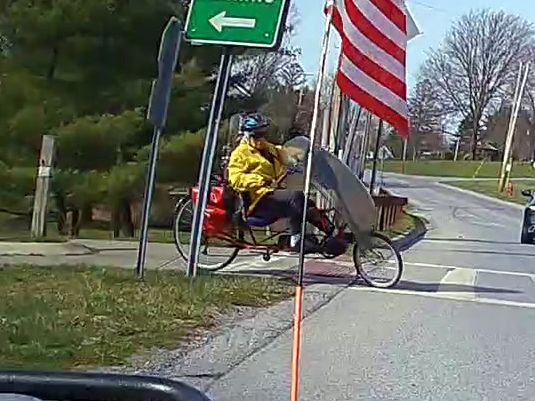
Mary is approaching along the same line with the same intent:
Rollover 2024-04-09 – 0198
A closer look shows her front wheel is parallel to the edge of the concrete ramp:
Rollover 2024-04-09 – 0198 detail
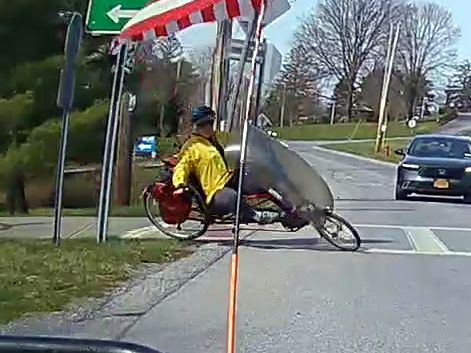
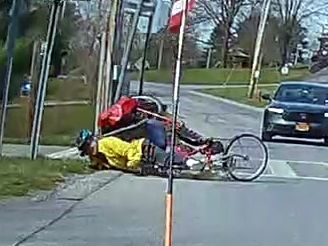
We think her wheel slipped off the edge of the concrete and, with the edge preventing her from steering left to counterbalance the sudden tilt, she knows she’s going to fall:
Rollover 2024-04-09 – 0228
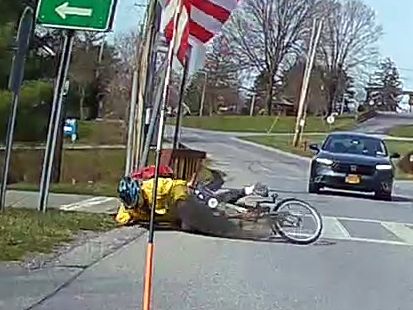
Whereupon Newton took control and left no way out:
Rollover 2024-04-09 – 0250
Fortunately, this is at about zero miles per hour:
Rollover 2024-04-09 – 0276
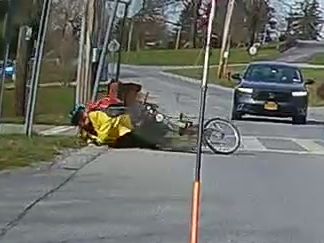
She collected a nasty bruise on her starboard ham, plus a few scuffs here and there as the bike basically rolled over her:
Rollover 2024-04-09 – 0306
And back down again:
Rollover 2024-04-09 – 0330
Elapsed time: 100 frames = 1.7 seconds.
The drivers of vehicles in both directions rushed to assist Mary, but, apart from a few bruises and scrapes, she was in good shape.
The fairing incurred fatal cracks, but held together as we completed the mission. No surprise: after nearly a quarter-century of sunlight exposure, polycarbonate loses a lot of its durability.
Now, to be honest, we both ignored the Dismount before crossing road sign at the intersection. Over the years, I have seen a few cyclists stop and dismount before walking through the trail’s at-grade road crossings, but they are most certainly the rare exception; we all stop while waiting for traffic to recognize our presence, then ride through.
Rail trail maintenance has always been a low priority and the County’s “Vision Statements” over the decades have been largely irrelevant to what actually happens out on the pavement. ADA strips at trail crossings have been decaying for years and I expect that to continue for many more.