The Smell of Molten Projects in the Morning

Ed Nisley's Blog: Shop notes, electronics, firmware, machinery, 3D printing, laser cuttery, and curiosities. Contents: 100% human thinking, 0% AI slop.

Category: Recumbent Bicycling

Cruisin’ the streets

  • Royal Carting Truck: Squeeze Play

    Royal Carting Truck: Squeeze Play

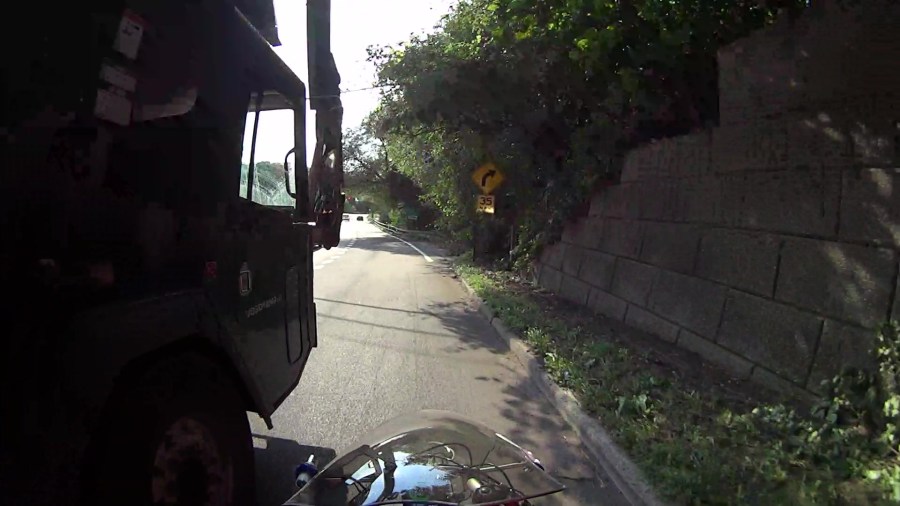
    I’m riding downhill from Red Oaks Mill toward the bridge across the Wappinger Creek, pedaling a bit over 24 mph = 37 feet/sec, far enough into the lane to avoid trash along the curb on the right:

    Royal front 2024-09-13 - 078
    Royal front 2024-09-13 – 078

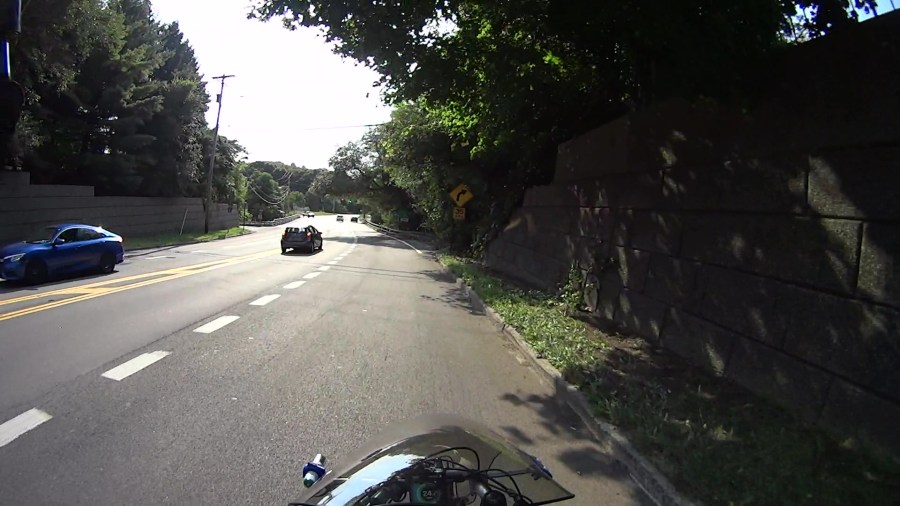
    Although you can barely see the vehicle passing on my left, I’ve just realized I am in one heap of trouble.

    Half a second later (the frame number in the caption ticks along at 60 fps) I’m caught in the slipstream:

    Royal front 2024-09-13 - 108
    Royal front 2024-09-13 – 108

    Another half second and I’m leaning slightly to the right:

    Royal front 2024-09-13 - 138
    Royal front 2024-09-13 – 138

    Make that wobbling:

    Royal front 2024-09-13 - 158
    Royal front 2024-09-13 – 158

    Well, that’s a relief:

    Royal front 2024-09-13 - 178
    Royal front 2024-09-13 – 178

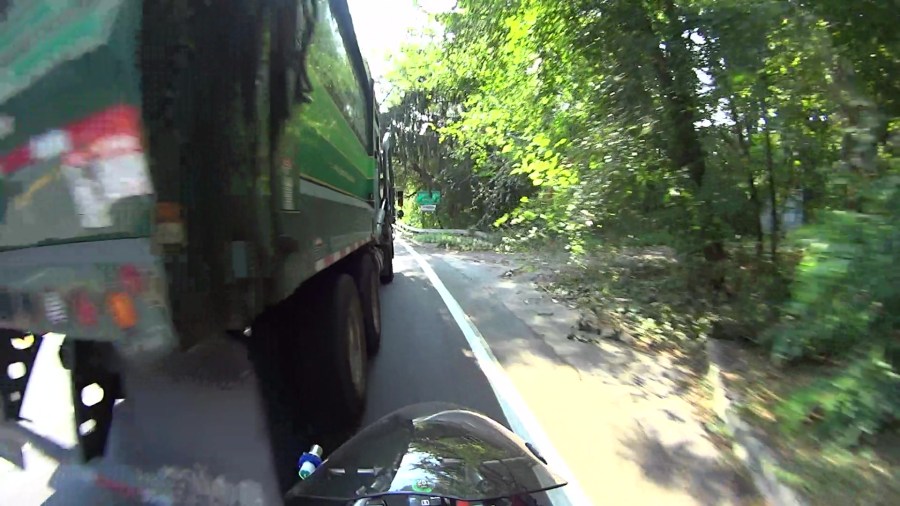
    The truck is now completely within our lane and I’m further to the right, so our paths really were converging:

    Royal front 2024-09-13 - 208
    Royal front 2024-09-13 – 208

    Elapsed time: 2.2 seconds.

    The view from the rear shows the driver started with reasonable clearance (these frames tick at 30 fps):

    Royal rear 2024-09-13 - 090
    Royal rear 2024-09-13 – 090

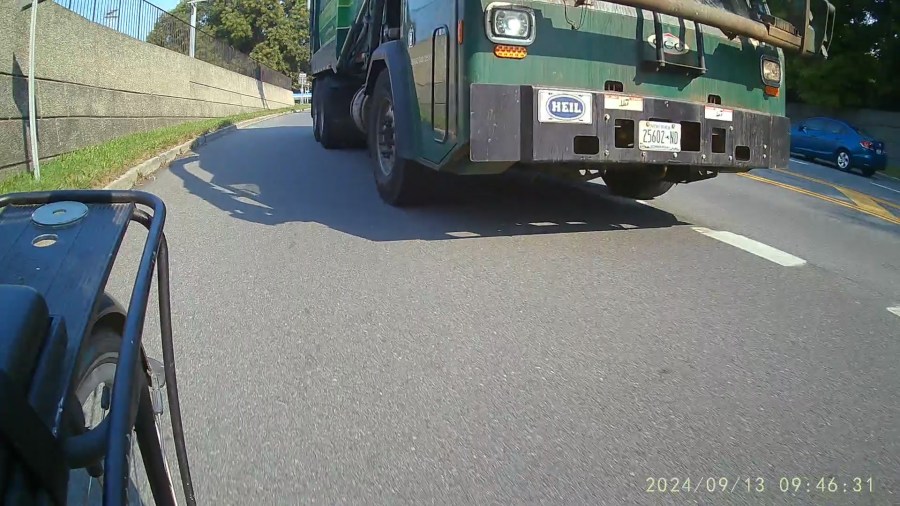
    A second later, the dumpster grabber is about even with my handlebars, corresponding to the first helmet camera picture:

    Royal rear 2024-09-13 - 120
    Royal rear 2024-09-13 – 120

    A third of a second later:

    Royal rear 2024-09-13 - 130
    Royal rear 2024-09-13 – 130

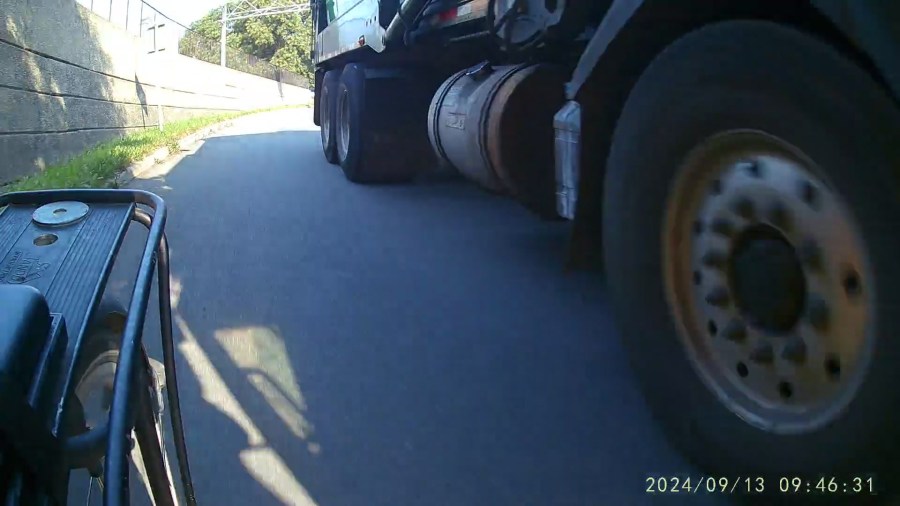
    The rear wheels passed much closer:

    Royal rear 2024-09-13 - 180
    Royal rear 2024-09-13 – 180

    In general, Royal’s drivers give us plenty of clearance.

    In this case, I think he badly misjudged how fast I was moving and figured he would be well past by the time he had to be completely in the right lane to avoid vehicles in the left-turn lane on the bridge.

    However, intent wouldn’t make me any less dead after a trip around those tires …

  • Sting-Kill: Everyday Carry Tube

    Sting-Kill: Everyday Carry Tube

    One of Mary’s gardening cronies suggested Sting-Kill might reduce her dramatic swelling [^1] after a bee / wasp / insect sting. Because it must be applied immediately after the sting, the swab must be on hand in the garden or on a bike ride, but the glass vial inside seem entirely too fragile to survive amid the usual clutter of a purse / pocketbook / belt pack / bike pack.

    Well, I can fix that:

    Pill tube - PETG default
    Pill tube – PETG default

    It’s a KeyChain Pill Tube from Printables, enlarged 20% in the XY plane to fit the Sting-Kill swab, with the white applicator end fitting neatly into the domed screw-on lid for a bit of cushioning.

    The solid model looks about like you’d expect:

    Pill Tube - slicer preview
    Pill Tube – slicer preview

    Despite that preview, I printed it with a brim. PETG sticks tenaciously to the Textured PEI steel sheet and a brim wasn’t really needed; just pop the parts off the platform when cool.

    Somewhat to my astonishment, the threads screwed together easily, smoothed out after a few on-and-off cycles, and it’s ready for a moment we both hope will never occur.

    [^1] Mary did tote an EpiPen back in the day, but a few near misses indicated she’s no longer quite as sensitized. She does swell up something powerful and we’re hoping immediately applying a Sting-Kill will help knock it down.

  • Anker A1215 PowerCore 13000 Power Banks: Five Years

    Anker A1215 PowerCore 13000 Power Banks: Five Years

    After five years of powering the action cameras on our Tour Easy recumbents, the pair of Anker A1215 PowerCore 13000 USB power banks have about 8 A·hr of capacity with a 2 A load after a full charge:

    Anker PowerCore 13000 - 20204-07-26
    Anker PowerCore 13000 – 20204-07-26

    It seems I did not test them on arrival, so I have no idea what their original capacity might have been, but I’m certain it wasn’t the 13 A·hr implied by their name.

    The sawtooth voltage output looks like the internal controller picks a constant boost (or buck) ratio based on the battery voltage, then adjusts it when the output voltage falls below the lower limit. You can imagine it desperately boosting the ratio as the battery voltage falls off a cliff near the end of the curve.

    I have no idea why the two packs behave so differently, although the voltages are certainly within ordinary USB limits.

    They’ll continue powering the camera on my bike for a while, after which I’m sure they’ll come in handy for something …

  • Tour Easy: Anker 20K V2 USB Power Bank

    Tour Easy: Anker 20K V2 USB Power Bank

    After five years, it’s time to replace the Anker 13000 mA·hr USB power banks / chargers I used with the M20 cameras and then the C100 cameras:

    SJCAM M20 Mount - Tour Easy side view
    SJCAM M20 Mount – Tour Easy side view

    The Anker 325 20K V2 power bank is considerably chunkier, as befits its 20,000 mA·hr cell capacity (although the fine print says 12,500 mA·hr output):

    Anker 20K V2 Power Bank - installed
    Anker 20K V2 Power Bank – installed

    The white tape stripe on the top marks the USB port on the end to reduce the fumbling involved in an out-of-sight socket. There’s also a USB-C port on that end for both charging the pack and powering other devices.

    The new mounting cradle descends directly from the 13000 cradle:

    Anker 325 20KV2 Power Bank - slicer preview
    Anker 325 20KV2 Power Bank – slicer preview

    The model includes a projection of the battery on the XY plane for export to an SVG file suitable for laser-cutting an EVA foam pad to cushion the bumps.

    The OpenSCAD source code as a GitHub Gist:

  • Tour Easy: PTT Button Replacement

    Tour Easy: PTT Button Replacement

    After five years and one cleaning, the PTT button on Mary’s Tour Easy became increasingly intermittent, both failing to activate solidly and sticking closed (there being nothing quite like a hot mic during a good hill climb), so it’s time for an autopsy:

    Failed PTT Switch - as extracted
    Failed PTT Switch – as extracted

    The snap dome is much more scarred at the central contact:

    Failed PTT Switch - snap plate
    Failed PTT Switch – snap plate

    That might be a gold flash coating, but it’s pretty well worn away where it hits the central contact:

    Failed PTT Switch - center contact
    Failed PTT Switch – center contact

    Those scratches surely happened during the previous cleaning pass, as I don’t see any way for the dome to create them.

    The corner contact also shows some scuffs, along with a scar where the dome corner pivots:

    Failed PTT Switch - edge contact
    Failed PTT Switch – edge contact

    All in all, though, it worked quite well.

    The replacement switch, also intended for indoor use on a keypad or some such device, pivots around the front edge and may be easier for her fingertip to activate:

    New PTT Switch - installed
    New PTT Switch – installed

    Hot melt glue seems vastly underrated for how wonderful a structural material it is.

    If this one lasts five years, I’ll be perfectly happy.

  • Rail Trail Brush Clearing

    Rail Trail Brush Clearing

    Having an aversion to getting slapped in the face by Blackthorn branches overhanging the Dutchess Rail Trail, I generally give up waiting for anybody else to do the job:

    Brush clearing B - 2024-07-14
    Brush clearing B – 2024-07-14

    They’re not all Blackthorn (Prunus spinosa), but Ailanthus altissima grows like a weed around here and requires heavy cutback:

    Brush clearing C - 2024-07-14
    Brush clearing C – 2024-07-14

    It’s not just small branches:

    Brush clearing A - 2024-07-14
    Brush clearing A – 2024-07-14

    Apparently, there was no law against that …

    Brush clearing E - 2024-07-14
    Brush clearing E – 2024-07-14

    A recent storm dropped many trees across the trail and the maintenance folks deploy bigger saws than I can carry:

    Brush clearing D - 2024-07-14
    Brush clearing D – 2024-07-14

    Three months after we were told they had ordered replacement tiles, I’m beginning to think I must buy some on Amazon and do this job myself, too:

    Overocker ADA - continued disintegration - 2024-07-21
    Overocker ADA – continued disintegration – 2024-07-21

    Maybe it’ll get done when the weather cools …

  • Tour Easy Running Lights: Updated Lights

    Tour Easy Running Lights: Updated Lights

    With the new battery mount & buck converter box installed on Mary’s bike, I updated the running light circuitry to match the ones on my bike. The original wiring just supplied 6.3 V from the headlight circuit, but now the four wire ribbon cable from the electronics box carries 6.3 VDC from the buck converter and a 6 VDC signal going high when the DPC-18 display’s “headlight” output goes active. The latter goes into an optoisolator pulling down Pin 2, telling the running light to stay on continuously.

    The optoisolator sits next to the Arduino Nano’s Reset button:

    Tour Easy Running Light - unified light top
    Tour Easy Running Light – unified light top

    The black wire barely visible below the optoisolator jumpers Pin 3 to ground, telling the firmware that this is the front running light.

    The black & white wires from the top of the optoisolator connect directly to the ribbon cable entering on the other side:

    Tour Easy Running Light - unified light bottom
    Tour Easy Running Light – unified light bottom

    The gray wrap of clear silicone tape mummifies the wire-to-wire soldered connectors.

    The firmware now pays attention to the jumper input, so I need only one source file for both front and rear lights:

        if (digitalRead(PIN_POSITION) == HIGH) {
            Blinks = String("i e  ");             // rear = occulting
            Polarity = true;
        }
        else {
            Blinks = String("n e  ");             // front = blinking
            Polarity = false;
        }


    It just doesn’t get much easier than that!

    The Arduino source code as a GitHub Gist: