Ed Nisley's Blog: Shop notes, electronics, firmware, machinery, 3D printing, laser cuttery, and curiosities. Contents: 100% human thinking, 0% AI slop.
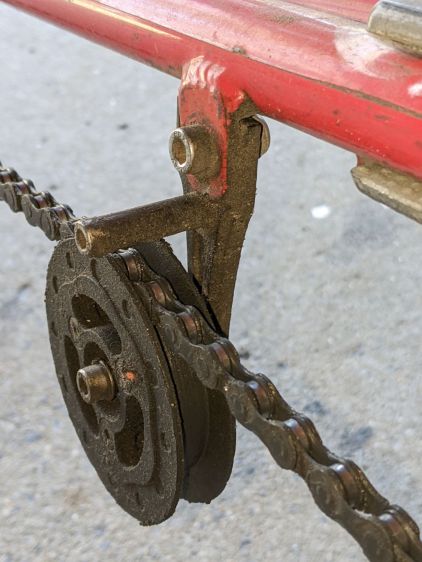
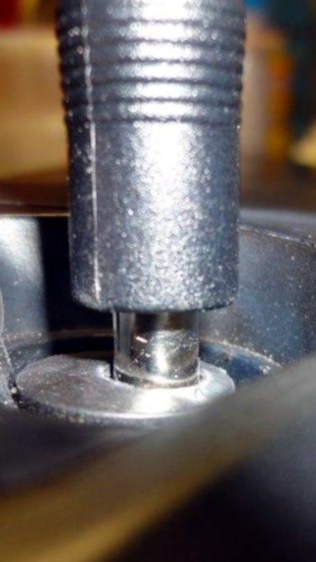
It turns out that under rare conditions, triggered by fumbling a front derailleur shift, the upper chain section (out of the picture on the top) can whip vertically enough to jam between the Terracycle Idler’s mounting bolt and its longer chain retaining pin:
Tour Easy – Terracycle idler
Whereupon the chain falls off the chainring, jams firmly between the spider and the crank, and brings the proceedings to a halt.
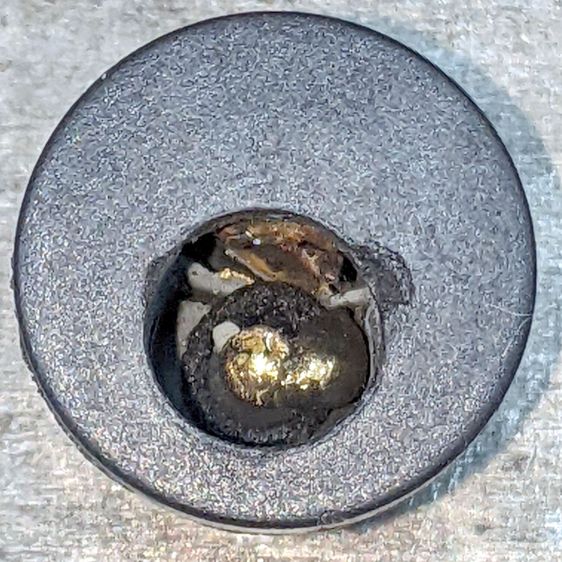
Having finally figured out the cause, I made a simple bushing to fit around the mounting bolt, reduce the gap, and (I hope) eliminate the problem:
Tour Easy – Terracycle idler bushing
Given its rarity, I will need a few more years to verify the solution.
Might get around to cleaning the chain one of these days, too …
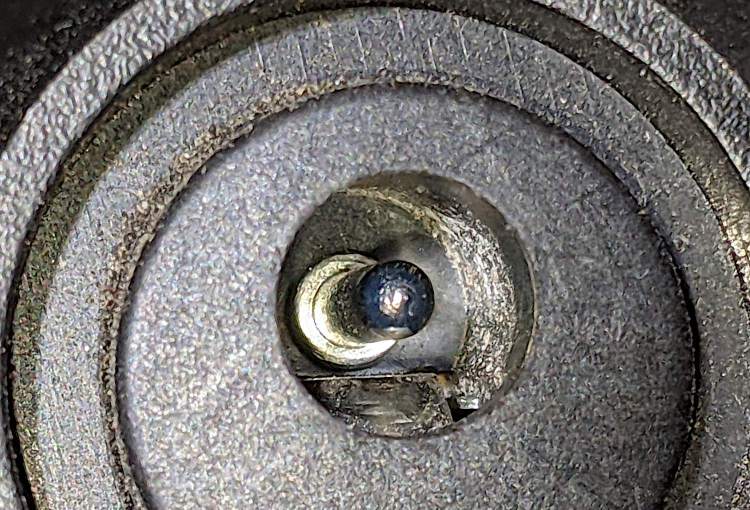
There’s not much left of the central pin: the nugget hanging on its side is much larger than I expected. Most of the pin melted into that nugget, with a bonus droplet on the near side.
The rectangular chunk (upper right) is the switch terminal, with the tab from the side contact (on the right) welded to it.
Fortunately, none of the mayhem (including a few small sparks during the connector replacement) damaged the battery management circuitry or triggered a shutdown, so the reset tool wasn’t needed.
It’ll make a great 3D printing show-n-tell exhibit, in the unlikely event I ever do an in-person talk …
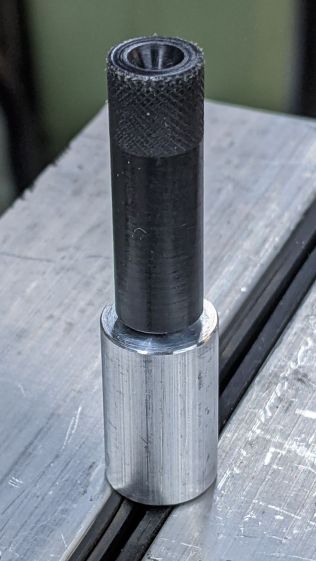
Rather than poke things into the undamagedcharge port of our battery, I built a quick-and-dirty mechanical duplicate:
Bafang battery – charge port simulator
The “center pin” is a snippet of what’s almost certainly 5/64 inch brass tube measuring Close Enough™ to 2.1 mm, with a few millimeters of 3/32 inch tube soldered on the end to simulate the nugget.
The aluminum rod has a 5.5 mm hole matching the coaxial jack’s diameter and depth, with a smaller through hole for the “pin” and a dab of Loctite bushing adhesive.
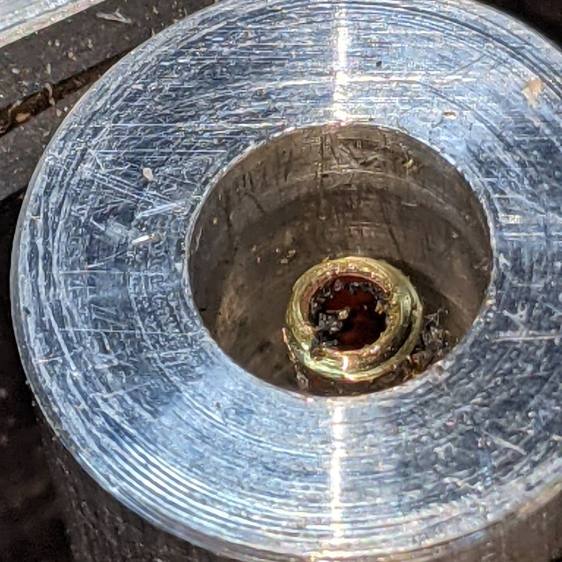
Then I turned the end of a 3/8 inch acetal rod down to a 5.5 mm bushing that completely fills the jack:
Bafang battery – guide bushing – dummy jack
It has a 3 mm hole down the middle to aim homebrew shell drills directly at the pin, while preventing a short to the side contact.
The first test looked encouraging:
Bafang battery – shell drill – test results
The nugget in the damaged jack is definitely larger than my soldered brass tube, but this was in the nature of exploratory tinkering while mulling the problem.
Short-circuiting the Bafang battery’s charge port may have done anything from completely destroying the battery management circuit to just welding a brass nugget onto the port’s center pin. The main output to the bike motor remained functional, so my friend used it on rides over the next few days to reduce the charge level.
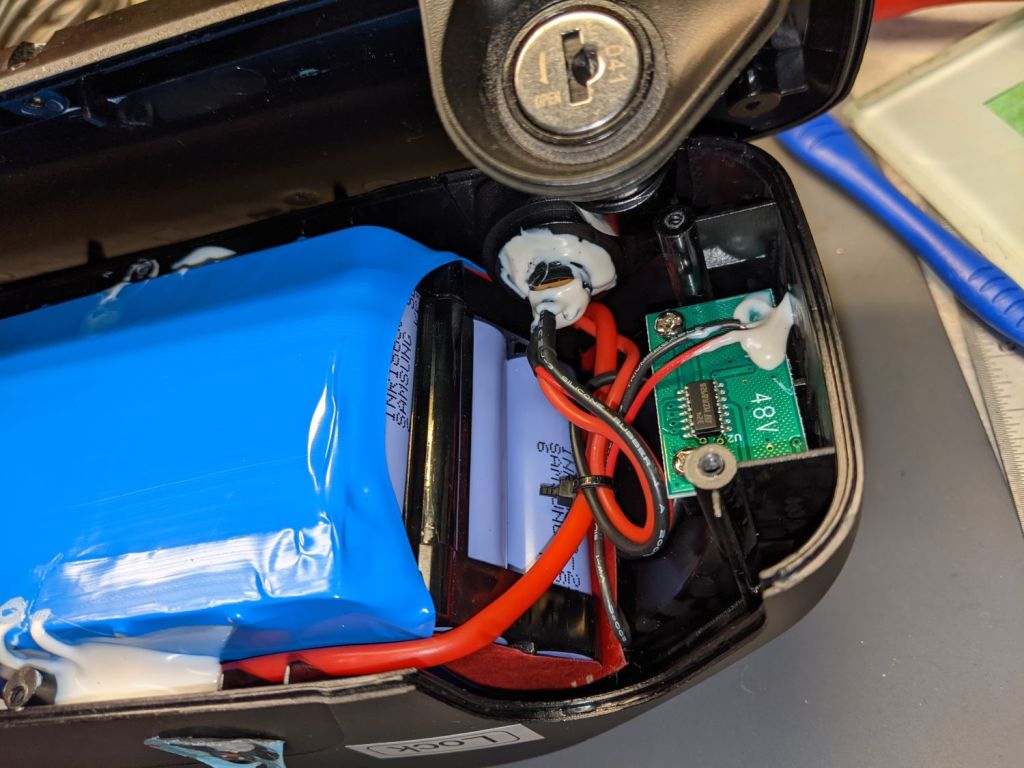
Meanwhile, I peeked inside the undamaged battery on Mary’s bike:
Bafang battery interior – overview
The battery pack is neatly shrink-wrapped and firmly glued into the plastic shell, with the battery management PCB on the other side of the battery. Some gentle prying suggests it will be difficult to disengage the adhesive, so getting the pack out will likely require cutting the blue wrap, extricating the cells as an unbound set, then cutting the blue wrap to release the wires.
A closer look at the nose of the battery:
Bafang battery interior – front
The large red wire entering on the left comes from the motor connector, loops around the nose of the battery, and probably connects to the battery’s most positive terminal or, perhaps, to the corresponding BMS terminal.
The medium black wire from the side contact of the coaxial jack (atop the pair of red wires) burrows under the battery and likely connects to the most negative battery terminal. This is the charger plug’s outer terminal.
The small red wire from the center contact of the coaxial jack (between the medium black and red wires) goes to the charge indicator PCB in the nose of the battery. This is basically a push-to-test voltmeter with four LEDs indicating the charge state from about 40 V through 54 V. The small black wire from that PCB burrows under the battery on its way to the BMS.
The medium red wire from the center contact goes to the BMS.
There is no way to determine how much damage the short might have done, although the silicone-insulated wires should have survived momentary heating, unlike cheap PVC insulation that slags down at the slightest provocation.
Removing and replacing the coaxial jack requires Cutting Three Wires then rejoining them, a process fraught with peril. You must already have a profound respect for high voltages, high currents, and high power wiring; this is no place for on-the-job learning and definitely not where you can move fast and break things.
With this in mind, the only hope is to remove the nugget and see if the battery charges properly.
The trick will be to do this without any possibility of shorting a metallic tool between the center pin and the side contact.
The lock might deter casual thievery, but really prevents the battery from bouncing out of its mounting plate while riding.
The right side has a charge port closed with a rubber plug:
Bafang battery – charge port – closed
The cover protects a coaxial jack with a 5.5 mm OD and a 2.1 mm center pin:
Bafang battery – charge port
My friend in Raleigh generally removes the battery before hoisting the bike into the back of her car to haul it to a friend’s house for their companionable rides: not lifting an additional seven pounds is a Good Idea™.
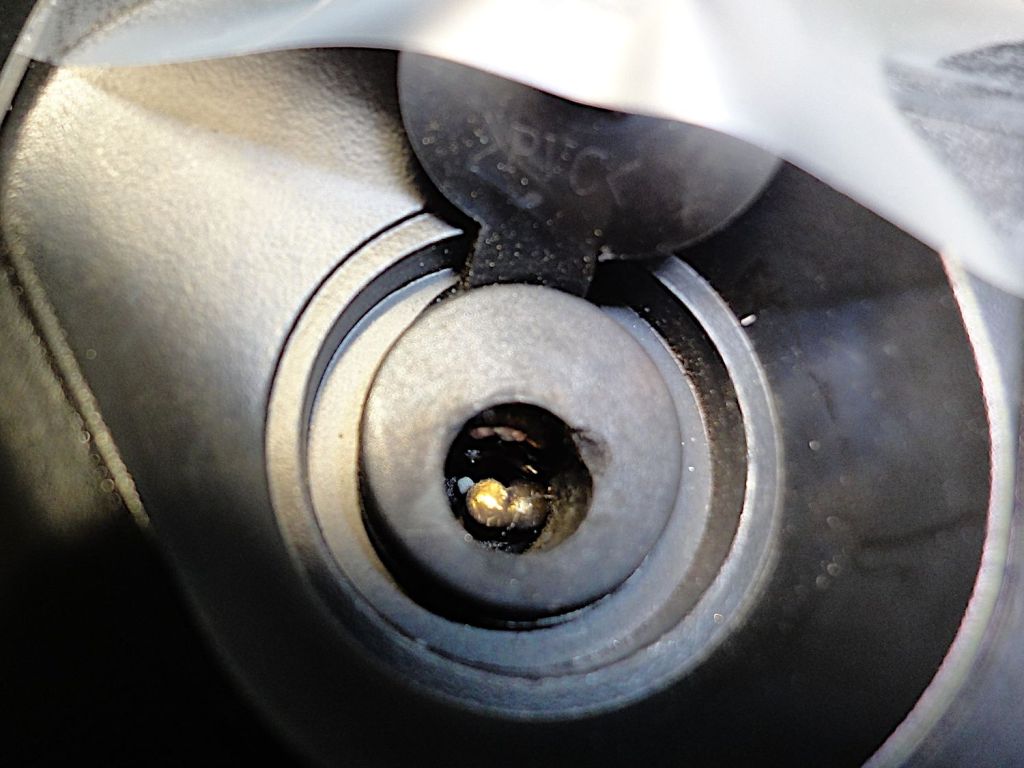
A momentary distraction in the middle of that process caused her to insert the brass key into the charging port, rather than the lock. The key put a very short circuit between the coaxial jack’s side contact and the center pin, melting the key tip and welding a brass nugget onto the side of the pin:
Bafang battery – damaged charge port
The charger plug normally sits almost flush to the port’s surface:
Bafang battery – charge plug
The nugget keeps the plug out the damaged port, preventing the plug from making electrical contact:
Bafang battery – damaged port – plug
She owned the problem and immediately bought another battery, which tells you the value she places on riding her e-bike.
Verily it is written: let someone who is without whoopsie cast the first shade.
Any takers? Yeah, the way I see it, someone who says they’ve never done anything quite like that is either not doing anything or not telling the complete truth. For sure, I’ve done plenty of inadvertent damage!
Here’s the problem:
The damaged battery is the better part of 600 miles away from my shop
Civilians cannot ship 560 W·hr lithium batteries through any parcel delivery service
Civilians cannot fly or take the train with such a battery, either
Driving 1200 miles twice is out of the question for either of us
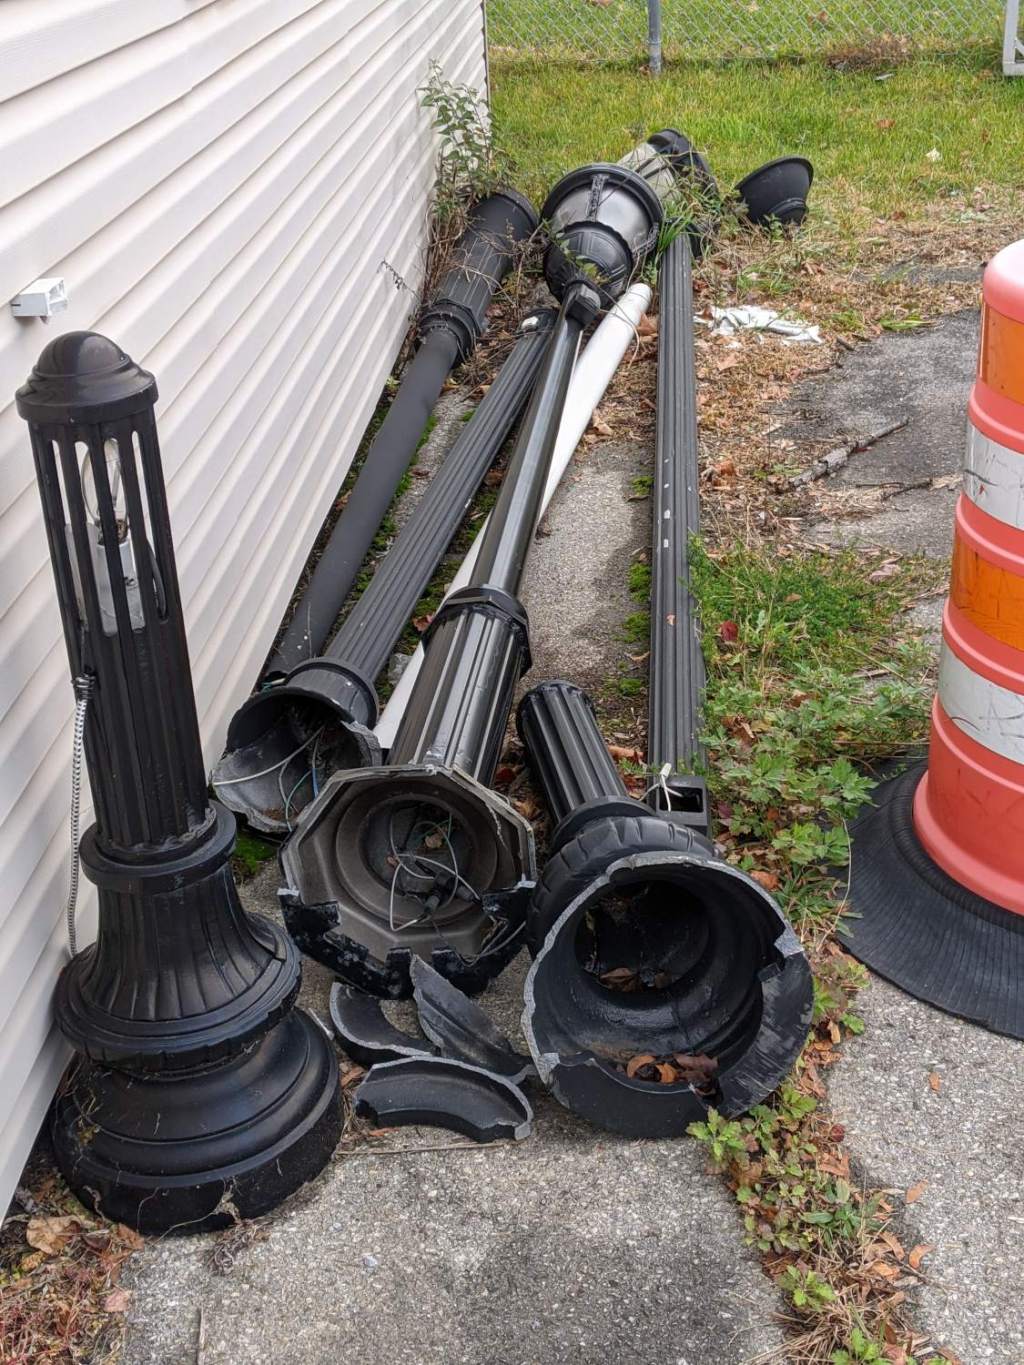
I hadn’t realized the “standards compliant” road design caused the death of so many street lights, but the dead bollard population is definitely under-represented. In round numbers, every traffic circle (“intersection”) always has at least one smashed bollard in addition to the vestigial stumps of those removed rather than being replaced.
The upright bollard is a relic of the earliest installations, back before they realized a bollard with an eye-level light glaring into drivers’ eyes weren’t an effective design, particularly along a road lined with dead-black / non-reflective posts.
Spotted in the Town of Poughkeepsie Highway Department compound.
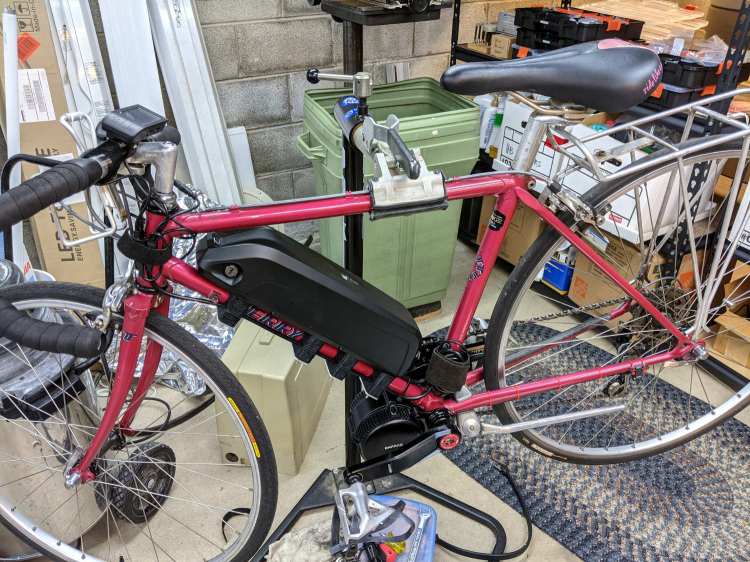
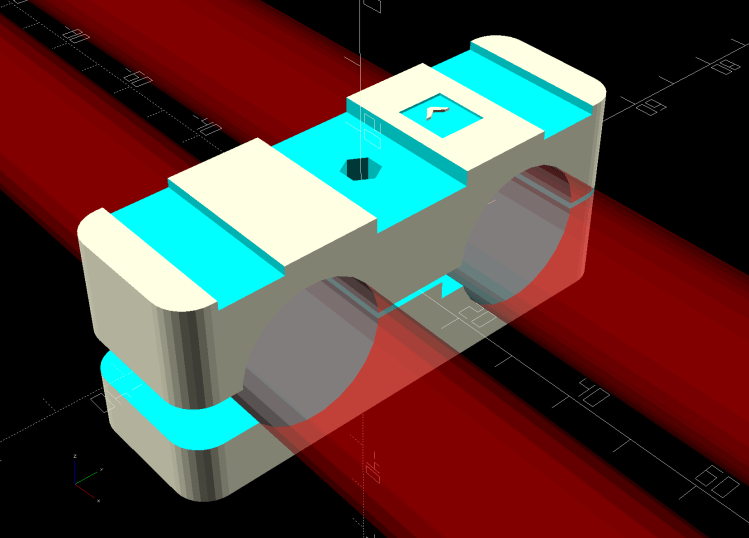
I’ll be talking about e-bikes and the solid modeling required to hang a Bafang motor and battery on your favorite bike for the Poughkeepsie Chapter of the ACM at 1930 EDT this evening:
Bafang Battery Mount – Show view
It’s a Zoom meeting, so (in the unlikely event you have nothing better to do) you could actually “attend”. The ACM meeting description and the Meetup announcement will get you there.
A PDF of the presentation slides (remember slides?) includes copious linkies to sources / blog posts / distractions: