Ed Nisley's Blog: Shop notes, electronics, firmware, machinery, 3D printing, laser cuttery, and curiosities. Contents: 100% human thinking, 0% AI slop.
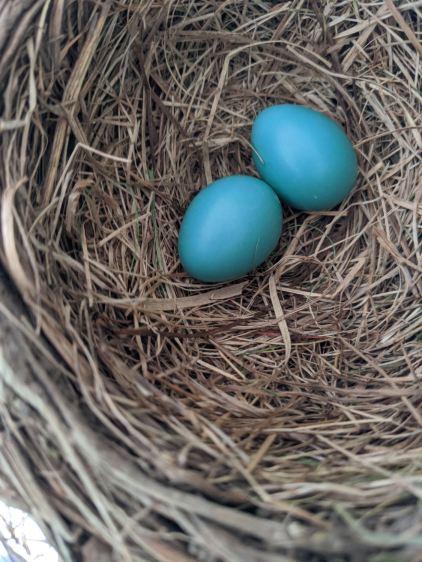
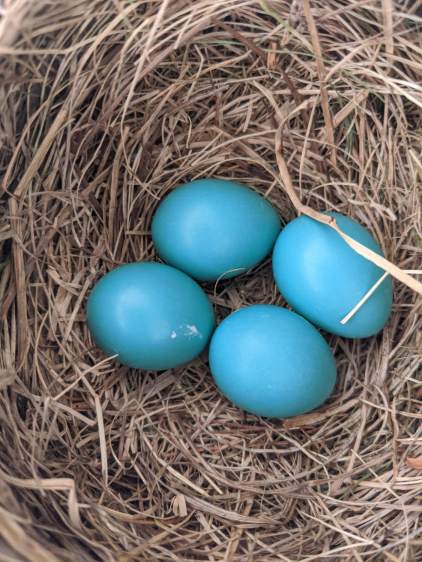
She’s surprisingly tolerant of our comings and goings, as well as garage door openings and closings:
Garage Robin Nest – robin brooding
We’re trying to stay out of her way as much as possible.
The gallery pix come from my phone, held against the soffit over the nest, and aimed entirely by feel, while standing on the Greater Ladder. If I had access to the top of the soffit, I’d drill a webcam hole, but …
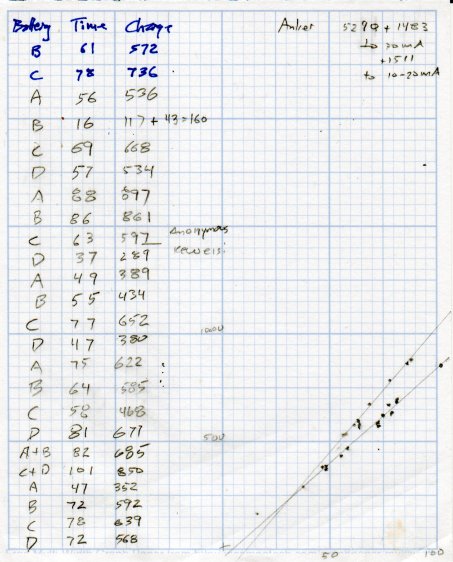
The vertical axis is the total charge in mA·h, the horizontal axis is the discharge time = recorded video duration. Because 1 A = 1 coulomb/s, 1 mA·h = 3.6 C.
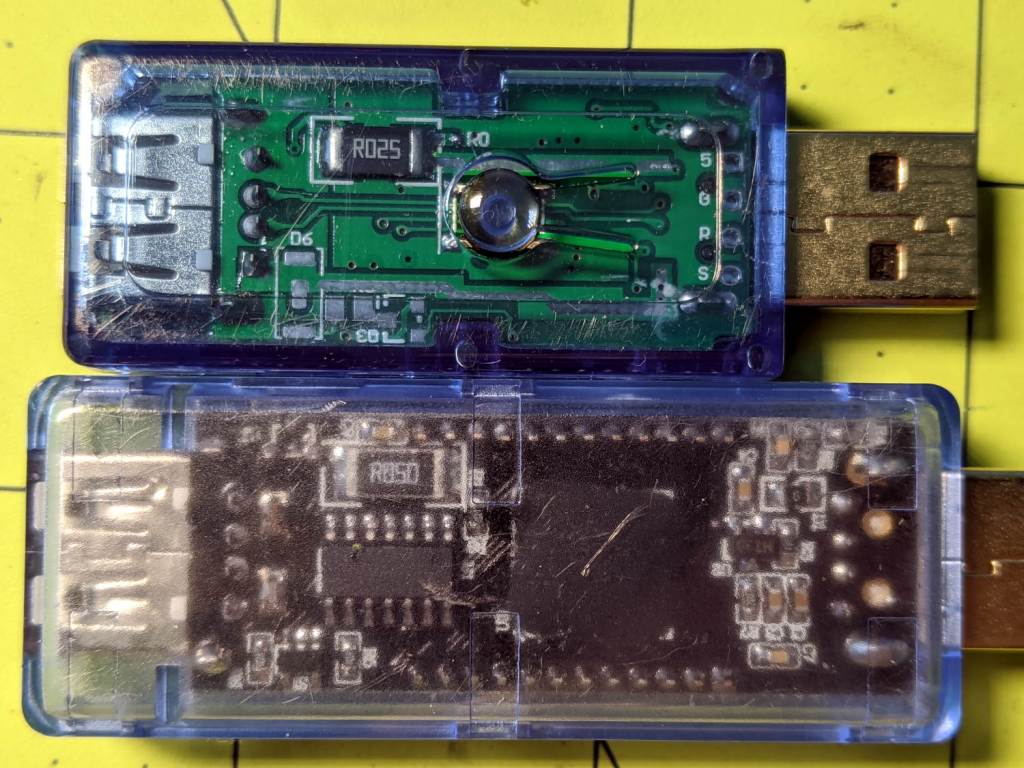
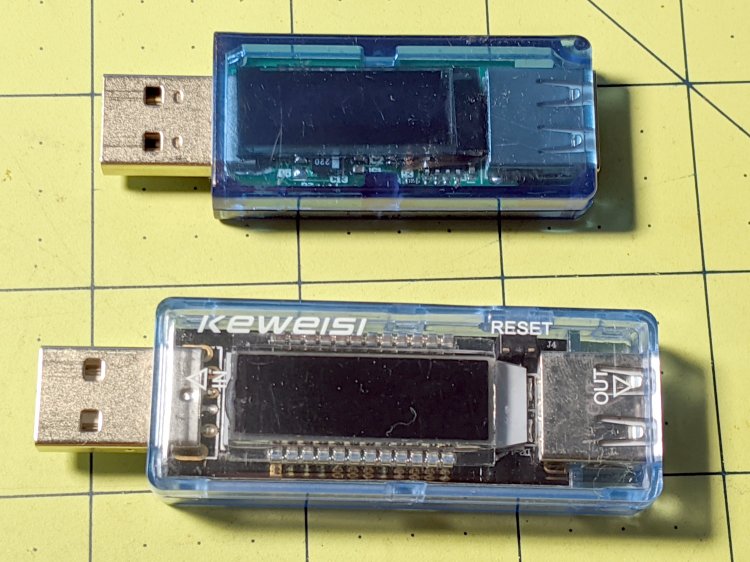
When you have one tester, you know the USB current. When you have two testers, you’re … uncertain.
The upper tester is completely anonymous, helpfully displaying USB Tester while starting up. The lower one is labeled “Keweisi” to distinguish it from the myriad others on eBay with identical hardware; its display doesn’t provide any identifying information.
The back sides reveal the current sense resistors:
USB Testers – sense resistors
Even the 25 mΩ resistor drops enough voltage that the charger’s blue LED dims appreciably during each current pulse. The 50 mΩ resistor seems somewhat worse in that regard, but eyeballs are notoriously uncalibrated optical sensors.
The upper line (from the anonymous tester) has a slope of 11.8 mA·h/minute of discharge time, the lower (from the Keweisi tester) works out to 8.5 mA·h/minute. There’s no way to reconcile the difference, so at some point I should measure the actual current and compare it with their displays.
Earlier testing suggested the camera uses 2.2 W = 600 mA at 3.7 V. Each minute of runtime consumes 10 mA·h of charge:
10 mA·h = 600 mA × 60 s / (3600 s/hour)
Which is in pretty good agreement with neither of the testers, but at least it’s in the right ballpark. If you boldly average the two slopes, it’s dead on at 10.1 mA·h/min; numerology can produce any answer you need if you try hard enough.
Actually, I’d believe the anonymous meter’s results are closer to the truth, because recharging a lithium battery requires 10% to 20% more energy than the battery delivered to the device, so 11.8 mA·h/min sounds about right.
No surprise, as the car completely shattered the utility pole.
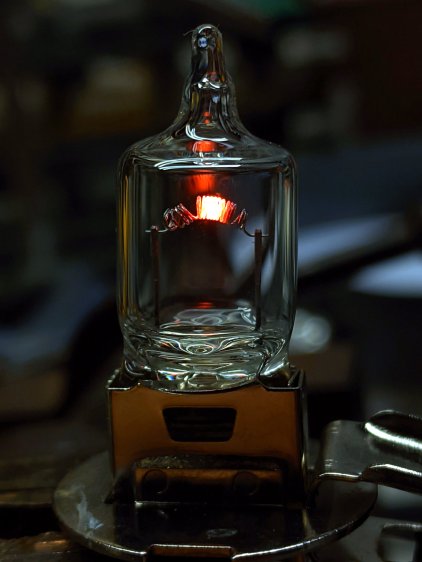
The glow draws 1.5 A from a bench supply at 1 V, just to show the filament isn’t lighting up evenly across those gaps. The bulb runs at 55 W from 12 V and would be, I’m sure, blindingly bright, although the heat concentrated in those few coils suggests it’d burn out fairly quickly.
By LED standards, though, you don’t get much light for your 1.5 W …
An underexposed version highlights the filament, just for pretty:
Bracing the Pixel 3a on the deck railing. Despite the star near the top, it decided to not invoke Astrophotography mode.
This was apparently a Pink Moon and a Supermoon and surely some other adjectives nobody cared about until Webbish media discovered they could generate ad revenue using clickbait headlines concerning a monthly event.
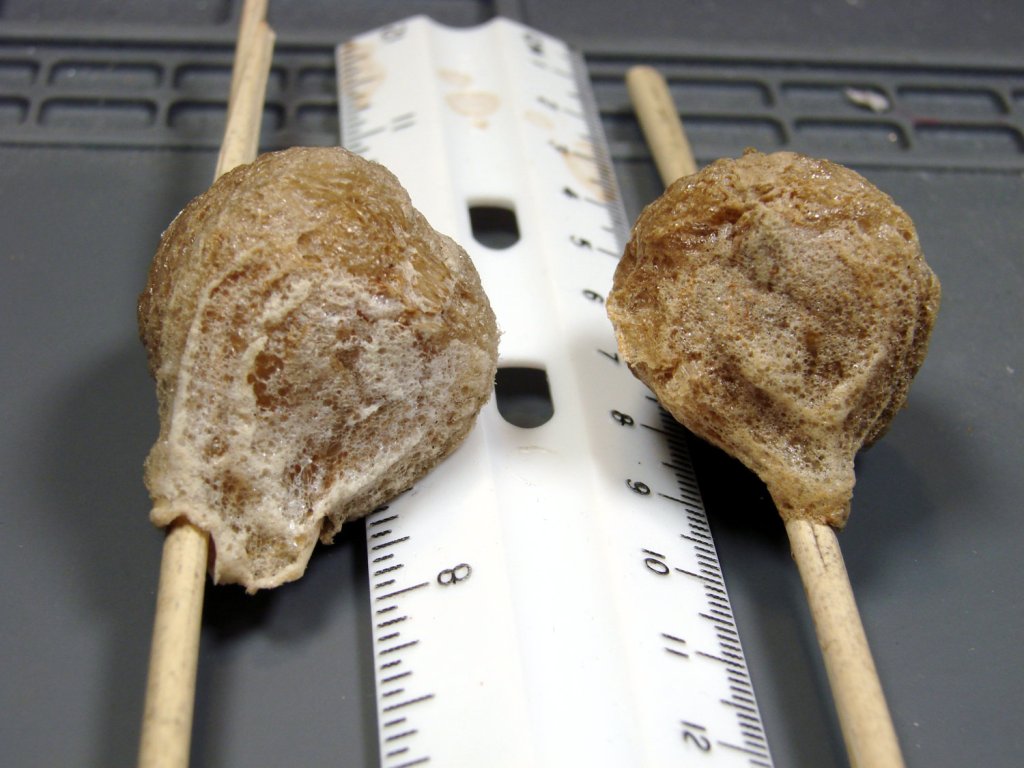
We extracted the Praying Mantisoothecae while clearcutting the decorative grasses bracketing the front door. As far as I can tell, they’re still charged up and ready for use.
The masses resemble rigid foam wrapped around grass stems:
Praying Mantis ootheca – stem side
It’s a mechanical joint, not an adhesive bond, and the dried stems slide freely through the openings:
Praying Mantis ootheca – bottom
From one side:
Praying Mantis ootheca – right
And the other:
Praying Mantis ootheca – left
They’re now tied to stems of the bushes along the front of the house, which (I hope) will resemble what the little ones expect to find when they emerge, whenever they do.