Ed Nisley's Blog: Shop notes, electronics, firmware, machinery, 3D printing, laser cuttery, and curiosities. Contents: 100% human thinking, 0% AI slop.
So the ancient Dell E1405 laptop on the Electronics Bench, connected to this-and-that, woke up without network connections. As in, right after booting, the link and activity lights jammed on solid, the usual eth0 device wasn’t there, WiFi was defunct, and nothing made any difference.
After a bit of searching, the best summary of what to do appears on the Ubuntu forums. The gist of the story, so I need not search quite so much the next time, goes like this:
The laptop uses the Broadcom BCM4401 Ethernet and BCM4311 WiFi chips, which require the non-free Broadcom firmware found in the linux-nonfree-firmware package. There’s a proprietary alternative in bcmwl-kernel-source that apparently works well for most Broadcom chips, but not this particular set.
Guess which driver installed itself as part of the previous update?
The key steps:
sudo apt-get purge bcmwl-kernel-source
egrep 'blacklist (b43|ssb)' /etc/modprobe.d/*
... then manually kill any files that appear ...
Apparently that problem has been tripping people for at least the last four years. That this is the 14.04 Long Term Support version evidently has little to do with anything at all.
While I was at it, I deleted all the nVidia packages that somehow installed themselves without my noticing; the laptop has Intel 945 integrated graphics hardware.
I vaguely recall what I intended to do before this happened…
Our Larval Engineer expressed a need for some monitors, so I dispatched a pair of IBM L191p panels from the heap. Despite reusing a gargantuan box from the Dell U2713HM monitor, I had to disassemble the struts from their swiveling base to fit everything inside.
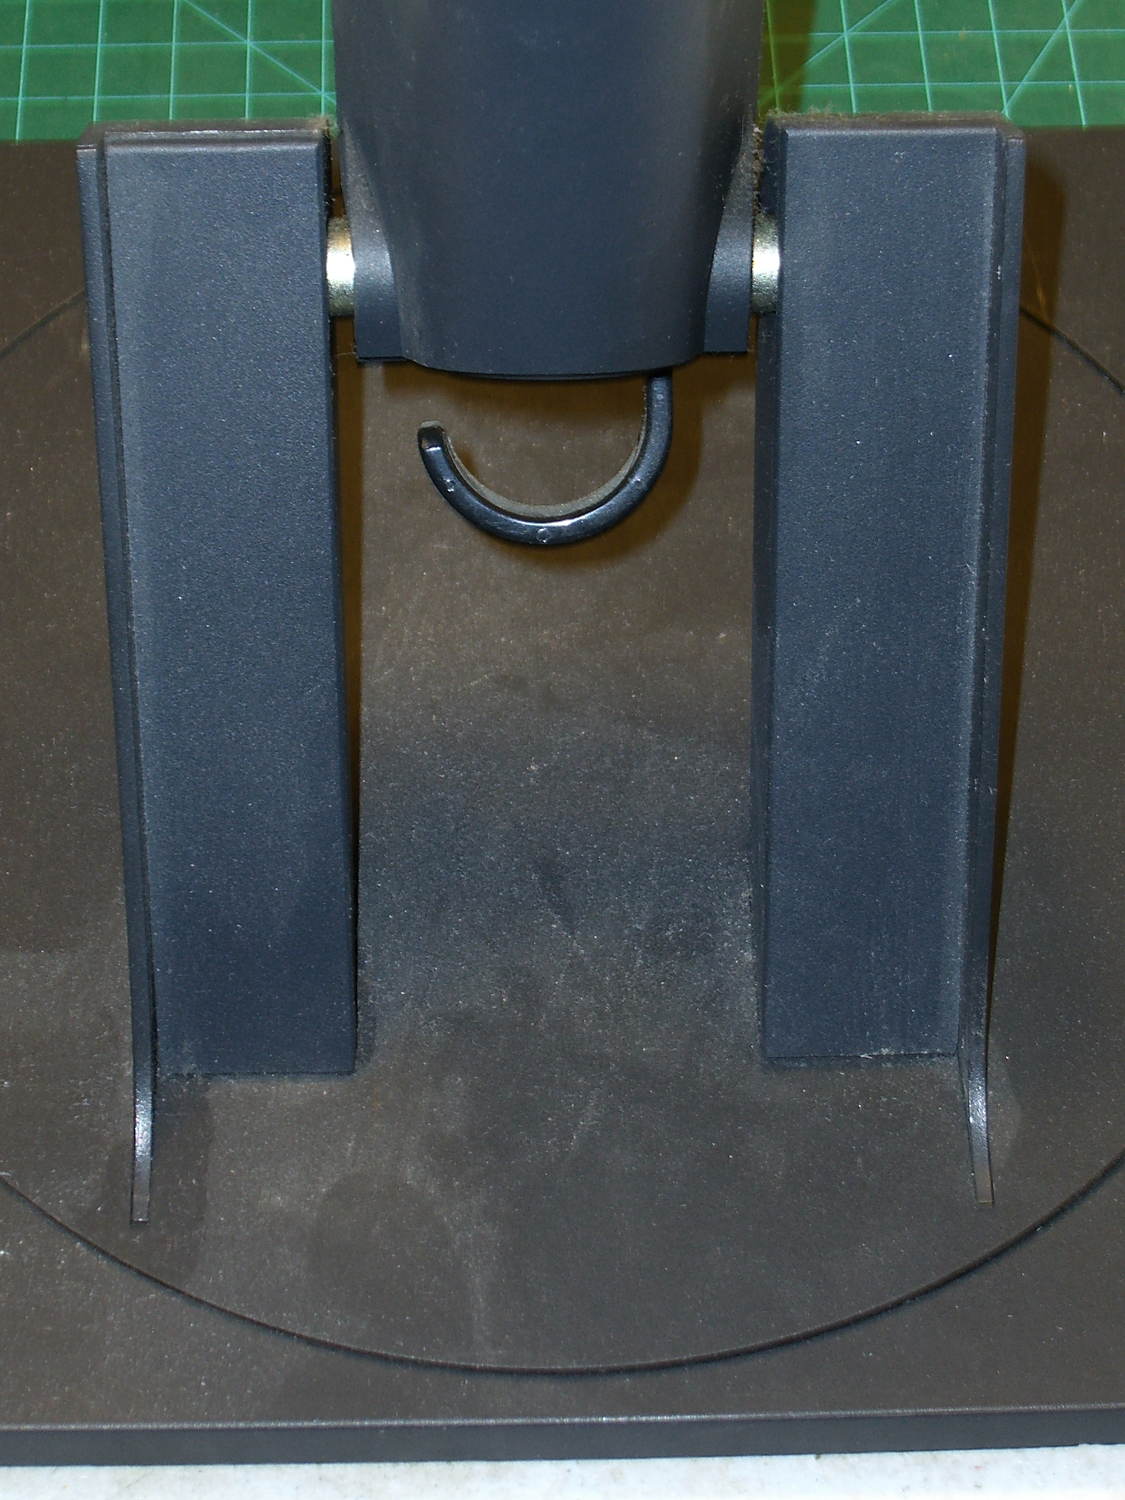
The intact base has no obvious affordance to remove the covers:
L191p Monitor Stand – struts intact
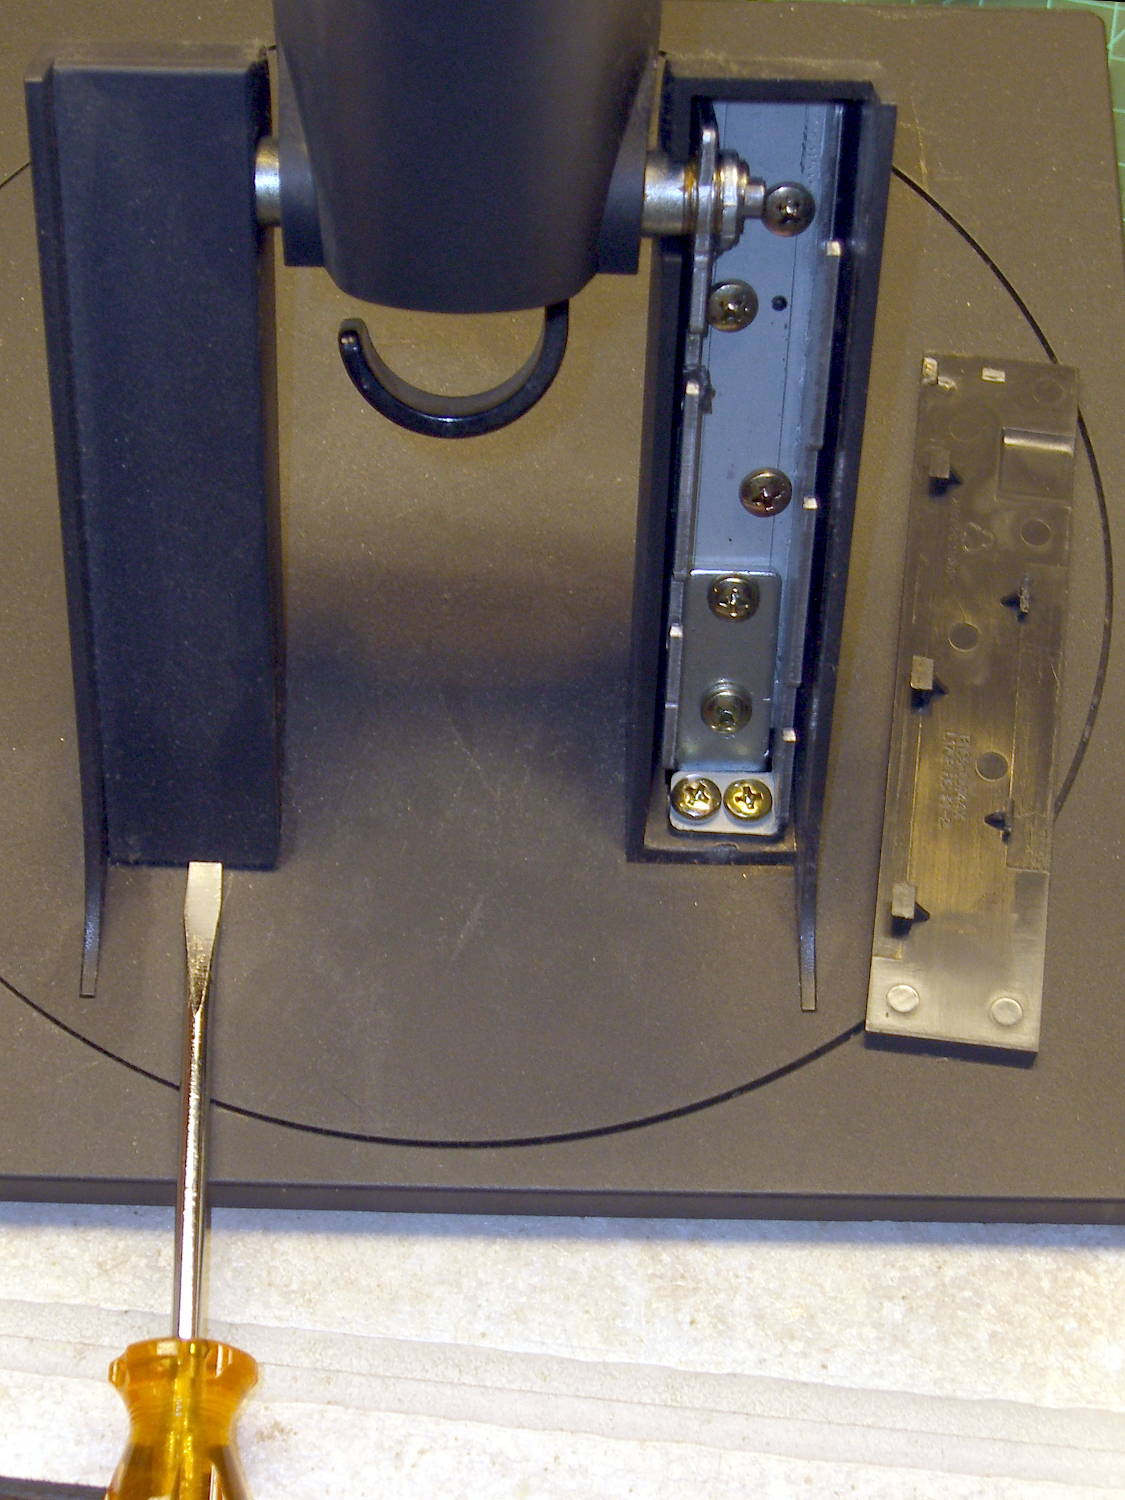
After taking the bottom apart, I discovered that you just poke a screwdriver under each cover and it slides upward and off:
L191p Monitor Stand – struts cover removal
Duh & similar remarks.
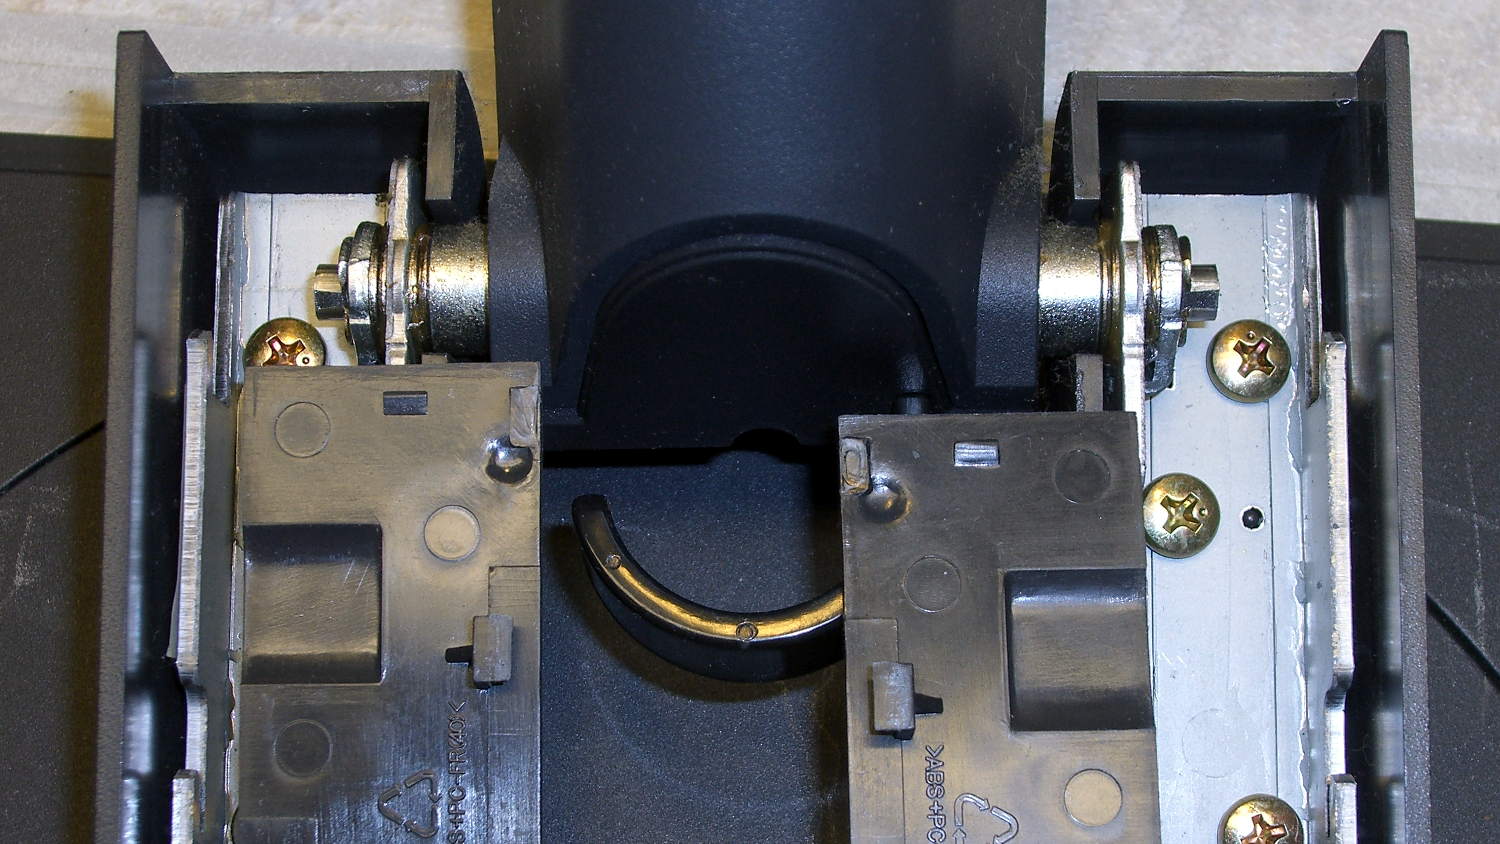
The two covers are not interchangeable:
L191p Monitor Stand – struts cover handedness detail
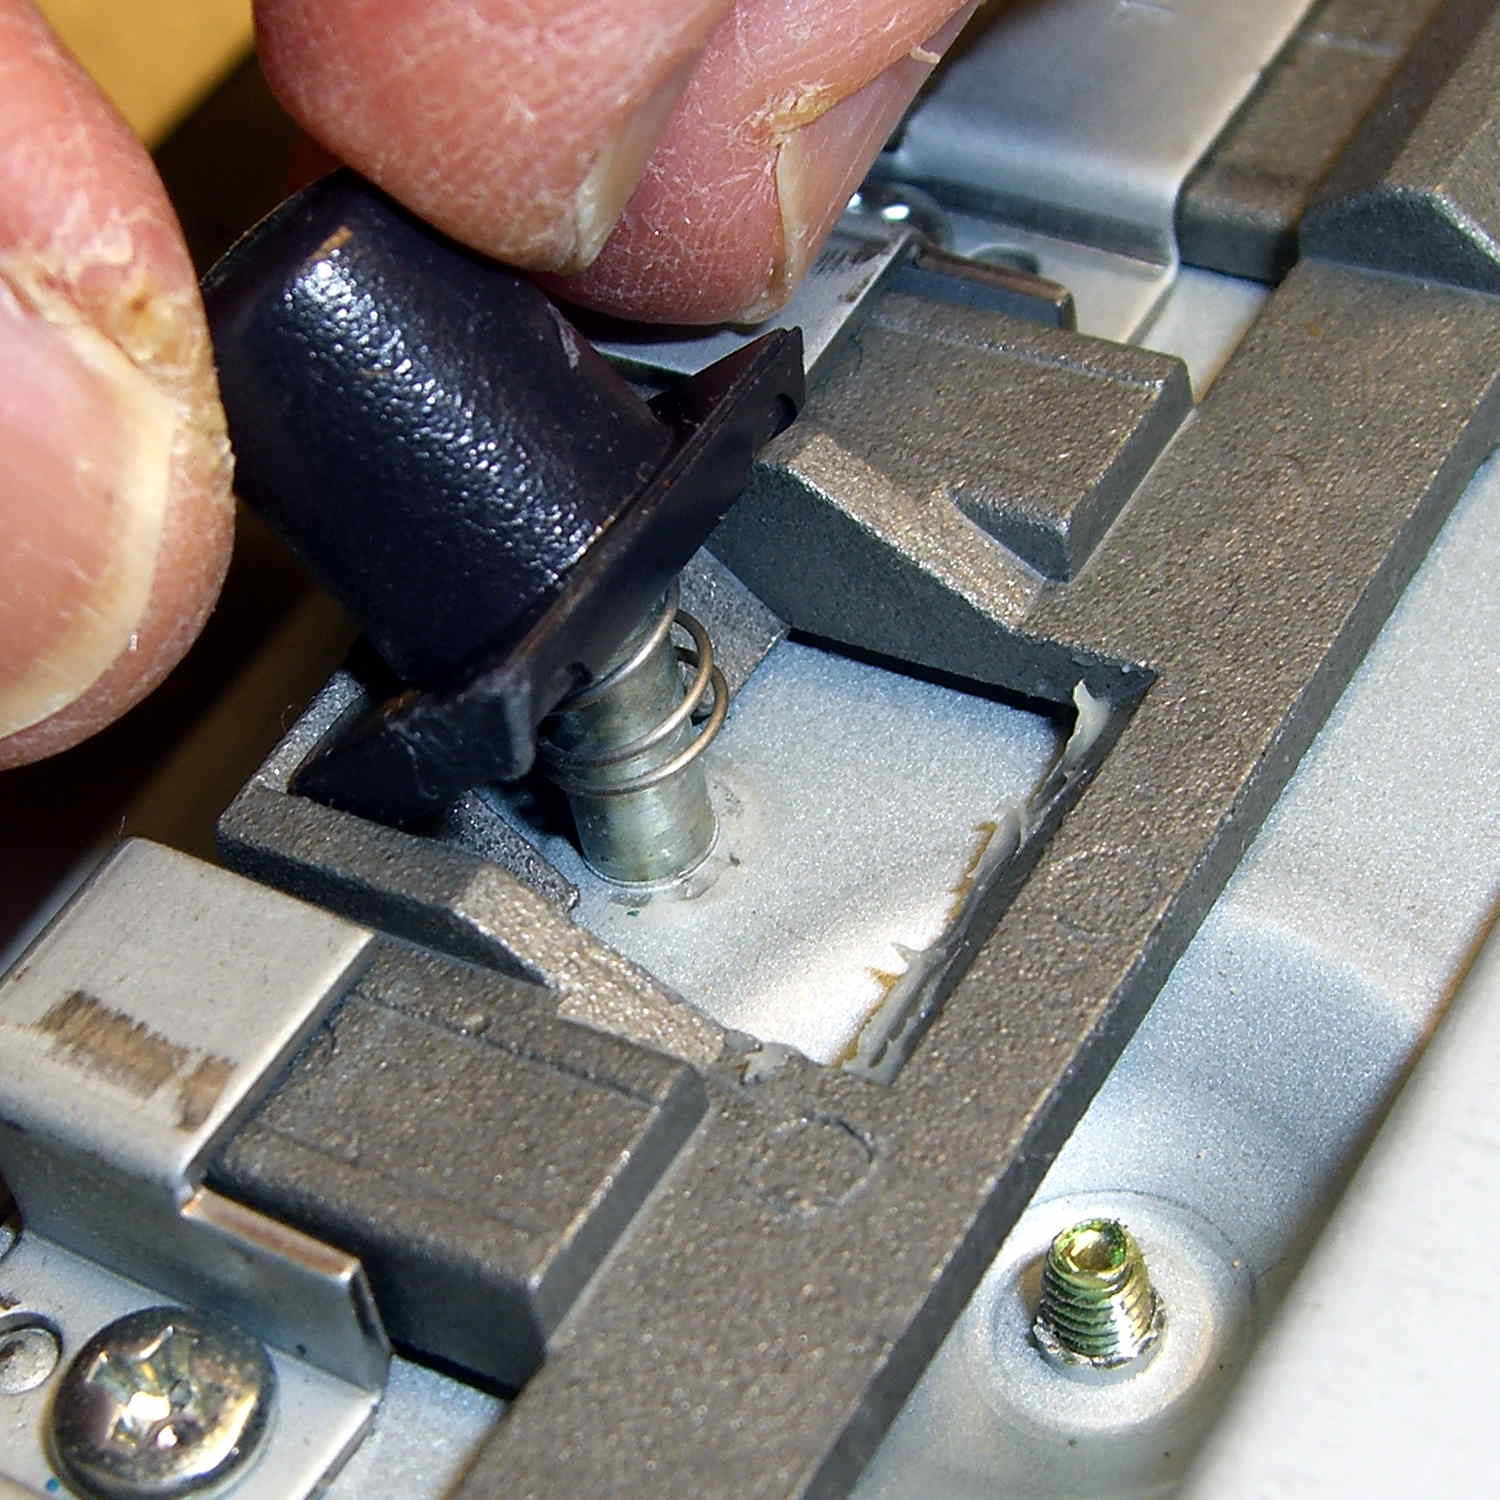
Removing two pairs of screws from each strut releases them from the base:
L191p Monitor Stand – struts disassembled
The projecting horns on the outboard side of those struts are exactly as delicate as you think.
I put a piece of thick cardboard sheathed in closed-cell foam between the LCD screens that separated their bezels (minus cutouts for the buttons), then taped them together face-to-face. Add foam peanuts, drop in the monitors, nestle struts beside monitors, add rigid foam blocks all around and between, put flat bases atop monitors with a foam slab protecting those strut brackets, over-stuff the box with more peanuts, forcibly tape the thing closed, and it survived the trip in good order.
A pair of 1280×1024 monitors isn’t worth insuring these days, though.
The Dell 2005FPW monitor that I’d been using in portrait mode suffered the common failure of rebooting itself, which suggested failing capacitors. Despite my reservations, I dropped eleven bucks on a repair kit containing exactly the right caps (from sunny California via eBay), hauled the carcass to a couple of Squidwrench sessions, replaced the offending caps, and it’s all good again.
No pix of the recapping, but a few notes that may prove useful next time.
The standard advice from the usual Internet Sages recommends prying the bezel apart along the nearly invisible outside joint. I did that, then found the user manuals and the Fine Repair Manual and discovered that you jam your fingernails under the inside of the bezel against the LCD screen, pry upward, rotate / bend the bezel around its outer edge, and it Just Pops Off. I doubt it’s that easy, but …
You should start from the top of the bezel, because the PCB behind the buttons & LEDs along the bottom doesn’t have a whole lot of slack in its cable. This shows the PCB and disconnected cable:
Dell 2005FPW monitor – button PCB cable
Just pull the small brown latch away from the cable and the cable will slide out. That would be significantly easier if the socket were on the backside of the PCB, but you must pop the PCB out of its own latches before you get access to the socket latch. Rotate the bezel carefully around the PCB and maybe it’ll survive.
The pushbutton that releases the stand’s not-quite-a-VESA-mount bracket remains in place when you remove the rear cover, held in place by a wedge:
Dell 2005FPW monitor – mount release button detail
It is, however, the only thing sticking that far out of the back surface and, if you leave it alone, it will eventually release itself from captivity, whereupon its spring will fire it across the room. You have been warned.
Reassembly is in reverse order, although I didn’t snap the button-and-LED PCB firmly into place. Fixing that will require dismounting the bezel again, which I’m so not doing for a 1 mm gap along the bottom edge.
Part of the flailing about while working around the Ubuntu video driver update glitch included blindly swapping a Displayport cable, which triggered another failure after everything settled down: the (empty) DVD drive’s activity light remained dimly lit with the PC off and both monitors in power-save mode. Unplugging the PC’s power cord extinguished all the internal LEDs on the system board, but left the drive light shining the same dim green. Disconnecting the USB cables to the monitors (they both have USB hubs) had no effect. Unplugging the monitors extinguished the LED after a bit. Unplugging one of the Displayport cables turned it off instantly, which was a clue that took a while to recognize.
Worse, the landscape monitor, a year-old Dell U2711, now refused to wake up from power-save mode during boot, even when it was the only monitor connected to the PC. Searching with an assortment of relevant keywords produced severalinterestingresults, including a lengthy Dell support forum thread, all suggesting a deeper and surprisingly longstanding problem with Displayport connections on big Dell monitors.
I knew most of the remedies weren’t relevant, because this failure happened while the BIOS felt around to identify the monitors: not a driver issue (not in effect yet), not a Windows issue (fer shure!), not a Linux issue, and not a BIOS configuration issue (nothing changed, plus Dell doesn’t allow much configuration).
It turns out that the original pair of Displayport cables bore Amphenol logos on the connector shells and cable. One of the replacements was a Genuine eBay cable from halfway around the planet, bearing no markings of any sort. Given the hints in those search hits, I discovered that the Amphenol-branded cables did not carry pin 20 between the connectors, but the eBay cables did: just a little something extra from eBay!
Installing the two Amphenol cables extinguished the DVD drive light by preventing the monitor standby power from backfeeding the PC through the video card and the monitor woke up correctly on the next two boots. Whether that will permanently cure the startup problem remains to be seen, as it was somewhat intermittent with the wrong cable and the forum threads suggest that the monitor will continue to work for a while before failing again.
While pondering all that, I severed the pin 20 connection in one of the eBay cables, just to have a different cable in hand. This diagram from the Wikipedia article, with pin 20 highlighted, shows it sitting under the longer blank section above one of the keys:
DisplayPort Connector – pin 20 highlight
The connector shell has snap latches that succumb to gentle prying with a razor knife, revealing the hot-melt-glue potted interior, with the orange wire snaking away from pin 20 at the top of the other side:
DP connector – latch side
One snip, a bit of prying to extract the end from the glue, and it’s ready to be buttoned up again:
DP connector – pin 20 wire cut
Both Amphenol cables and the modified eBay cable now have labels noting that they do not connect pin 20. We’ll see if that makes any difference…
So there’s been a conflict between Ubuntu’s kernel update procedure (which has trouble with non-GPL kernel modules) and the nVidia proprietary drivers (which you must use in order to Make Things Work). Ever since 14.04LTS came out, some-but-not-all kernel updates have produced anything from no problem at all to a totally broken system requiring esoteric manual tweakage that shouldn’t be expected of mere mortals.
**WARNING:** This bug has been widely reported and has *many* automatic subscribers. Please be considerate.
The most recent update to my desktop box clobbered it hard enough that the landscape display didn’t start up properly and the portrait display wasn’t rotated. The same update to other boxes seems to have worked, but that may be a set of unwarranted assumptions; the boxes simply haven’t displayed any obvious symptoms.
After having to fix this mess every now and again over the last year, this worked:
sudo apt-get install --reinstall nvidia-331-uvm
As nearly as I can tell, reinstalling any nVidia package that’s already installed simply retriggers the failing step, resulting in a clean and workable installation. There’s apparently something wrong with the Dynamic Kernel Module Support structure that works the second time around, but I have no idea (and little interest) about the details.
However, that “fix” required this sequence:
Boot the rescue session from the Grub menu
Activate networking
Clean out any broken packages
Drop to a root shell prompt
Do the apt-get dance
Power off
Unplug the portrait montitor’s Displayport cable
Boot to the BIOS settings to force-start the landscape monitor
Power off
Reconnect the portrait monitor
Reboot into Xubuntu as usual
Reset the monitor positions
Reload the desktop backgrounds
Now, at least, all that’s written down where I can refer to it the next time this happens… on a separate laptop, of course.
This has been happening for nigh onto a year in what Ubuntu charmingly calls a “long term support” release.
Once again, another Xubuntu desktop box started having troubles with the Gnome keyring manager, with baffling symptoms including a request for a password you don’t know and forgetting passwords you’ve entered correctly.
The solution, much as before, requires at least some of:
A longstanding Xubuntu / XFCE UI problem has been single-pixel window borders that make click-and-drag resizing essentially impossible. The reason it’s a longstanding problem has been the developers’ unflinching response to any and all issues raised on the bug tracker:
I had never looked for the XFCE theme-building documentation (and, thus, never found any), because building a whole new theme would be a lot of work just to resize the damn borders. It should be feasible to tweak only the borders of an existing theme, but … I stalled.
Repeatedly. On every single version of Xubuntu that’s come along.
Fortunately, someone recently did the legwork and summarized the method, which I slightly adapted:
cd /usr/share/themes/
sudo cp -a Greybird-compact/ Greybird-wide
cd Greybird-wide/xfwm4
for f in bottom left right ; do sudo cp ../../Daloa/xfwm4/${f}* . ; done
sudo sed -i -e 's/C0C0C0/CECECE/' *xpm
sudo sed -i -e 's/A0A0FF/7C7C7C/' *xpm
sudo sed -i -e 's/E0E0FF/E0E0E0/' *xpm
The exact color mapping depends on which two themes you’re using. You can also specify GTK element colors, which seems like a better way to do it. Maybe next time.
Apparently, the corresponding PNG files contain transparency information for the XPM files, but I haven’t bothered to investigate how that works or what might happen if I tweaked them.
Then you select the new Graybird-wide theme and It Just Works.