Ed Nisley's Blog: Shop notes, electronics, firmware, machinery, 3D printing, laser cuttery, and curiosities. Contents: 100% human thinking, 0% AI slop.
It turns out that the dual-core Intel Atom Inside an old Dell Mini 10 isn’t up to the demands of rendering modern web design; disk I/O speed has nothing to do with the CPU’s (lack of) ability to chew through multiple layers of cruft adorning what used to be straightforward static HTML.
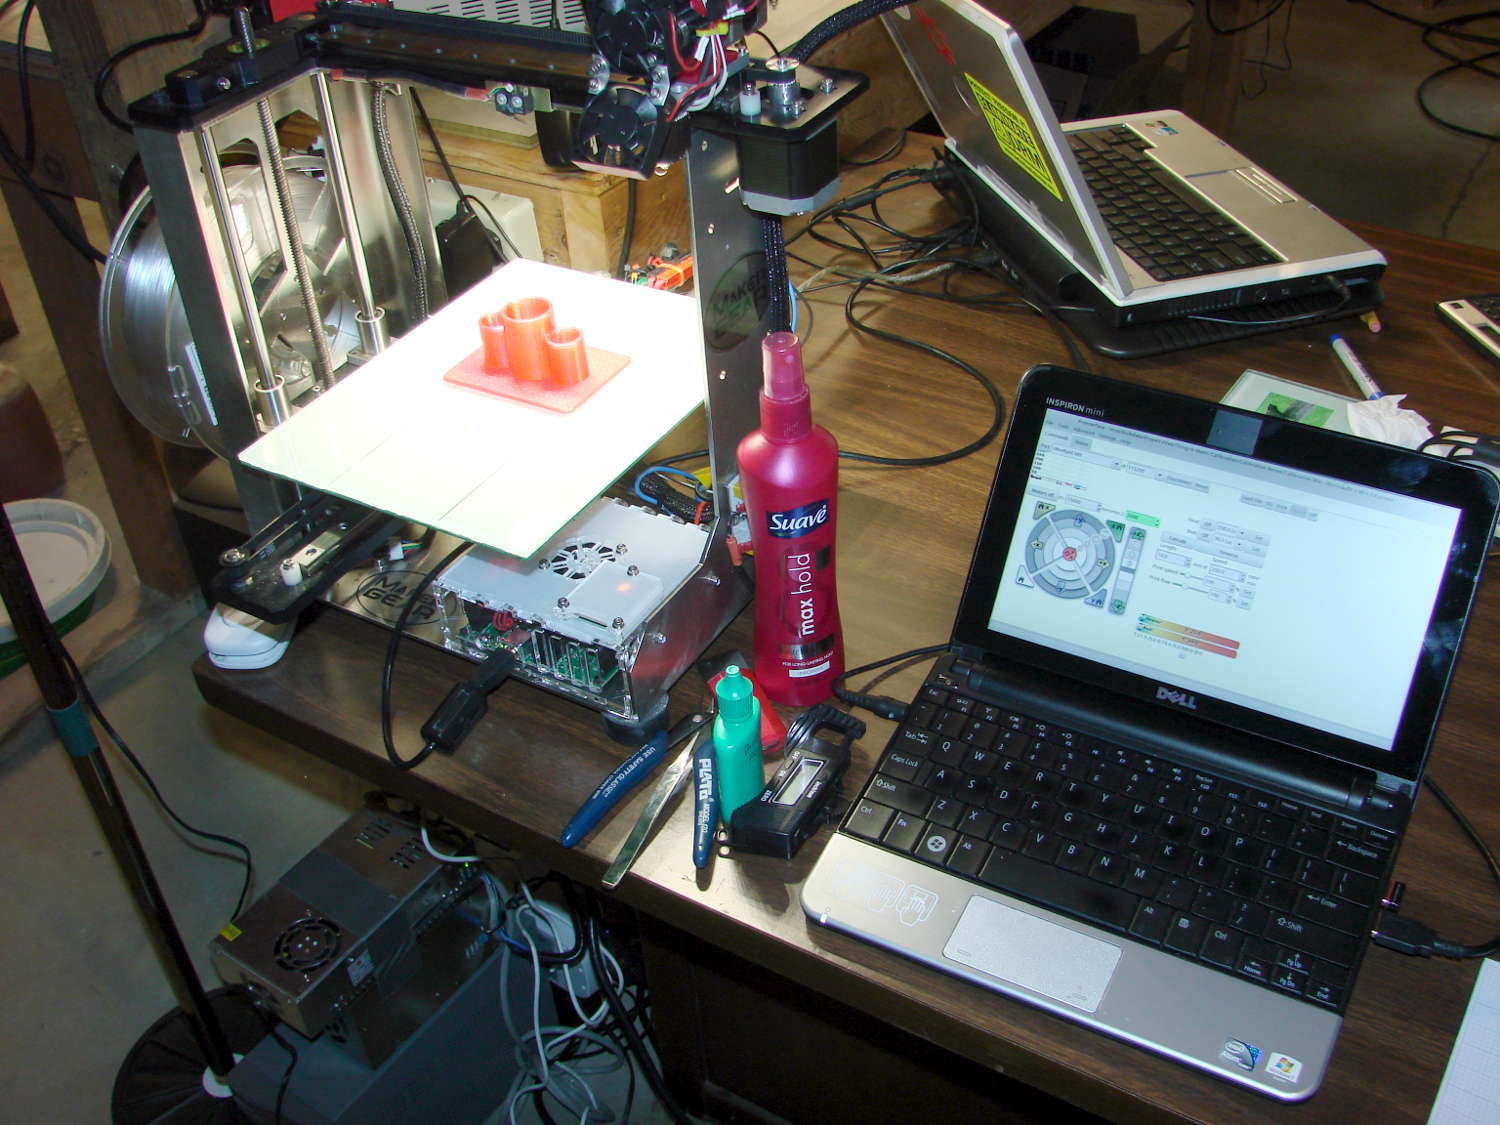
So, equipped with Linux Mint / XFCE, it’s now found a new purpose in life:
SnowWhite back in action
In truth, an Atom isn’t quite up to the demands of modern 3D printing, either, at least in terms of processing a huge G-Code file into a layer-by-layer path preview. Fortunately, Pronterface doesn’t generate the preview until you ask for it: arranging the UI to put the preview on a separate tab eliminates that problem.
The Mini 10 can dribble G-Code into the printer just fine and looks much cuter than the hulking laptop in the background.
I volunteered to update an old Inspiron Mini 10 netbook (or whatever they called the things) with Mint Linux and wanted to see what replacing the dead-slow 5400 rpm hard drive with an SSD would do for the struggling Intel Atom Inside. Dell provides a Service Manual showing how to remove the three screws on the bottom of the case, then gently remove the keyboard (!) to get access to the innards.
You start by covering the screen with some low-tack plastic film that you’ve been saving for this very purpose, sticking a small screwdriver into the center screw hole, and pushing the keyboard firmly away from the case. This bends the keyboard enough to get your fingernails underneath, after which you can pull / pry it away from the latches on each side.
The left side of the keyboard (as seen from the normal vantage point) comes out first, after clearing a small latch just over the single left-side USB port:
Dell Inspiron Mini 10 – left keyboard latch
The right side pops free from its latch over the HMDI port when you push the keyboard firmly to the left:
Dell Inspiron Mini 10 – right keyboard latch
Then release the keyboard’s ribbon cable clamp, pull the cable out, remove the keyboard, remove the single screw holding the hard drive carrier in place, and swap drives in the obvious manner.
Conclusion: an SSD helps a lot, but Firefox on an Atom CPU remains pretty slow off the starting blocks …
Stipulated: garish labels that don’t fit the keys well at all.
I need more than one stream for testing; the only one that matters is Classical.
The keypad uses the same 2.4 GHz ISM band as the Raspberry Pi’s Wifi radio, which means holding a key down (which should never happen) puts a dent in mplayer’s cache fill level. Even absent that interference, the WiFi link seems more than a little iffy, probably because it’s at the far end of the house and upstairs from the router.
Other WiFi devices report that 2.4 GHz RF has trouble punching through the intervening fifty feet of hardwood floor (on the diagonal, the joists amount to a lot of wood) and multiple sets of doubled wallboard sheets; the RPi probably needs a better radio with an actual antenna. I did move the WiFi control channel away from the default used by the (relatively distant) neighbors, which seemed to improve its disposition.
The general idea is to use keystrokes plucked from a cheap numeric keypad to control mplayer, with the intent of replacing some defunct CD players and radios and suchlike. The keypads look about like you’d expect:
Numeric keypads
The keypad layouts are, of course, slightly different (19 vs 18 keys!) and they behave differently with regard to their NumLock state, but at least they produce the same scancodes for the corresponding keys. The black (wired) keypad has a 000 button that sends three 0 events in quick succession, which isn’t particularly useful in this application.
With the appropriate udev rule in full effect, this Python program chews its way through incoming events and reports only the key-down events that will eventually be useful:
This file contains hidden or bidirectional Unicode text that may be interpreted or compiled differently than what appears below. To review, open the file in an editor that reveals hidden Unicode characters.
Learn more about bidirectional Unicode characters
e.type is numeric, so just compare against evcodes.EV_KEY
KeyEvent(e).scancode is the numeric key identifier
KeyEvent(e).keystate = 1 for the initial press
Those KeyEvent(e).key_down/up/hold values don’t change
If you can type KEY_KP0 correctly, wrapping it in quotes isn’t such a big stretch, so I don’t see much point to running scancodes through ecodes.KEY[KeyEvent(e).scancode] just to compare the enumerations.
I’m surely missing something Pythonic, but I don’t get the point of attaching key_down/up/holdconstants to the key event class. I suppose that accounts for changed numeric values inside inherited classes, but … sheesh.
Anyhow, that loop looks like a good starting point.
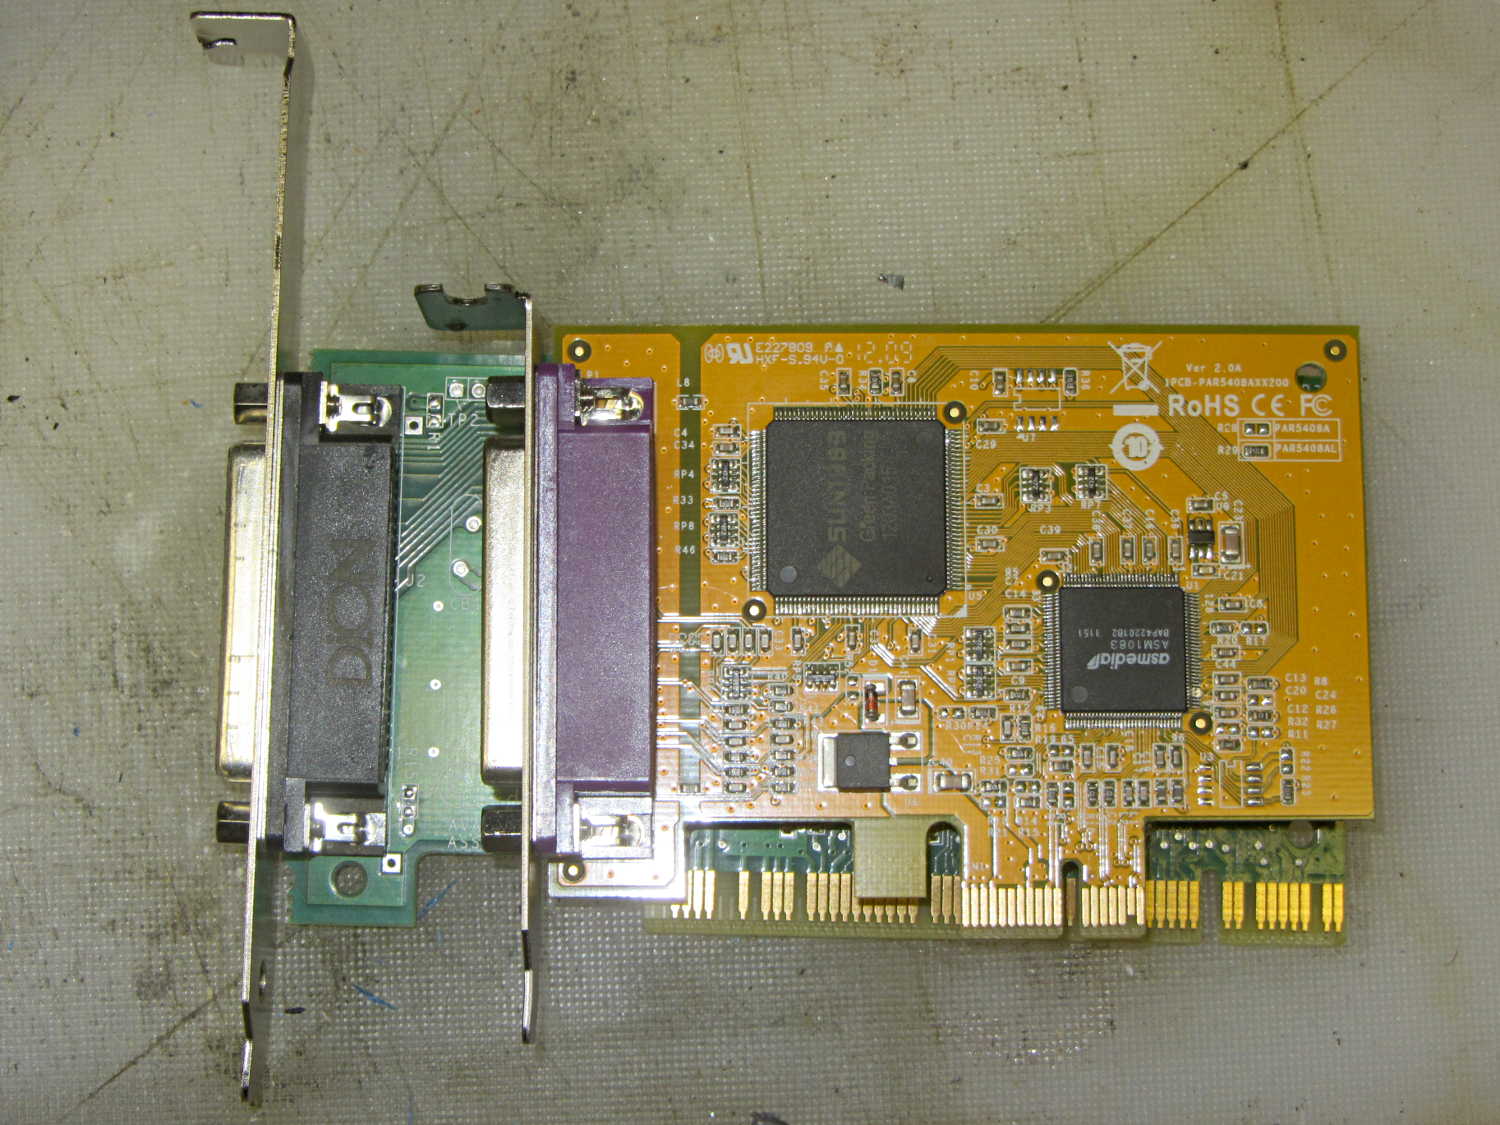
I picked up an Adaptek AVA-2902 SCSI card from eBay to use with an ancient Epson Perfection 636 SCSI scanner from the heap, but it came with a high-profile bracket wrapped around its DB-25 connector:
SCSI card bracket fix – before
The old-school serial port card sitting atop it (from one of the off-lease Optiplexes in the stable) has a low-profile bracket that seemed promising, so I swapped the brackets.
Alas, the SCSI card positioned the DB-25 just a smidge higher than the serial card, putting the right-angle top of the bracket about 2 mm above the ledge, where it prevented the locking cover from engaging. I filed the bracket’s DB-25 mounting holes into ovals, using up all the slop around the connector shell, to no avail.
So I snipped off most of the bracket’s top, grabbed it in the bench vise, smashed the corner with a drift punch, and bashed the whole affair 2 mm lower. It fit reasonably well, although there’s an air gap near the bottom of the bracket where it tapers down to the guide slot. The SCSI connector barely fit, with some persuasion, under the locking cover:
SCSI card bracket fix – installed
Close enough for me; the scanner (looming over the SCSI connector) works fine and delivers much better image quality / color balance than the crappy HP 7400C with an auto-feeder that I’d been using.
At least on my network, disabling the IPv6 functions makes Avahi start up faster. You do that by tweaking the obvious IPV6 line in /etc/avahi/avahi-daemon.conf:
Sorta like wedding pictures: you can expose for the groom-in-black or the bride-in-white, but not both at the same time.
The wireless keypad does not have a slot for the USB radio: put ’em in a bag to keep ’em together when not in use.
The general idea is to create a standard name (/dev/input/keypad) for either keypad when it gets plugged in, so the program need not figure out the device name from first principles. This being an embedded system, I can ensure only one keypad will be plugged in at any one time.
The wired keypad has an odd name that makes a certain perverse sense:
That may be because the 0x06a2 Vendor ID was cloned (that’s pronounced “ripped-off”) from Creative Labs. My guess is they ripped the entire chipset, because the 0x4101 device ID came from a Creative Labs wireless keyboard + mouse:
lsusb
... snippage ...
Bus 001 Device 011: ID 062a:4101 Creative Labs
... snippage ...
Because it’s a dual-mode wireless device, we need more information to create the corresponding udev rule. The keyboard part appears (on this boot) as event0, which we find thusly:
ll /dev/input/by-id
total 0
lrwxrwxrwx 1 root root 9 Feb  5 17:39 usb-Burr-Brown_from_TI_USB_Audio_CODEC-event-if03 -> ../event1
lrwxrwxrwx 1 root root 9 Feb  5 17:39 usb-MOSART_Semi._2.4G_Keyboard_Mouse-event-kbd -> ../event0
lrwxrwxrwx 1 root root 9 Feb  5 17:39 usb-MOSART_Semi._2.4G_Keyboard_Mouse-if01-event-mouse -> ../event2
lrwxrwxrwx 1 root root 9 Feb  5 17:39 usb-MOSART_Semi._2.4G_Keyboard_Mouse-if01-mouse -> ../mouse0
Some spelunking suggests using the environment variables set up by the default udev rules, which we find thusly:
sudo udevadm control --reload
sudo udevadm trigger
And then It Just Works:
ll /dev/input/by-id
total 0
lrwxrwxrwx 1 root root 9 Feb  5 17:39 usb-Burr-Brown_from_TI_USB_Audio_CODEC-event-if03 -> ../event1
lrwxrwxrwx 1 root root 9 Feb  5 19:03 usb-MOSART_Semi._2.4G_Keyboard_Mouse-event-kbd -> ../event0
lrwxrwxrwx 1 root root 9 Feb  5 19:03 usb-MOSART_Semi._2.4G_Keyboard_Mouse-if01-event-mouse -> ../event2
lrwxrwxrwx 1 root root 9 Feb  5 19:03 usb-MOSART_Semi._2.4G_Keyboard_Mouse-if01-mouse -> ../mouse0ll /dev/input

ll /dev/input
total 0
drwxr-xr-x 2 root root     120 Feb  5 19:03 by-id
drwxr-xr-x 2 root root     120 Feb  5 19:03 by-path
crw-rw---- 1 root input 13, 64 Feb  5 19:03 event0
crw-rw---- 1 root input 13, 65 Feb  5 17:39 event1
crw-rw---- 1 root input 13, 66 Feb  5 19:03 event2
lrwxrwxrwx 1 root root       6 Feb  5 19:03 keypad -> event0
crw-rw---- 1 root input 13, 63 Feb  5 17:39 mice
crw-rw---- 1 root input 13, 32 Feb  5 19:03 mouse0
My configuration hand is strong…
Note: Once again, I manually restored the source code after the WordPress “improved” editor shredded it by replacing all the double-quote and greater-than symbols inside the “protected” sourcecode blocks with their HTML-escaped equivalents. Some breakage may remain and, as always, WP can shred sourcecode blocks even if I don’t edit the post. They’ve (apparently) banned me from contacting Support, because of an intemperate rant based on years of having them ignore this (and other) problems. I didn’t expect any real help, so this isn’t much of a step backwards in terms of actual support …