Ed Nisley's Blog: Shop notes, electronics, firmware, machinery, 3D printing, laser cuttery, and curiosities. Contents: 100% human thinking, 0% AI slop.
My OMTech 60 W laser cutter has a stepper motor Z axis drive that has worked flawlessly since it arrived. However, it recently developed a periodic klonk during autofocusing and manual jogging, loud enough to shake the platform and rattle the cabinet’s bottom plate.
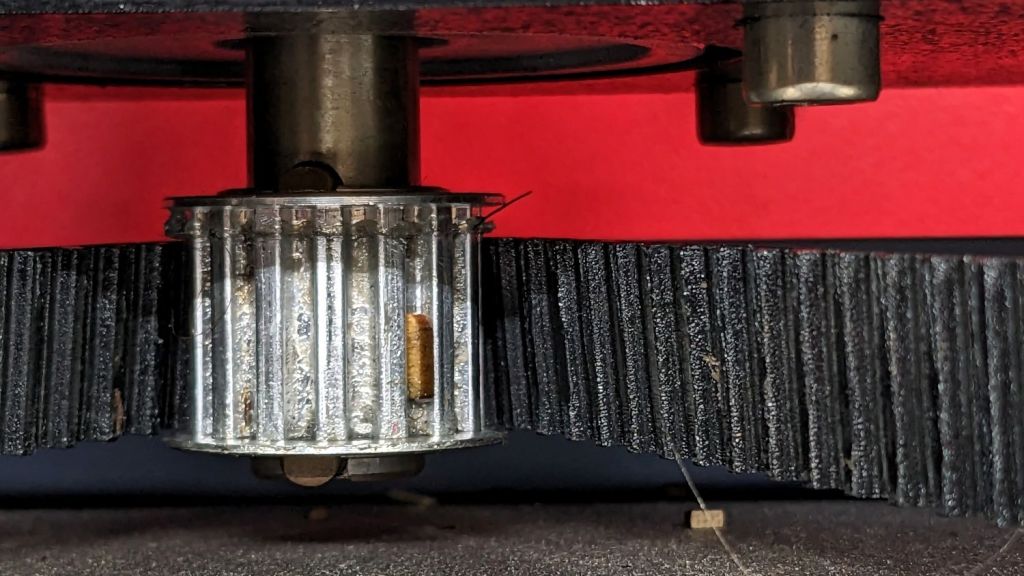
A few minutes of poking around revealed the klonk happened on each turn of the Z axis leadscrews, which quickly led to finding the cause:
Craft Stick – swarf in belt drive
It’s a rectangular wood chip, perfectly sized to jam into the Z axis motor pulley driving the belt: a belt tooth lifts up on the chip as the pulley turns, then klonks as it slips off the other side. The motor pulley and all four leadscrew pinons have the same number of teeth, so they’re all at the same point in their rotation when the belt slams down onto the pulley.
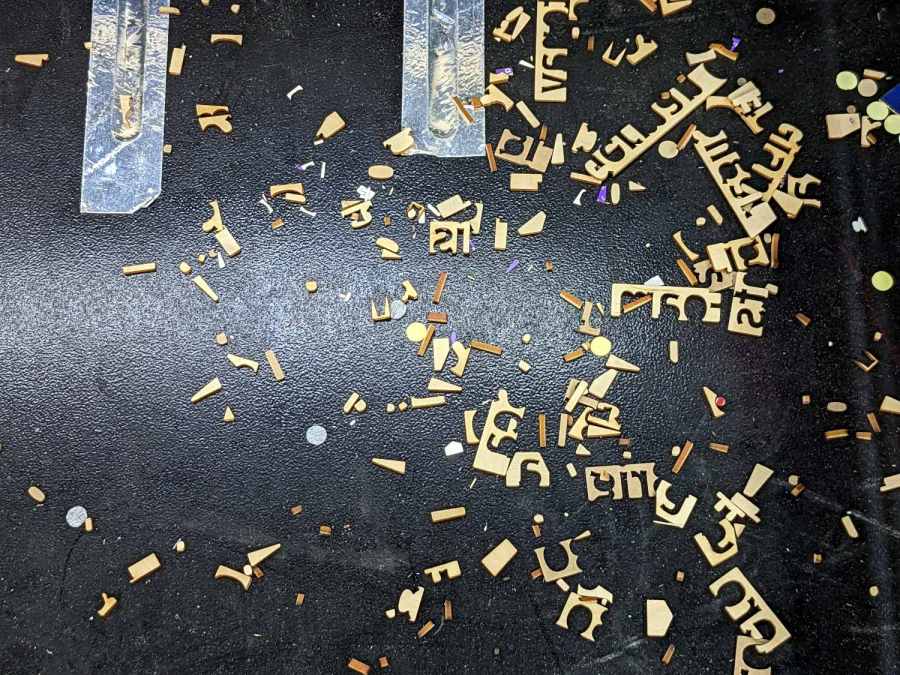
Where might such a thing come from? Well, I recently finished a batch of plant markers and hadn’t yet cleaned out the “chip tray” which is also just the bottom plate of the cabinet:
Craft Stick – swarf
I briefly considered building a guard for the motor pulley, but the belt most likely carried it from elsewhere. The leadscrews have an ample coating of grease that was also smeared elsewhere on the cabinet, making the belt sticky enough to catch such things.
The chip tray is once again pretty clean and the platform behaves normally again.
You know how we’re constantly reminded not to click on links in emails from “people we don’t know” and never provide personal information?
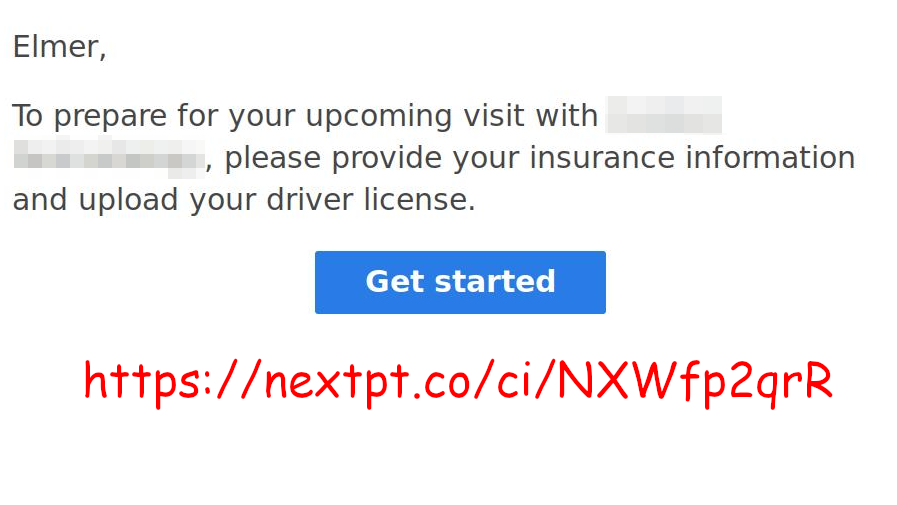
I’m certain this email came from a physician I’m about to see, but, with a concealed URL like that, somehow I just can’t bring myself to Get started like this:
Provide Drivers License
Remember, I’m in the US and *.co links are typically “foreign”, so they are going out of their way to look sketchy. I replaced several characters in the URL to make it invalid, but it closely resembles the original.
Of course, everything is outsourced these days, so the physician and her staff have nothing to do with the scheduling and patient information group, so they will have no idea what’s going on or be able to do anything about it.
We’ve never seen a skunk by day, so this was a bit of a surprise:
Skunk by night
We occasionally smell a skunk by night, but this critter seems peaceable enough:
Skunk by night – detail
Skunks usually have a striped back, so this one’s pure white fur will be easy to identify should we meet again, ideally at a mutually respectful distance.
I walked up to a sign-in kiosk with an interesting difference:
Kiosk app update
If they ask a question on a public-facing device, they must expect a response. Right?
This interesting assembly sprouted from an upstairs wall:
Wash hose valve
The brass fitting seems intended for a braided hose leading to a nozzle, but there was no corresponding floor drain in the room. I’m sure the shutoff valve in the bottom elbow was turned off.
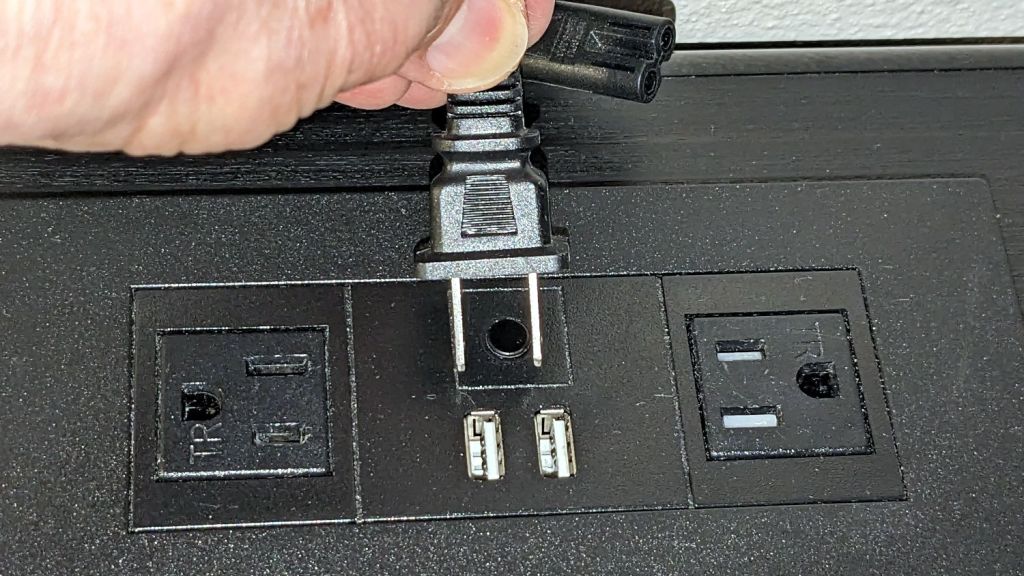
Back in the motel, I attempted to plug in my charger:
USB sockets vs AC plug
The currently trendy black-on-black design scheme doesn’t work well in the low-light environment of a motel room. The white plastic tabs in those USB sockets were the only visible parts of that whole assembly.
As the saying goes, “Without temptation, there can be no virtue.”
According to the manual, which I have hitherto had no reason to doubt, our non-turbo 2015 Subaru Forester has a 15.9 gallon fuel tank:
Subaru Forester – Fuel Capacity Chart
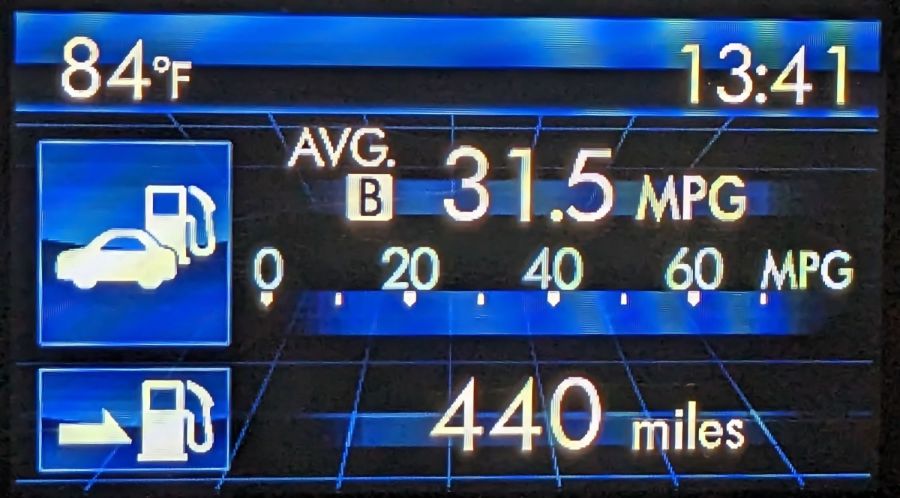
One screen shown on the dashboard’s Multi-Function Display gives the current mileage and estimated range:
Forester – MPG Range
Dividing those two numbers gives you 13.97 gallons, the current fuel level. As you’d expect, should the average miles per gallon change, the range will change accordingly.
The trip odometer says we have driven 72.8 miles since I filled the tank. Dividing that by the average mpg gives 2.3 gallons, so the tank could possibly hold 16.2 gallons, which, given all the averages involved, is reasonably close to the 15.9 gallons shown in the manual.
Being that type of guy, I have a spreadsheet tallying each fillup since the car was new:
8.1 gal average
7.5 gal median
13.9 gal maximum
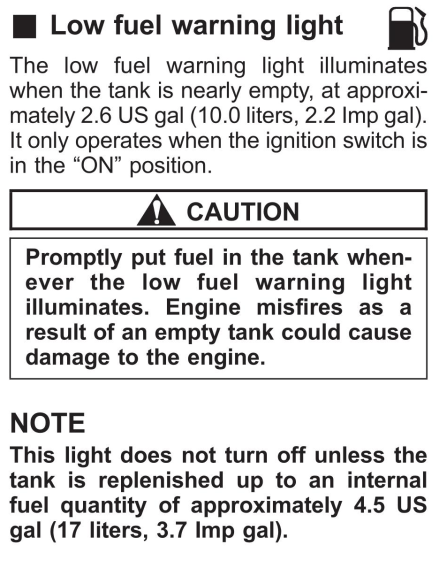
Long ago, my father taught me to fill the tank when the needle got halfway down and I’ve been doing so ever since. As a result, we have only rarely seen the Low Fuel Warning Light:
Subaru Forester – Low Fuel Warning Light info
A concatenation of unavoidable events put us southbound on I-87 when that light went on. Given the estimated range of 70-ish miles, I planned to refuel at the New Baltimore Service Area, about a dozen miles ahead.
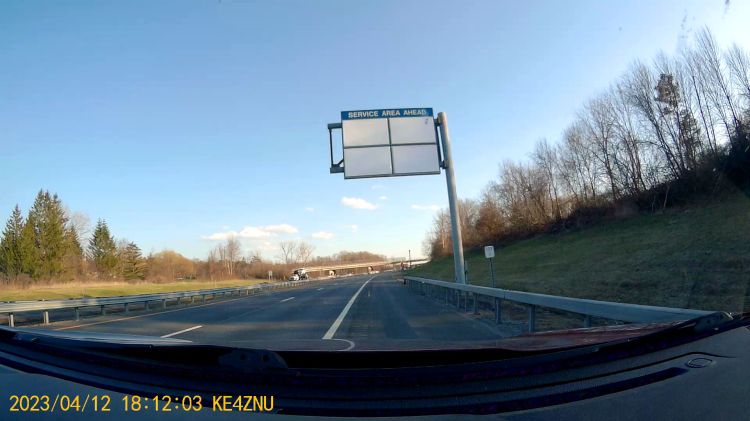
The engine shut down and all the dashboard warning lights lit up with the Service Area Ahead sign in view:
Out of Gas – Service Area Ahead
All the “facilities” are blank because they’re rebuilding the whole place, with the gas station remaining open.
So I slapped the shifter into neutral and we drifted slowly along the shoulder, under the bridge visible ahead, and eventually came to a halt at the beginning of the exit lane.
There was only one thing to do:
Out of Gas – Walking On
Some storytelling later:
Out of Gas – Walking Back
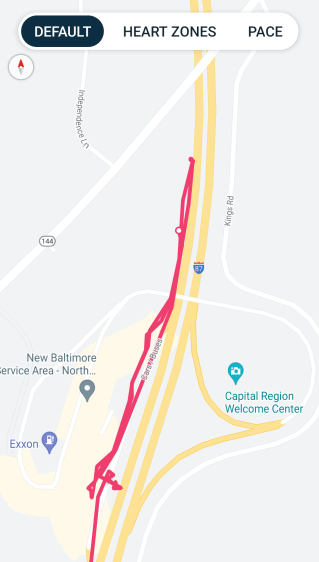
Just because I could:
Refueling – GPS Track
For what are, I trust, understandable reasons, I started the tracker after I began hiking and forgot to turn it off before driving away.
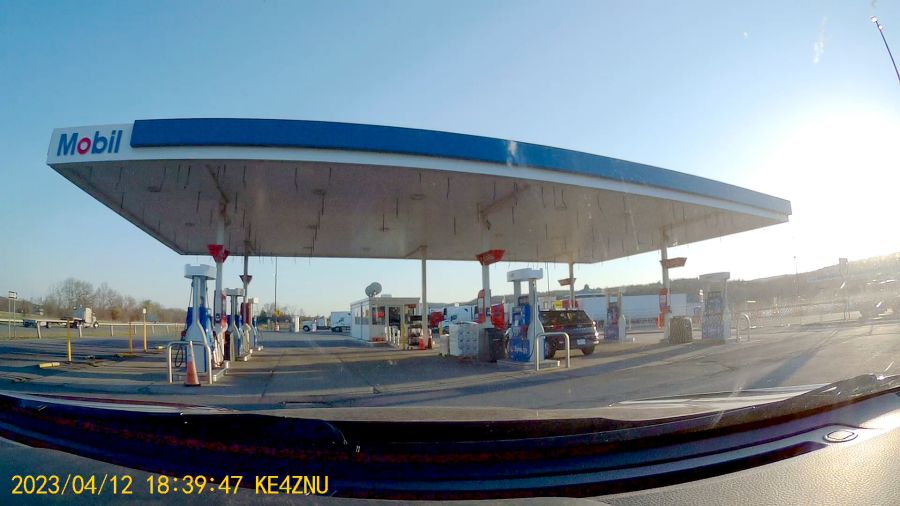
After figuring out the devilishly complex spring-loaded anti-spill spout on the gas can, we drove 1500 feet to the Service Area:
Out of Gas – Service Station
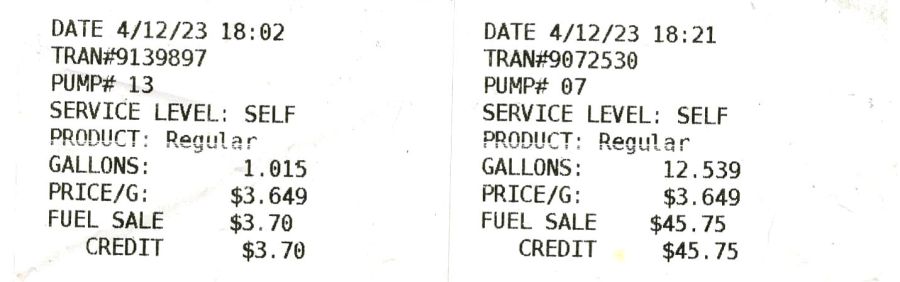
As usual, I filled the tank until the nozzle automatically shut off, for a total of 13.554 gallons in two transactions:
Pump Receipts
Now, it is possible the Forester fuel system has another 2.3 gallons tucked away somewhere, but if that reserve doesn’t make the wheels go around, it’s not doing me the least bit of good.
The fact that I’ve occasionally added just short of 14 gallons suggests the estimated remaining capacity depends strongly on the average mileage up to that point and I have come very very close to running out of gas on several occasions.
As far as I can tell, the usable fuel capacity is a scant 14 gallons and the Low Fuel Light goes on with, at most, a dozen more miles in the tank.
This is the second time in more than half a century of driving I’ve run out of gas.
My father was right and I shall henceforth mend my wayward behavior.
The color is apparently a side effect of the CO₂ laser vaporizing the plastic, because it emerged during the engraving process.
Polycarb tends to get all melty when cut, so it’s not particularly good for laser machining. Indeed, the engraving produced filaments of (presumably) melted / condensed plastic that I brushed off after taking this picture:
Polycarbonate engrave – 400mm-s 20pct 0.1mm – as cut
If you could put up with the filaments and the poor cut edges, it might be useful for front panel legends and suchlike.