
Once again, the hedge trimmer failed to turn on with the switch pressed, so I took it apart, did nothing, and had thing start working again:
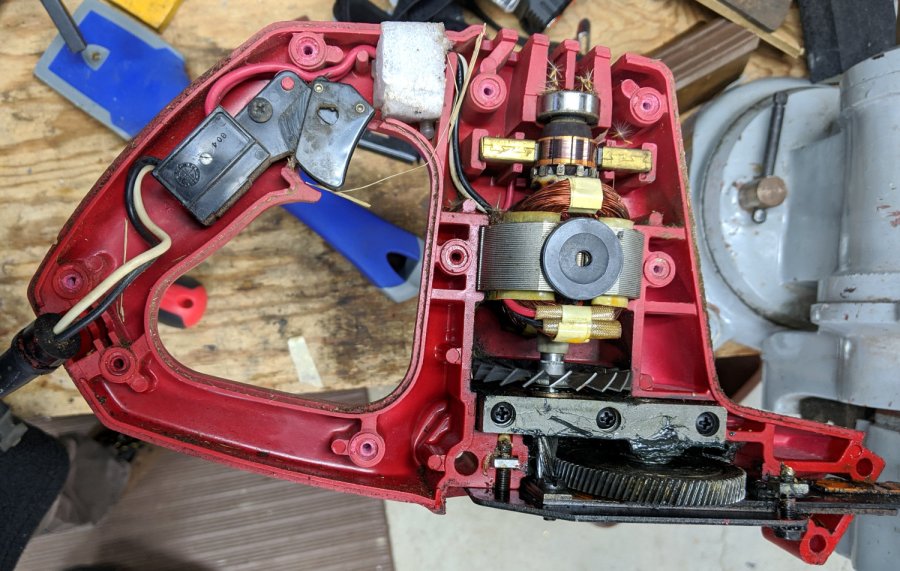
It finally penetrated my dim consciousness: perhaps the switch is fine and a carbon brush (or two) has lost contact with the commutator atop a layer of oil and dust.
So a year from now when this happens again, try jamming a screwdriver through a vent slot and moving the motor a few degrees to jostle the crud.
If it works, that would be much easier than taking it apart!


