Ed Nisley's Blog: Shop notes, electronics, firmware, machinery, 3D printing, laser cuttery, and curiosities. Contents: 100% human thinking, 0% AI slop.
So I bought 530 bucks worth of new tires for the van; it’s ten years old with 66k on the clock. Picked the most suitable ones:
Near the top of the Consumer Reports list
Best constellation of features for our use
Available at the local tire shop
CR is essentially the only place that does actual across-the-board tests; you can disagree with their methodology, but it’s pretty much the only game in town.
I wound up at the local tire shop after bouncing off one of the online sources. In this case, tire + shipping + installation costs more online; the local shop was one of the online source’s installers.
So I went direct. They’re aboveboard: the balance + installation charge is the same no matter where the tires come from.
Had a 10:00 appointment and it took 90 minutes to get out of the shop. Not impressed.
The tire pressure monitor light came on halfway home. Well, OK, maybe it’s noticed the tires are bigger? But it’s a differential rotation counter, sooo… that’s not the problem.
Checked the pressure after letting the tires cool off for a few hours.
37 – Left rear
32 – Right rear
40 – Left front
34 – Right front
The pressure monitor was definitely doing its job!
Adjusted them all to 36 psi (hard, but we’ll see how it rides), reset the monitor, and it’s all good.
Factory trained and certified mechanics, my obscene-gerund deleted-noun.
Oh, and the lug nuts were evidently tightened by Andre the Giant… gotta break those suckers free before we do much more driving!
Saw this mountain at Marist College. I wonder how many will go directly to the recycling bin?
I can’t recall the last time I used a phone book; it’s faster and easier to type the name & location into that little search field, whack Enter, and click the obvious hit.
If you look hard enough, somewhere in the first few pages you’ll find the instructions to turn off next year’s phone book. We’ll see how that works out…
I tote around an ancient Palm Zire 71, which suffices for my simple calendar & to-do lists. This is my second, as the first failed when the flexible cable connecting the guts to the charging / USB connector crapped out; turns out that the slide-to-open feature that reveals the crappy camera also stresses the flexy cable to the breaking point. Now I don’t do that any more.
The battery (well, it’s actually a single Li-Ion cell, but let’s not be pedantic) finally stopped taking a charge, so I did a full backup, tore the thing apart, and popped in a new battery. This being my second Zire 71, things went smoothly…
I got a stack of surplus Palm batteries some years ago, but they’re readily available from the usual suspects for prices ranging from $5 to $50. We’ll see how well mine survived their time in isolation.
The connectors don’t match, which means you just chop off them in mid-wire, then solder the old connector onto the new battery. A few dabs of Liquid Electrical Tape and it’s all good.
Some teardown instructions are there, with fairly small pix.
General reminders:
Stick the teeny little screws on a strip of tape
Watch out for the tiny plastic switch fin on the side
Torx T06 screws on either side of the camera
The silver shield around the shutter button snaps under the sides with more force than you expect
There’s a metal strip over the connector that can be taped back in place after the plastic posts snap off
Gently pry the flexy cable up off the base, using the tabs on either side
The speaker seems to be held in with snot
The battery shield is not soldered in place!
The battery adhesive comes off with a sloooowww pull
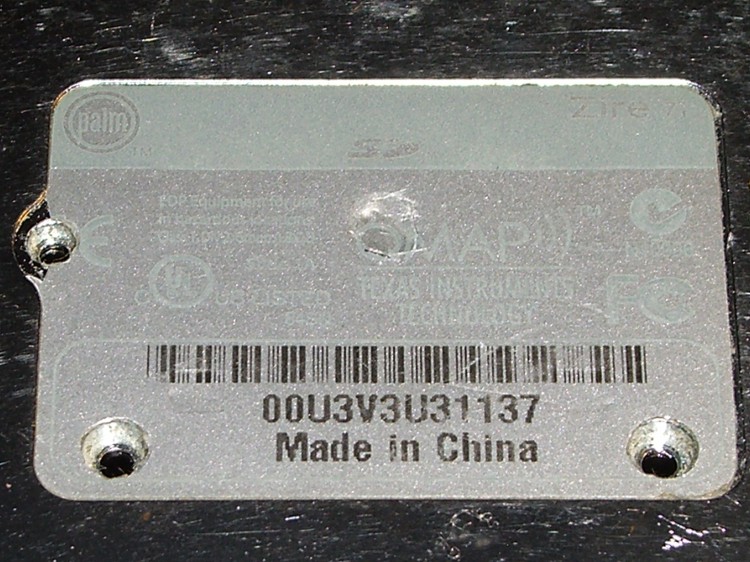
Screws under label
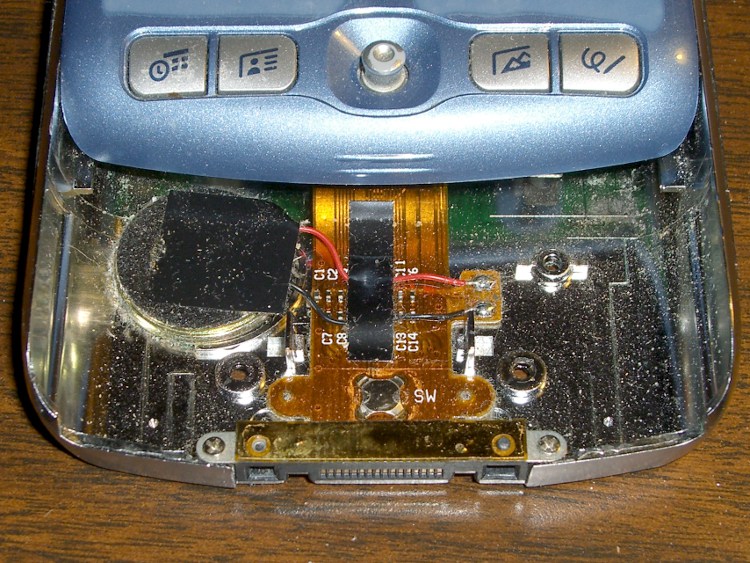
Components around shutter button
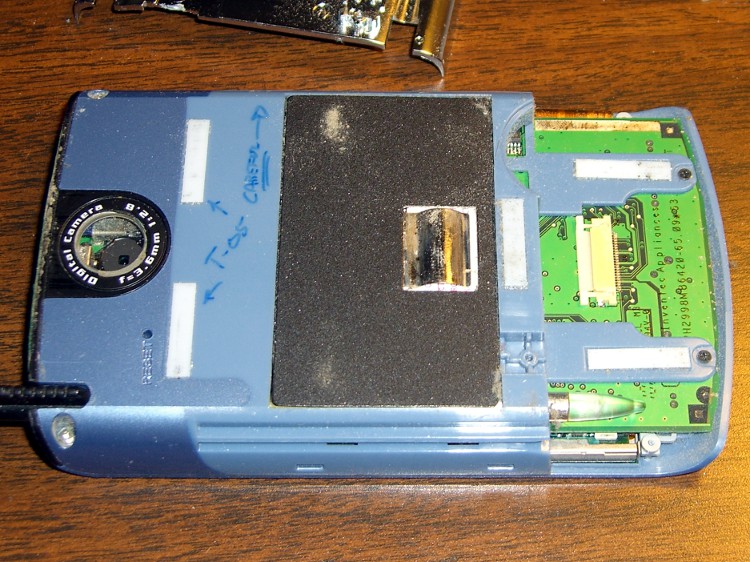
Back side
Although it may not be obvious, I replaced the crappy plastic window over the camera with a watch crystal. Much better picture quality, although much worse than my pocket camera.
Backup and restore with various pilot-link utilities:
The latch closing my tea ball consists of a nice stainless steel dingus held on by a grotty rivet of unknown provenance that I’ve repeatedly staked over the years. It finally came undone this morning, so I had a few minutes of Quality Shop Time right after breakfast.
My tiny-screw box (left over from the long-gone Leichtung Workshops) has some stainless 0-80 screws that I found somewhere, but only brass nuts. Ah, well, we used to use brass water fixtures and lead pipe, so an 0-80 nut in hot water isn’t going to kill me.
The ball rim has a recess for the rivet head, but the screw head was slightly larger. I braced the rim of the ball across the vise jaws and give the recess a few shots with a fat punch to enlarge it.
Stainless screw and brass nut
Then…
A dot of Loctite on the threads
Assemble everything
Take it apart to put the latch on the correct side of the rim
Reassemble
Attempt to close
Gently bend the rim to flatten it out
Close
Attempt to latch
Brace closed rim on vise opening with screw head up
A few shots with a drift punch to settle recess around screw head
Success!
It seems I ain’t worth a damn in the morning without a hot cuppa. The rituals must be preserved.
I tossed the ball in the dishwasher and opted for a tea bag today…
Heat pumps behave like bidirectional refrigerators: they cool the building by heating the outside air or heat the building by cooling the outside air. In relatively mild, dry weather, this works perfectly.
Here in the Northeast US, it’s not such a bright idea. For about half the year, the ambient temperature is low enough and the humidity high enough that pumping heat out of the exchanger drops its temperature below the dew point, whereupon ambient moisture condenses on the fins and, given the temperature differential between ambient and coil, freezes solid.
In that situation, the efficiency of the heat exchanger drops well below zero: it turns on electric resistance heating bars to warm the inside air and runs a defrost cycle on the exterior heat exchanger.
Just for curiosity’s sake, I applied a slitting saw to the oldest defunct generic NP-FS11 battery pack, cutting carefully along the bonded joint between the two parts.
No coolant, 1000 rpm, 200 mm/min, the saw is 22 mm diameter. Much slower than you’d use if you were in production, but I’m not.
First cut all the way around at 0.5 mm inside the case, then another pass at 1.0 mm. The second cut went ting as it passed the tabs at the base of the cells, so I knew the halves were released.
Inside we find a pair of 14430 Li-Ion cells, wired in parallel, with a little protection circuit board just jam-packed with teeny parts. One may reasonably assume the circuit controls over-charge and over-discharge, as well as current limiting.
Pack opened
So a reasonable (or, perhaps, amusing) thing to do would be to buy raw cells from a nominally reputable supplier, do a heart transplant, and see if that improves the situation.
Protection Circuit – Outboard
Photos of the protection PCB, showing the cell connections. Positive end of the cells is toward the PCB. I think there’s enough clearance in the camera’s battery compartment to allow a wrap of tape around the case in lieu of re-bonding the plastic together.
Sony no longer offers the NP-FS11 Li-Ion batteries required for my DSC-F505V camera, so I’ve been using “generic” replacements for quite some time. My experience has been mixed: some batteries provide a reasonable amount of run time, others provide almost none.
Feeding the appropriate keywords into Froogle gives you a range of battery suppliers, with offerings from, as of this writing, $3 to $103. Perhaps not surprisingly, the image for a $70 battery exactly matches the one on my desk that cost perhaps $15 a few years ago… although I’m certain that the actual battery you’d get wouldn’t match that picture.
I just bought three NP-FS11 batteries from the usual low-buck Hong Kong eBay supplier: six bucks apiece, shipped halfway around the world. The eBay listing claimed 1800 mAh, which seemed aggressive, and the batteries sport a 3900 mAh label, which is flat-out impossible.
Frankly, I didn’t expect much and here’s the discharge test graph to show I wasn’t disappointed. I used a 1-amp rate as a reasonable guess at the camera’s peak draw, although that might be a touch high for a continuous discharge.
Generic Sony NP-FS11 Li-Ion Batteries
The top blue curve is from a two-year-old literally no-name battery (no logo, no nothing!) that still provides decent run time; it’s the one matching that $70 battery. It provides about 1100 mAh, reasonably close to its 1300 mAh rating.
The middle curves, black and purple, are two of the new cells that provide about 900 mAh: half the as-listed-on-eBay capacity, 25% of the absurd label value. Their very low terminal voltage during most of the discharge says that these won’t provide much run time at all.
The green curve piddling off on the bottom is the third new cell, which is obviously defective. As I said, I didn’t expect much and I certainly wasn’t surprised.
The red curve is an old and completely defunct batteries.com offering that never provided good service.
Here’s another plot of three successive charge-discharge cycles for just the three new batteries. The first curves (at 1.0 A) correspond to what you see above, the remaining two sets (at 0.5 A) are the next two cycles. Batteries G and I have improved, H remains a dud.
MaxPower NP-FS11 Battery Tests
Given the varied offerings on the Web, I believe that there is no way to ensure you’re getting a known-good battery from a reputable supplier. It’s absolutely certain that price does not correlate with quality; the ones I bought simply establish that low-end offerings are crap.
The purchase was worth it for the amusement value alone; I don’t expect any action from the vendor, although I did send a copy of that graph with some explanatory text. The question is whether I should give them a five-star rating for prompt delivery…
As it happens, there’s enough room to slide a standard CR123A-size cell into the battery compartment. I think a bit of Quality Shop Time applied to a dead NP-FS11 battery case (and the vital Sony “Infolithium” DRM module) will provide a baseplate with all the proper connectors. Perhaps I can conjure up a “battery” containing a single cell of known-good quality?
Primary CR123A cells supply only 3 V, not the 3.6 V the camera really wants, so I can’t use disposable cells.