Ed Nisley's Blog: Shop notes, electronics, firmware, machinery, 3D printing, laser cuttery, and curiosities. Contents: 100% human thinking, 0% AI slop.
We have an old floor lamp that’s always been a bit tippy and I finally got around to wondering what’s going on.
The cord exits through the center of the base, where it passes through a plastic nut that keeps it off the raw metal edge of the central rod holding the lamp together.
The ruler has 1/16 inch divisions, so the cord requires a bit over half an inch of clearance.
Floor lamp foot with bumper
Here’s what one of the five molded-in feet look like, with a white rubber bumper that I just added to improve the ground clearance…
Notice that the foot is barely 1/4 inch tall, so the lamp has always been resting on the cord and two other randomly chosen feet. No wonder the thing was tippy.
The new rubber feet make it a lot less tippy, but there’s not a lot of clearance under there. When one of those things falls off, I’ll think of something better.
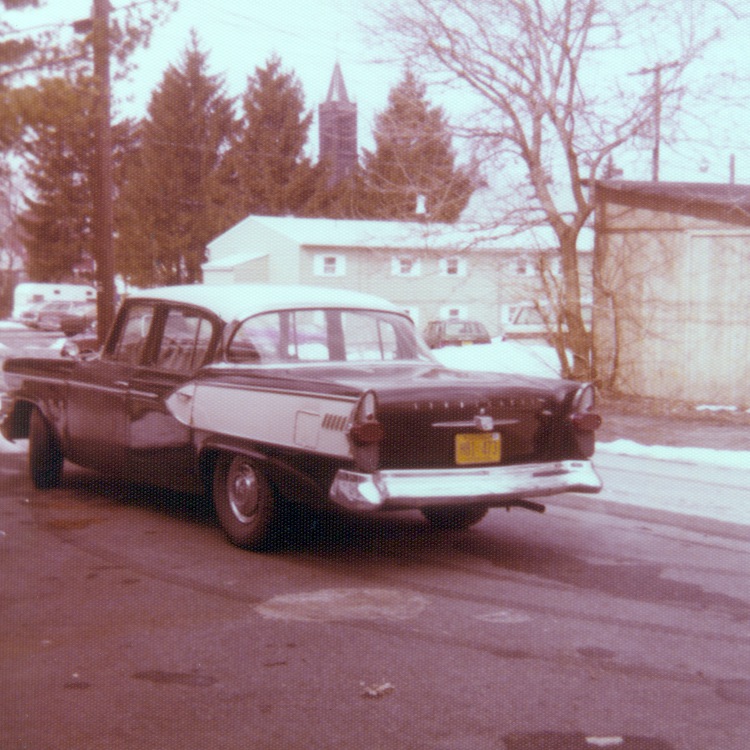
In addition to those after-restoration images, here are some pix from an old family album that show our 1957 Studebaker President in its prime.
I think these were taken around 1970, but I really don’t know. As with many family pix, I also have no idea why these were so important…
The photos were in bad shape, as you can see in the lower-right image, with the magenta dye having faded very little over the decades compared to cyan and yellow; they’ve been brutally color-corrected and contrast-stretched. They were also printed on horrible satin-finish paper and that fishnet overlay is painfully obvious.
If you need an original image for some perverse purpose, let me know…
Those water bottles turned out to have an unexpected feature: the vent hole dribbles when they’re laid sideways. I think it’s an unfortunate side effect of a product cheapnification: the spout is slightly concave on the side that could seal the vent, so surface tension sucks water out of the hole.
The hole is to the right of the spout, in the center of the transverse ridge. Looks like a little black dot here; clicky for a somewhat bigger image.
Water bottle cap showing vent hole
The solution is to put a silicone plug at the Spot Marked X on the spout, which I marked by running a small punch through the vent hole and scarring the spout. You might be able to see the tiny mark on the spout if you look closely.
The spout comes out of the cap with a firm pull, but the sockets in the cap are obviously not intended to take much of that abuse. It’s not clear to me that the designers of these things ever take cleaning into consideration; past experience says you must completely dismantle fluid-facing components to get the crud out.
Anyway.
Chuck the spout up in the Sherline mill, align over the spot, and mill a 1/8 inch diameter flat-bottom hole 0.100 inch deep. The spout has a large finger-friendly flange directly underneath the Spot Marked X, so this setup isn’t quite as precarious as it looks.
Milling socket for vent plug
Dab in a little silicone caulk, leave a mostly flat surface standing just higher than the spout’s concavity, and we’ll see how well it works.
Vent plug
The little nub just to the left of the new plug (on the ball-shaped part of the spout) engages the edge of the socket in the cap to sorta-kinda hold the spout closed. Doesn’t really accomplish much, but it’s a nice thought.
So Kohl’s sent Mary a killer deal coupon and we bought some odds and ends, including a new cutting board to replace the decades-old one that I’ve been flycutting clean every few years. Evidently bamboo is the new Right Stuff for cutting boards; it’s certainly eyeshattering.
The thing spent the last few days soaking up a slathering of canola oil, in the hope it won’t soak up other juices.
Recess for cutting board foot
The instructions say to store the board standing on end so it dries properly. Evidently you’re supposed to hang it from the ring screwed into one end, but a corresponding hook (not supplied) just doesn’t doesn’t have a place on our counter / cabinet / backsplash. However, we could stand it up, leaning against an under-cabinet shelf next to the toaster oven, if only it wouldn’t slide away.
This calls for some aftermarket tweakage!
So I hauled it to the Basement Laboratory Woodworking Wing and installed a pair of silicone rubber feet in little recesses.
I grabbed a 7/16-inch end-cutting end mill in the drill press, because even the manual mill doesn’t have enough height for the board on end and the drill press doesn’t have enough reach for a Forstner bit without fiddling around with the emergency drop stopper clamp. The drill press does have a good vise and an XY table, so I got it pretty close to dead center on the third dark stripe from each edge.
The feet are about 1/4 inch tall: I went down half that in the hopes they wouldn’t bump off quite so easily.
Silicone foot in cutting board
But that didn’t quite work: the adhesive on the feet doesn’t grip the rather porous endgrain bamboo nearly well enough: a foot popped off after a day. I added a layer of Genuine 3M double-stick foam tape to the feet and that’s holding just fine.
After slightly over half a century, the rubber bumpers on the doorstops around the house have stiffened up and, occasionally, one falls off.
Although I suppose I should just buy a new doorstop, molding a dab of silicone snot around the end of the nice brass post takes only a few minutes (plus an overnight cure). If what they tell us about silicone adhesives is true, this one is good until the sun goes dark…
Thou shalt not eat siphon feeders, bottom feeders, things without eyes, or bugs
Someone famous once observed that being a gourmet consists almost entirely of being able to make approving noises and say “That was very good!” after eating a morsel that would cause ordinary folks to throw up.
The lab tech who coined that aphorism, obviously a man with an earthy sense of humor, also experimentally determined that the women he dated couldn’t tell the difference between fancy wine in ornate bottles and cheap wine in screw-top gallon jugs. So he kept a couple of ornate bottles around which he refilled as needed from the jugs. He simply pushed the corks back in and did a credible job of re-sealing the top with paper and wax.
We worked together on the IBM Video Disk project, then served time together in the East Fishkill Factory. Lost touch over the years and I think I just saw his obituary go by… sic transit, etc.
Most office desk chairs are crap. Spend a couple of hours in a typical office chair and you wonder if it had been designed by aliens who, perhaps, read the specs for human beings, but never actually met a person in the flesh.
Conversely, you can drive for a couple of hours and get out of the car feeling at least OK. (Well, if you buy a decent car, that is. Last rental car I drove had terrible seats.)
So, a couple of decades ago, I went to a junkyard and picked up a nice seat from a fancy wreck for about $50, built a plywood base with six casters from Home Depot, put a 1-foot-diameter Lazy Susan bearing between the two, and bolted everything together. The seat even had power adjustments, so (just for fun) I tucked a battery underneath.
After a while, I stripped off the seat belt doodads… and, of course, you really don’t need power adjustments after the first week.
Worked like a champ for about a decade, but even a high-end seat cushion eventually goes flat. So I swapped in a front seat salvaged from one of our cars (a Toyota Camry wagon, from back before minivans ruled the road) and that lasted another decade. It finally went flat and I swapped in the other front seat.
The 2×6-inch upright boards have slopes and cutouts that match the peculiar shape of the seat frame, with holes drilled in the wood for the metric machine bolts, and that’s a good enough anchorage for an office environment.
Chair base
The Lazy Susan bearing is between the top plywood layer and the square corner sticking out to the front. That layer bolts to the bottom sheet, providing enough clearance for the various heads and whatnot.
You really need six casters on a fairly large base, because the chair is immensely heavy (it was, after all, designed to not fall apart during a full-on collision) and rather top-and-back-heavy without you in place.
Considerations:
Get the seat close to the right height, as the adjustment range isn’t all that wide
Put your center of gravity in the middle of the base. Fortunately, the seat has plenty of forward-aft adjustment
Get the seat base pretty much horizontal
A closer look at the front:
Front detail
The back isn’t a lot different:
Back detail
Maybe I just have a weird butt or don’t spend enough money on office chairs.