Ed Nisley's Blog: Shop notes, electronics, firmware, machinery, 3D printing, laser cuttery, and curiosities. Contents: 100% human thinking, 0% AI slop.
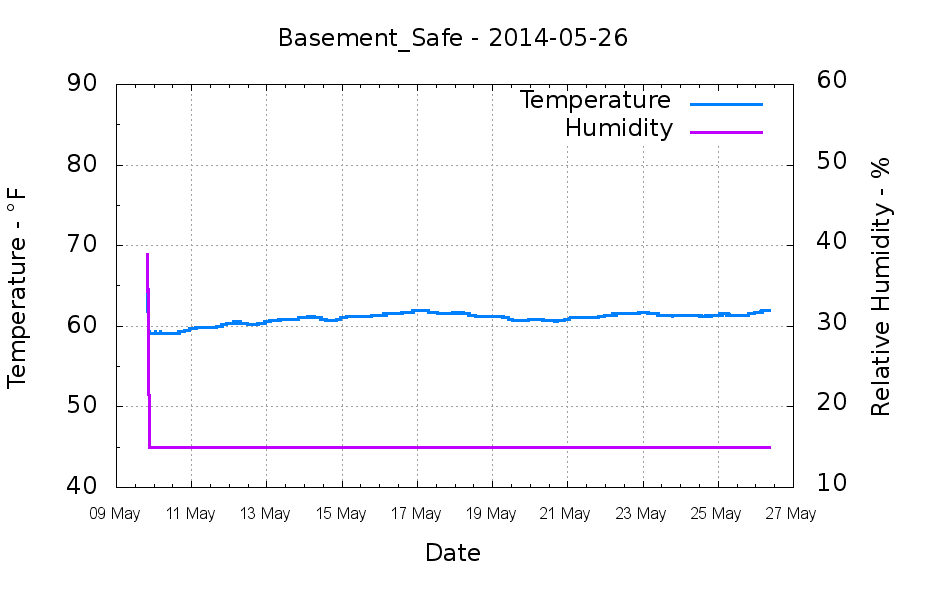
Back in early May, I swapped in a new bag of silica gel, which (as always) immediately punched the humidity down to the Hobo datalogger’s 15%RH minimum reading:
Basement Safe – 2014-05-26
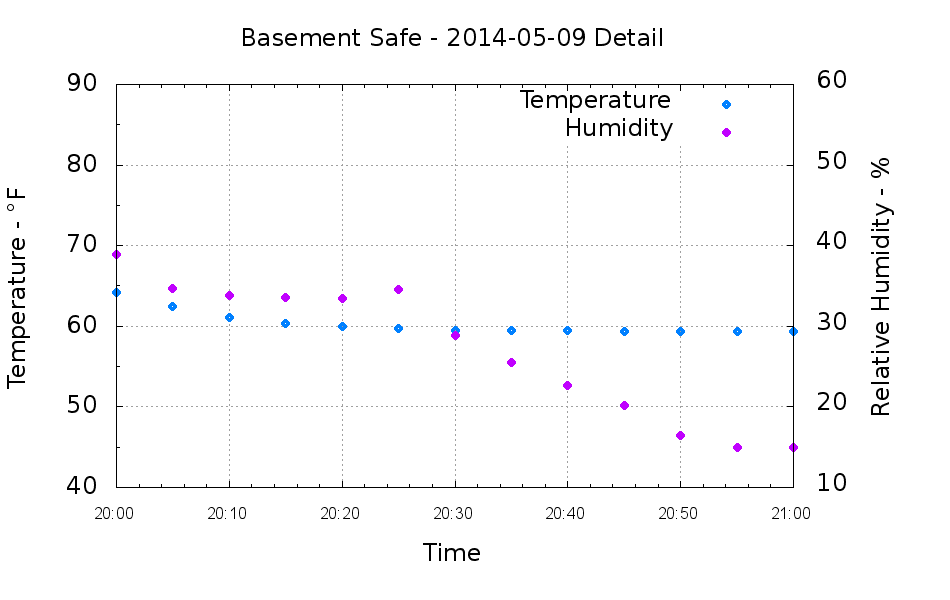
A closer look at the very beginning of that data shows the humidity dropping for an hour after the door closes:
Basement Safe – 2014-05-09 Detail
The logger is on the bottom of the safe, with the desiccant bag on the shelf above it, and there’s no mechanical air circulation: it’s all done by air currents, driven by whatever drives them. I have no idea what that bump in the middle means.
I recently ordered a pound of genuine Japanese Sencha Green Tea from Harney & Sons (who turn out to be a long bike ride away at the Millerton end of the Harlem Valley Rail Trail), having had entirely enough of the rather bitter Chinese Sencha from the local grocery store.
Guess which one is which:
Japanese vs Chinese Sencha Green Tea
Yup, Japanese on the left, Chinese on the right. The latter comes from the bottom of the container, hence the larger proportion of flakes, but it’s obviously different stuff.
Based on the first few cups, the new tea has a much better taste.
From what I read, the price of Japanese teas has taken a real beating in recent years, because everyone (else) fears Fukushima Daiichi fallout. My feeling is that a Chinese tea plantation could be downwind of Smiling Face Heavy Metal Refinery Complex Number 5 and you’d never know it.
Mary (not the spammer) uses a stirrup hoe for most of what little weeding she does, so it spends much of its life outdoors in the Vassar Farms plot. The bottom of the handle disintegrated and she brought the business end home for repair:
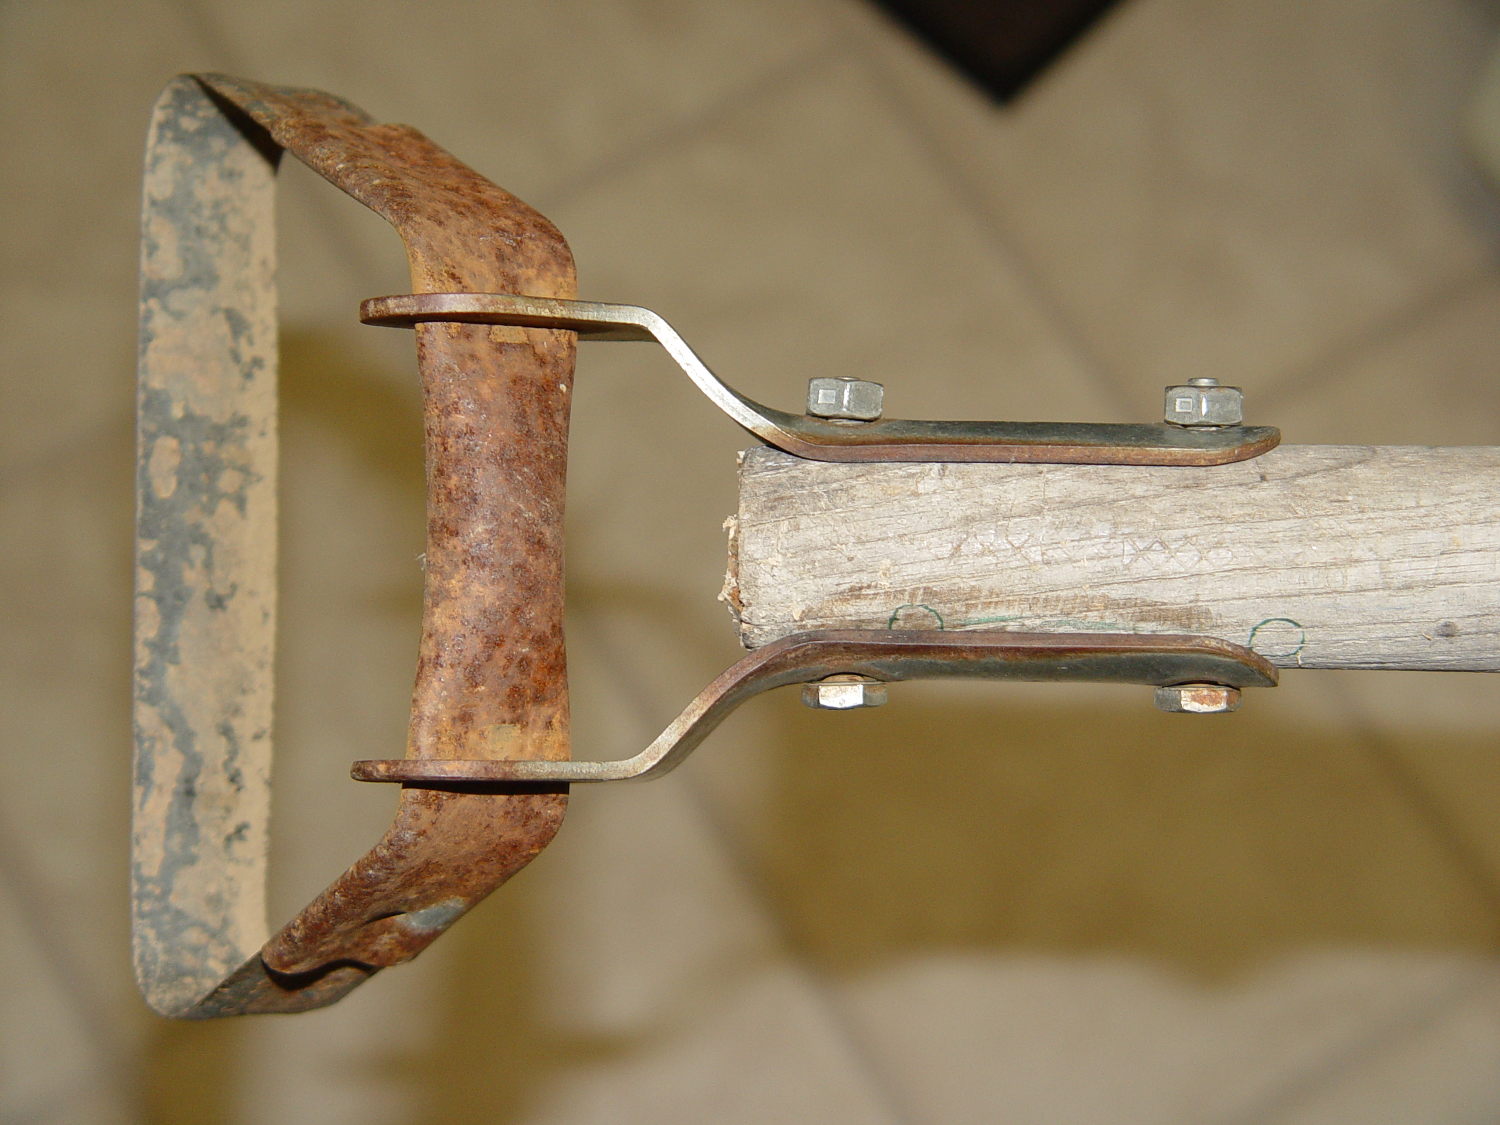
Stirrup hoe – replacement handle
That was easy: a suitable handle lay on the top of the rods-and-tubes rack; I’d harvested it from a defunct rake a while back. Although the wood is weathered, we think of it as well-seasoned. The errant hole marks came from a first pass, before I realized there was no point in having the handle extend beyond the outward-bending part of the brackets.
The bolts and locking nuts are original!
Ya gotta have stuff…
(And not a trace of 3D printing anywhere to be seen. Imagine that!)
A cold call from Family Energy, completely in violation of our presence on the FTC Do Not Call registry, produced an offer: “lock in” a rate of 8.9 ¢/kWh for two years. My experience has been that anybody cold calling me does not have my best interest in mind and a few minutes of search-fu showed that, while Family Energy may not be a scam, they certainly employ unique marketing methods for an “energy supply company”.
For reference, the last two years of Central Hudson supply charges:
Central Hudson Gas & Electric
Dollars per kWh
Date
MFC Supply Ch
Market Price
Market Pr Adj
Net Supply Ch
2012-03-08
0.00190
0.05982
0.00635
0.06807
2012-05-09
0.00190
0.05665
0.00524
0.06379
2012-07-12
0.00191
0.06396
0.00532
0.07119
2012-09-10
0.00196
0.07805
0.00260
0.08261
2012-11-08
0.00196
0.05206
-0.00100
0.05302
2013-01-12
0.00196
0.05027
0.00322
0.05545
2013-03-12
0.00196
0.08340
0.00241
0.08777
2013-05-09
0.00196
0.07359
0.00116
0.07671
2013-07-10
0.00197
0.05458
0.00397
0.06052
2013-09-09
0.00203
0.08143
0.00420
0.08766
2013-11-05
0.00203
0.06634
-0.00368
0.06469
2014-01-08
0.00203
0.05816
0.00061
0.06080
2014-03-12
0.00203
0.14779
-0.00534
0.14448
Average
0.07514
That’s the only part of the bill Family Energy (and other suppliers) can replace; the remainder pays for delivering the energy to our meter.
Family Energy’s marketing obviously plays off the staggering price spike in the most recent bill, but the CHG&E rate is lower than their “locked in” offer. In fact, if you exclude the last line, the CHG&E average is 6.9 ¢/kWh. The price spike came from the 2014 midwinter natural gas shortage and, assuming no simultaneous equipment failures, prices should return to the normal pattern.
Family Energy does offer a $25 cash-back if your annual bill exceeds the CHG&E rate, up to a maximum of $75, but that’s chump change compared to the size of our bills…
All I know is what I read on the Intertubes, but it seems the Family Energy door-to-door sales droids have even less interest in overall customer satisfaction.
We bought a replacement for the CorningWare casserole (that a raccoon broke when I put the rice out on the deck to cool) at a tag sale:
Nouveau Ceramic Pan – assembled
According to the information on the bottom, it’s “Nouveau A Princess House Exclusive” that’s no longer in their listing. Evidently, they’ve gone to metal stovetop cookware these days. Anyhow, it has a separate handle that latches onto a cleverly shaped tab molded into the pan:
Nouveau Ceramic Pan – handle released
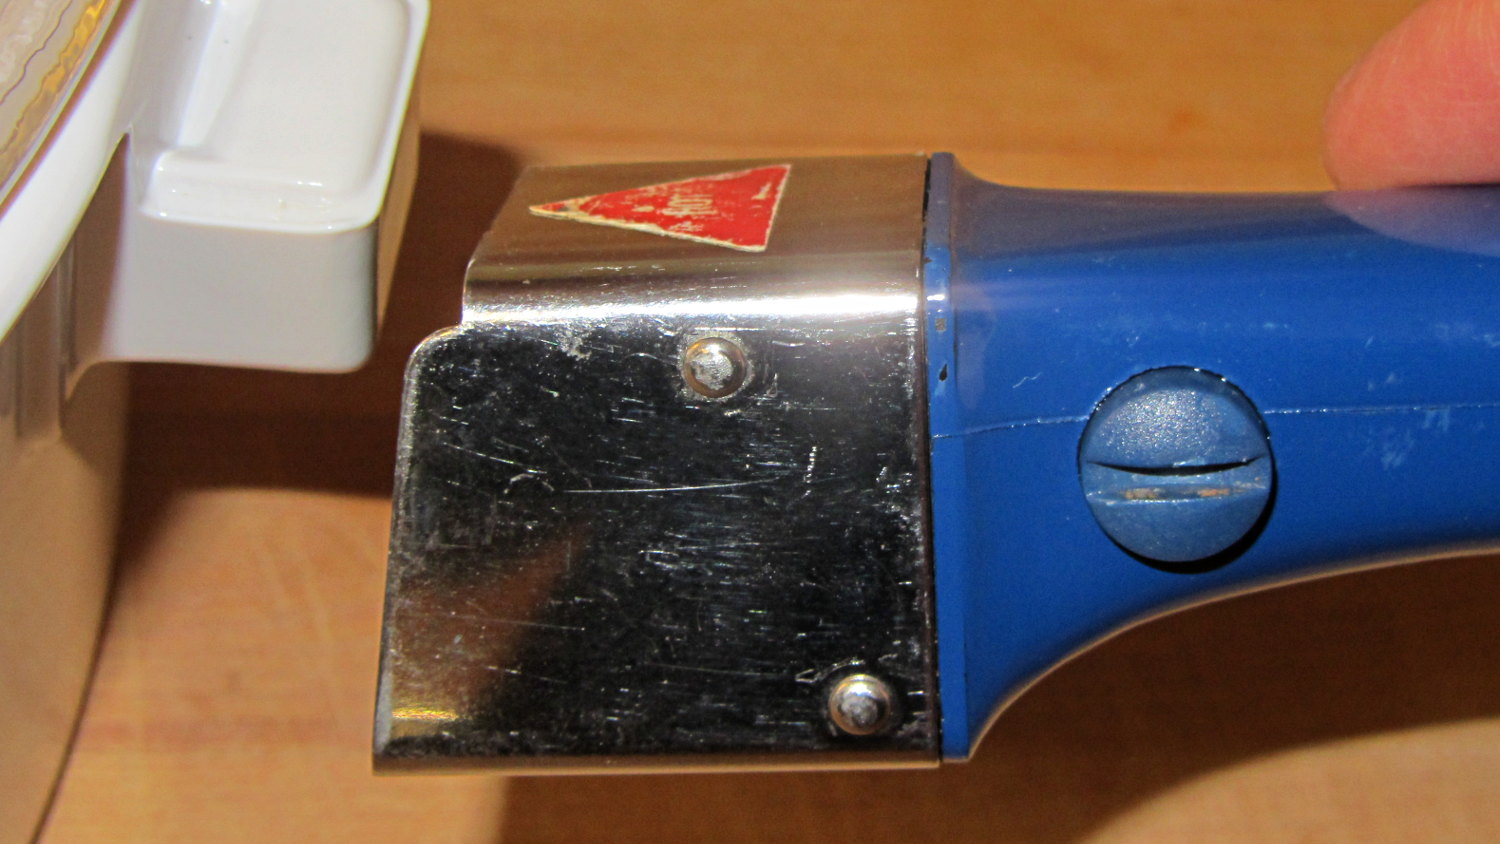
Latching the handle in place is simple: put the end of the handle over the tab and squeeze the lever until it snaps into the handle. Well, I managed to latch it quite easily, after which nobody could figure out how to release it. That slotted button cries out to be pushed, but it wasn’t push-able.
That’s a condition I call “being outwitted by inanimate objects”…
After bringing it home, I discovered the secret: the slot must be exactly vertical (equivalently, maximally counter-clockwise) before you can press the button to release the latching handle. Turning the button so the slot is horizontal (maximally clockwise) locks the button out, so that you cannot press it and release the handle:
Nouveau Ceramic Pan – handle locked
The button locks out when the slot is almost imperceptibly clockwise from vertical; if you don’t know what to look for, you’d never notice the difference.
Which makes perfect sense to me. You want the handle to latch securely and require a deliberate action to release, lest the pan fall and release hot stuff all over your front. Any errors should leave the handle securely latched in place.
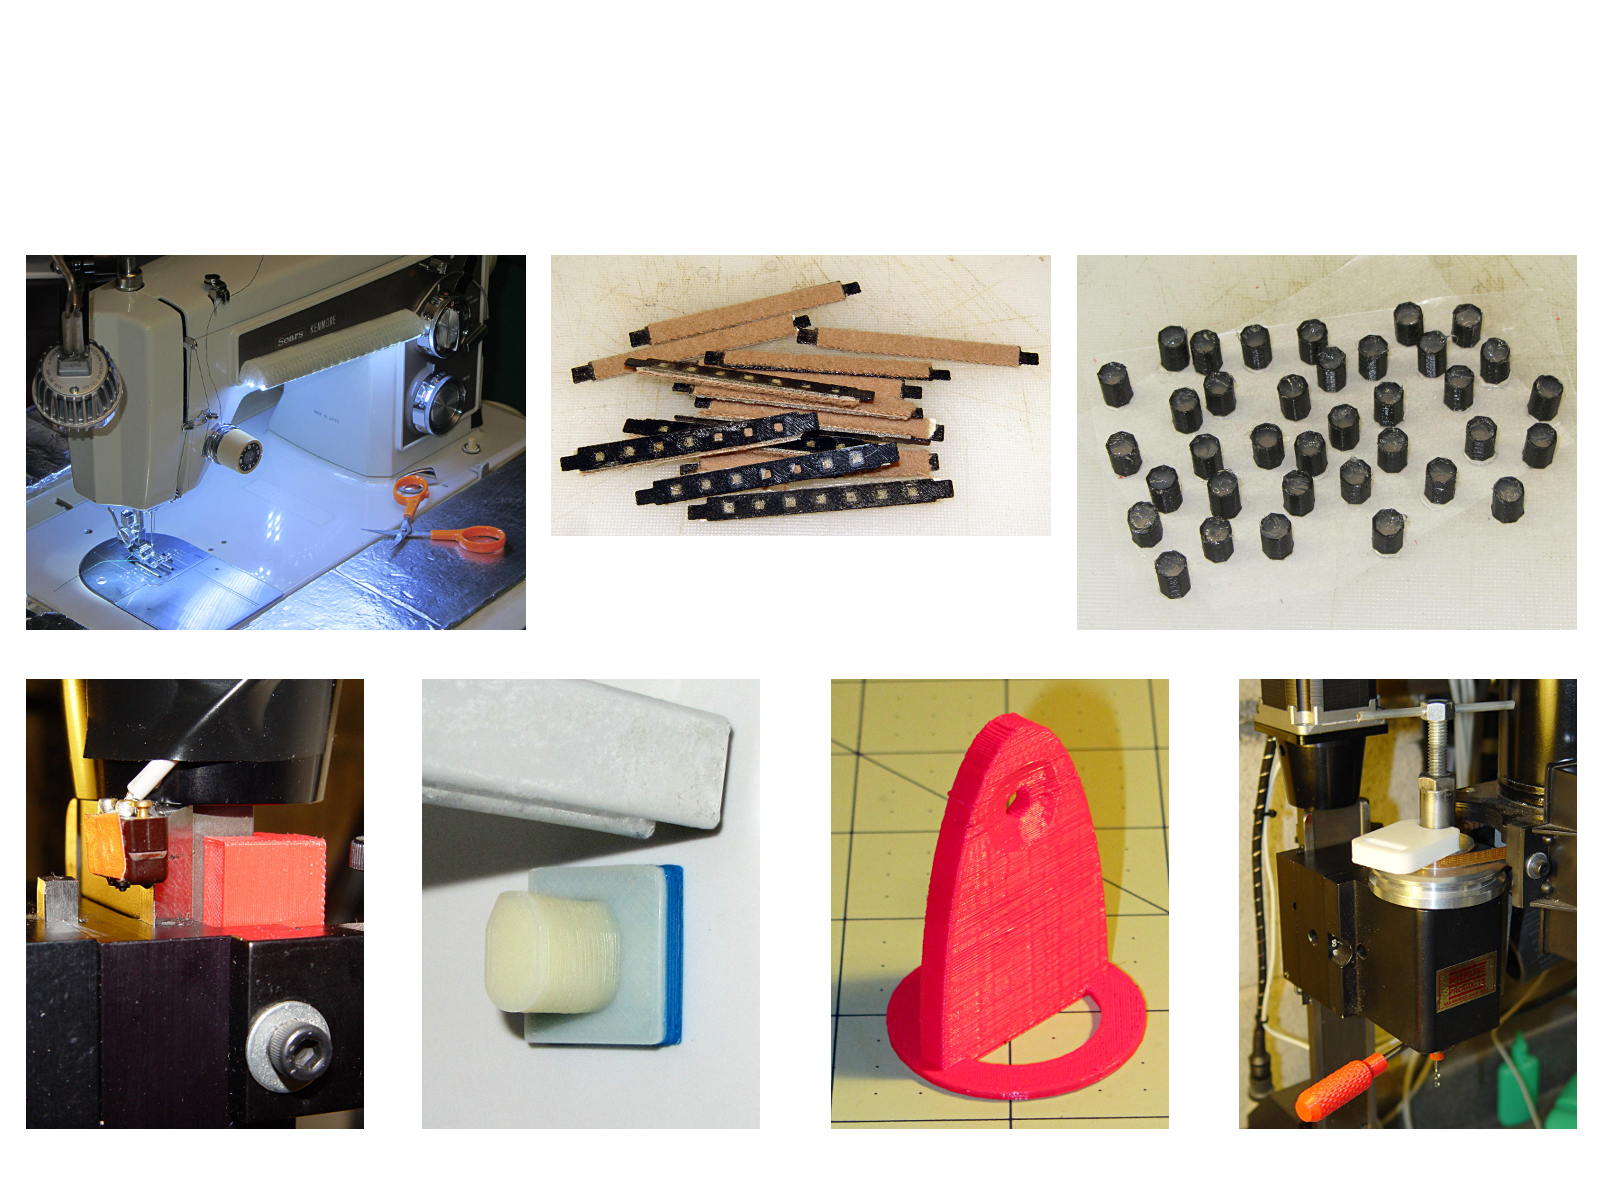
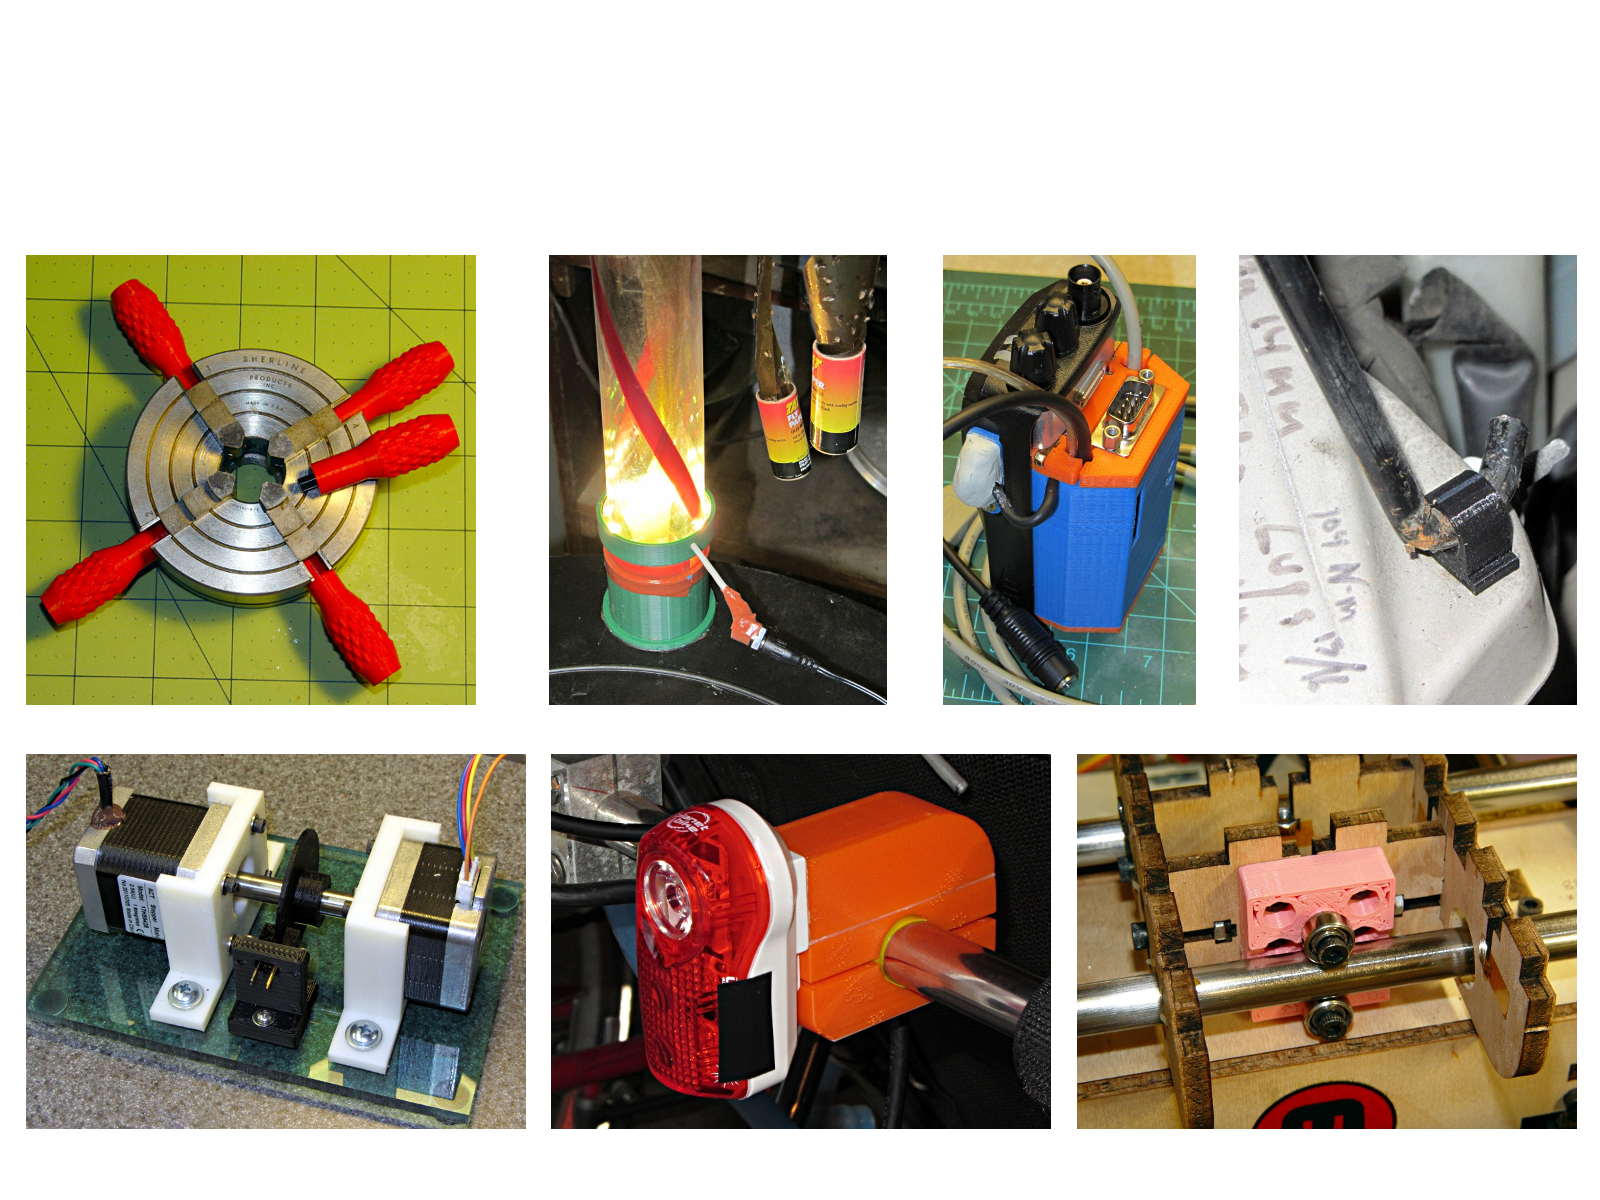
The whole reason I got a 3D printer in the first place was to make things that would otherwise be too difficult or tedious by hand or on a CNC mill. Most of the things I make look like brackets and I don’t do sculptures … this stuff solves problems!
Being able to go from “I need a part shaped like that” to holding the thing in my hand a few hours (or, for complex designs, days) later is empowering. Being able to adjust a dimension by changing the source code and “recompiling” to get a new part is wonderful.
These five slides from the presentation show my answers to the question “Why would anyone want a 3D printer?” Clicky for more dots.
Things I Designed – 1Things I Designed – 2Things I Designed – 3Things I Designed – 4Things I Designed – 5
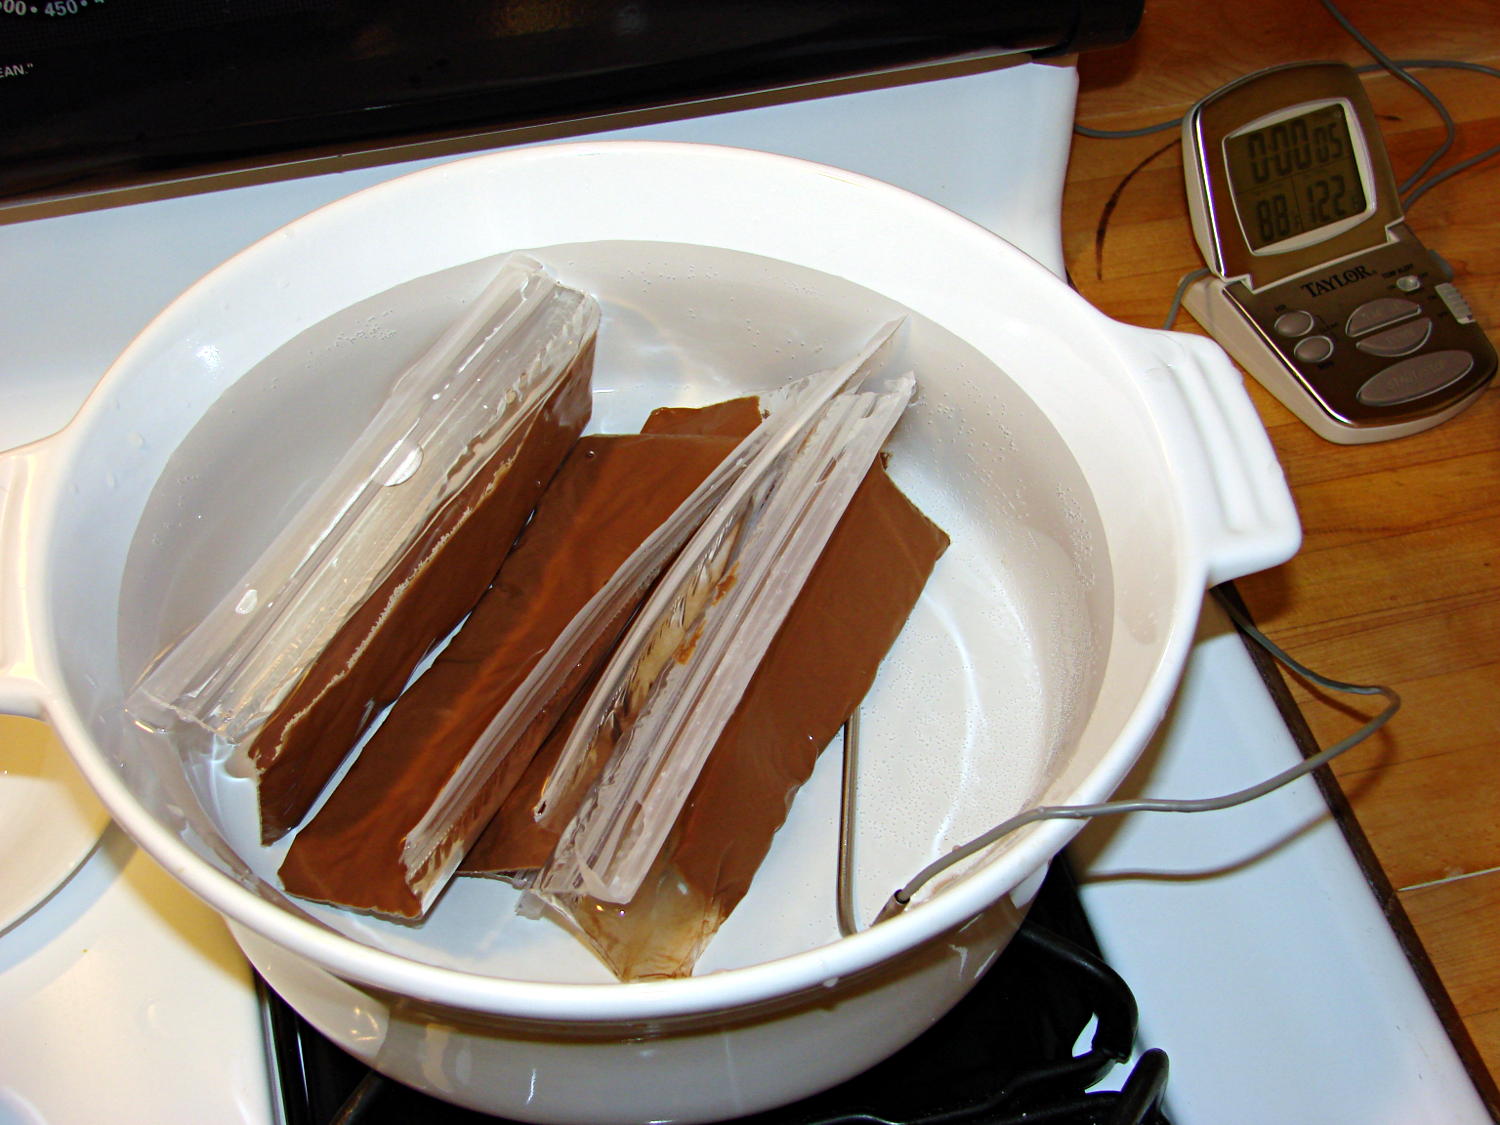
I’m producing more Tux chocolates with the 16 cavity silicone mold, so I dumped four bags (each with 50 g of chocolate chips) into a big pot of tepid water:
Milk Chocolate Bags – in Tempering Bath
I taped them closed to ensure the zip tops didn’t come unzipped while squeezing the chocolate, which worked out quite well: highly recommended.
Based on previous experience, I paid a bit more attention to the water temperature and kept it at 88±1 °F, transferring a cup or two at a time between this pot and the slightly hotter water (about 95 °F) in another pot. Although I’m sure a closed-loop sous vide bath would maintain tighter tolerances, I’m also sure that wouldn’t make any real difference in this operation.
I also wore thin white cotton gloves, in an attempt to prevent my hands from warming the chocolate above the proper temperature while squeezing the bags. That probably didn’t make any difference, because you must get pretty chummy with the bags and the gloves didn’t amount to much.
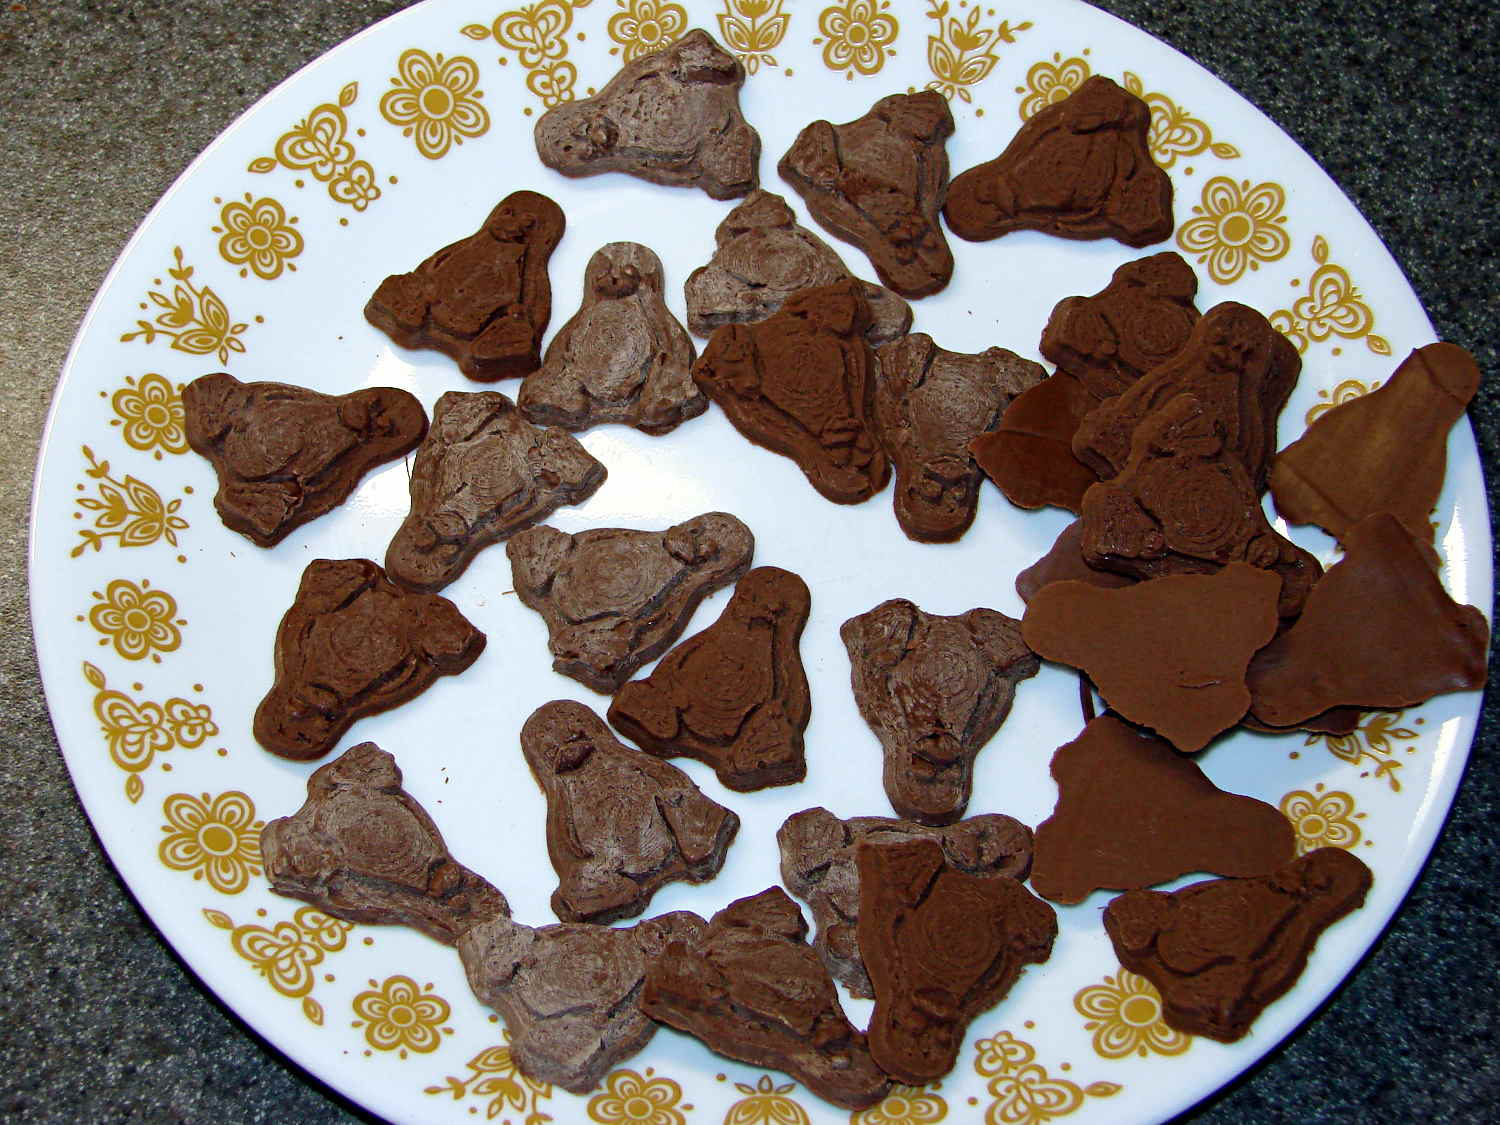
The results, just after extracting the second set of 16 chocolates (minus some, ah, shrinkage), looks pretty good:
Tux – Milk Chocolate – Batch 1
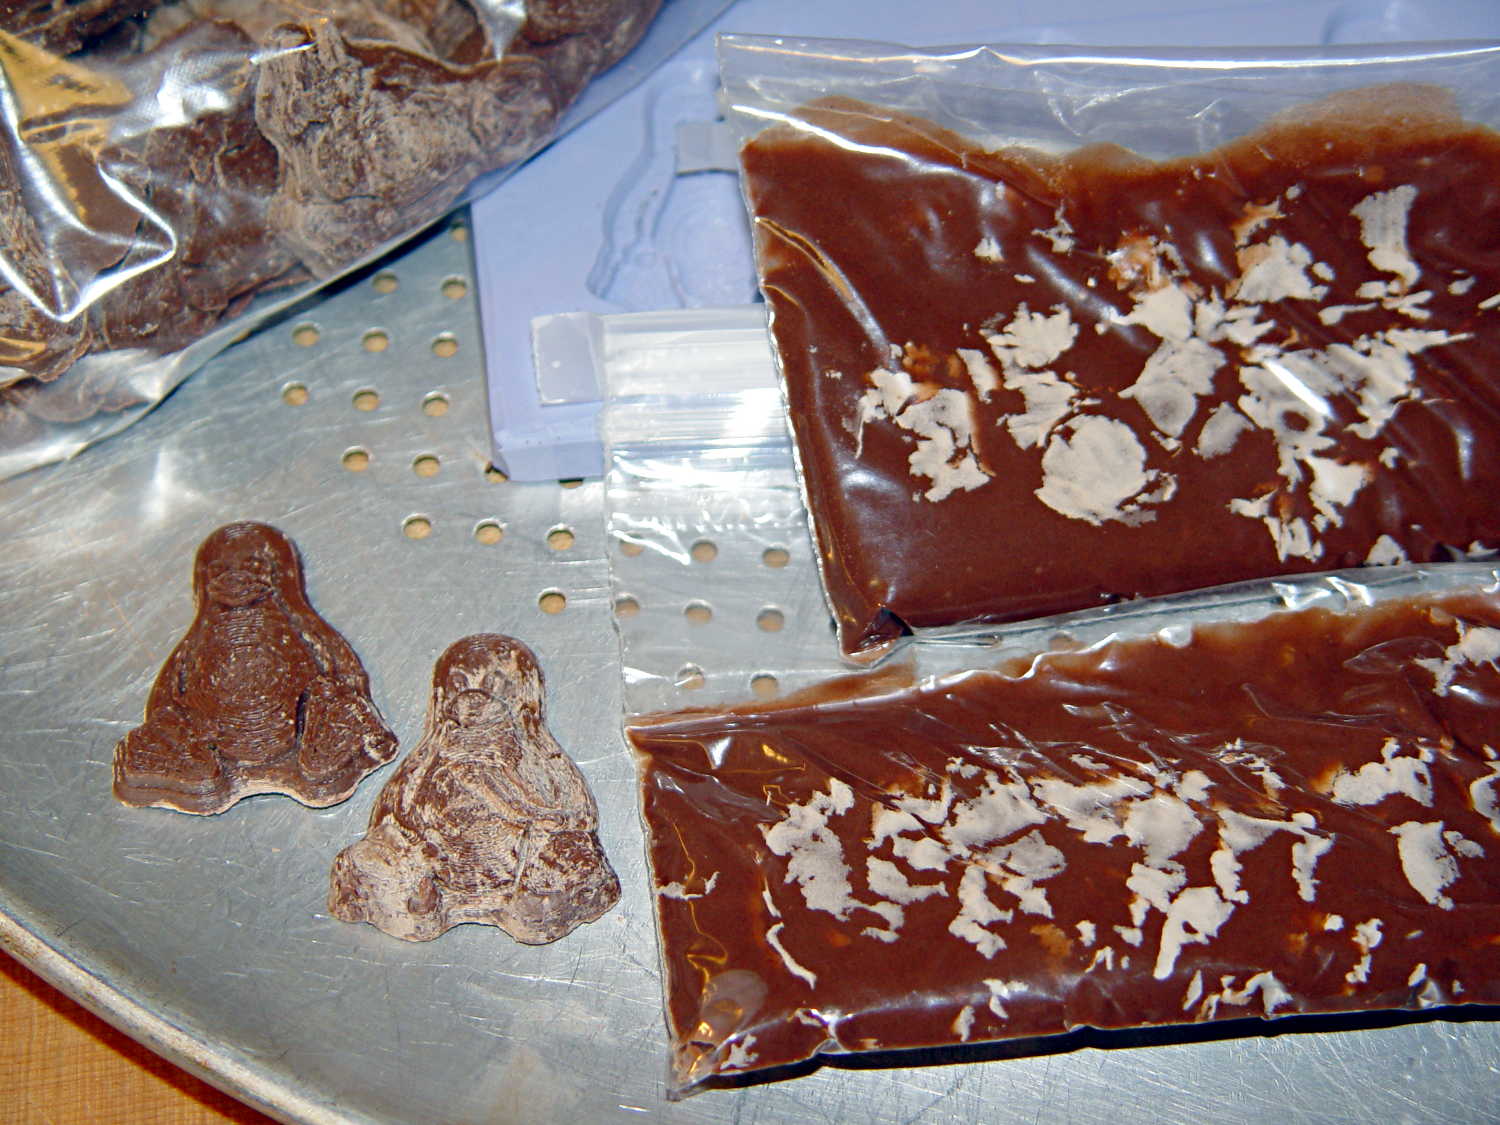
I called it quits for the evening, extracted the two unopened bags from the bath, and let them cool overnight. The next morning revealed an interesting sight:
Milk Chocolate Blooming – Tux and bags
Now, I’d kneaded all the bags to mash the melting chocolate chips together and squeeze out the air, but hadn’t done much more than that. The patches of white cocoa butter seem to correspond to individual chips within the melted mass, so it’s not entirely a temperature thing; I don’t see how to make an individual chip hotter (or colder) than everything else in the bag.
Remelting those two bags the next morning produced these Tuxen, with the very brown ones having just emerged from the mold:
Tux – Milk Chocolate – Batch 2
The proper temperature for dark chocolate is about two degrees higher than for milk chocolate, so I boosted the water bath from 88 °F to 90 °F and dropped in four bags of dark chocolate chips.
At those low temperatures, the chocolate resembles putty, rather than honey, and requires firm pressure on the bags. I think the close contact with my fingers, even with gloves, raises the temperature too much; the chocolate isn’t untempered (I think that’s the right word; “distempered” sounds much more ominous), but it may be more prone to blooming.
Thinking that the silicone mold might chill the chocolate too rapidly, I put a warming pad under the aluminum pizza pad, brought the silicone slab up to about 85 °F, and found that the chocolate molded much more readily. Cooling the mold to 72 °F, just over room temperature, took quite a while.
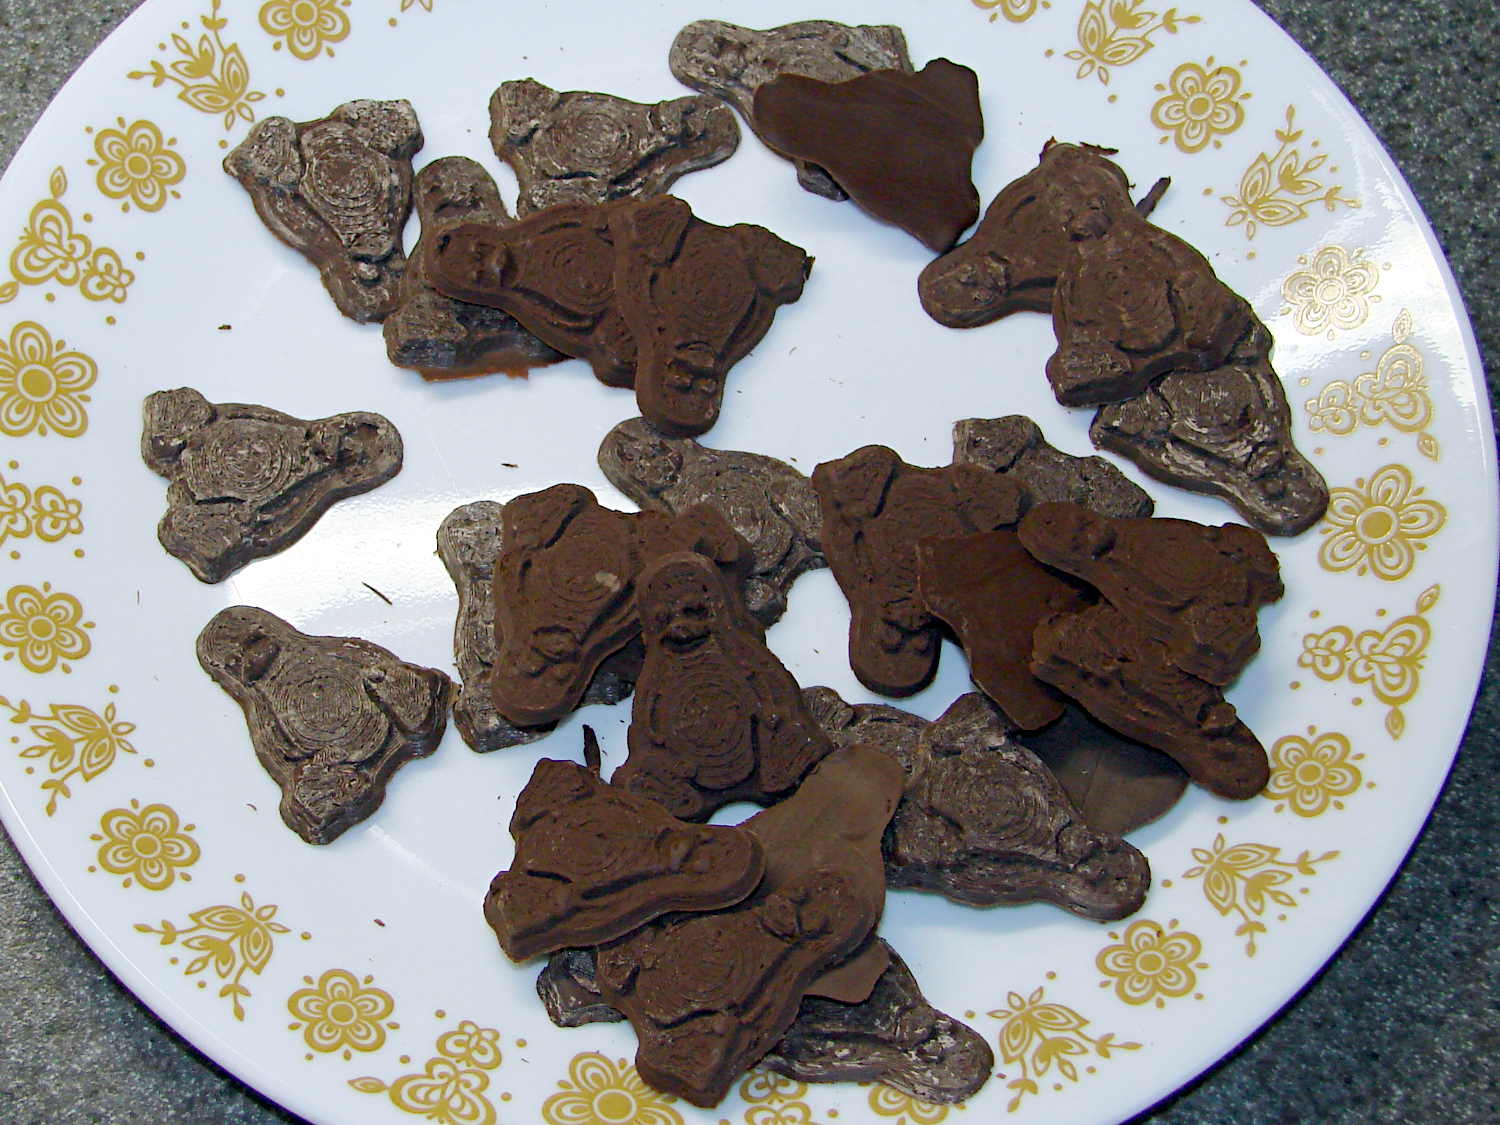
The first dark chocolate Tuxen were already blooming when the second set emerged:
Tux – Dark Chocolate – Batch 1
I tried cooling the mold by putting a damp towel under the pizza pan, with equivocal results: the last two sets of dark chocolate bloomed about as rapidly as the first.
It is, perhaps, significant, that the blooming seems confined to the chocolate surfaces in contact with the mold. The flat back surface of each Tux remains in good condition, which suggests that the mold temperature is more critical than I expect.
So my process, such as it is, doesn’t produce good results. Obviously, I need more practice…