Ed Nisley's Blog: Shop notes, electronics, firmware, machinery, 3D printing, laser cuttery, and curiosities. Contents: 100% human thinking, 0% AI slop.
These sunglasses fit Mary’s face and do a good job of keeping road grit out of her eyes, but she doesn’t like the extended earpieces. So I cut ’em off:
Ironman sunglasses – trimmed earpieces
The trick is to shape the ends with an ordinary diagonal cutter, then round the edges with sandpaper.
The lower pair has seen a few years of use, during which the bright yellow plastic faded quite a bit.
Nothing profound, other than that you need not put up with nuisances.
In these degenerate times, it seems anyone can just buy a crysknife:
Farberware ceramic knife
Admittedly, it lacks the original’s kinjal shape and curved blade. We once had a double-edged, serrated kitchen knife and I swore a mighty oath on the bones of my ancestors to never, ever make that mistake again.
Surprisingly, the plastic handle balances well with the ceramic blade: no need for another tungsten counterweight. The handle extends slightly below the blade’s heel, which may call for some abrasive adjustment.
The blade is slightly thicker than the wonderful steel santokuknives we’ve been using forever and doesn’t taper uniformly from spine to edge, so it’s no good for constrained cutting (like quartering an apple). The hollow-ground section behind the edge forms a wedge that cracks apples apart, unlike the santoku’s full-width taper that just slides right through.
I was mildly surprised to find that it’s no sharper (perhaps that’s “no more keen”) than our steel knives, but, then, I’m wicked with the sharpening steel. The edge arrived minus a few tiny chips and I suspect we’ll add more in normal use, right up to the moment when one of us drops it on the floor.
A gotcha: that blade’s eyeblink affordance is harmless plastic. I must remind myself it’s a real knife with a lethally sharp edge.
Thus far, we’ve sheathed the blade unblooded, in clear violation of the Fremen ritual. May it ever be so…
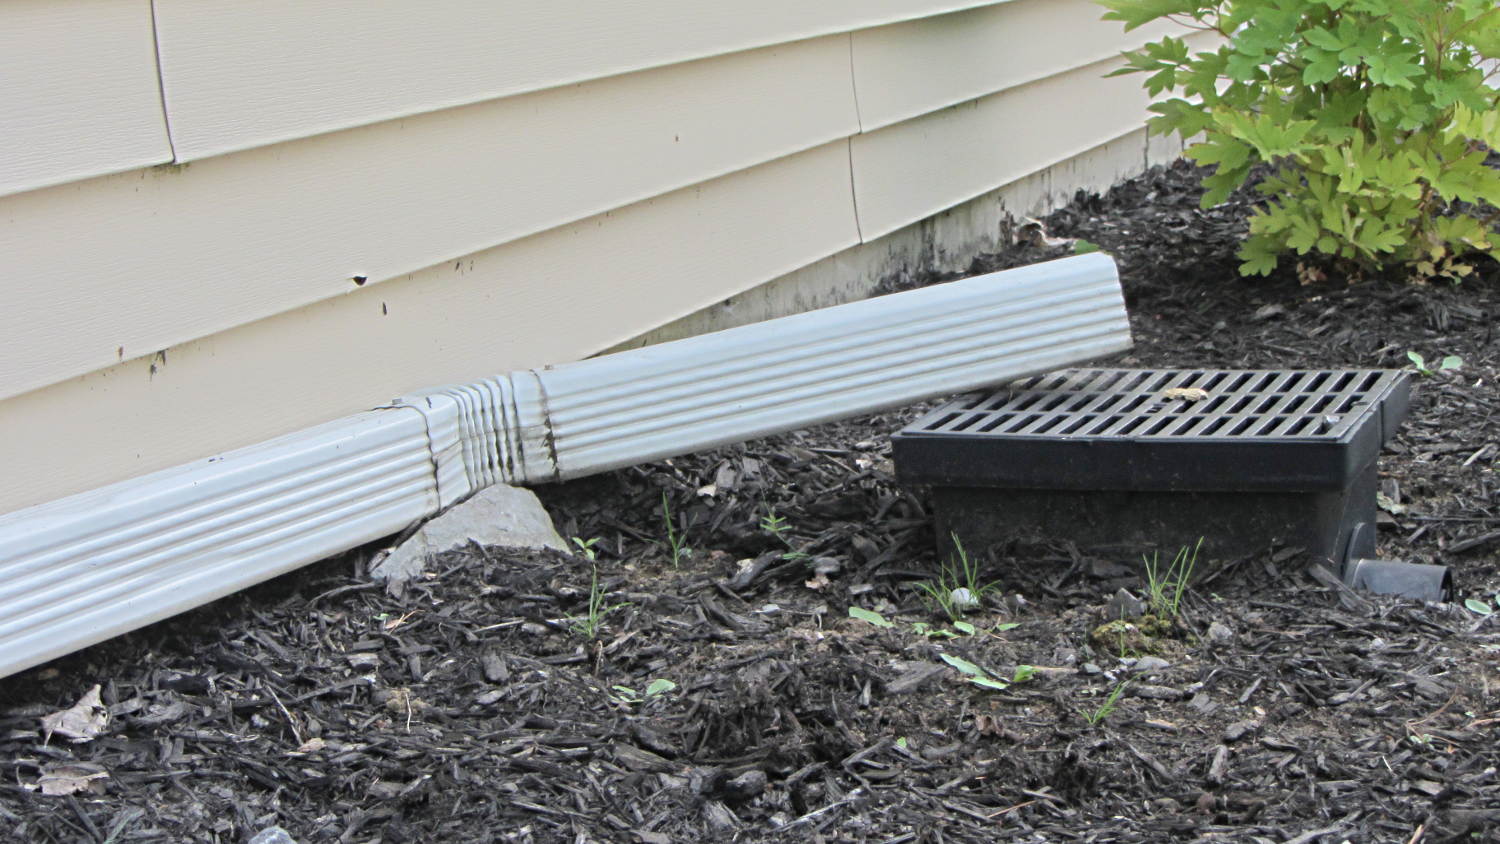
As nearly as I could tell, the vertical downspout along the edge of the building ends level with the top of the drain grate. If that convenient rock were high enough to level the last length of pipe, the elbow would be above the end of the downspout.
The architectural drawings for the apartment complex surely didn’t look like that.
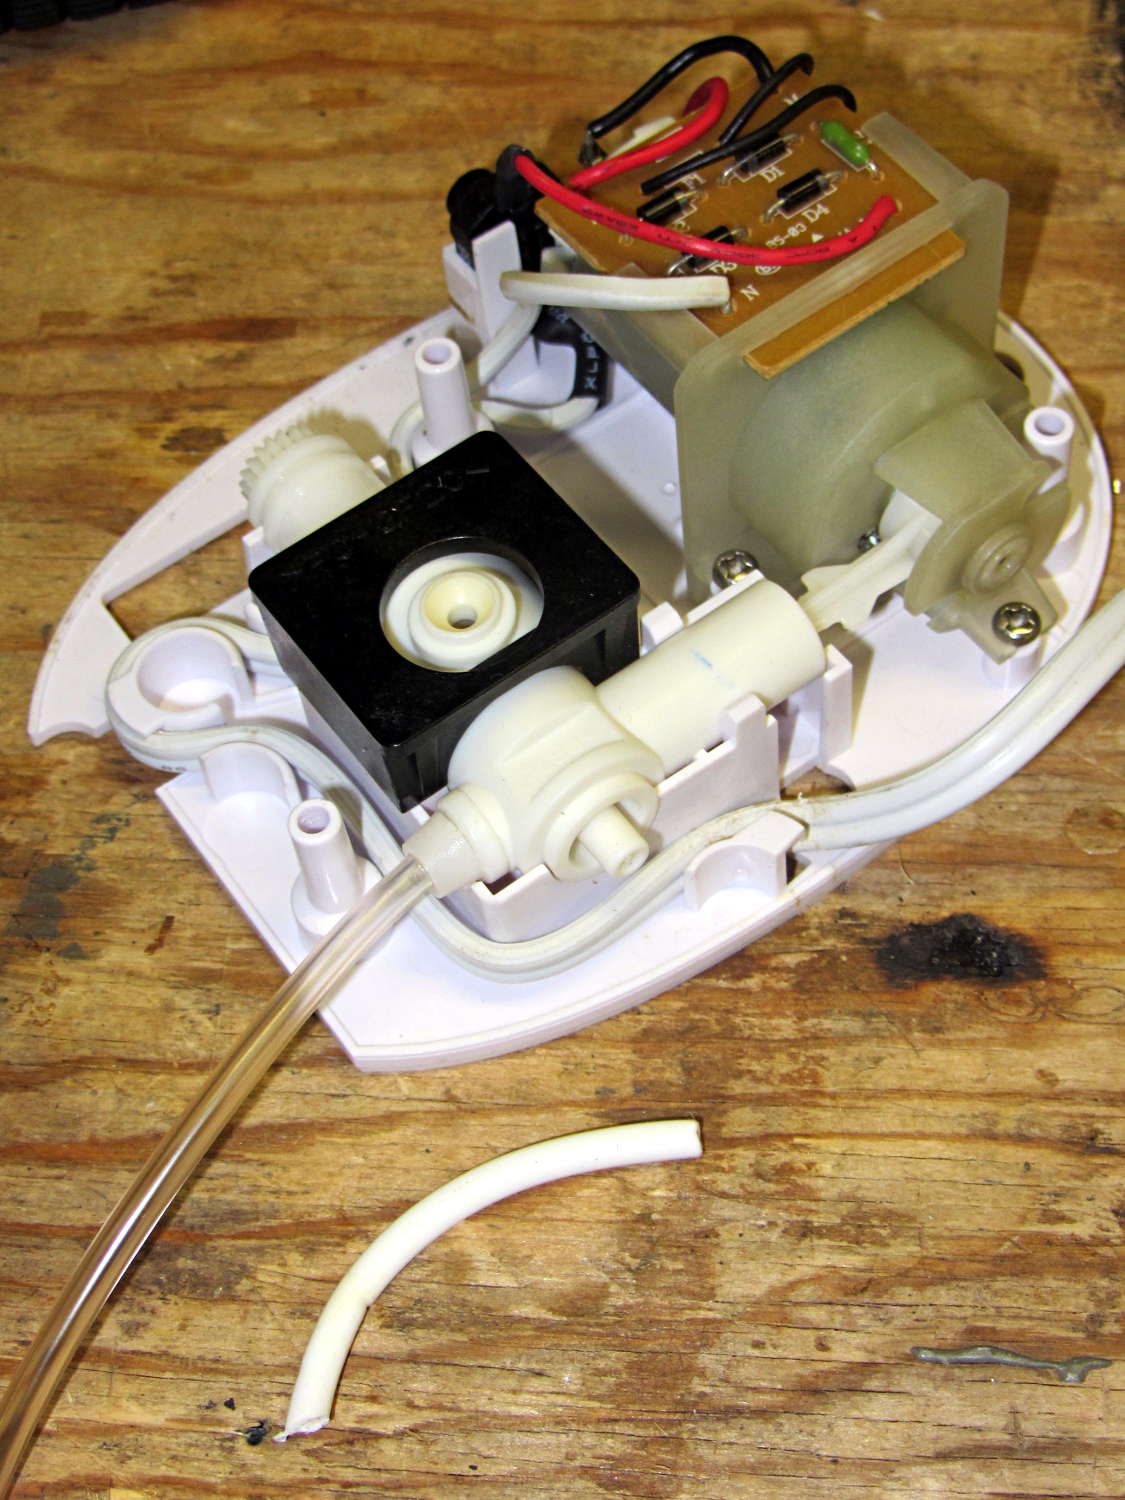
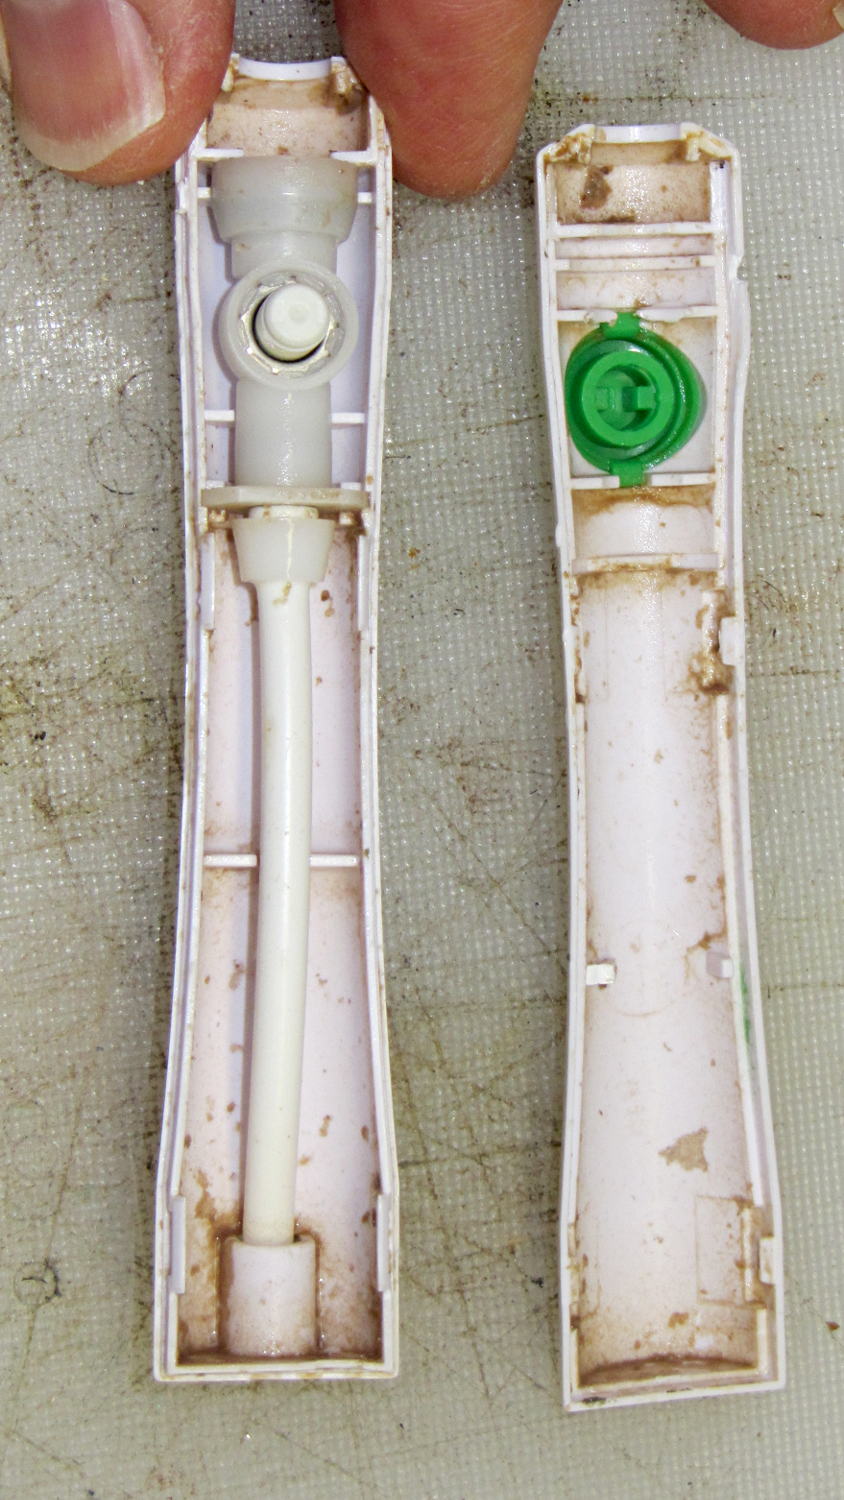
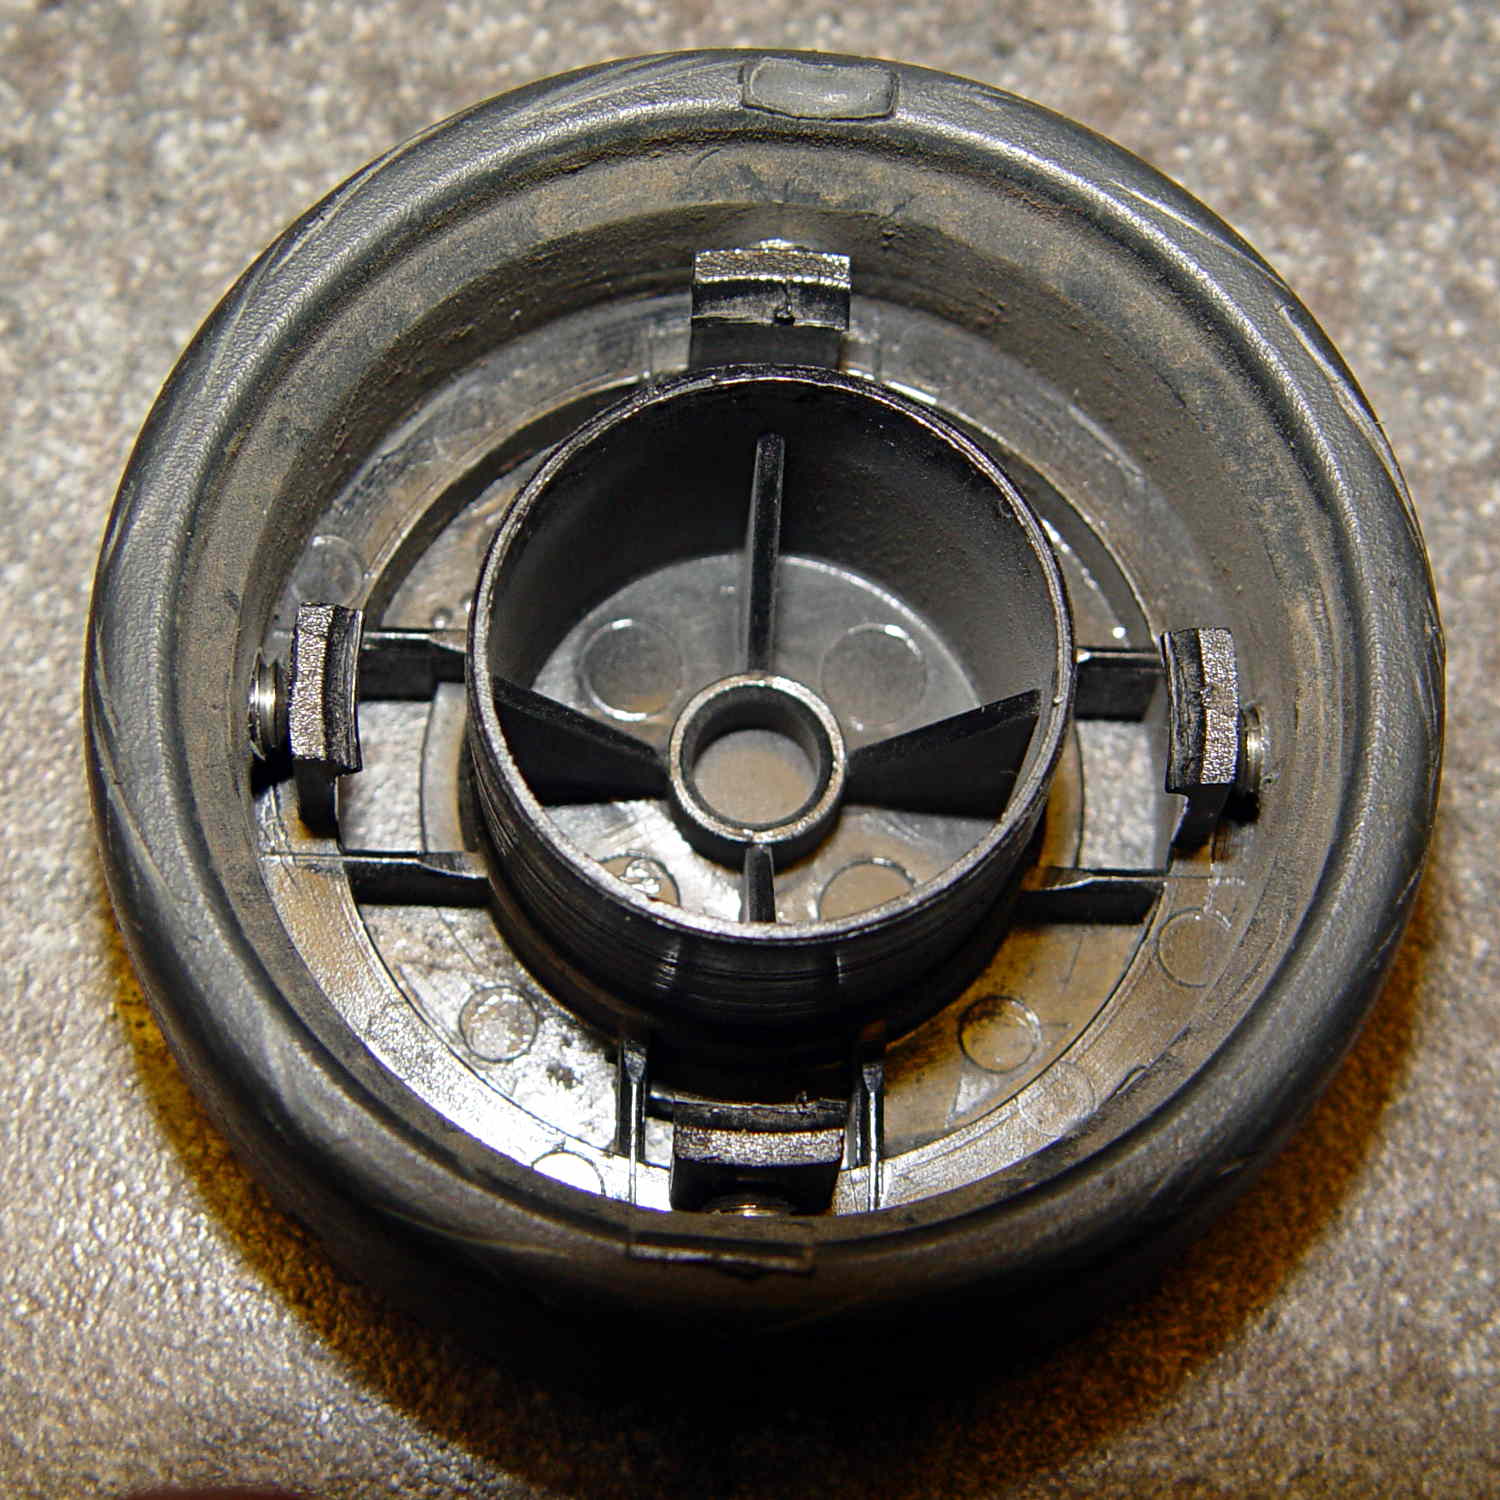
The brittle tubing on Mary’s Interplak water jet continued to disintegrate, so I replaced the entire tube with Tygon:
Interplak water jet – interior
Nisley’s First Rule of Plumbing: Never, ever look inside the pipes delivering water to your faucet.
Interplak handle – interior view
That’s not quite inside the pipes, but it’s pretty grotendous, isn’t it?
As expected, flexible tubing doesn’t transmit the pressure pulses nearly as well as the OEM rigid tubing, so we finally bought a new Waterpik. At least you can get replacement tubing for Waterpiks, but I’ll wait until it fails before stocking up.
Contrary to what you might expect, I cut the Interplak’s cord, harvested the motor windings, and dumped the carcass in the trash.
After doing the second batch of quilting pin caps, I dropped the newly opened silicone caulk tube into a jar with some desiccant, which worked wonderfully well. Unlike the usual situation where the caulk under the cap hardens into a plug after a few weeks, the tube emerged in perfect condition. In fact, even the caulk in the middle of the conical nozzle was in good shape, with just a small cured plug on either end; it had been sitting inside a cloth wrap with no sealing at all.
Here’s what it looked like after finishing the last of the most recent caps:
Silicone caulk tube with silica gel
The indicator card says the humidity remains under 10%, low enough to keep the caulk happy and uncured. Well worth the nuisance of having a big jar on the top shelf instead of a little tube next to the epoxy.
Although I thought the desiccant was silica gel, it’s most likely one of the clay or calcium desiccants.
Pinning the top of Mary’s latest quilt used more than 1600 pins: three boxes of specialized quilting safety pins, plus straight quilting pins tucked into all the 3D printed / silicone filled caps. Less than a quarter of the quilt top fits on the table:
Quilt top with pins
Although Mary doesn’t need them right now, I made another batch of 100 caps for her next project:
Quilting pin caps – 4 x 25 – on platform
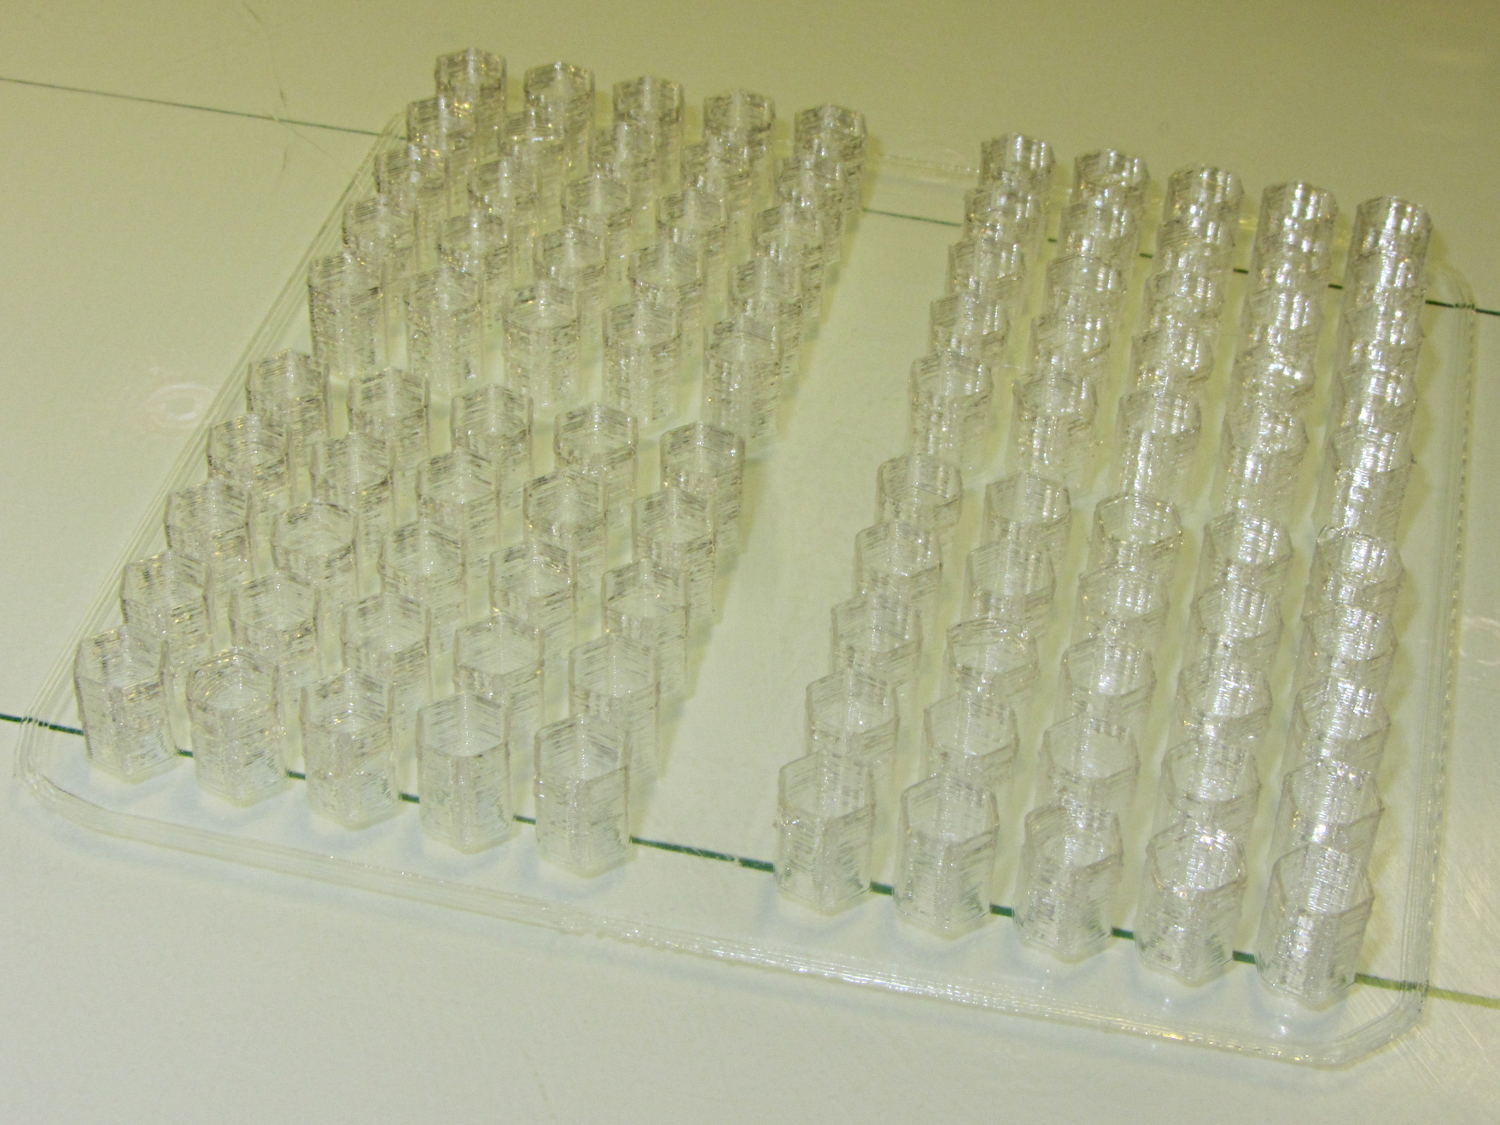
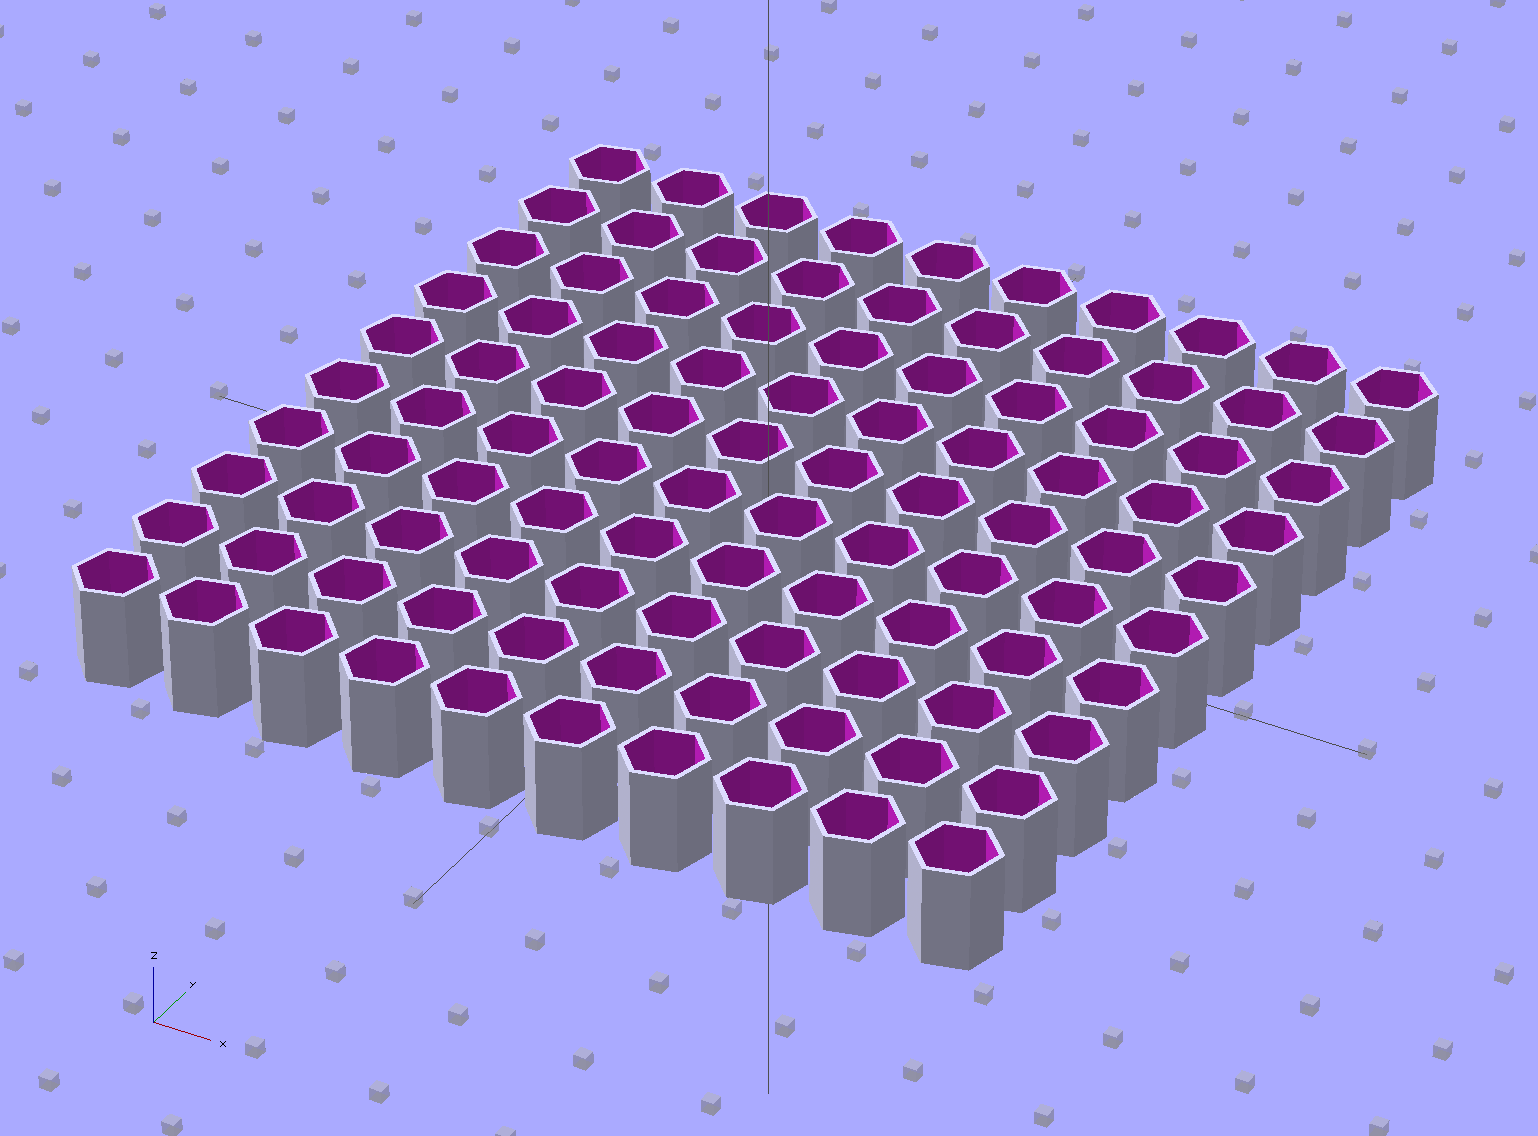
I tweaked the OpenSCAD source to build a 10×10 array:
Quilting Pin Cap – 10×10 array
But it turns out that a 5×5 array of caps, duplicated four times, works out better:
Quilting Pin Cap – 5×5 array
Slic3r takes far longer to process the larger array than to make four copies of the smaller array.
Half an hour later, they’re ready for silicone fill. In retrospect, natural PLA wasn’t a good choice for this job: there’s no way (for me) to take a picture of translucent silicone in crystalline PLA atop waxed paper on a white cutting board under fluorescent light…
On the upside, however, you can see exactly how far the pin goes into the cap:
We still haven’t exhausted the never-sufficiently-to-be-damned Samsung Quiet Jet vacuum’s bag supply, so when a wheel fell off the floor brush again, I had to come up with a better fix than a twist of wire. Obviously, those delicate little retaining latches need more persuasion.
Capture the wheel in the Sherline’s 4-jaw chuck on the rotary table and drill four holes just below the end of the latches:
Samsung wheel – drilling
The wheel is 20 mm thick. The holes lie 9 mm back from the open end of the wheel or 11 mm from the closed end at the chuck face. Drill maybe 6 mm down; I did it by eye, jogging slowly downward until the tip of the drill touched the latch.
Tap the holes and install four 8-32 setscrews:
Samsung wheel – setscrews installed
I don’t have a bottoming tap, but an ordinary plug tap was Good Enough; the incomplete threads should hold the setscrews in place.
Reinstall the wheel, tighten the setscrews, and wrap festive silicone tape around the whole affair:
Samsung floor brush – wheel installed
I heroically resisted the temptation to pry the other wheel off for a preemptive repair …