The Smell of Molten Projects in the Morning

Ed Nisley's Blog: Shop notes, electronics, firmware, machinery, 3D printing, laser cuttery, and curiosities. Contents: 100% human thinking, 0% AI slop.

Category: Home Ec

Things around the home & hearth

  • Pencil Guides for Ruler Quilting

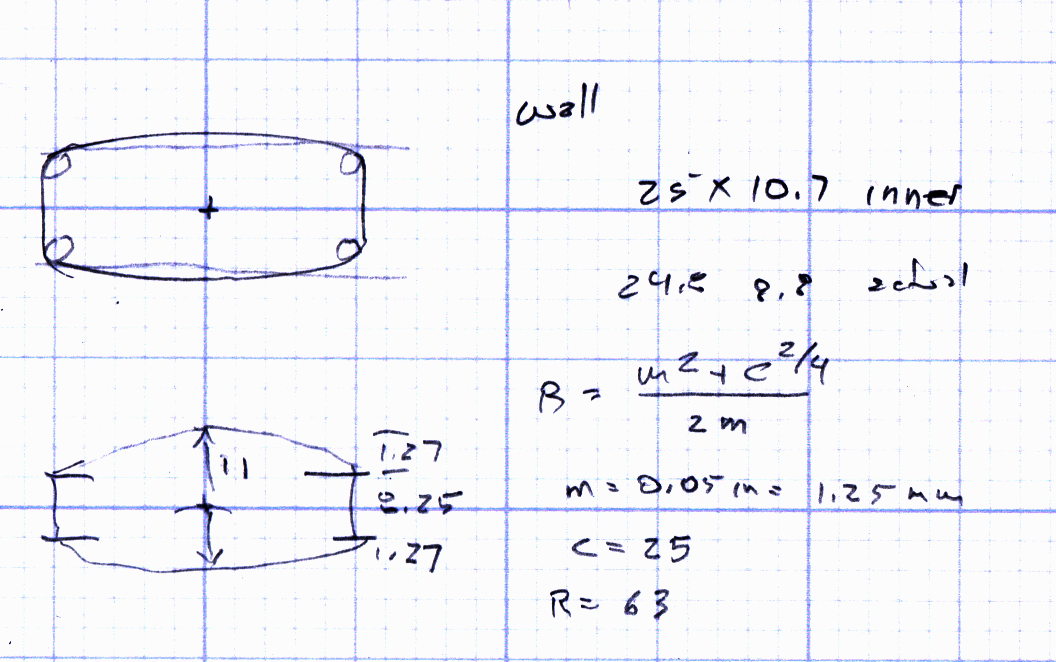
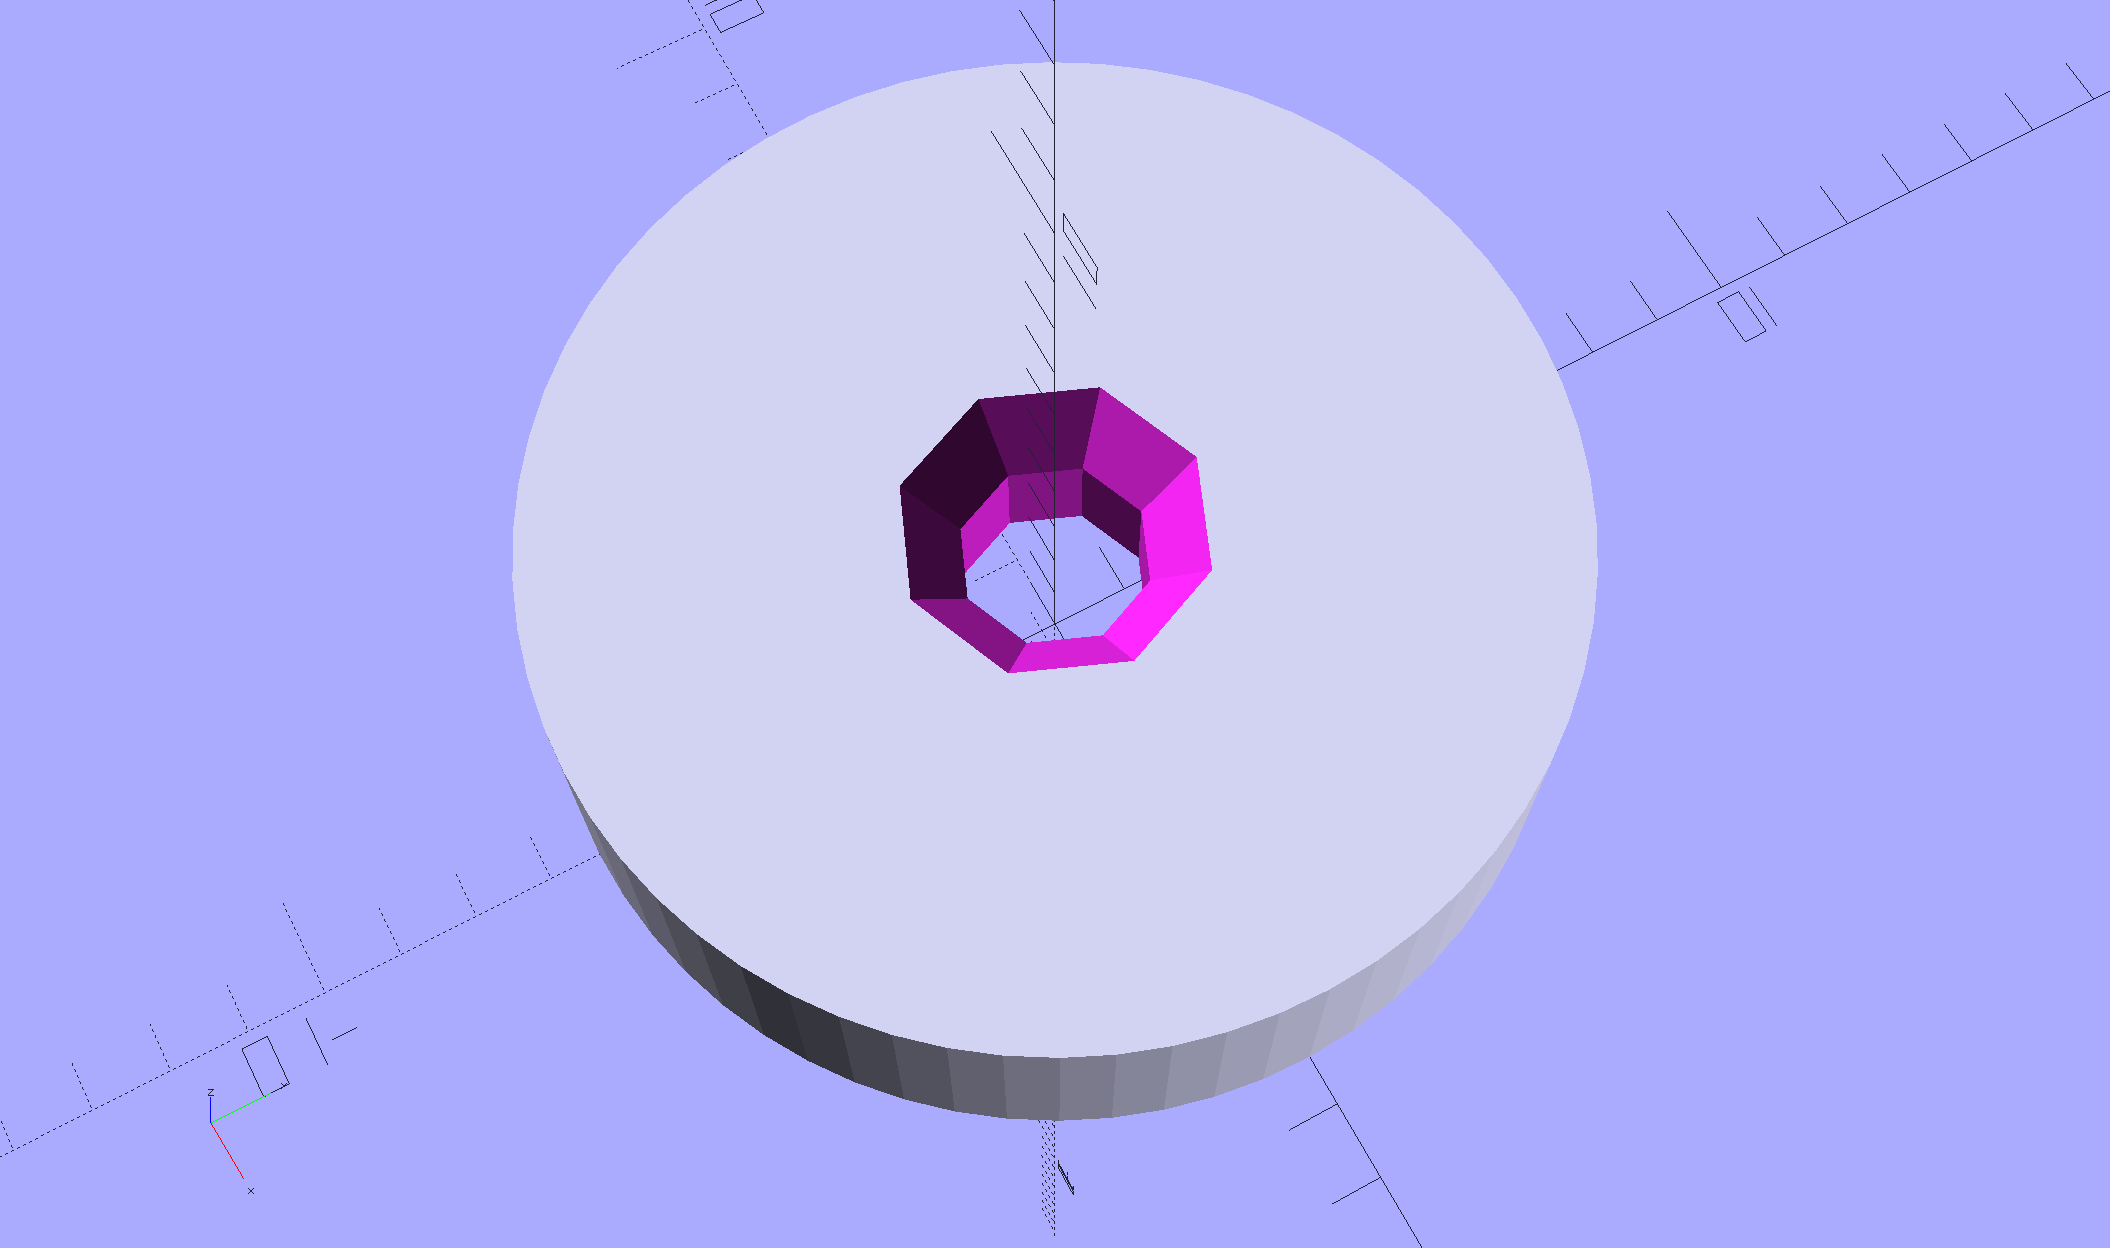
    Mary has been doing Ruler Quilting and wanted a pencil guide (similar to the machine’s ruler foot) to let her sketch layouts before committing stitches to fabric. The general idea is to offset the pencil by 1/4 inch from the edge of the ruler:

    Ruler Adapter - solid model
    Ruler Adapter – solid model

    That was easy.

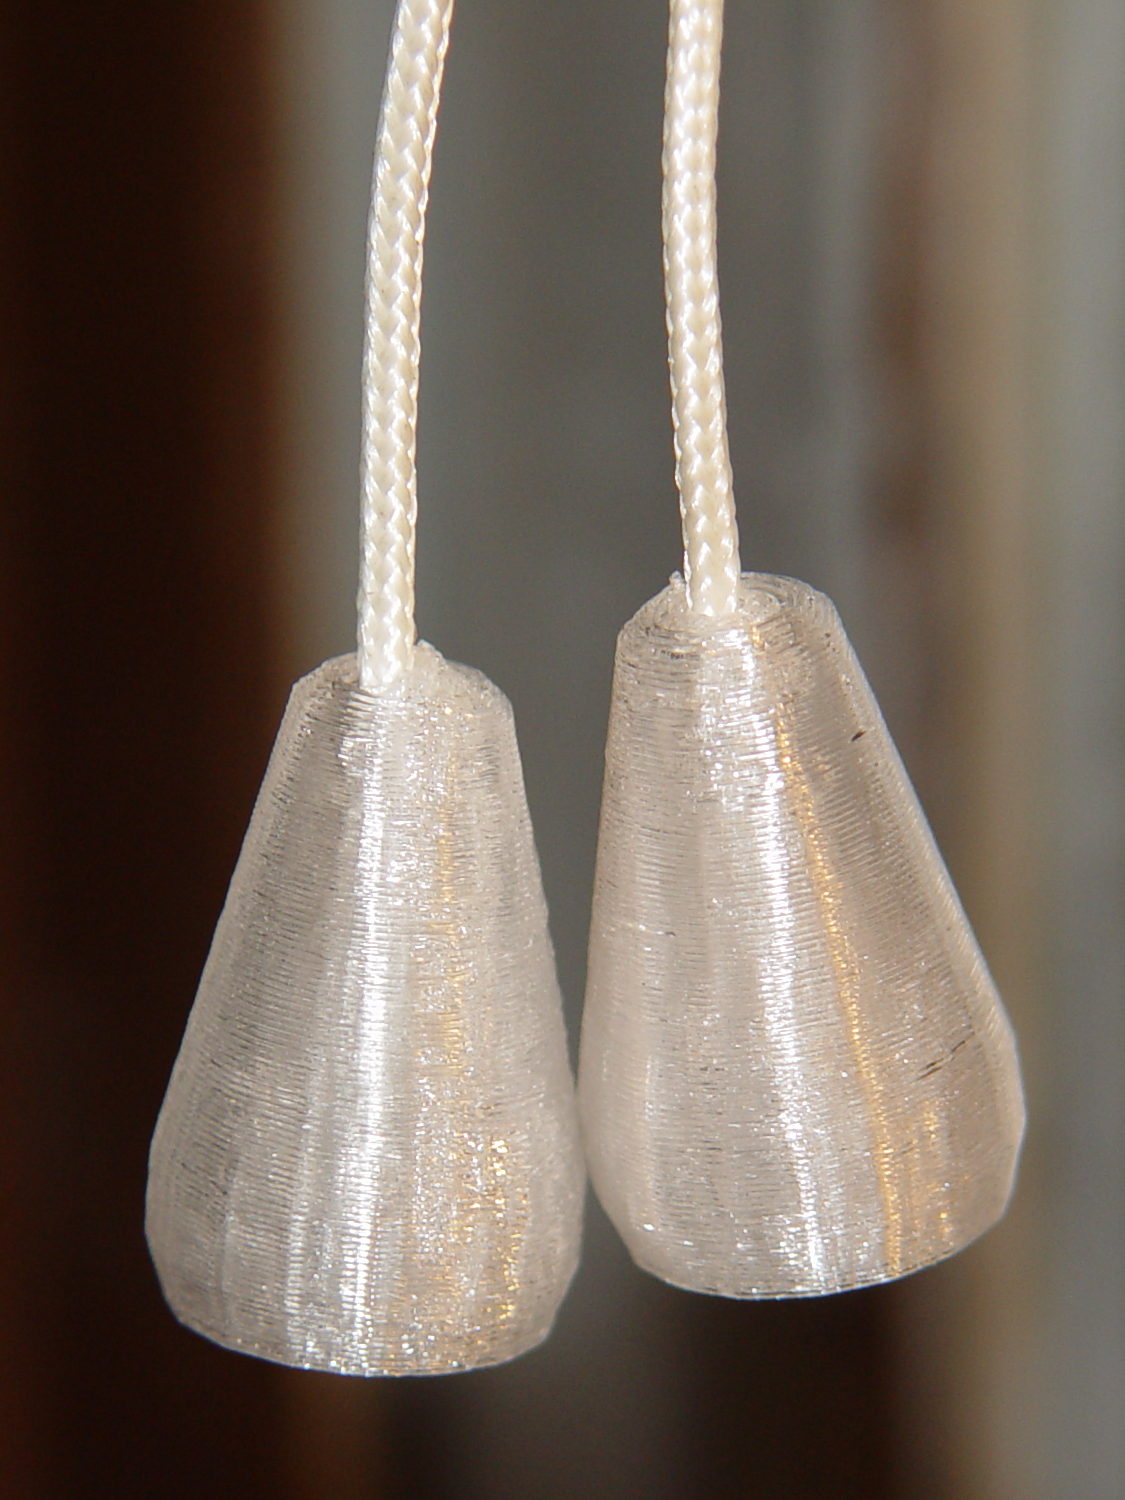
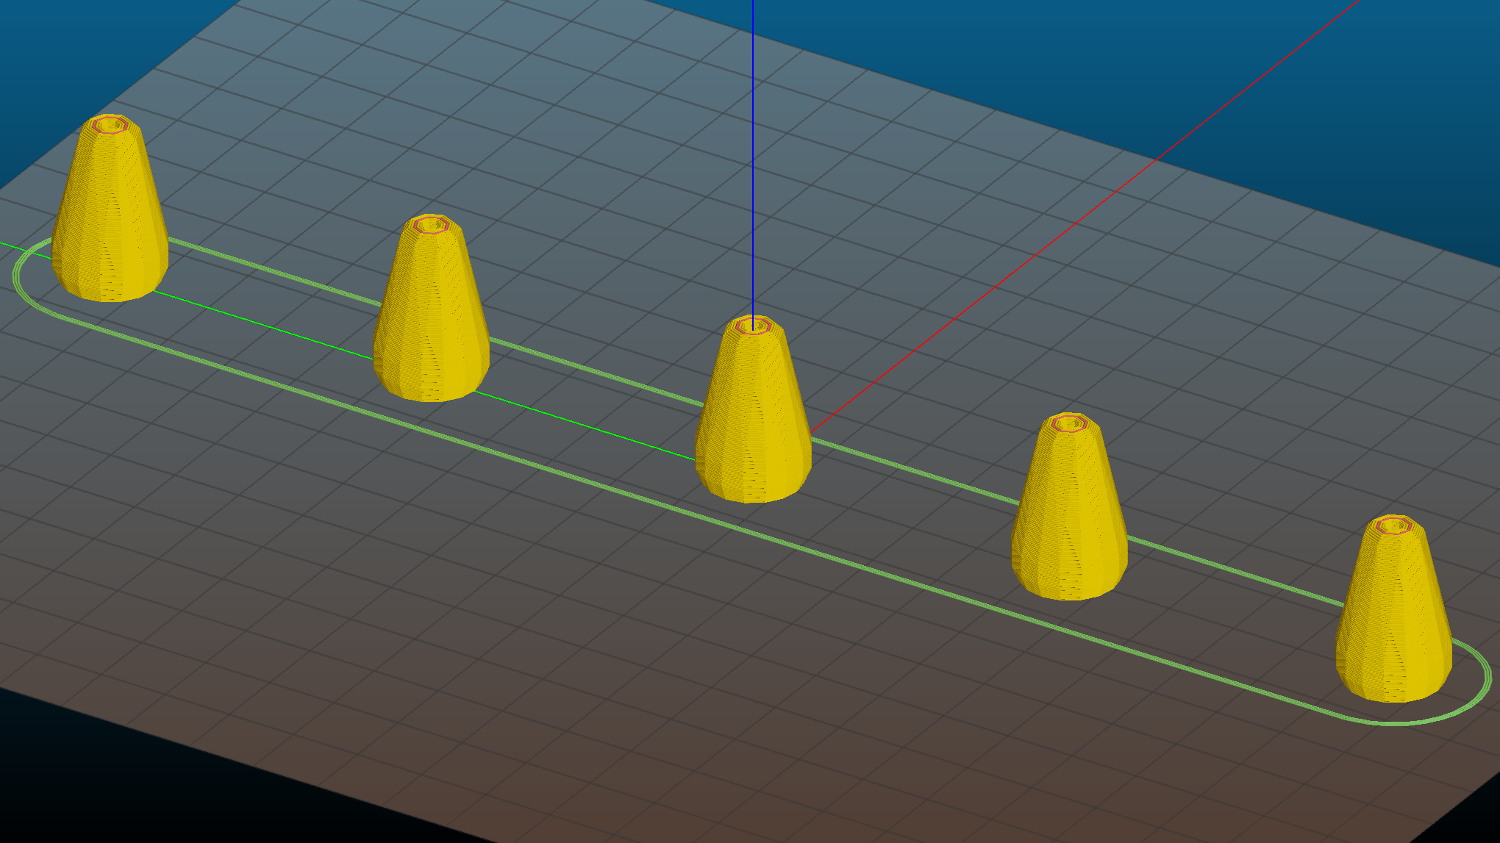
    Print three to provide a bit of cooling time and let her pass ’em around at her next quilting bee:

    Ruler Adapter - Slic3r preview
    Ruler Adapter – Slic3r preview

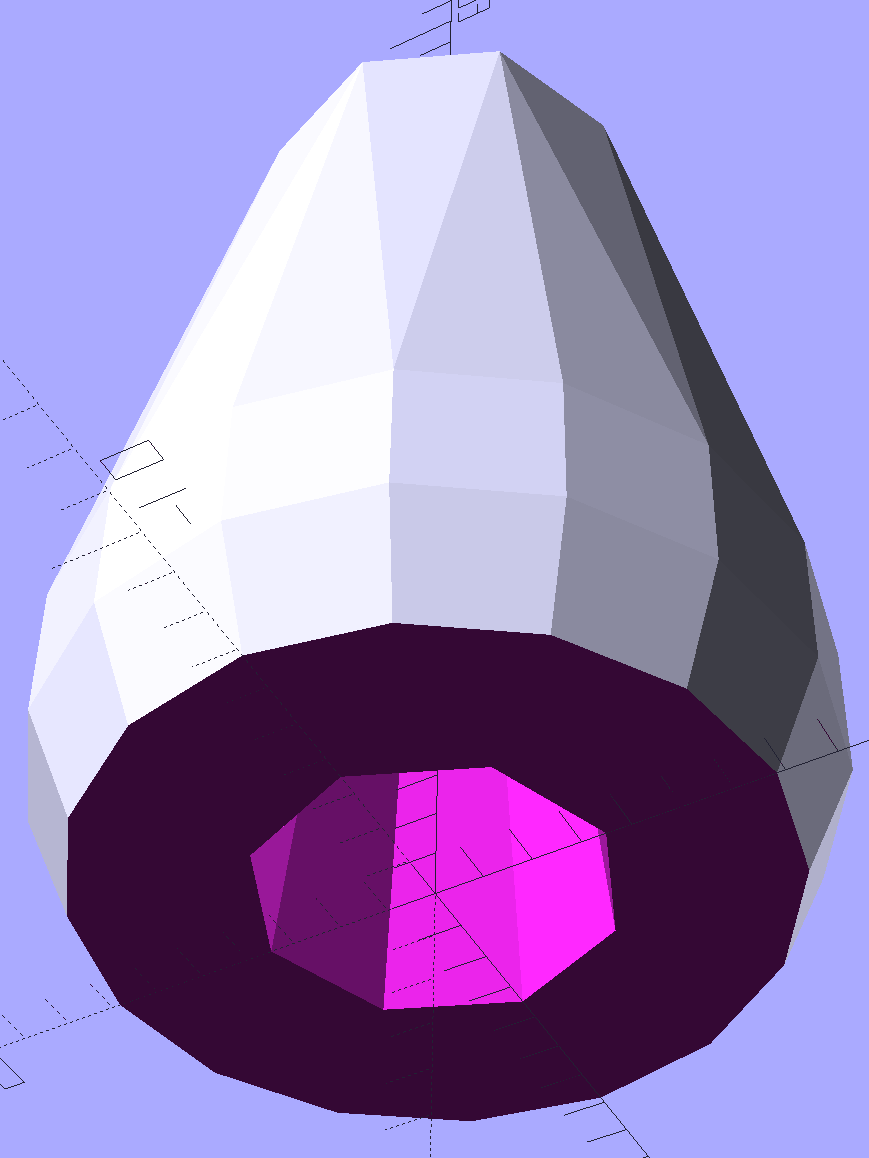
    Her favorite doodling pencil shoves a 0.9 mm lead through a 2 mm ferrule, so ream the center hole with a #44 drill (86 mil = 2.1 mm) to suit:

    Ruler quilting pencil guides
    Ruler quilting pencil guides

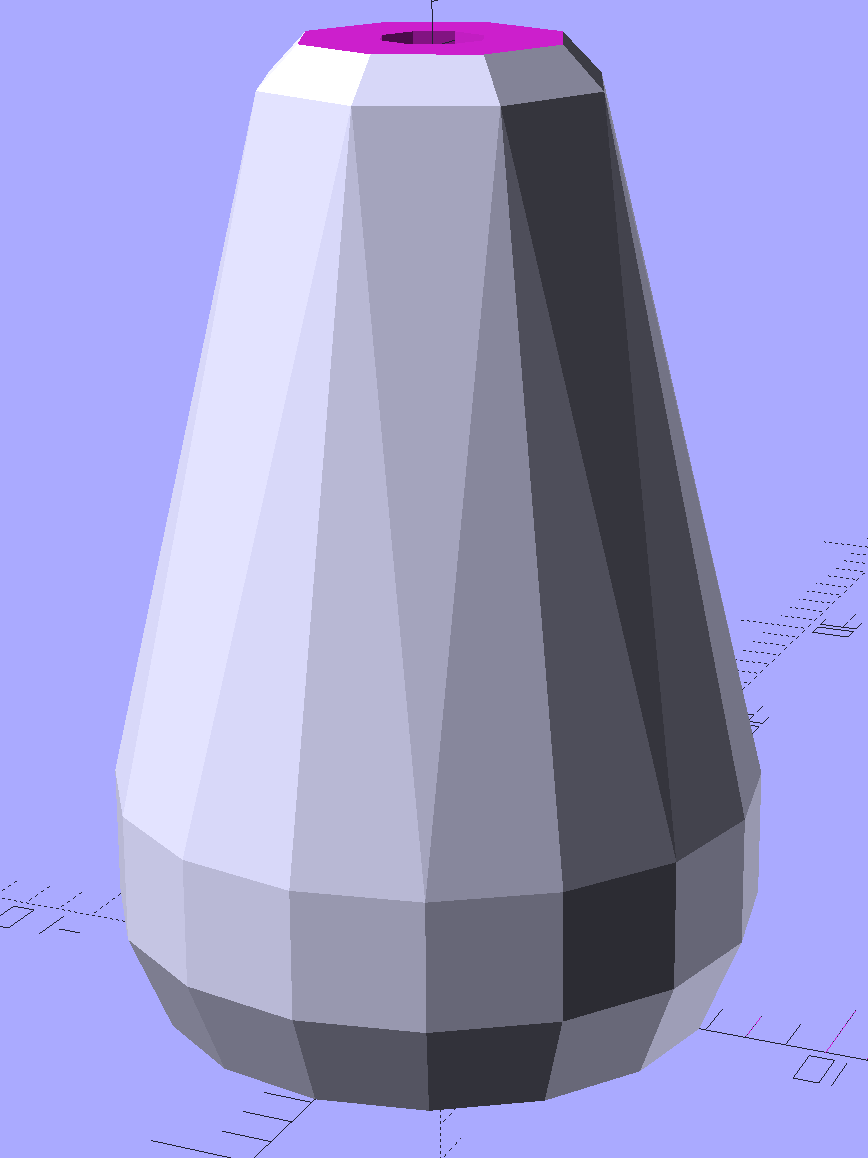
    The outer perimeters have 64 facets, an unusually high number for my models, so they’re nice & smooth on the ruler. Even though I didn’t build them sequentially, they had zero perimeter zits and the OD came out 0.500 inch on the dot.

    The chamfers guide the pencil point into the hole and provide a bit of relief for the pencil’s snout.

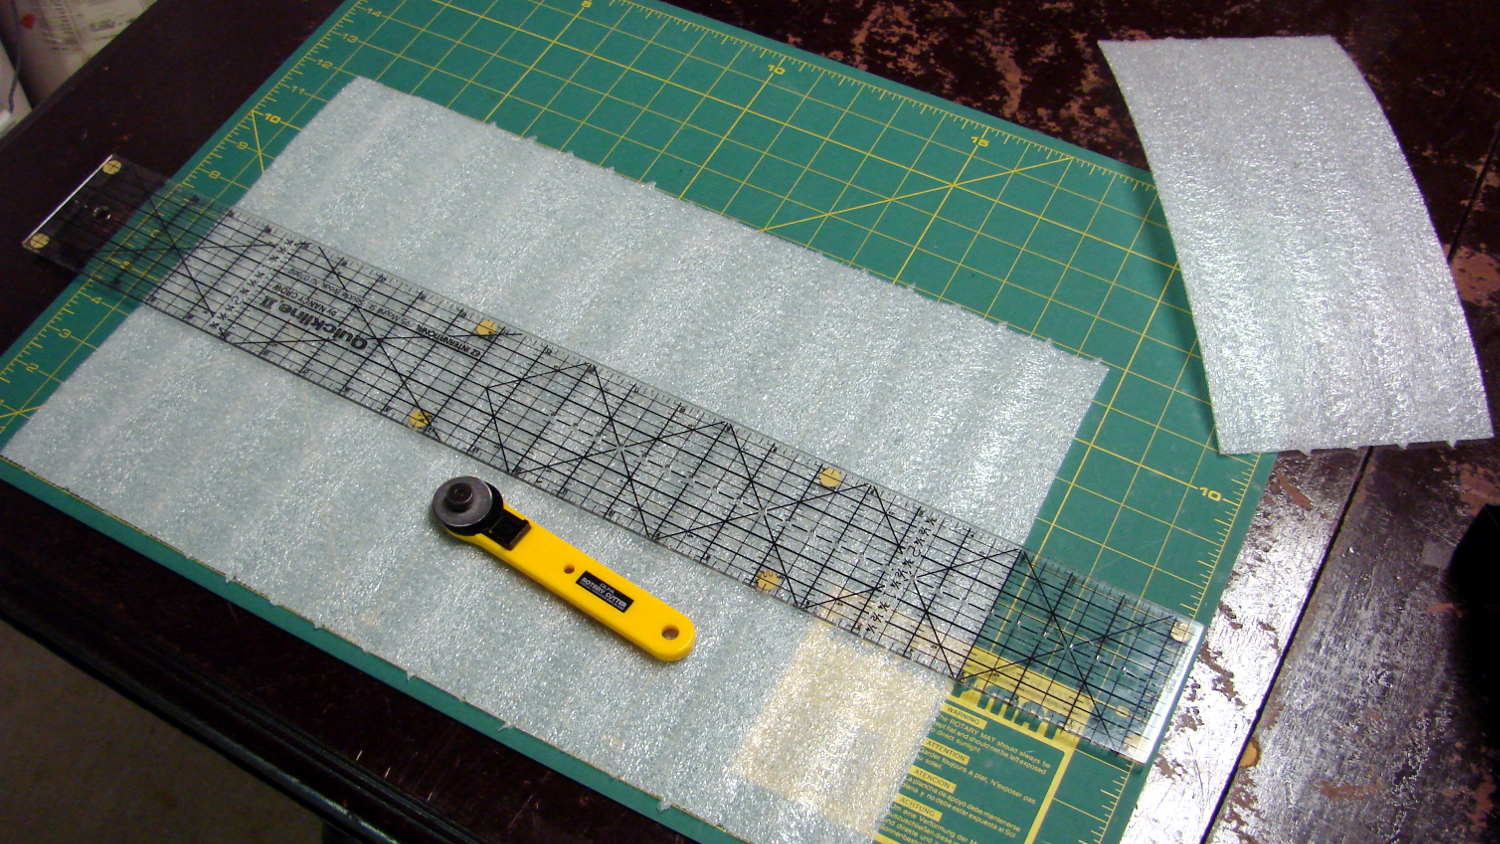
    If I had a laser cutter, I could make special rulers for her, too …

    The OpenSCAD source code as a GitHub Gist:

    // Quilting Ruler Adapters
    // Ed Nisley KE4ZNU October 2016
    //- Extrusion parameters must match reality!
    ThreadThick = 0.25;
    ThreadWidth = 0.40;
    HoleWindage = 0.2;
    Protrusion = 0.1; // make holes end cleanly
    inch = 25.4;
    function IntegerMultiple(Size,Unit) = Unit * ceil(Size / Unit);
    //———-
    // Dimensions
    ID = 0;
    OD = 1;
    LENGTH = 2;
    Offset = 0.25 * inch;
    Template = [2.0,2*Offset,3.0];
    NumSides = 16*4;
    HoleSides = 8;
    //———————-
    // Useful routines
    module PolyCyl(Dia,Height,ForceSides=0) { // based on nophead's polyholes
    Sides = (ForceSides != 0) ? ForceSides : (ceil(Dia) + 2);
    FixDia = Dia / cos(180/Sides);
    cylinder(d=(FixDia + HoleWindage),h=Height,$fn=Sides);
    }
    //———-
    // Build it
    difference() {
    cylinder(d=Template[OD],h=Template[LENGTH],$fn=NumSides);
    translate([0,0,-Template[LENGTH]])
    PolyCyl(Template[ID],3*Template[LENGTH],HoleSides);
    translate([0,0,-Protrusion])
    cylinder(d1=2*Template[ID],d2=Template[ID],h=Template[LENGTH]/3 + Protrusion,$fn=HoleSides);
    translate([0,0,Template[LENGTH] + Protrusion])
    mirror([0,0,1])
    cylinder(d1=2*Template[ID],d2=Template[ID],h=Template[LENGTH]/3 + Protrusion,$fn=HoleSides);
    }
  • Miniblind Bottom Rail Caps

    A few days after installing the replacement cord caps, I bumped the bottom rail of the miniblind while opening the window and had one endcap disintegrate; apparently window hardware isn’t hardened against prolonged UV exposure. Who knew?

    Fortunately, I can fix that:

    Miniblind bottom rail caps
    Miniblind bottom rail caps

    Making the walls three threads wide provides enough room for a single solid infill thread:

    Miniblind Endcaps - Slic3r Preview
    Miniblind Endcaps – Slic3r Preview

    The exterior shape comes from a hull wrapped around six circles: four to define the corner radius and a pair that bump the center out by the calculated chord height. The interior shape comes from a pair of chord-radius polygonal circles (they only have three facets across the length of the inside wall) that fit the bottom rail almost perfectly.

    As always, natural PETG has a crystalline, slightly transparent, appearance:

    Miniblind bottom rail cap installed
    Miniblind bottom rail cap installed

    I should spring for some opaque white filament, but that way lies madness; I might start caring what these things look like.

    You can buy entire miniblinds for a few bucks a pop, but the last time we did that, they were different than the ones we had before. That wouldn’t matter if the standard miniblind mounting brackets fit our 1955 Anderson windows, but noooo they don’t: the custom adapters I machined for the first miniblind brackets, of course, didn’t fit the new miniblinds.

    Now I can just snap the replacement endcaps (and cord pulls) in place, declare victory, and move on.

    The OpenSCAD source code as a GitHub Gist:

    // Cap for miniblind cord and bottom rail endcaps
    // Ed Nisley KE4ZNU – September 2016
    Layout = "BaseEndCap"; // CordCap BaseEndCap
    //- Extrusion parameters – must match reality!
    ThreadThick = 0.25;
    ThreadWidth = 0.40;
    Protrusion = 0.1;
    HoleWindage = 0.2;
    //——
    // Dimensions
    OD1 = 0;
    OD2 = 1;
    LENGTH = 2;
    //———————-
    //- Build it
    if (Layout == "CordCap") {
    Cap = [9.0,16.0,25.0];
    Cord = [2.5,7.0,Cap[LENGTH] – 5];
    NumSides = 8;
    difference() {
    hull() { // overall shape
    translate([0,0,Cap[LENGTH] – Cap[OD1]/2])
    sphere(d=Cap[OD1],$fn=NumSides);
    translate([0,0,0.5*Cap[OD2]/2])
    sphere(d=Cap[OD2],$fn=2*NumSides); // round the bottom just a bit
    }
    translate([0,0,-Cap[LENGTH]/2]) // trim bottom
    cube([2*Cap[OD2],2*Cap[OD2],Cap[LENGTH]],center=true);
    translate([0,0,Cap[LENGTH] + 0.8*Cap[OD1]]) // trim top (arbitrarily)
    cube([2*Cap[OD1],2*Cap[OD1],2*Cap[OD1]],center=true);
    translate([0,0,-Protrusion])
    cylinder(d=Cord[OD1],h=(Cap[LENGTH] + 2*Protrusion),$fn=NumSides);
    translate([0,0,-Protrusion])
    cylinder(d1=Cord[OD2],d2=Cord[OD1],h=(Cord[LENGTH] + Protrusion),$fn=NumSides);
    }
    }
    if (Layout == "BaseEndCap") {
    Base = [25.2,9.0,12.2]; // base outside dimensions
    Edge = 8.0; // size of sqare ends
    CornerRadius = 0.75;
    Wall = 3; // wall thickness in threads
    ChordHeight = (Base[1] – Edge) / 2;
    ChordRadius = (pow(ChordHeight,2) + pow(Base[0],2)/4) / (2*ChordHeight);
    NumSides = 4*4;
    echo(str("Chord height: ",ChordHeight," radius: ",ChordRadius));
    difference() {
    linear_extrude(height=Base[2],convexity=2) {
    hull() {
    for (i=[-1,1], j=[-1,1])
    translate([i*(Base[0]/2 – CornerRadius + Wall*ThreadWidth),j*(Base[1]/2 – CornerRadius + Wall*ThreadWidth)])
    circle(r=CornerRadius,$fn=4*4,center=true);
    for (j=[-1,1])
    translate([0,j*(ChordHeight + Base[1]/2 – CornerRadius + Wall*ThreadWidth)])
    rotate(180/(2*4))
    circle(r=CornerRadius,$fn=2*4,center=true);
    }
    }
    translate([0,0,3*ThreadThick])
    linear_extrude(height=Base[2],convexity=2)
    intersection() {
    intersection_for (j=[-1,1])
    translate([0,j*(ChordHeight + Base[1]/2 – ChordRadius)])
    circle(r=ChordRadius,$fn=32*4,center=true);
    square([Base[0],2*Base[1]],center=true);
    }
    }
    }

    The original doodle with some dimensions that didn’t withstand careful measurements:

    Miniblind Endcap dimension doodle
    Miniblind Endcap dimension doodle
  • Cast Iron Pan Seasoning

    The motivation for stripping our cast iron pans:

    Wagner cast iron skillet - before - top
    Wagner cast iron skillet – before – top

    The bottom, of course, carried a heavier layer of crust:

    Wagner cast iron skillet - before - bottom
    Wagner cast iron skillet – before – bottom

    The wet areas came from the usual after-breakfast washing.

    Looking down into the electrolytic stripping bath, with bubbles forming on exposed metal areas around the crust on the bottom of the pan:

    Wagner cast iron skillet - in stripping bath
    Wagner cast iron skillet – in stripping bath

    After a day of electrolysis, all the crust was gone. Low labor, low danger, no fuss, not much muss.

    Given three stripped pans, the seasoning process involved wiping them with flaxseed oil, baking at 500 °F for an hour, cooling for two hours, and repeating. Six iterations occupied a long day, uncomfortably warmed the kitchen during a long hot summer day, and turned out to be just fussy enough to fit around some short-attention-span projects.

    Fast forward one day.

    The outside of the seasoned pans looks lovely:

    Wagner cast iron skillet - after - bottom
    Wagner cast iron skillet – after – bottom

    I’d have been hard-pressed to pick out the “Wagner Ware” before stripping the pan.

    The inside of all three pans had a peculiar mottled appearance:

    Wagner cast iron skillet - after - top
    Wagner cast iron skillet – after – top

    The medium pan:

    Medium cast iron pan - after - top
    Medium cast iron pan – after – top

    The small pan:

    Small cast iron pan - after - top
    Small cast iron pan – after – top

    The dark spots might suggest I used too much oil and it puddled / collected / whatever while baking, except that I’d slathered the oil on using a scrap from a cotton towel (actually, many scraps, one per iteration), then wiped it off with more towel scraps before baking the pans.

    Protip: You’ll eventually have a pile of cotton rags soaked in a drying oil similar to linseed oil. Woodworkers will tell you to wet oily rags with water before sealing them in a plastic bag, because the “drying” process is exothermic: oil-soaked rags can get hot enough for spontaneous combustion. Make it so.

    Breakfast proceeded pretty much as usual and the giant omelet (5 eggs, lots of chopped chard, two finely chopped bacon rashers, cheddar cheese, plenty of oil, stuff like that) seemed to stick somewhat less than usual: it’s not a Teflon-coated pan, but worked pretty well.

    I did the usual post-breakfast KP, which involves washing the pan with ordinary dish soap, scuffing the recalcitrant bits, and dropping the pan in the dish drainer. I don’t scour the pans, but I don’t treat them with fawning obeisance, either; they’re utensils, not sacred objects.

    Just before lunch, this appeared:

    Wagner cast iron skillet - washed - top
    Wagner cast iron skillet – washed – top

    The bottom sported similar rust spots:

    Wagner cast iron skillet - washed - bottom
    Wagner cast iron skillet – washed – bottom

    So that suggests I didn’t apply enough oil. Or scrubbed too hard. Or did something utterly wrong.

    Haven’t a clue about what happened. If I didn’t follow the seasoning process, I don’t know what I’d change. Ditto for washing up; it’s not like we haven’t been using the pan for decades.

    After supper, I washed & dried the pan, slathered on a generous oil coating, and let it sit, all in the hope the oil eventually forms a good crusty layer.

    By and large, the pan works better than it did before and the seasoning not nearly as well as I expected.

  • Taylor Kitchen Thermometer Dial Cover

    Fortunately, it didn’t fall off into the roasting pan:

    Taylor meat thermometer - cover failure
    Taylor meat thermometer – cover failure

    The lens slides right out of that nicely curved and crimped housing, the rim ID of which should be slightly smaller than the lens OD. But it ain’t and I definitely can’t crimp it any further.

    Three small dabs of clear epoxy and it should be good forever more…

    It’s a simpler replacement for the digital thermometer, when continuous monitoring isn’t needed. I thought it’d be more durable, but … no.

  • Cast Iron Pan Electrolysis Stripping

    Our cast iron pans need seasoning, so I decided to start with full-metal-jacket electrolysis stripping, rather than soaking them in oven cleaner / smogging the kitchen with the self-cleaning oven / actually doing any work. The electrolysis setup involves the big battery charger and a bucket of sodium carbonate solution:

    Cast iron pan electrolysis - setup
    Cast iron pan electrolysis – setup

    Although the charger has a 40 A capacity, the small pan bubbles along merrily at a self-limited 7 A:

    Cast iron pan electrolysis - bucket
    Cast iron pan electrolysis – bucket

    The anode is a big sheet of steel that was once an EMI shield in a big PC case. The side facing the pan corroded very quickly, but the outside remains in good shape and I think it’ll suffice for the medium and large pans.

    After two hours, only the crustiest bits of the crust remained:

    Cast iron pan electrolysis - 2 hours
    Cast iron pan electrolysis – 2 hours

    Those flakes fell right off after a few pokes from my demolition scraper; definite anticlimax, that.

    Another hour in the tank cleaned the handle and removed a few other spots; it now sports a layer of flash rust that’ll require another pass after I strip the other two pans…

  • Miniblind Cord Caps

    After smashing one of the cord pulls between the sash and the frame:

    Miniblind cord caps - installed
    Miniblind cord caps – installed

    The glittery PETG looks surprisingly good in the sunlight that will eventually change it into dullness. The black flecks come from optical effects in the plastic, not the usual burned PETG snot.

    The solid model is basically a hull around two “spheres”, truncated on top & bottom:

    Miniblind cord cap - solid model
    Miniblind cord cap – solid model

    The interior has a taper to accommodate the knot, but they’re chunky little gadgets:

    Miniblind cord cap - solid model - bottom
    Miniblind cord cap – solid model – bottom

    I thought the facets came out nicely, even if they’re mostly invisible in the picture.

    Each pull should build separately to improve the surface finish, so I arranged five copies in sequence from front to back:

    Miniblind cord cap - 5 sequential - Slic3r preview
    Miniblind cord cap – 5 sequential – Slic3r preview

    If you’re using an M2, the fans hanging off the front of the filament drive housing might come a bit too close for comfort, so rotate ’em upward and out of the way.

    If you remove the interior features and flip ’em upside down, they’d work well in Spiral Vase mode. You’d have to manually drill the top hole, though, because a hole through the model produces two shells.

    The OpenSCAD source code as a GitHub Gist:

    // Cap for miniblind cord
    // Ed Nisley KE4ZNU – August 2016
    //- Extrusion parameters – must match reality!
    ThreadThick = 0.25;
    ThreadWidth = 0.40;
    Protrusion = 0.1;
    HoleWindage = 0.2;
    //——
    // Dimensions
    OD1 = 0;
    OD2 = 1;
    LENGTH = 2;
    Cap = [9.0,16.0,25.0];
    Cord = [2.5,7.0,Cap[LENGTH] – 5];
    NumSides = 8;
    //———————-
    //- Build it
    difference() {
    hull() { // overall shape
    translate([0,0,Cap[LENGTH] – Cap[OD1]/2])
    sphere(d=Cap[OD1],$fn=NumSides);
    translate([0,0,0.5*Cap[OD2]/2])
    sphere(d=Cap[OD2],$fn=2*NumSides); // round the bottom just a bit
    }
    translate([0,0,-Cap[LENGTH]/2]) // trim bottom
    cube([2*Cap[OD2],2*Cap[OD2],Cap[LENGTH]],center=true);
    translate([0,0,Cap[LENGTH] + 0.8*Cap[OD1]]) // trim top (arbitrarily)
    cube([2*Cap[OD1],2*Cap[OD1],2*Cap[OD1]],center=true);
    translate([0,0,-Protrusion])
    cylinder(d=Cord[OD1],h=(Cap[LENGTH] + 2*Protrusion),$fn=NumSides);
    translate([0,0,-Protrusion])
    cylinder(d1=Cord[OD2],d2=Cord[OD1],h=(Cord[LENGTH] + Protrusion),$fn=NumSides);
    }
  • Tool Drawers: Cheap Foam Liner

    You can get fancy closed-cell foam sheets for the bottom of your tool chest drawers and tote, but it seems awfully spendy, even with Harbor Freight quality plastic, for something that you must cut-to-fit. The drawers are just under 22×11 and 22×17 inches, so a 18×72 inch roll would line maybe three drawers; call it three bucks per drawer and, with nearly three dozen drawers to line, I’d rather drop a hundred bucks on tools.

    Rather than do that, the usual eBay supplier provided 150 feet of 1/8 inch x 24 inch white polyethylene closed-cell foam sheet for $27 delivered:

    Polyethylene foam sheet - roll
    Polyethylene foam sheet – roll

    It’s intended for packaging small items for shipping, but I’ll never tell.

    I mooched Mary’s 2×3 foot rotary cutting mat (this reenactment shows the awkwardly sized 17×23 inch mat), her longest quilting rulers, and dullest rotary blades:

    Rotary cutting foam sheets
    Rotary cutting foam sheets

    After a few mis-steps, I got the hang of it:

    Foam-lined tool tray
    Foam-lined tool tray

    It’s not as contrast-y as black foam, but I can still find the tools:

    Foam-lined tool drawer
    Foam-lined tool drawer

    And I have plenty of foam left over for shipping small things, if I ever do any of that…