Ed Nisley's Blog: Shop notes, electronics, firmware, machinery, 3D printing, laser cuttery, and curiosities. Contents: 100% human thinking, 0% AI slop.
The Pixel’s camera shows a black stripe across both the live preview and the final image:
Pixel XL Camera – shutter stripe
That’s under the high-intensity LED lamp on my desk, which must have a high-frequency flicker. I’m amazed the camera remains in absolutely stable sync with the flicker for as long as I’m willing to aim it.
The stripe covers only the moth and greenery, not the LCD monitor in the background, so it’s caused by the overhead lamp, not something internal to the Pixel or its camera.
A closer look shows shading on either side of the deepest black (clicky for more dots):
Pixel XL Camera – shutter stripe – detail
The stripe location and width differ based on the image zoom level, although in no predictable way:
Pixel XL Camera – shutter stripe – 2
The Pixel camera definitely doesn’t have optical zoom, so it’s surely related to the scaling applied to convert the physical sensor array into the final image. Even though all images have 4048×3036 pixels (or the other way around, at least for these portrait-layout pix), zoomed images get made-up (pronounced “interpolated”) data in their pixels.
Not a problem under any other illumination I’ve encountered so far, so it’s likely something to do with this specific and relatively old LED lamp.
Replacing the 22 pF series capacitor with a variable cap went smoothly after I got over having to rip-and-replace the adjacent socket and header, too:
LF Crystal Tester – variable CX
The circuit remains the same, plus a test point to simplify measuring the actual capacitance:
Test Fixture – variable CX
I didn’t add a jumper to disconnect the crystal fixture, because (I think) it would add too much uncontrolled stray capacitance: removing the header would disconnect the socket / header wires.
The little red cap adjusts from (nominally) 3 pF to 28 pF over half a turn, without a stop. The rotor does have a marked side, but basically you’re supposed to tune for best picture and leave it at that.
The AADE L/C meter works fine, but in the low pF range everything affects the reading. The only way to measure the actual capacitance seems to be:
Clip one lead to the top of the 24 Ω terminating resistor
Hold the other within a millimeter of the test point pin
Zero the meter, note any residual offset
Touch clip lead to test pin
Note reading, mentally subtract residual offset
The as-installed range spans 6.5 pF to 28 pF. I think I can measure it to within ±0.05 pF, with a considerable dependence on maintaining the same pressure on the clip lead.
I suppose if you were doing this for real, you’d throw another Teledyne relay at the problem.
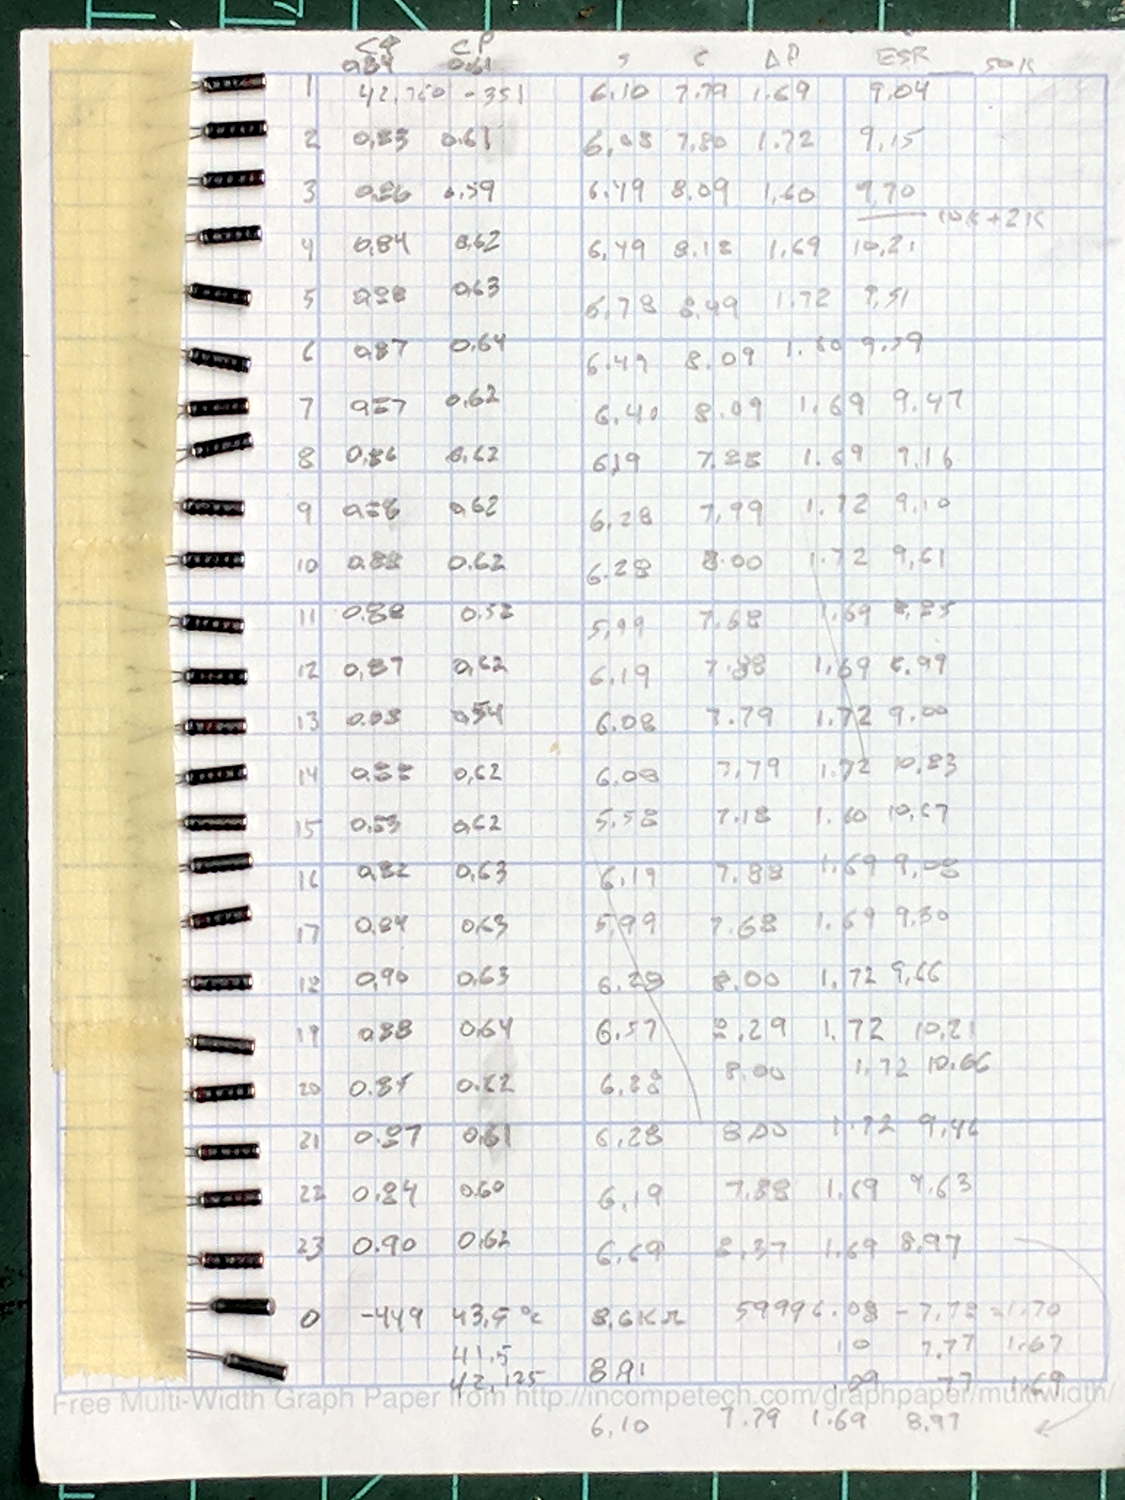
The second batch from the same eBay source arrived a few months later and I finally got around to measuring them:
60 kHz TF26 resonators – Batch 2 data
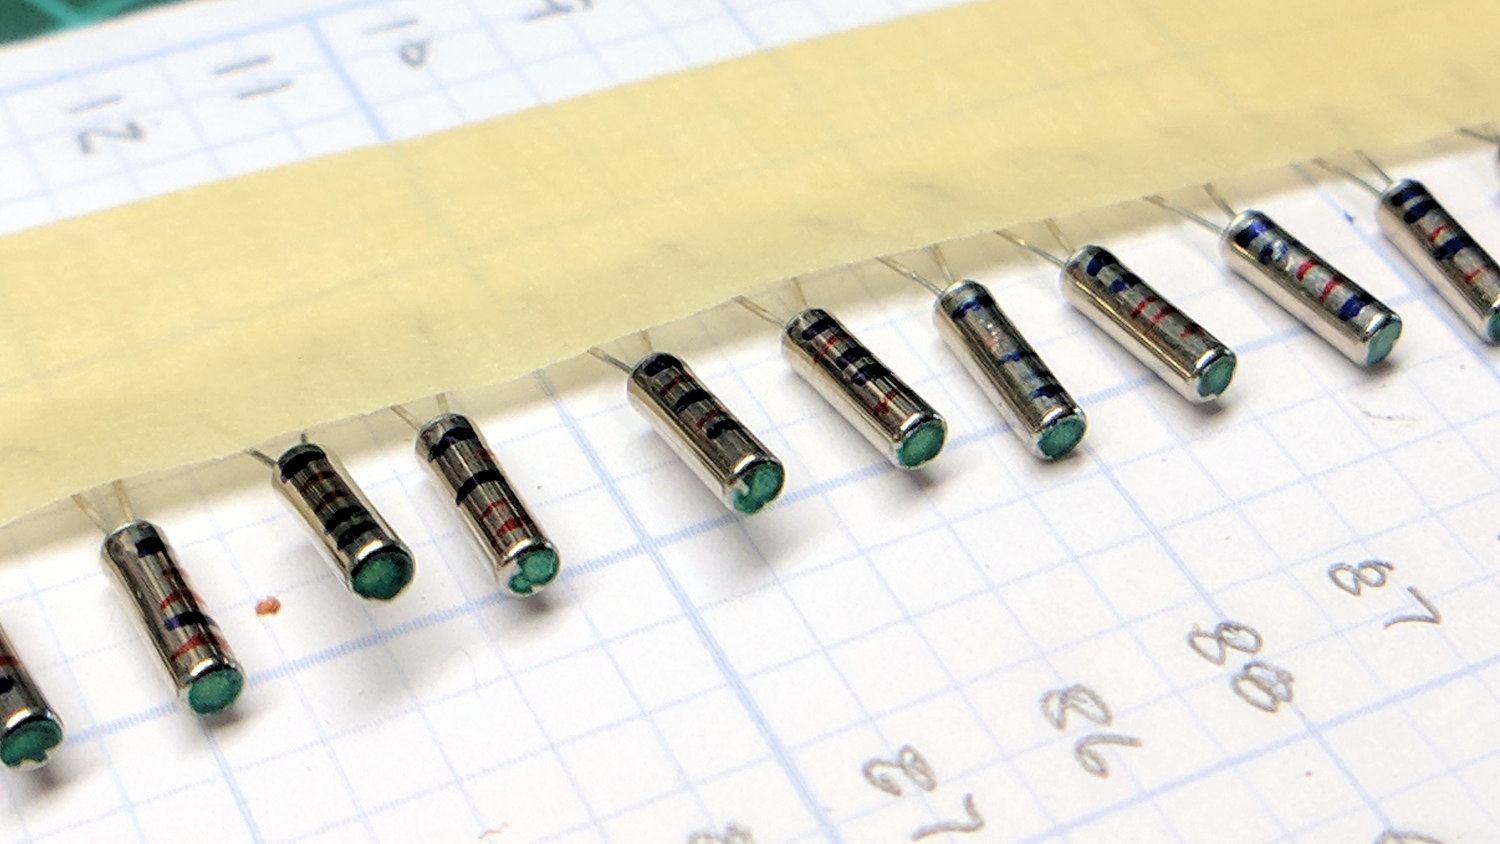
A dot of green Sharpie on the AT26 cans identifies the second batch:
60 kHz TF26 resonators – Batch 2 marking
The alert reader will notice an un-measured 25th resonator at the bottom of the first batch. I dropped one from the second batch under the Electronics Workbench, found it, then also found its long-missing brother; now I have a genuine it’s-never-been-used resonator, just in case the need arises.
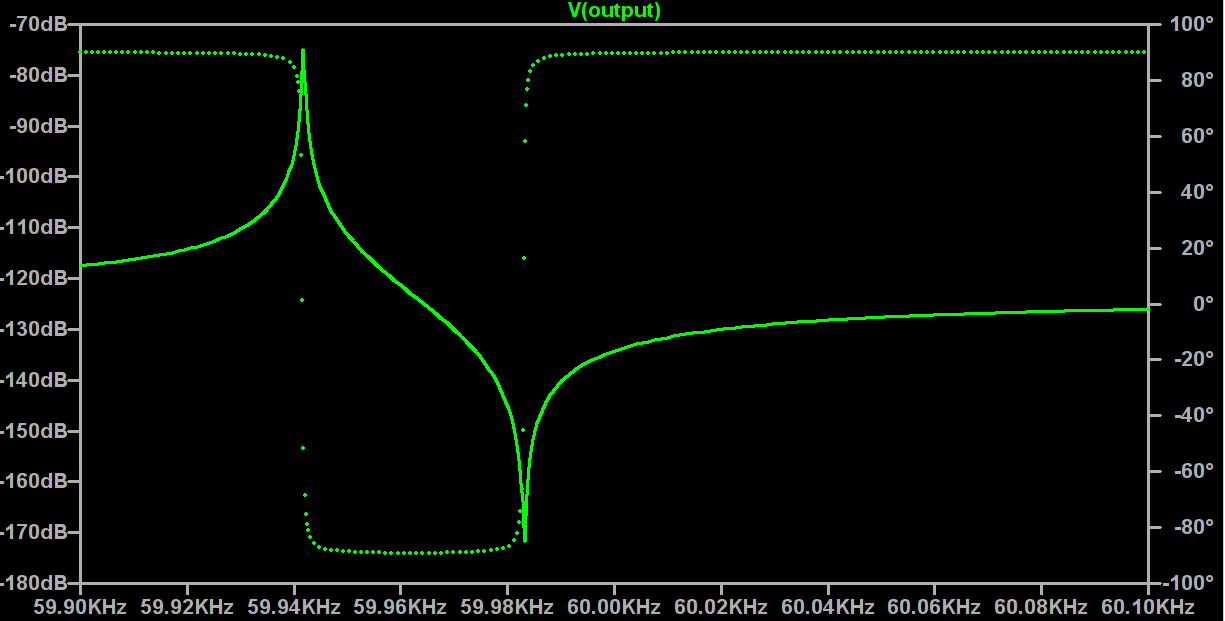
A quick-and-dirty simulation shows the series and parallel resonant peaks come out close, but not dead on, the actual measurements:
Simulation – 60 kHz resonator
The model obviously doesn’t exactly match reality, which isn’t too surprising. However, I don’t understand something about tuning fork resonators, because the parallel resonance shouldn’t shift upward with the series resonant peak when the circuit gains a 24 pF series capacitance:
Resonator 0 Spectrum
Suffice it to say that doesn’t happen with the simulation.
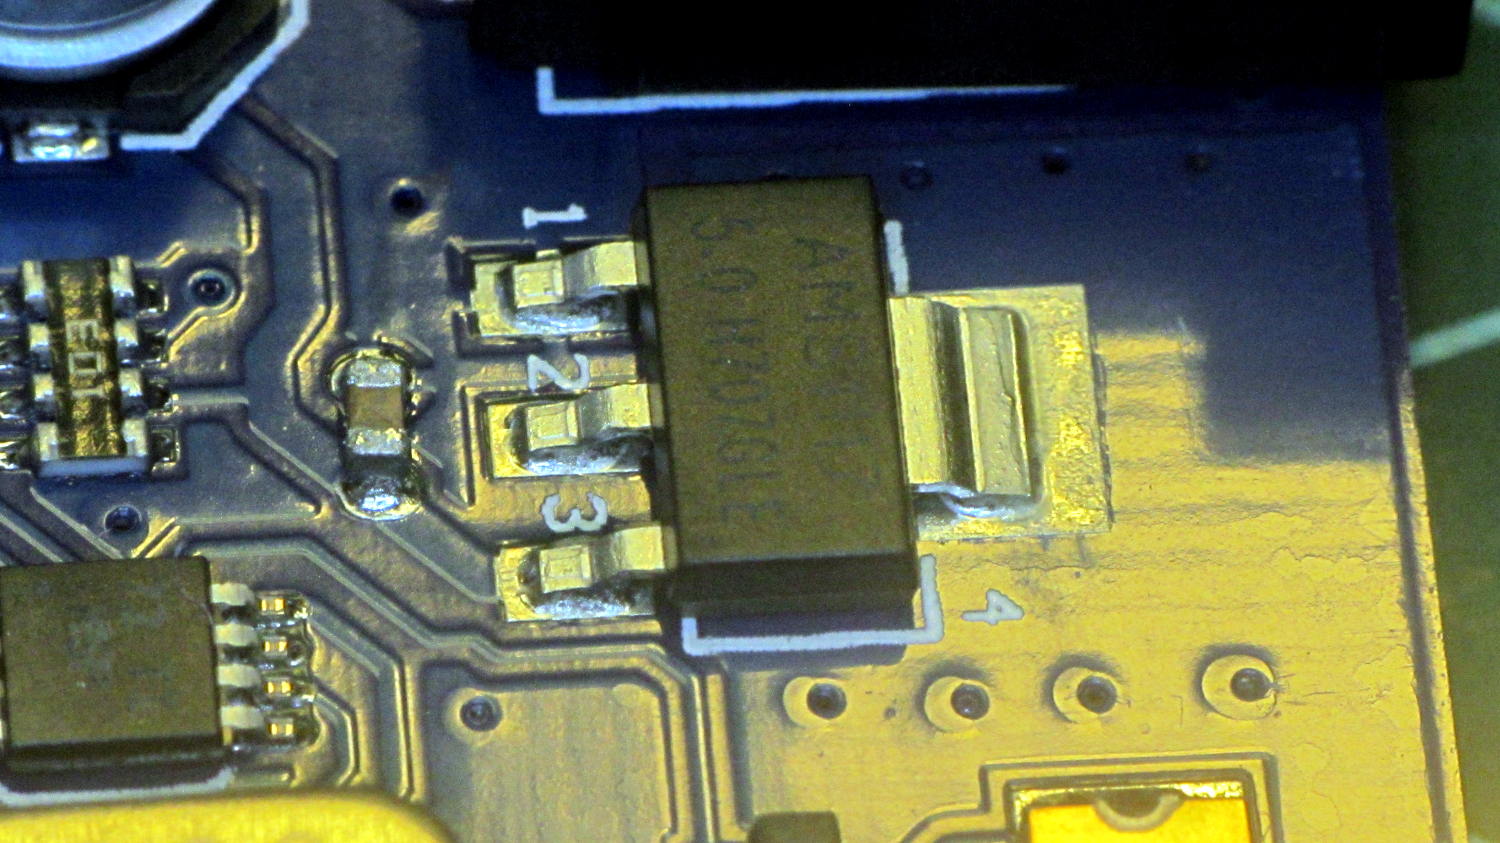
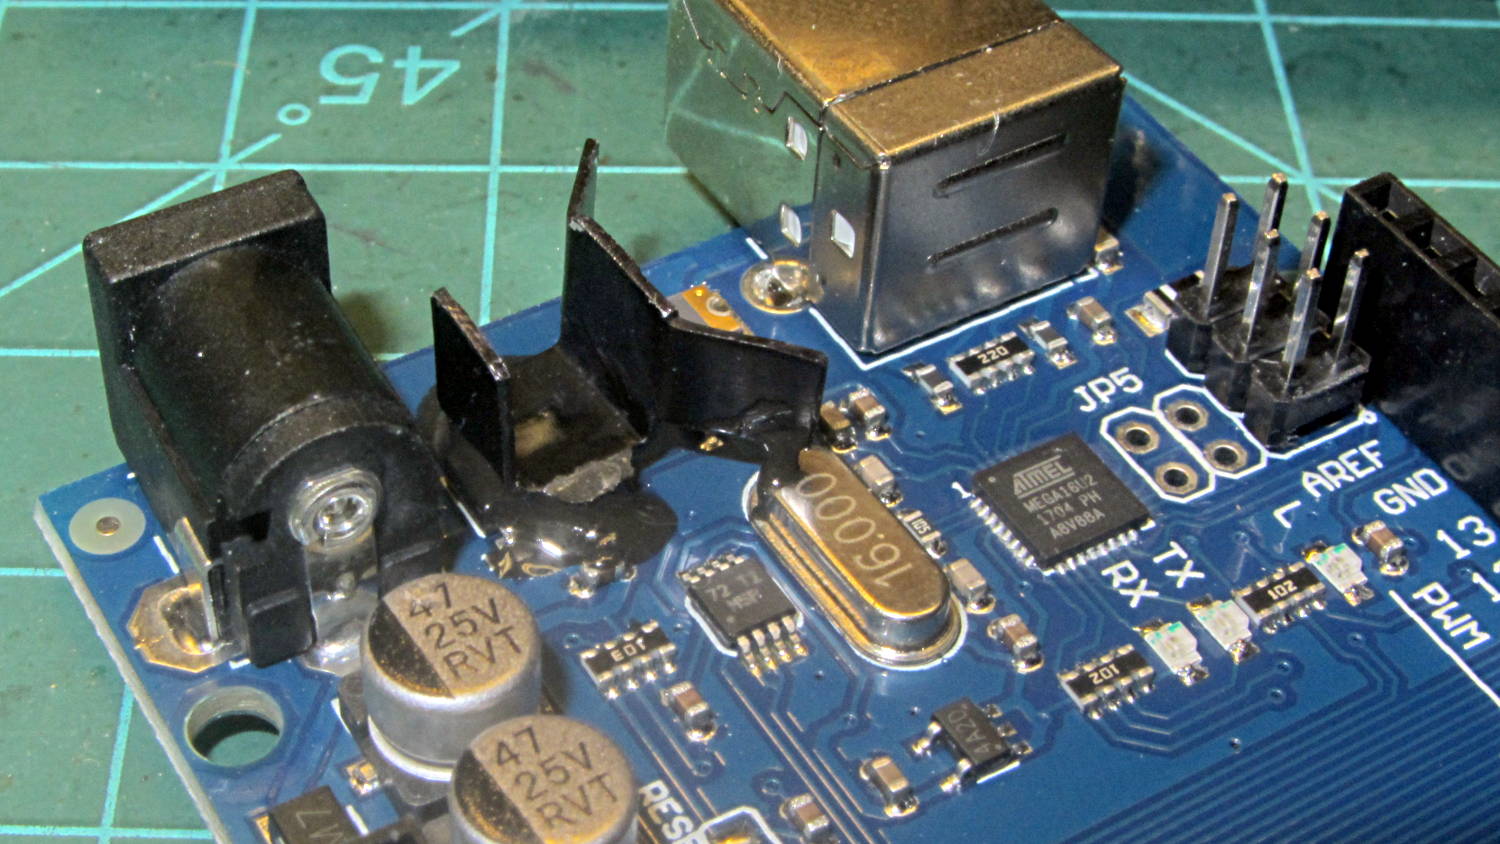
I sawed up a clip-on heatsink originally intended for a 14 pin DIP, bent it a bit, and epoxied it atop the regulator with enough of a blob to contact the copper pour:
RAMPS Mega – regulator heatsink – clamping
That’s metal-filled JB Weld for good thermal conductivity and electrical insulation:
RAMPS Mega – regulator heatsink
The blob affixing the heatsink to the crystal can was an oopsie, but won’t do any harm. It’s not clear the heatsink will do any good in that confined space, but those regulators lead a rough life and need all the help they can get.
I’d rather see a knockoff than a counterfeit, although by now there’s really no way to tell if it’s a counterfeit knockoff. The Kynix datasheet looks like a direct rip from Allegro.
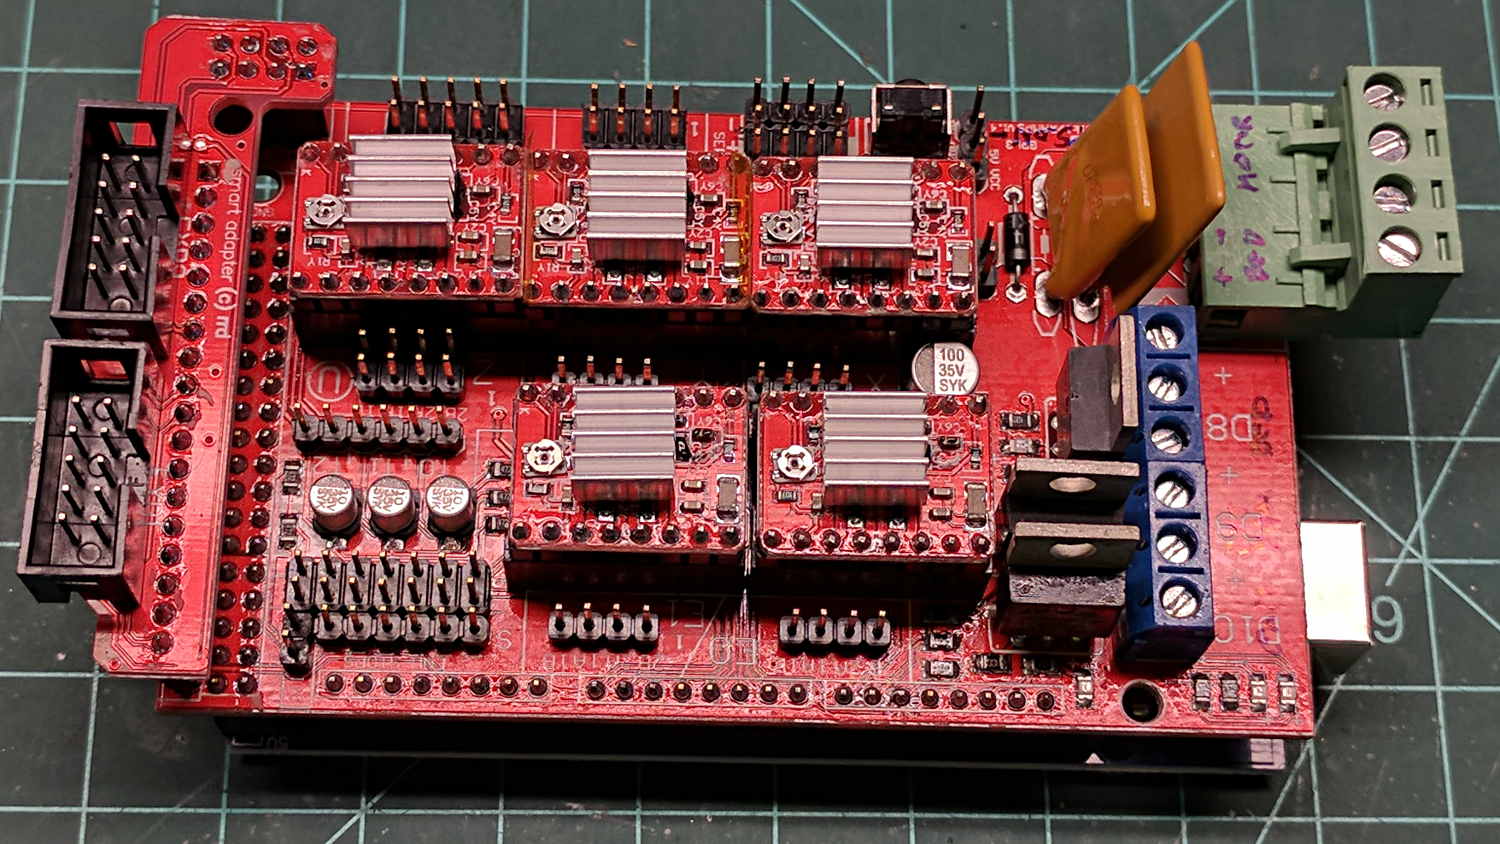
They now sport cute little heatsinks, which, for all I know, might help a bit:
RAMPS shield – stepper heatsinks
The driver boards are slightly longer than the spacing mandated by the continuous socket strips under the three-in-a-row layout:
RAMPS – stepper driver board fit
Introducing them to Mr Disk Sander (turned by hand) knocked off just enough to make ’em fit.
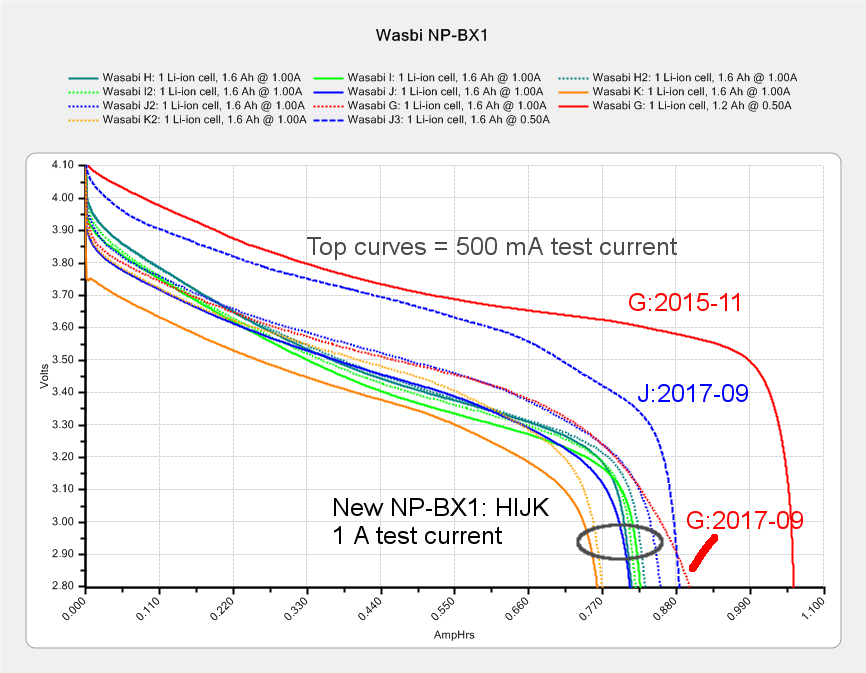
The replacement NP-BX1 batteries arrived and, as I expected, perform just as badly as the previous pair:
Sony NP-BX1 – Wasabi GHIJK – 2017-09-01 – annotated
The note I sent to Wasabi’s tech support summarizes the details:
The second pair of NP-BX1 batteries are just as bad as the first two. In fact, all four perform worse than the nearly two-year-old Wasabi batteries I’ve been using.
The graph shows the test results from my CBA III analyzer. All batteries were all charged in a Wasabi wall charger.
The top solid red curve shows the as-delivered performance in late 2015 for the battery I labeled “G”, tested at 500 mA. It delivered only 1 Ah, not the claimed 1.6 Ah, even at that relatively low current, but has delivered over one hour of service in the camera.
The top dotted-blue curve shows the as-delivered performance for the NEW battery I labeled “J”, also tested at 500 mA. It delivers only 0.88 Ah, 55% of the claimed 1.6 Ah, at a much lower voltage while discharging.
After two years, OLD battery “G” has more capacity and a higher voltage than the NEW battery “J”!
The lower curves shows the results for the four most recent batteries I labeled H I J K, all tested at 1 A to better match the camera’s actual current; the dotted traces mark the second test of each battery.
The orange traces show battery K has about 0.77 Ah of capacity, less than half of the claimed 1.6 Ah and much worse than the others.
I also re-tested battery old battery G at 1 A, as shown by the dotted red curve labeled “G:2017-09”. It outperforms ALL of the new batteries!
Batteries H and I have date codes BQF22, which I interpret as 2017-06-22: fairly recent stock.
Batteries J and K have date codes BPL28: 2016-12-28. They’ve been sitting around for a while, which may account for the poor performance of battery K.
These Wasabi batteries cost roughly twice (*) as much as they did in late 2015, have /much/ lower capacity, and, to judge from the date codes, they’ve been consistently poor since late last year.
What is going on?
It’s worth noting that Wasabi NP-BX1 batteries are currently $16 for the pair on Amazon and were $9 in late 2015. Allegedly genuine Sony NP-BX1 batteries run $50 MSRP and a suspiciously consistent $37.99 from all the usual big-box sources, including Amazon, where they’re out-of-stock for the next few months. Combining the number of counterfeits in the supply chain with Amazon’s commingled SKU stock bins, I have my doubts about what I’d get by increasing my battery spend by a factor of five.
I think it’s about time to conjure an external 18650 holder / helmet mount for that camera and be done with it.
[(*) Edit: I screwed up the unit of measure: the old invoice had two single batteries. The new order was one pair, so I now pay slightly less for much worse performance. A refund is wending its way through the system.]
(Typo in the permalink: should be W vs. X. Fixing it will break all the auto-linkies. Hate it when that happens.)
When our lass first began using calculators, I put a pair of Sharp EL-531W calculators in harm’s way around the shop, where they still reside. The new EL-531X seems to have an identical key layout and internal logic (*), as well as the same under-ten-buck price, but I don’t like it nearly as much:
Sharp EL-531W EL-531X calculators
It’s maybe 10 mm wider and doesn’t fit readily in my hand. I’m sure the rounded-rectangle stylin’ mimics a phone, but the cheapnified keys look ugly(particularly the ones around the arrow keys at the top) and don’t feel nearly as good.
The new one fills a gap next to the lathe, where it should collect plenty of swarf.
(*) Including engineering notation with multiple-of-three exponents, which I regard as vital.
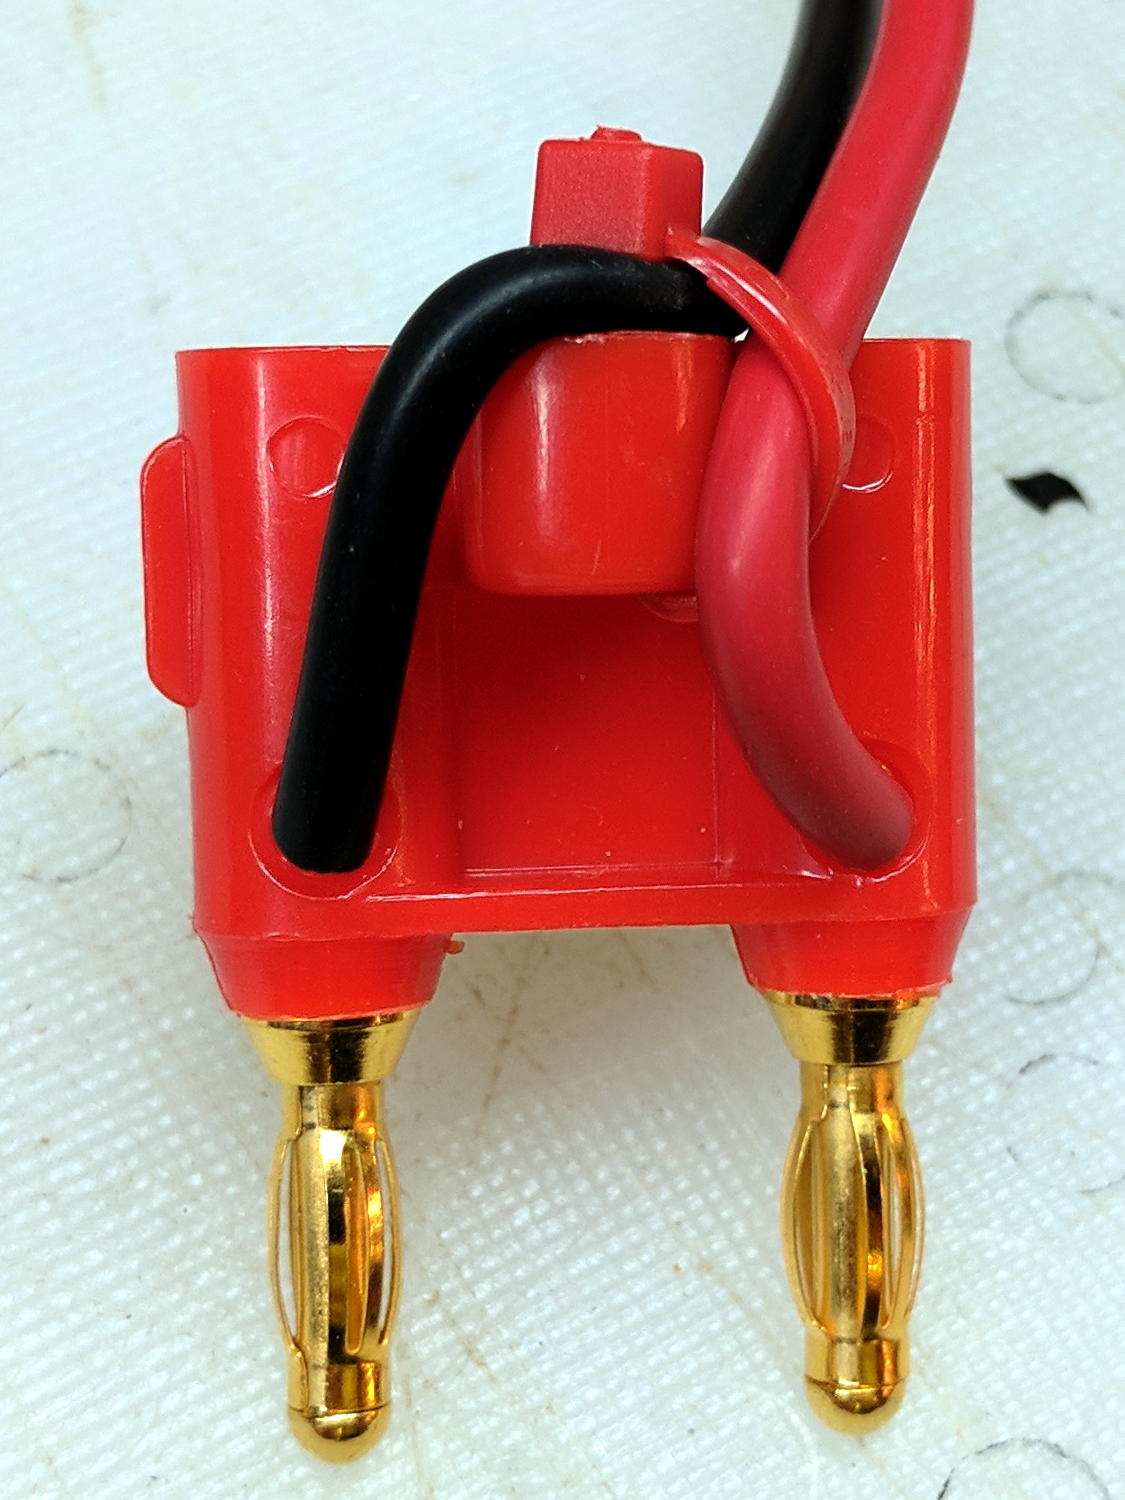
The second banana plug on one of my multimeters failed, so I finally got around to replacing them with a dual plug from the Drawer o’ Banana Stuff:
Dual banana plug – assembled
The bulky test leads don’t quite fit through the convenient retaining ring, so the zip tie holds ’em in place.
A setscrew at the base of each banana jack tunnel crunches the test lead wire against the plug base, but, alone among the collection, this plug had one missing screw. Rather than toss it away (or, worse, back in the Drawer), I decided to Solve The Problem once and for ever:
Dual banana plug – improvised clamp screw
That’s an ordinary M3 screw from the Drawer o’ Random M3 Stuff with its head hacksawed off, a slot crudely hacksawed slightly off-center into the end, then lightly filed to hide the worst damage. With a bit of luck, nobody will ever notice it …