The Smell of Molten Projects in the Morning

Ed Nisley's Blog: Shop notes, electronics, firmware, machinery, 3D printing, laser cuttery, and curiosities. Contents: 100% human thinking, 0% AI slop.

Author: Ed

  • Antique Desk Chair: Leg Rebuild

    Antique Desk Chair: Leg Rebuild

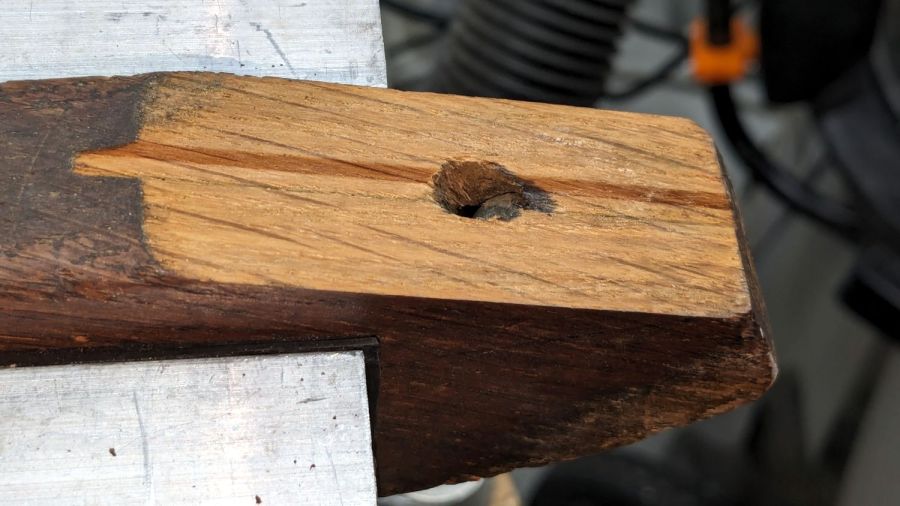
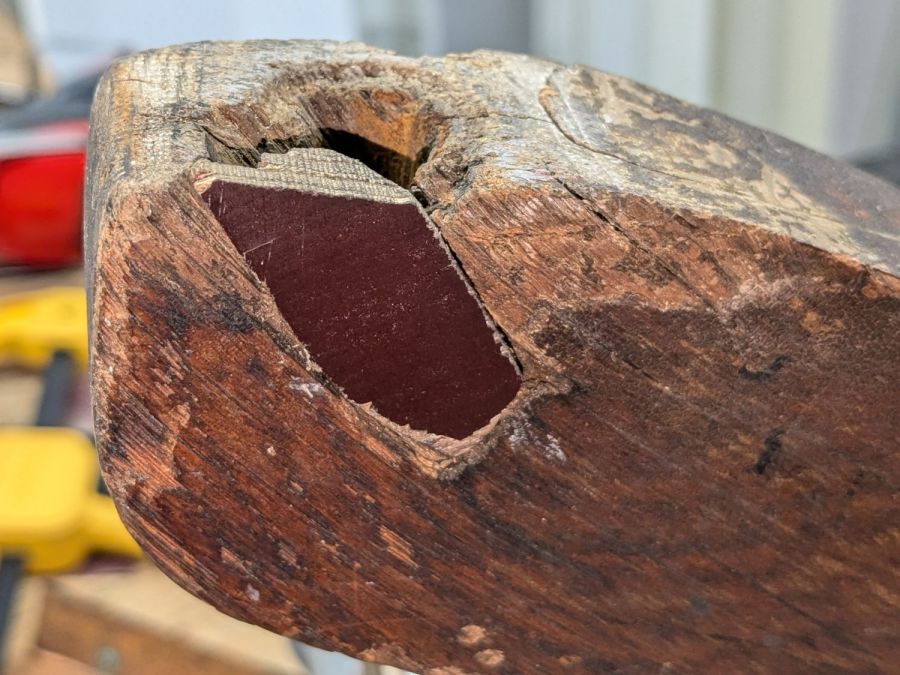
    With the seat glued and the old caster sockets yanked, I carved a piece of plywood to fit the gap in one leg:

    Wood desk chair - leg filler - bottom
    Wood desk chair – leg filler – bottom

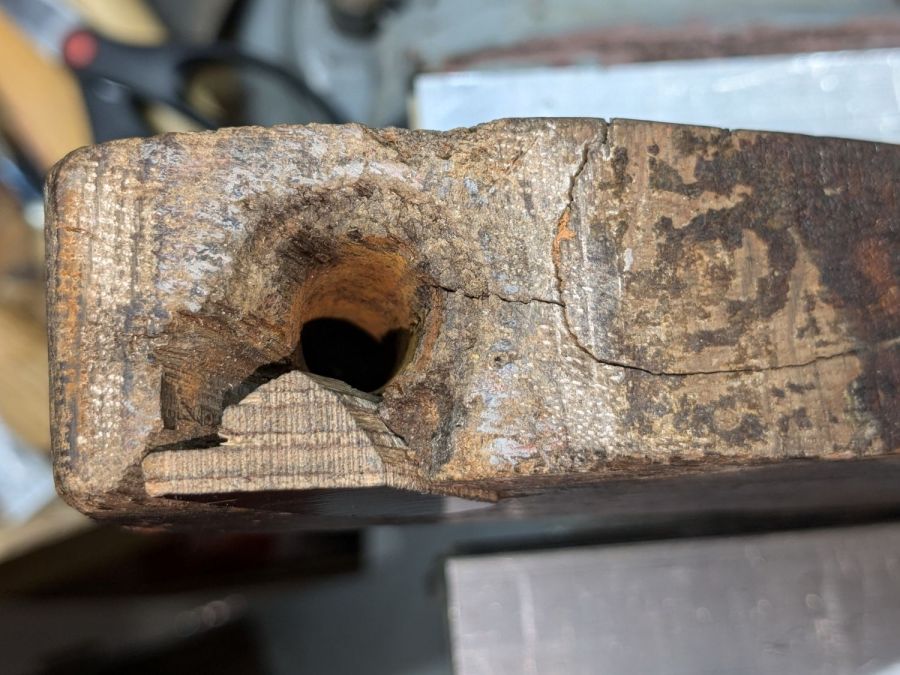
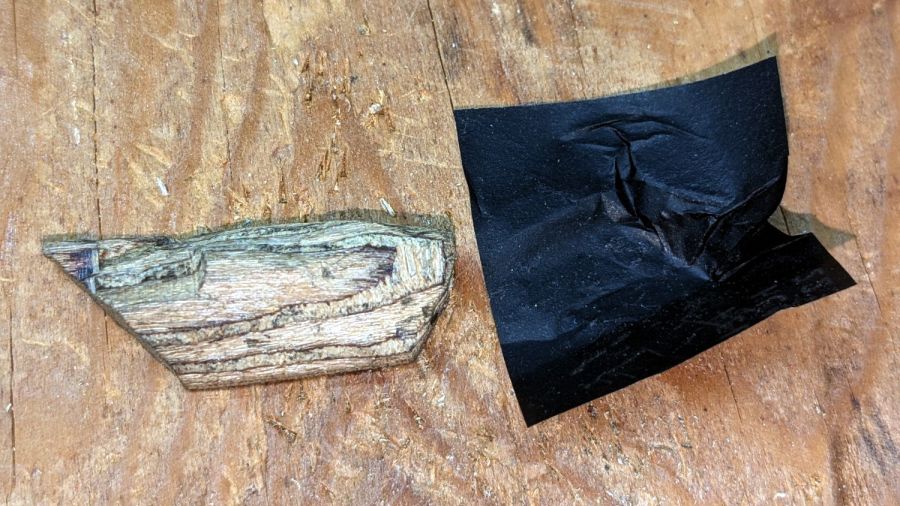
    After whittling the wood to kinda-sorta go in there, I pressed it against snippets of carbon paper (remember carbon paper?) to mark the contact points and carve them off:

    Wood desk chair - leg filler - carbon paper fitting
    Wood desk chair – leg filler – carbon paper fitting

    This occupied most of a SquidWrench remote meeting, but eventually sank it flush with the leg:

    Wood desk chair - leg filler - side
    Wood desk chair – leg filler – side

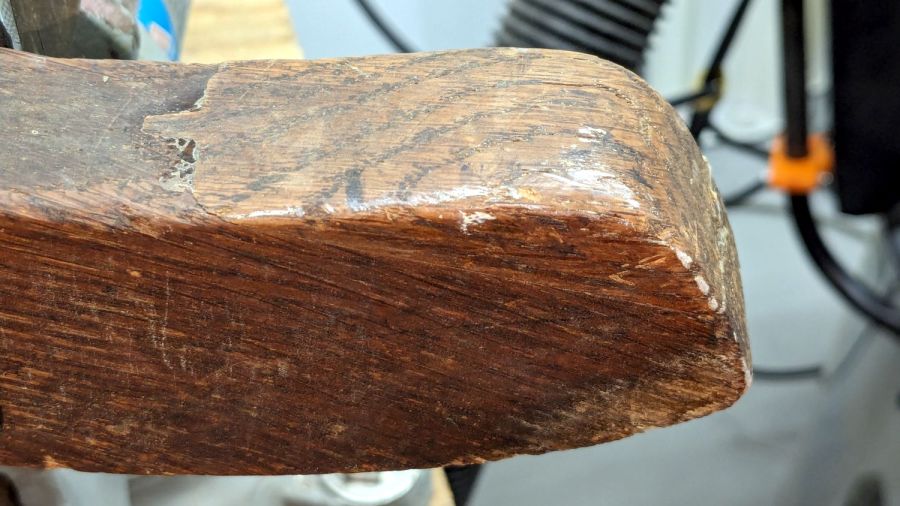
    Now, that’s not the prettiest job you’ve ever seen, but it gets worse:

    Wood desk chair - leg epoxy shaping
    Wood desk chair – leg epoxy shaping

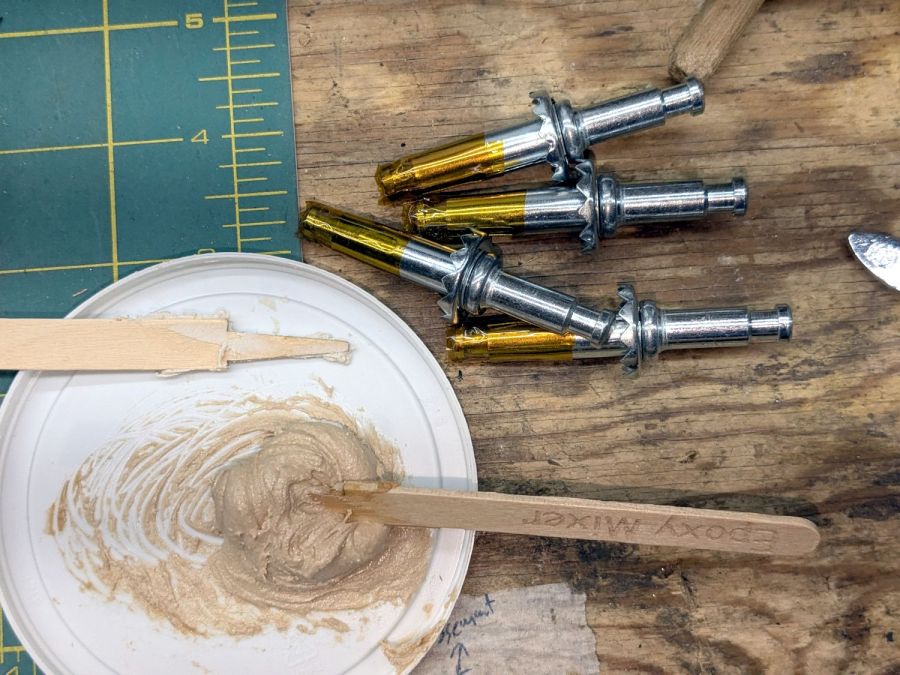
    This time around, I tinted the epoxy with brown and black dye, which knocked the color back to something tolerable and increased the curing time well beyond the usual couple of hours. Fortunately, I wasn’t in a hurry and it was pretty much done by the next afternoon.

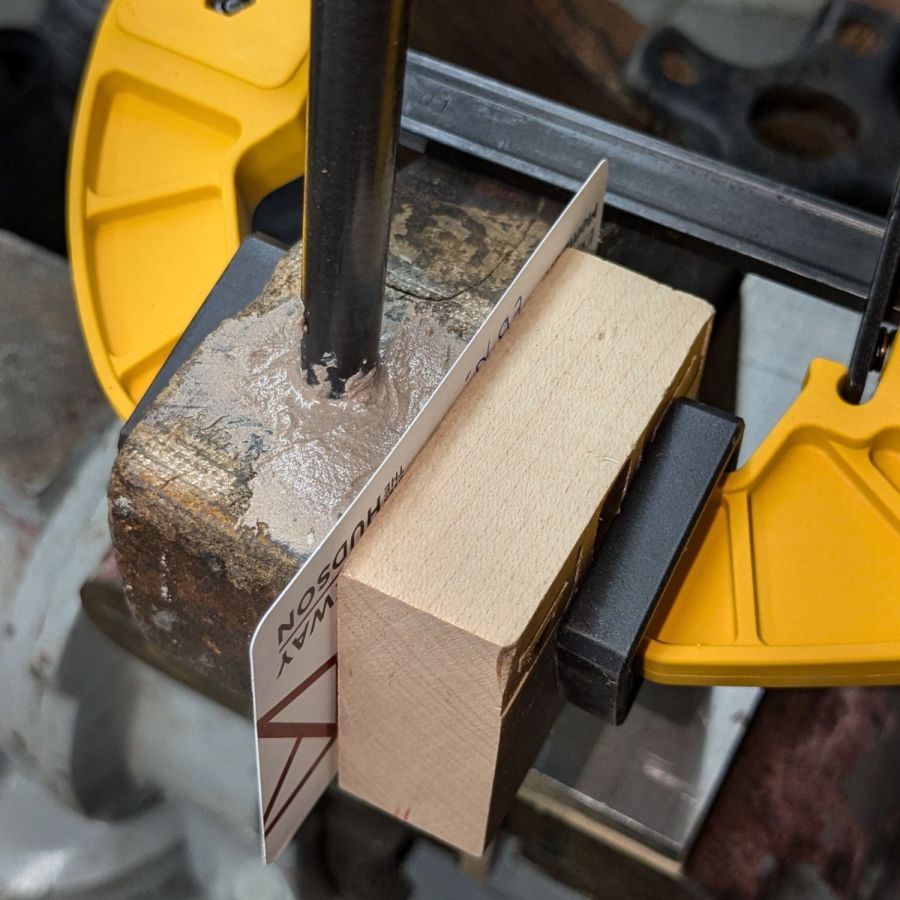
    Whereupon I mixed up another bodacious batch of epoxy:

    Wood desk chair - caster pin prep
    Wood desk chair – caster pin prep

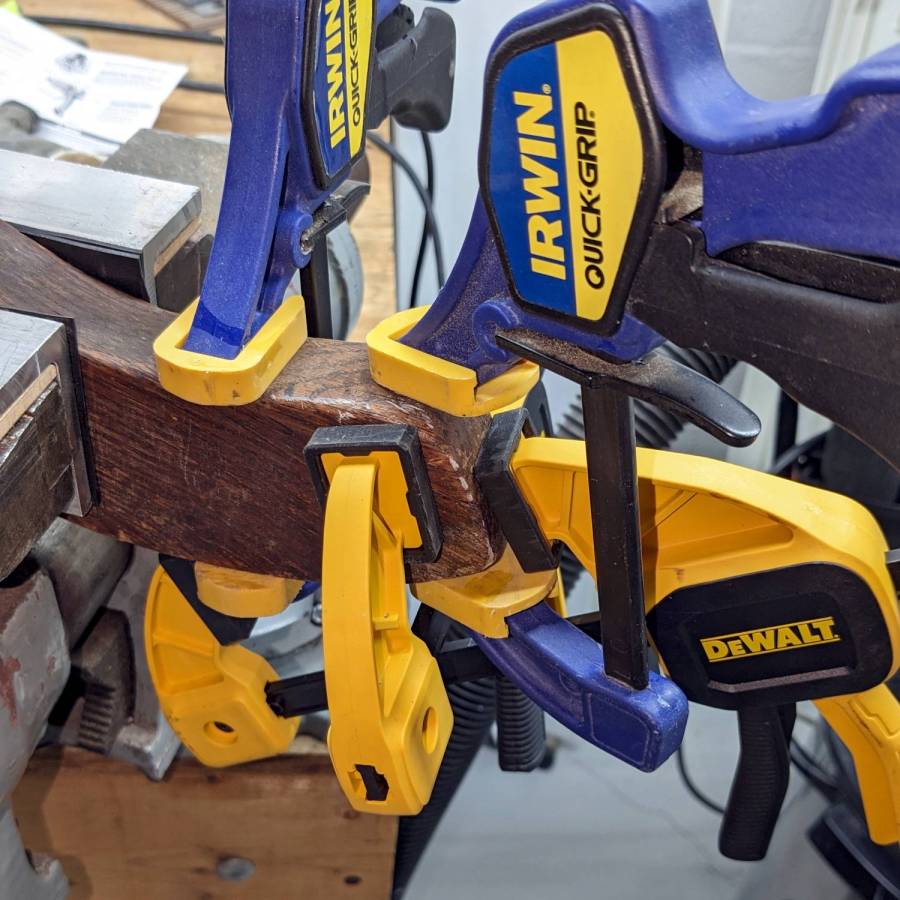
    The Kapton tape wrap kept (most of) the epoxy out of the end of the sockets. I buttered up the sockets just below their serrated heads and tapped them into the legs:

    Wood desk chair - caster pin installed
    Wood desk chair – caster pin installed

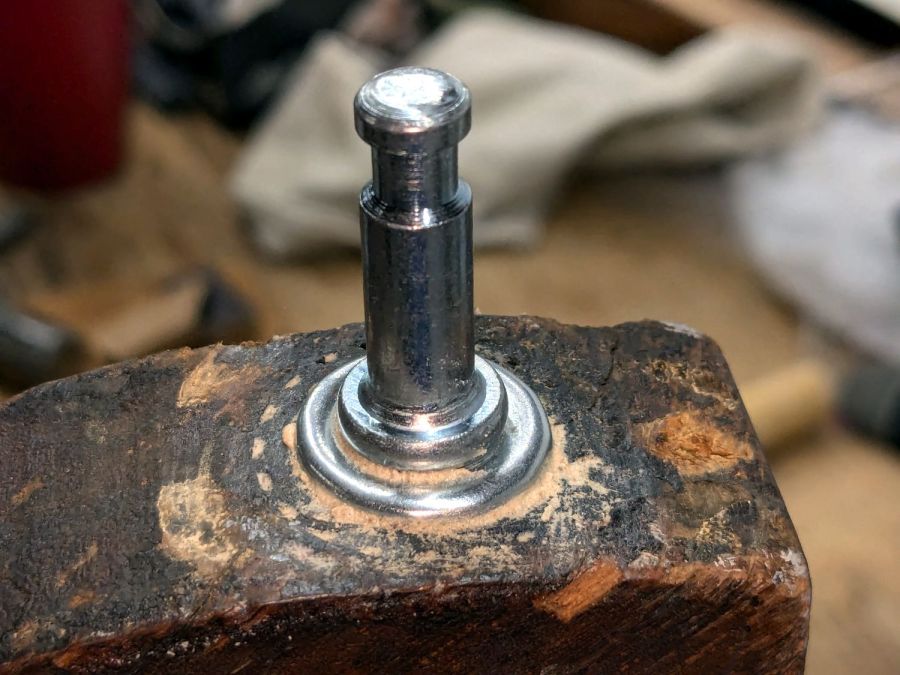
    Yeah, I wiped that down a little better before another overnight cure left the four pins firmly secured in their legs; the pins still rotate (albeit stiffly) in the sockets, although the casters really swivel on their pins.

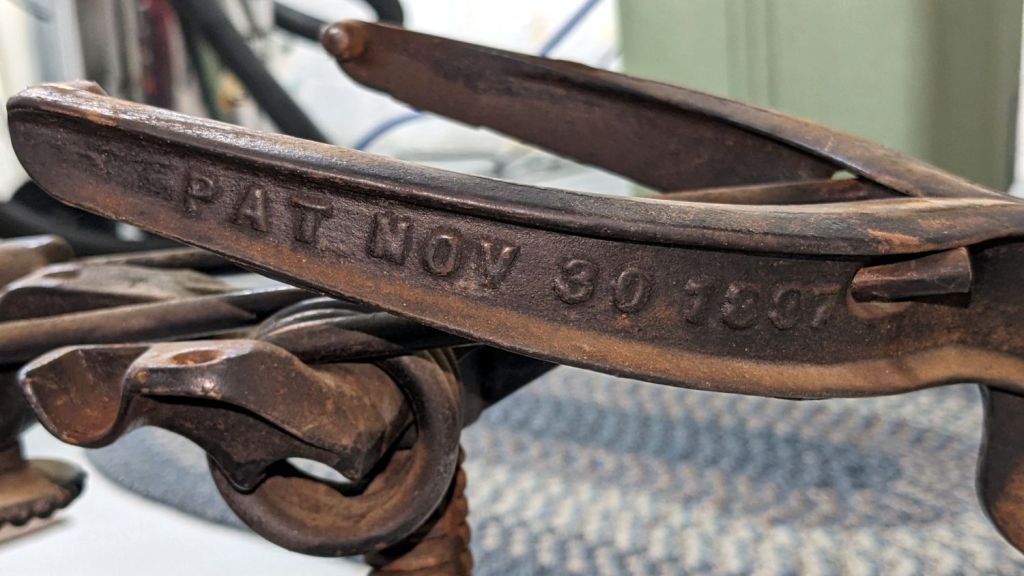
    A cast iron fitting of the kind they just don’t make any more holds the legs in place:

    Wood desk chair - bottom plate
    Wood desk chair – bottom plate

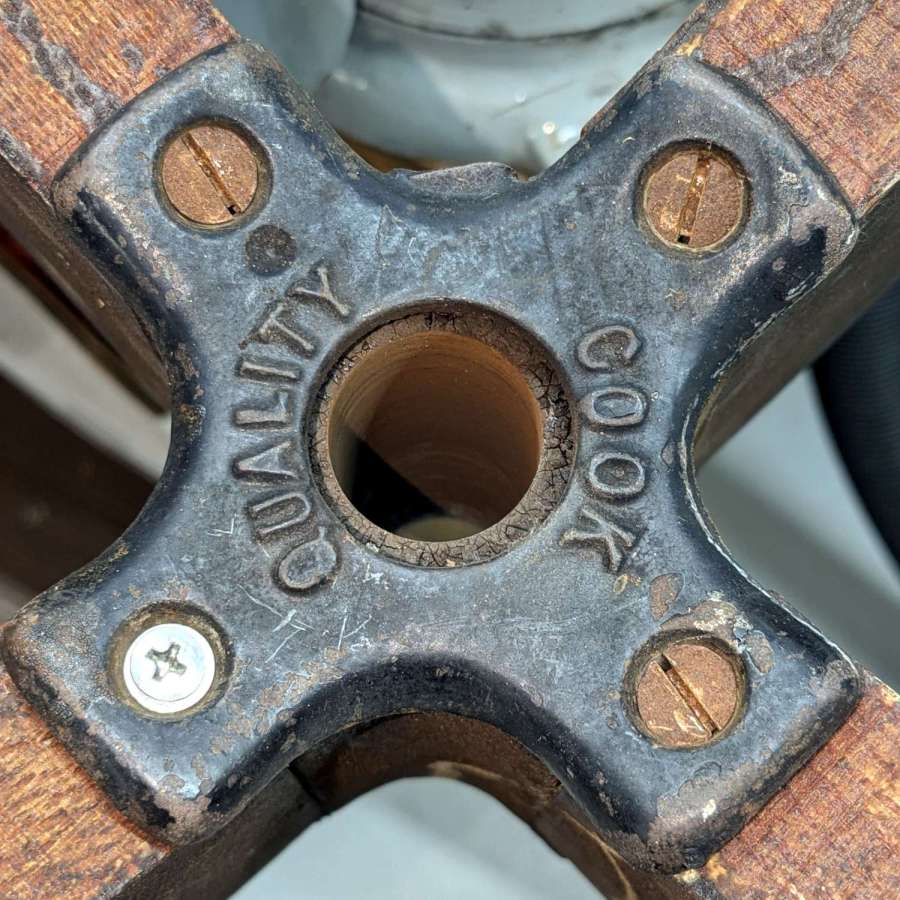
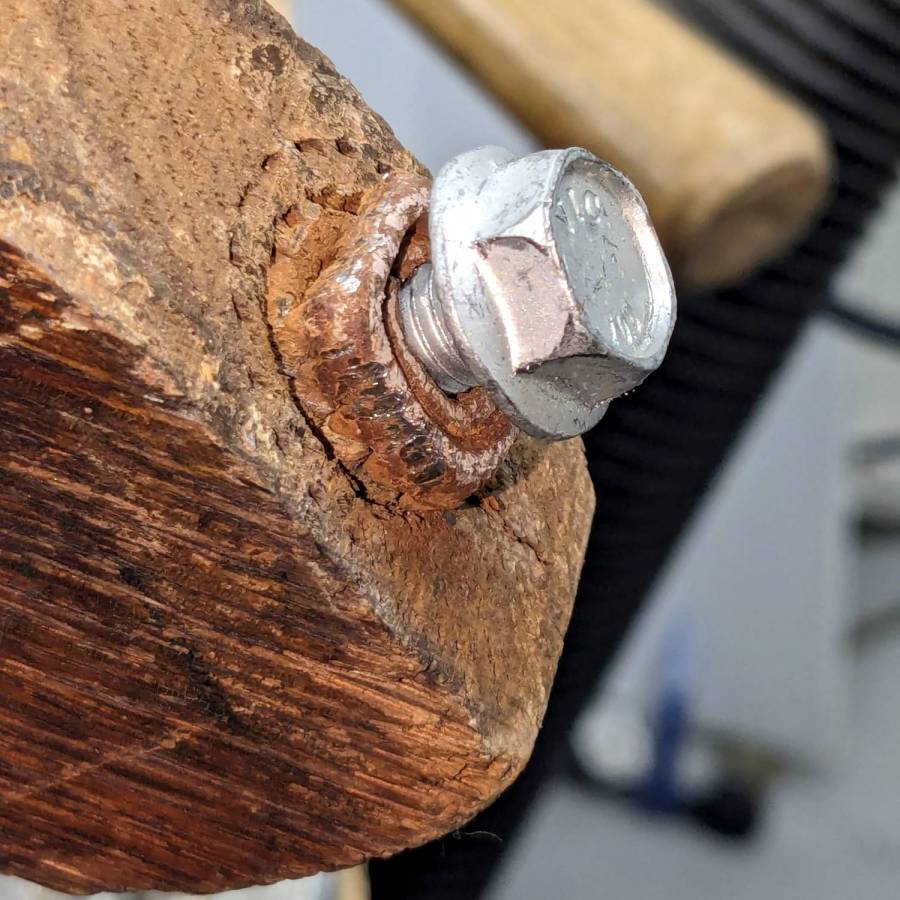
    My screw collection lacks chonky wood screws, but I doubt anybody will ever notice that shiny crosspoint screw.

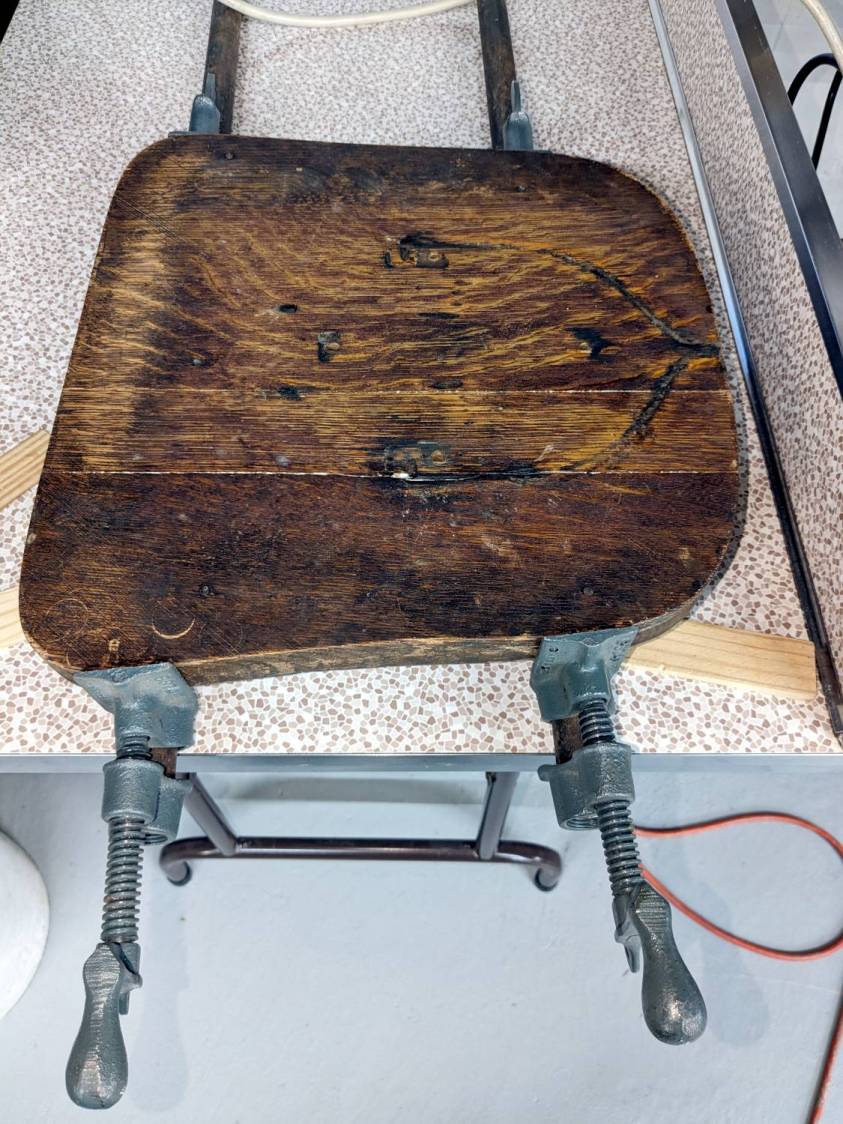
    In any event, the plate holds the legs in tapered slots along the cast iron base that also guides the height adjusting leadscrew under the seat:

    Wood desk chair - leg wedge shims
    Wood desk chair – leg wedge shims

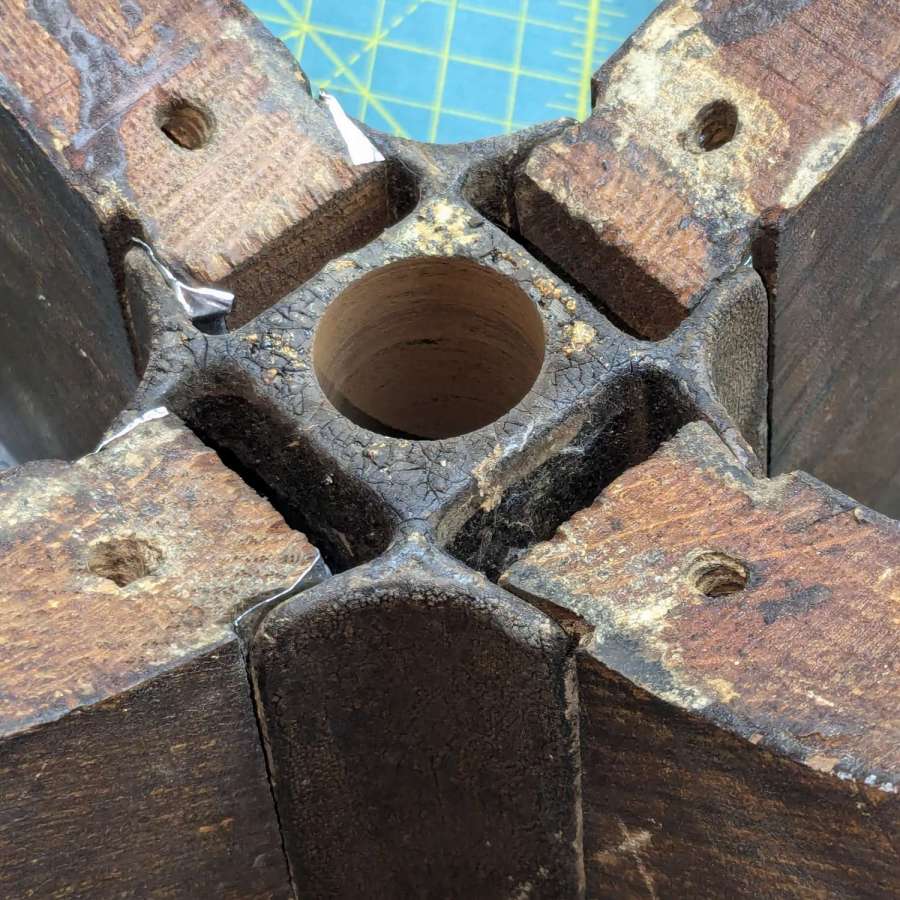
    The wood dovetails in the legs were a bit worn / shrunken, so I shimmed them with two strips of 3.5 mil = 0.09 mm stainless steel tape on each side and tapped the legs into place with a plastic mallet. The steel is completely invisible from outside and the legs are magically solid, just like they should be.

    As expected, the new casters clash horribly with the chair’s classic style:

    Wood desk chair - repaired
    Wood desk chair – repaired

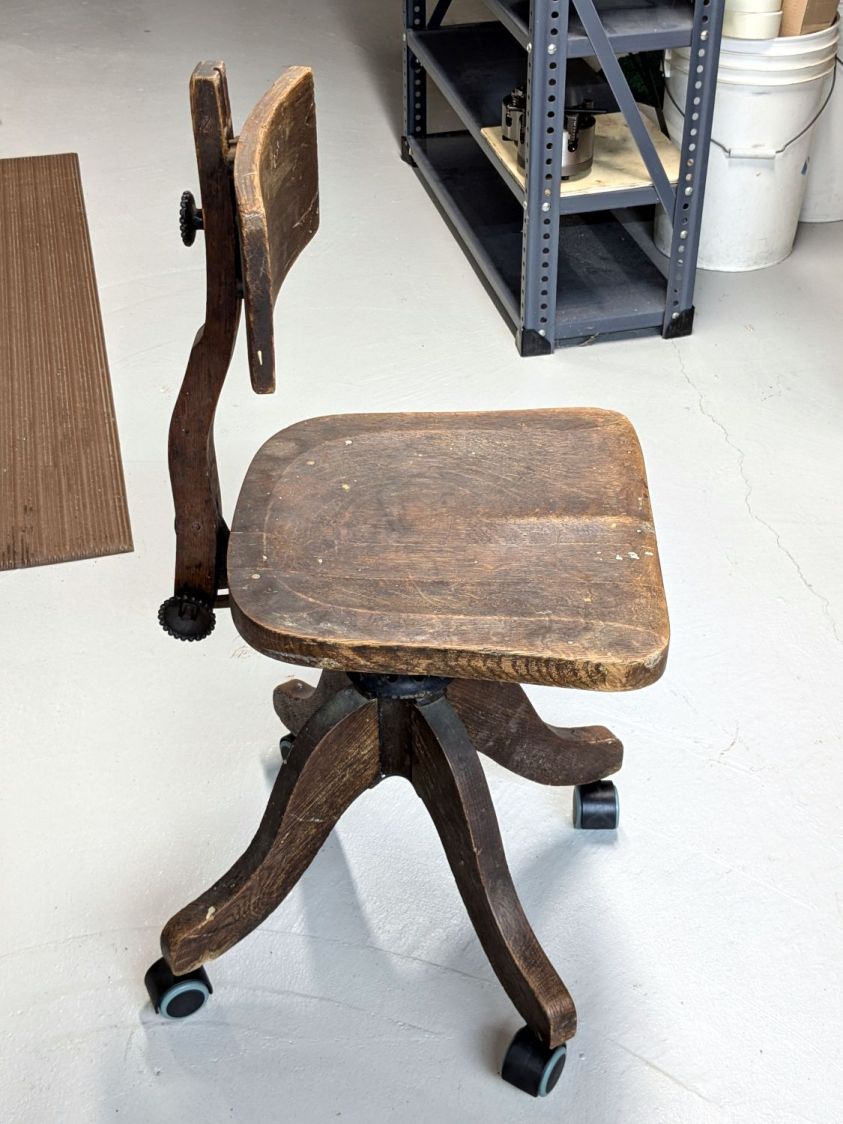
    Somewhat to my surprise, it’s now undergoing a field test at Mary’s desk, where it replaces a chair she never liked. The seat adjusts down enough to let her feet reach the floor (which most modern chairs do not) and the edge doesn’t press on the back of her legs. We fiddled with the backrest height / angle / tension and it feels surprisingly good.

    You gotta admire something with that kind of durability and repairability.

    A good refinishing job would definitely improve its appearance, but that’s well beyond my abilities.

  • Samsung Dishwasher Screen Filter Fix

    Samsung Dishwasher Screen Filter Fix

    The Screen Filter (DD81-02011A) in our Samsung dishwasher (DW80K7050US) turned out to have a mold defect from the factory that’s been sitting there since the previous owners had it installed back in 2018:

    Samsung dishwasher screen filter - gap
    Samsung dishwasher screen filter – gap

    The mesh apparently didn’t quite make it into the molded plastic, so that little gap has been letting debris in the wash water circulate through the spray bars and clog the orifices.

    While replacements are readily available, they seem rather pricey for what they are and this seemed like an easy repair:

    Samsung dishwasher screen filter - glued
    Samsung dishwasher screen filter – glued

    That’s a bead of EVA hot melt glue that will probably withstand the 163 °F = 73 °C “sanitize” cycle we haven’t had any occasion to use and seems no more toxic than anything else around here.

    Protip: if your dishwasher has a filter, it’s likely clogged with a nasty accumulation of gunk, too …

  • CUPS vs. HP Jetdirect 175x: Admitting Defeat

    CUPS vs. HP Jetdirect 175x: Admitting Defeat

    For several decades, a succession of PCs in the basement have served files and shared printers, the former through NFS and the latter through CUPS. When the Epson R380 finally went casters-up, I got an Epson ET-3830 printer with a network interface, leaving only our venerable HP Laserjet 1200 shared through the server.

    For reasons I do not profess to understand, whatever magic shared the printers rotted away over the last month (or, more likely, software updates), to the extent that we could no longer reliably print to the Laserjet. Various software tinkerings being unavailing, I dropped just under thirteen bucks to make the problem Go Away™:

    HP Jetdirect 175x - installed
    HP Jetdirect 175x – installed

    It’s a new-old-stock HP Jetdirect 175x print server from the turn of the millennium, with an Ethernet jack on the back and a USB 1.0 (yes, one-point-zero) jack on the front. It’s roughly contemporaneous with the Laserjet and designed to work with it.

    The thing started up in DHCP mode, so I had to ask the router where it was on the network. Configuration then amounted to putting it in static (“Manual”) IP mode, assigning an address, and restarting it.

    Aim the CUPS servers on our desktop PCs at the new address, fire off a test page, It Just Worked™, and we’re once again printing like it’s 1999.

    That was surprisingly easy.

  • M5 Tee Nut: Test To Destruction

    M5 Tee Nut: Test To Destruction

    The mounting block under the electronics box for the new UPP battery has a recess for an M5 tee nut:

    UPP Battery Mount - Block 5 Show View
    UPP Battery Mount – Block 5 Show View

    As with the Terry frame mounts, I glued the modified tee nut in place with JB Plastic Bonder urethane adhesive, did a test fit on the bike, discovered the whole affair had to sit about 10 mm forward, put the new frame measurement into the OpenSCAD code, and ran off a new block.

    Which gave me the opportunity to perch the old block atop the bench vise with the tee nut aimed downward between the open jaws, run an M5 bolt into the nut, and give it a good thwack with a hammer:

    UPP Battery Mount - M5 insert adhesive test
    UPP Battery Mount – M5 insert adhesive test

    Although the urethane adhesive didn’t bond uniformly across the tee nut, it had enough grip to tear the PETG layers apart and pull chunks out of the block.

    As with the tee nuts on the Terry bike, this one will be loaded to pull into the block, so it will never endure any force tending to pull things apart, but it’s nice to know how well JB Plastic Bonder works.

    I chiseled the PETG and adhesive debris off the tee nut, cleaned it up, slathered more Bonder on the new block, and squished the nut in place. After I get the electronics box sorted out, the whole affair will never come apart again!

  • Antique Desk Chair Woodwork

    Antique Desk Chair Woodwork

    A wood desk chair that I’ve known since I was a pup finally got some much-needed attention, although not a restoration. By and large, I’m finally sorting out that corner of the basement and needed to put the chair’s parts back together so I can work on something else.

    The wood seat consists of several slabs glued along keyed joints, one of which had fractured into a rough mess. Amazingly, the two sides fit perfectly together, albeit with the bottom no longer a planar surface, and glued up just like they should:

    Wood desk chair - seat clamping
    Wood desk chair – seat clamping

    The chair isn’t up to contemporary office standards, but it has a seat elevation screw, a backrest with adjustable angle & elevation, and even a backrest tension setting:

    Wood desk chair - ironwork
    Wood desk chair – ironwork

    It was the cutting edge of desk chair technology:

    Wood desk chair - patented
    Wood desk chair – patented

    I vaguely recall it rolled on long-vanished steel-wheeled casters. Somewhat less long ago, one of the legs broke enough to lose its caster socket (about which, more later), so I set about yanking the three remaining sockets:

    Wood desk chair - caster socket removal
    Wood desk chair – caster socket removal

    During that struggle, another leg revealed a neat woodwork joint:

    Wood desk chair - leg joint
    Wood desk chair – leg joint

    It’s easy to remove a caster socket when you can bash it from the top!

    Gluing that piece back in place required Too Many Clamps™ aligning it with the leg:

    Wood desk chair - leg clamping
    Wood desk chair – leg clamping

    But the end result looks pretty good:

    Wood desk chair - leg glued
    Wood desk chair – leg glued

    They did a nice job of matching the wood grain; I hadn’t noticed that joint while attacking the socket.

    Pending restoring the broken leg’s socket, the soon-to-arrive new casters will clash horribly with the chair’s woodwork. At least it’ll roll again and its new plastic wheels won’t scar the floors.

  • IWISS SN-2549 Crimping Tool Instructions

    IWISS SN-2549 Crimping Tool Instructions

    Because I needed to know which of the four dies in the jaw of my IWISS SN-2549 crimper was the right one for 24 AWG ribbon cable:

    IWISS SN-2549 JST Crimper Manual
    IWISS SN-2549 JST Crimper Manual

    It turns out either of the two middle slots should work, but the crimps look better in the smaller one.

    Admittedly, the instructions are thin on technique, but I only wrecked four pins while retraining my crimping hand. The key trick is indexing the insulation fingers on the step inside the jaw, thus putting the socket box or the male pin outside where it won’t get smashed flat. Squishing those fingers from their normal splayed condition into a rectangular shape helps fit them into the jaw against the step.

    Living in the future where the right crimping tool doesn’t cost five Benjamins is great …

  • Squirrels Need Sleep, Too

    Squirrels Need Sleep, Too

    Spotted outside a window:

    Sleepy Squirrel
    Sleepy Squirrel

    The one on the right stayed in that pose, with eyes getting heavier and heavier, until it nodded off. The other squirrel wasn’t quite that far gone and, after a minute, turned around to see what was(n’t) happening.

    Those two squirrels have been chasing each other around the yard for several weeks, so they’re either siblings or a mated pair.

    I’ve never seen a squirrel take a nap before and it seemed like a good idea for the afternoon …