Ed Nisley's Blog: Shop notes, electronics, firmware, machinery, 3D printing, laser cuttery, and curiosities. Contents: 100% human thinking, 0% AI slop.
One of my Old Guy medicines has an elaborate desiccant container:
Pill desiccant container
Being that type of Old Guy, I weighed the container when I emptied the bottle, then left it sit in the kitchen cabinet with the scale for a week as the weight slowly increased.
It started at 2.38 g and stabilized at 2.56 g, so it absorbed 0.18 g of water from the air after it got my attention.
Peeling the label revealed an obvious joint:
Pill desiccant – contents
Looks like HO-scale coal in there!
The desiccant weighs all of 1.20 g, so it absorbed something more than 10% of its weight. That’s less than I found with silica gel, but I don’t know the starting weight or how much moisture it already absorbed.
A newly opened pill bottle disgorged a container weighing 2.42 g. The initial weight obviously depends on many variables, none of which would be tightly controlled.
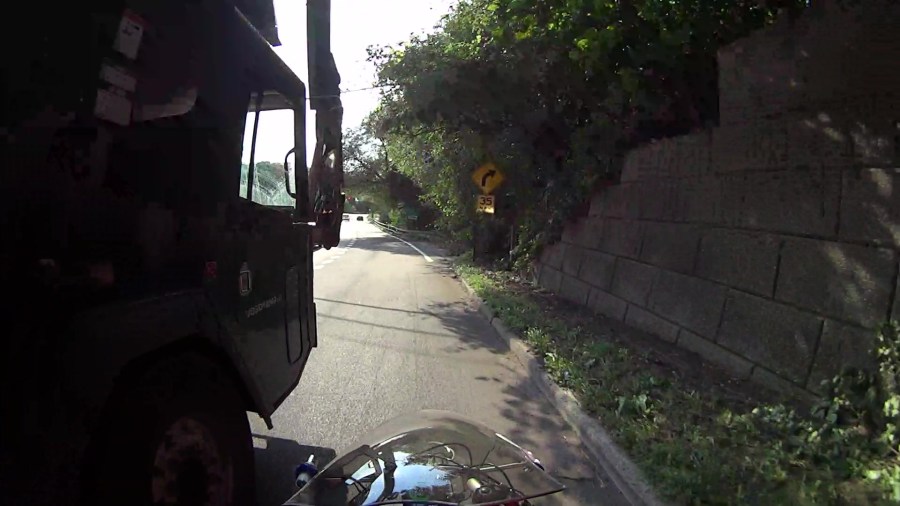
I’m riding downhill from Red Oaks Mill toward the bridge across the Wappinger Creek, pedaling a bit over 24 mph = 37 feet/sec, far enough into the lane to avoid trash along the curb on the right:
Royal front 2024-09-13 – 078
Although you can barely see the vehicle passing on my left, I’ve just realized I am in one heap of trouble.
Half a second later (the frame number in the caption ticks along at 60 fps) I’m caught in the slipstream:
Royal front 2024-09-13 – 108
Another half second and I’m leaning slightly to the right:
Royal front 2024-09-13 – 138
Make that wobbling:
Royal front 2024-09-13 – 158
Well, that’s a relief:
Royal front 2024-09-13 – 178
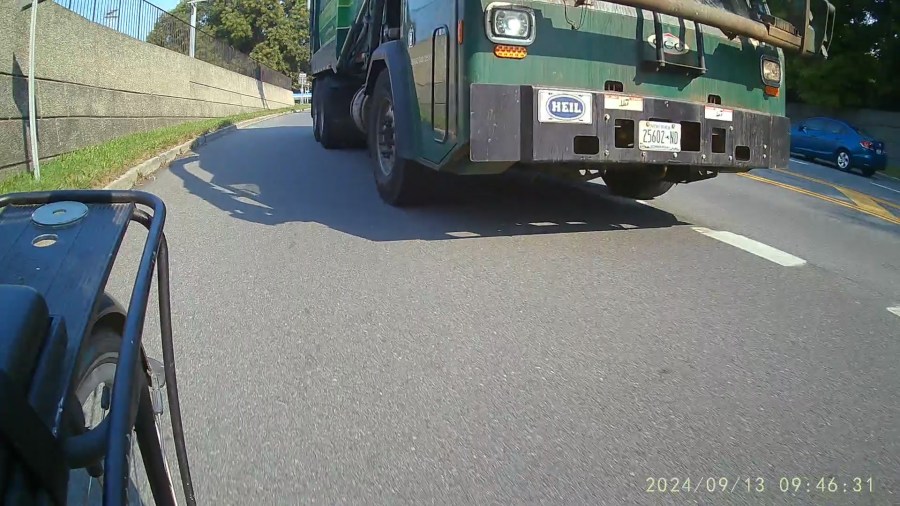
The truck is now completely within our lane and I’m further to the right, so our paths really were converging:
Royal front 2024-09-13 – 208
Elapsed time: 2.2 seconds.
The view from the rear shows the driver started with reasonable clearance (these frames tick at 30 fps):
Royal rear 2024-09-13 – 090
A second later, the dumpster grabber is about even with my handlebars, corresponding to the first helmet camera picture:
Royal rear 2024-09-13 – 120
A third of a second later:
Royal rear 2024-09-13 – 130
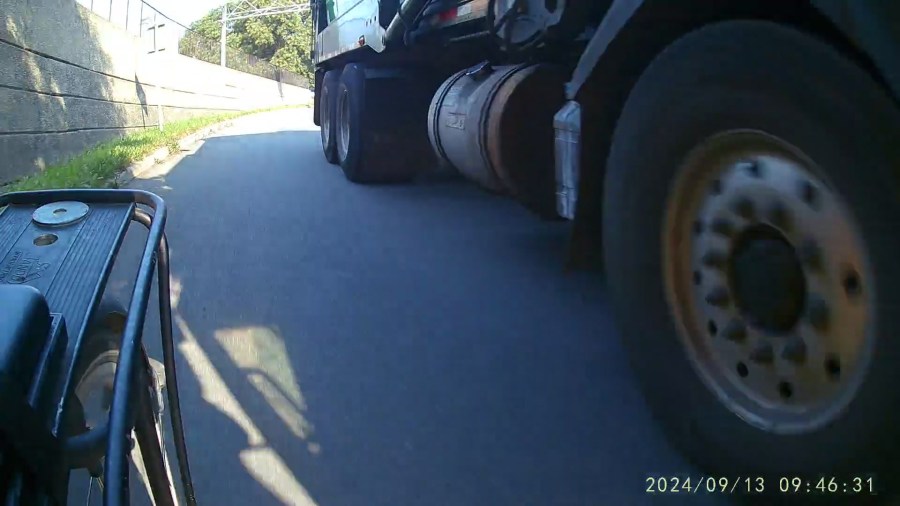
The rear wheels passed much closer:
Royal rear 2024-09-13 – 180
In general, Royal’s drivers give us plenty of clearance.
In this case, I think he badly misjudged how fast I was moving and figured he would be well past by the time he had to be completely in the right lane to avoid vehicles in the left-turn lane on the bridge.
However, intent wouldn’t make me any less dead after a trip around those tires …
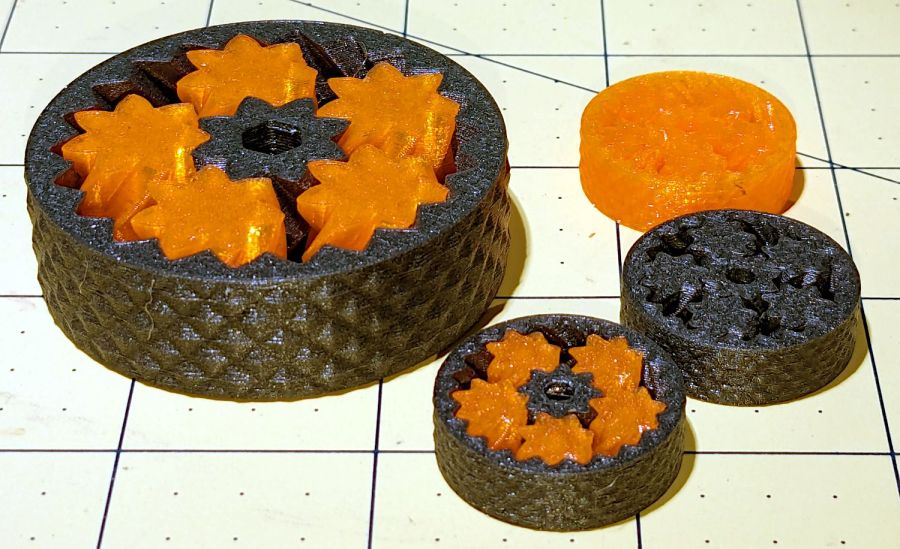
The small bearings are 25 mm OD, with correspondingly small clearances between their moving parts, but they all spun easily after a bit of breaking in.
As with their larger cousins, the orange PETG bearing has the most axial play and worked just fine right off the platform. The gray PETG-CF bearing was jammed and required concerted effort to get the gears rolling, but now has essentially no axial play while turning easily. The snappy-looking orange and black bearing has very little play and feels the best of the three.
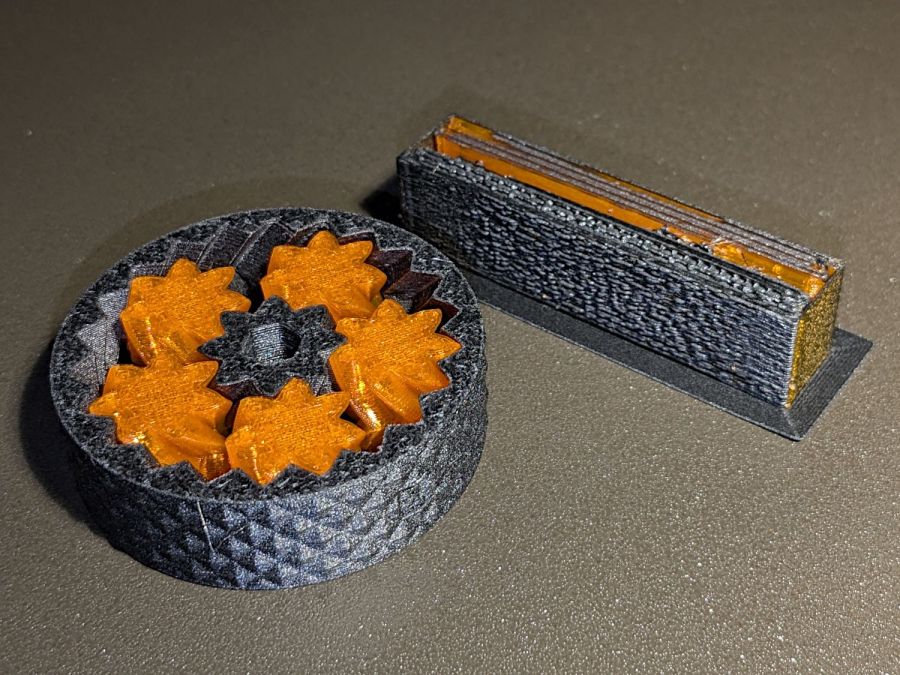
The single-material bearings take about 20 minutes to print, while the mixed material one requires 80 minutes due to the extruder purging and nozzle clearing. The larger mixed material bearing took more than three hours, but time doesn’t scale as the cube of the size because changing materials runs at a constant time:
Small Planetary Gear Bearings – PETG PETG-CF with wipe towers
The smaller mixed gear produced the smaller wipe tower on the right, but changing materials remains an expensive process. Of course, if you were doing this in production, you’d make a couple dozen of the little things in one job: the machine would spend most of its time squirting out planetary gear bearings with the same number of material changes building the same size wipe tower.
They’re slightly too small for my fingers and surely pose a choking hazard to children, but they’re definitely cute.
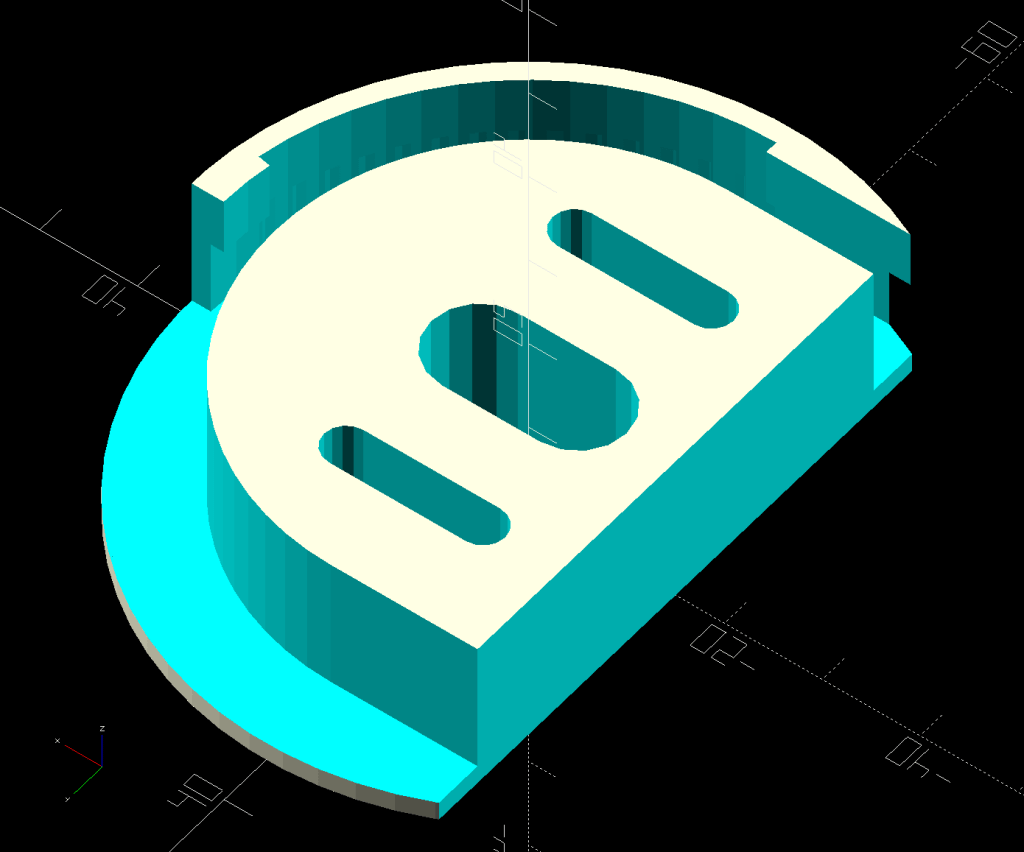
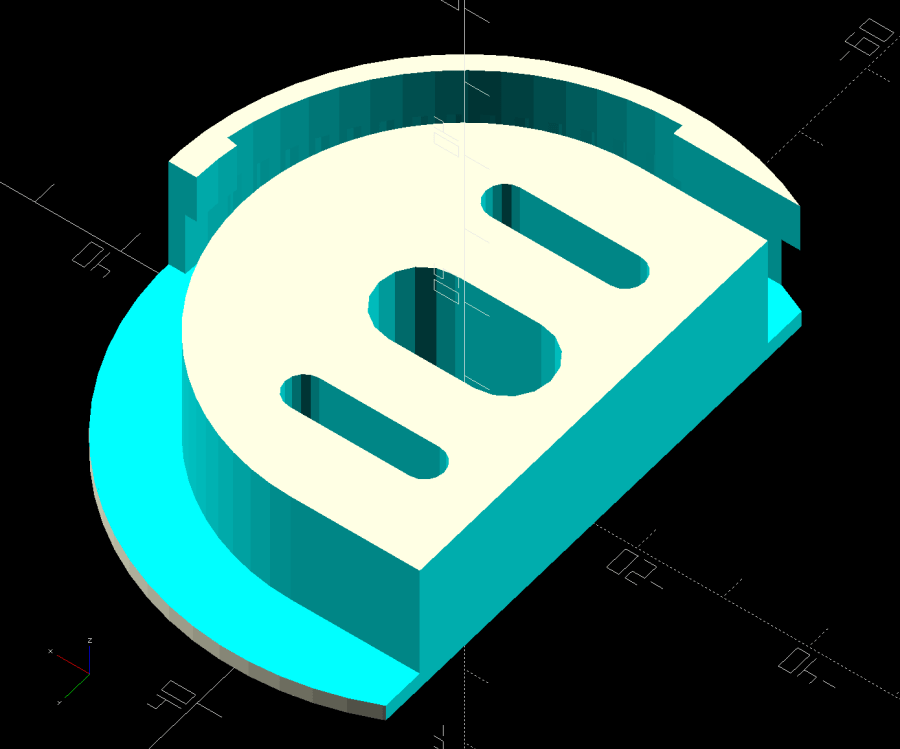
A small tweak to the venerable spoon drainer adds a configurable cutout adapting it to a slightly different dish drainer rack:
Measuring Spoon Drainer – solid model
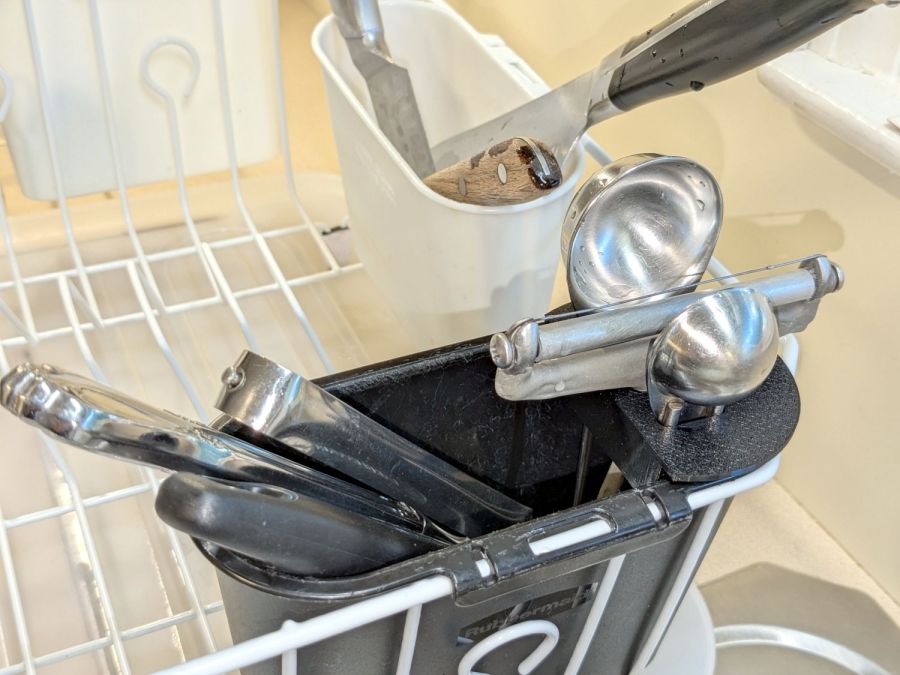
Which lets it snuggle into the corner:
Measuring spoon drainer – installed
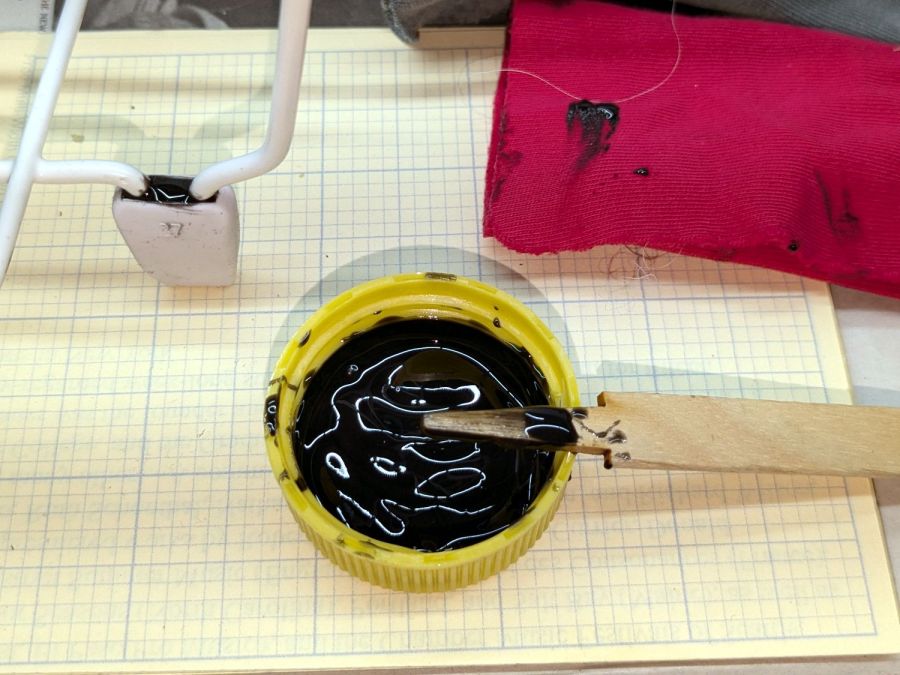
Both the old and new racks had coated steel loops stuck into rubberoid feet perfectly suited to collect water and eventually rust the loops. Given a new rack, I figured potting the feet in JB PlasticBonder urethane adhesive would help forestall the rust:
Rubbermaid dish drainer – foot potting
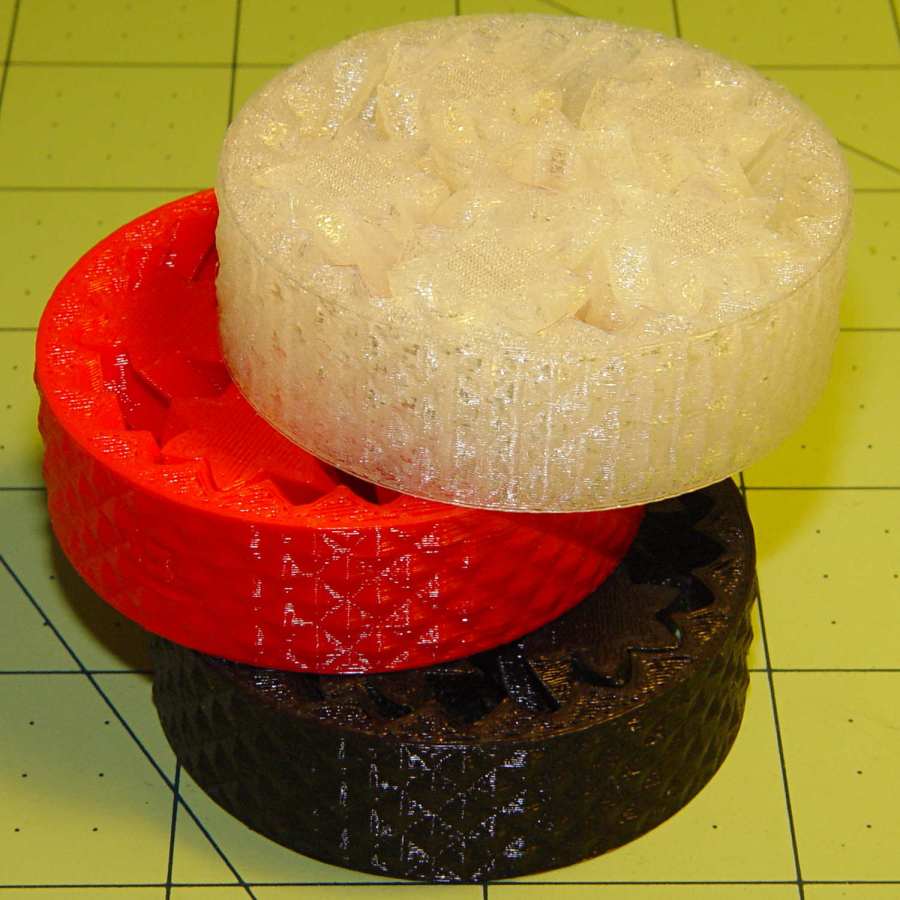
I wish it were white, rather than black, but the only other color choice is tan and I can’t wish nearly that hard.
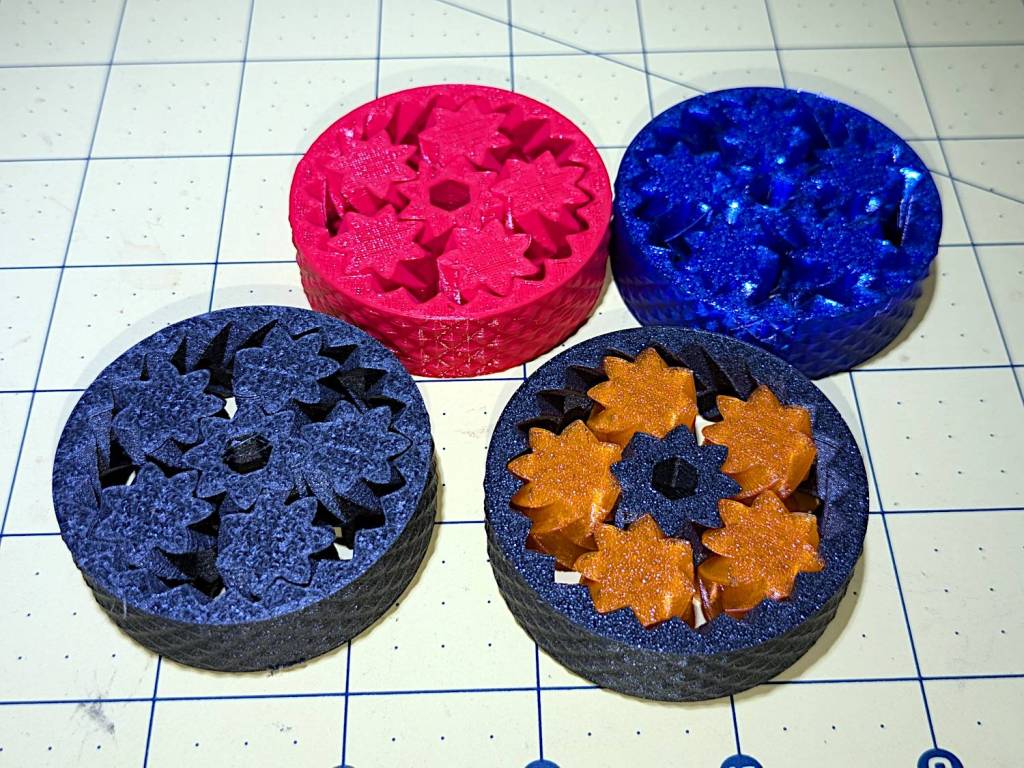
So I loaded up the same STL in Prusaslicer and made three more:
Planetary Gear Bearing – M2 vs MK4
Both pictures show the same red bearing, done in PLA on the Makergear M2. The other bearings are PETG and PETG-CF on the Prusa MK4 + MMU3.
The blue bearing has about 5 mm of axial play, a bit more than the red.
The gray bearing is PETG-CF and has maybe 1 mm of axial play, which agrees with my original observation that an Extrusion Multiplier of 1.0 results in slightly overstuffed carbon fiber parts. It’s not much and, frankly, produces a better fit in this case, but it’s different than pure PETG. Which should come as no surprise, of course, given that it’s 15% carbon.
The gray-and-orange bearing looks spectacular in person and has about 3 mm of axial play, roughly the same as the red bearing, which you’d expect from overstuffed PETG-CF and pure PETG.
The single-color bearings print in about 1.5 hours and the two-color one weighed in over four hours. Multi-material objects are do-able, but you gotta want the results.
I told Prusaslicer to wipe the orange filament into the gray infill during color changes (per the Wipe Tower doc), but those two gray parts have so little infill as to make no difference:
Planetary Gear Bearing – PETG PETG-CF with wipe tower
The wipe tower in that posed photo has a nubbly texture because the filament just gets squirted without regard to anything other than maintaining the basic tower shape.
Seeing things appear on the platform never gets old!
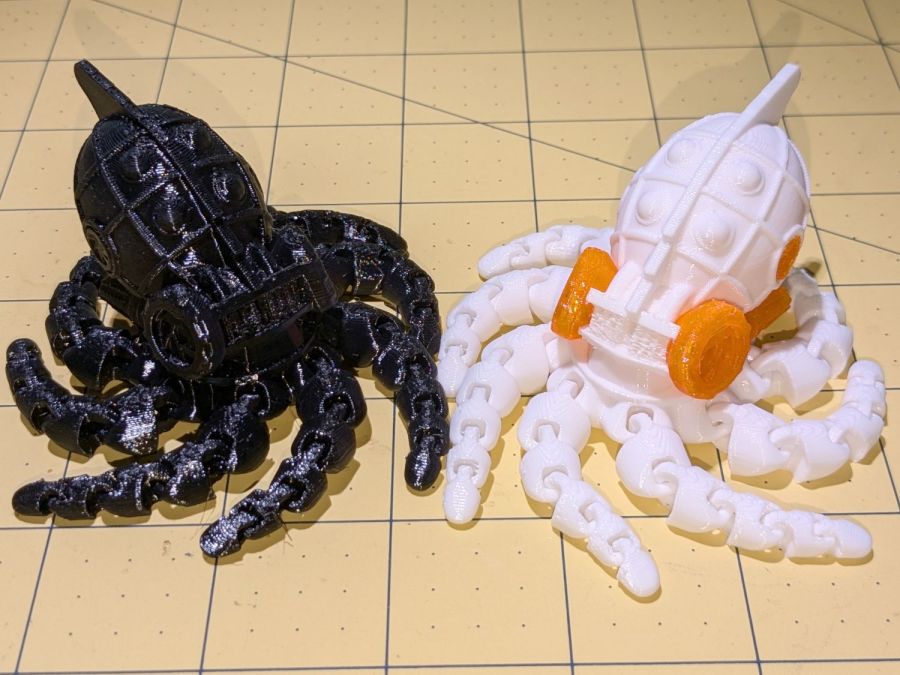
The model is the Steampunk Octopus (in retrospect, the lower-vertex NixFix version should print better with its under-engine braces). The tests were to see how well its articulated tentacles printed and whether I understood how PrusaSlicer’s Multimaterial Painting worked. The answers: “Perfectly” and “Undo is my copilot”.
They’re both in PETG, with the orange eyes & features painted onto the STL model using the Smart Fill tool type to select surface facets joined within a given angle. Getting that right requires some fiddling, because you (well, I) can inadvertently select & flood a nearby area.
With Halloween fast approaching, they should be useful:
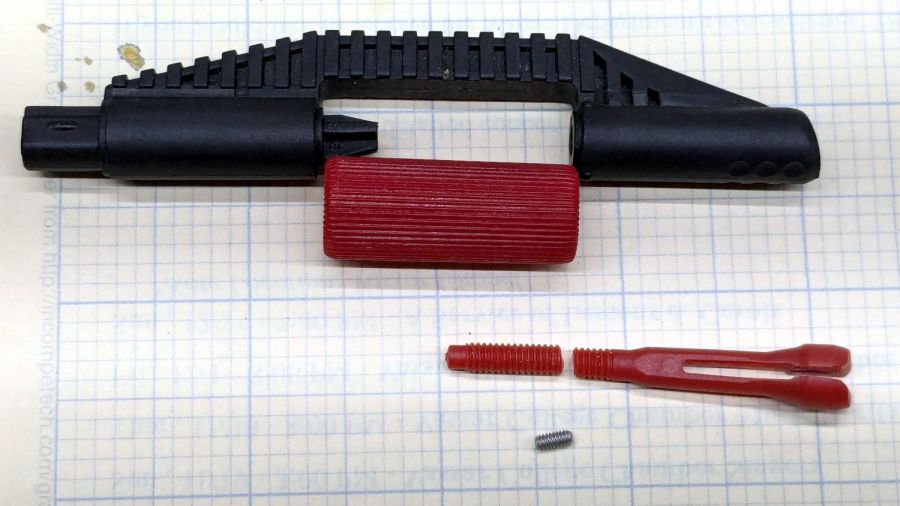
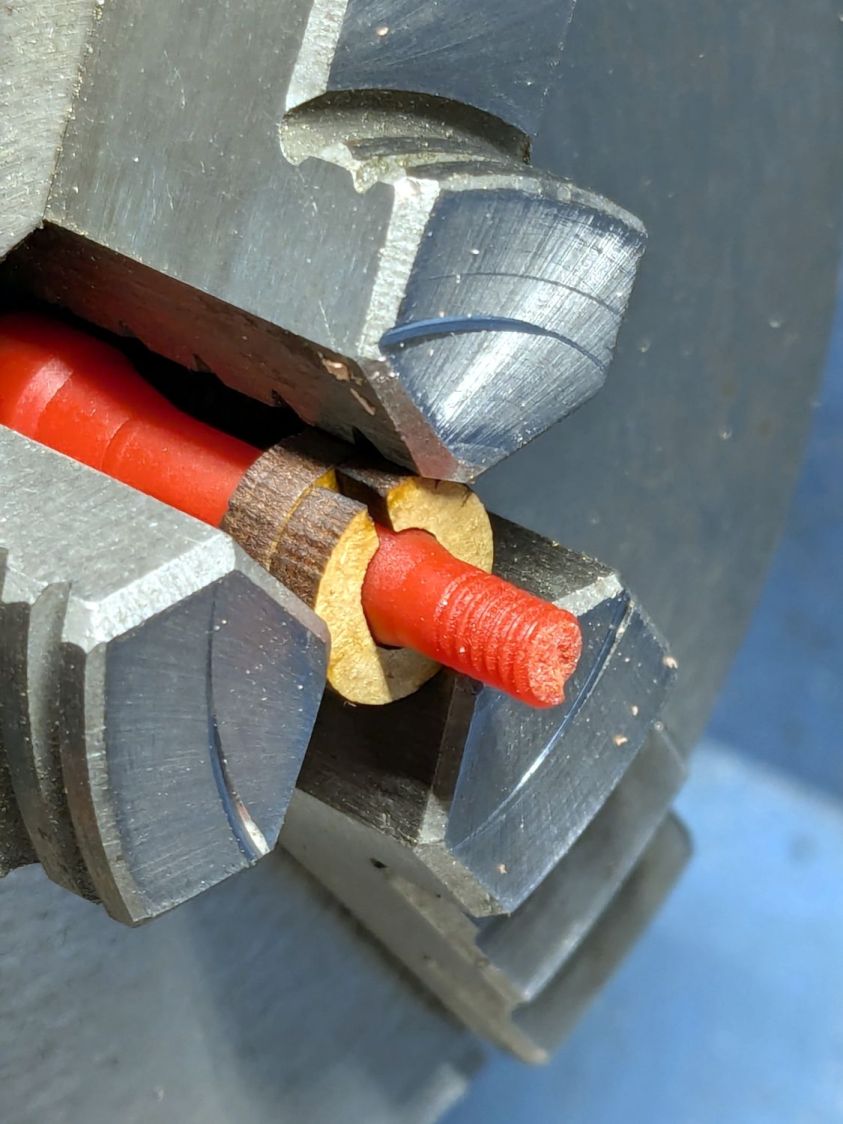
In the process of fixing something else, I discovered my favorite desktop razor knife had a loose blade. There being nothing like a new problem to take one’s mind off all one’s previous problems, I obviously had to fix it before proceeding:
Razor Knife – broken collet thread
Come to find out the plastic screw tightening the blade collet had snapped. The remaining stub stuck out from the red ribbed nut just far enough to prevent sliding the nut out of the black plastic body, but jamming a small screwdriver through the body got enough traction to unscrew the stub. It’s threaded 8-32, despite being old enough to be Made in Taiwan.
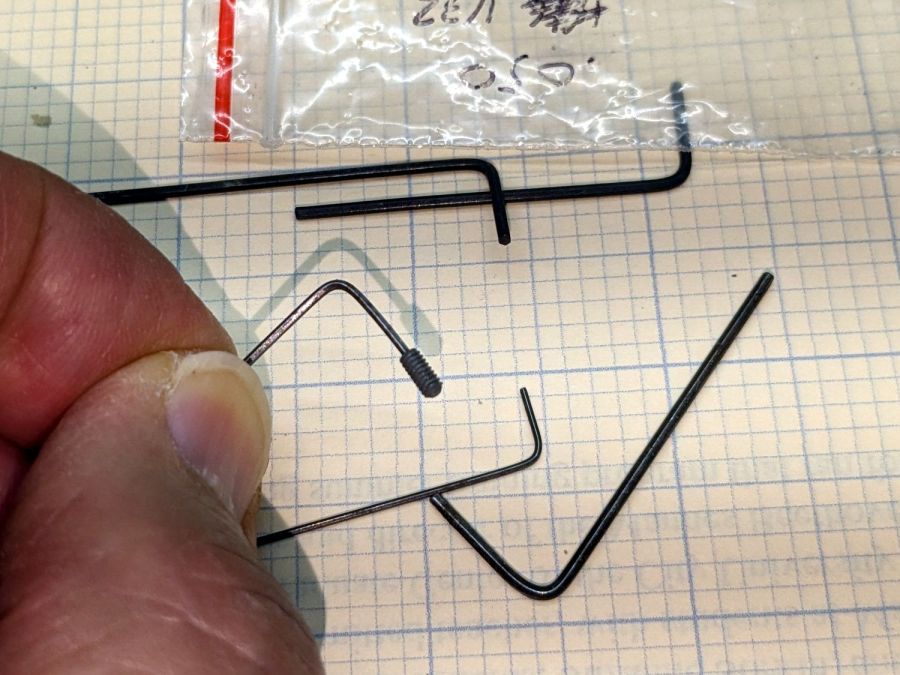
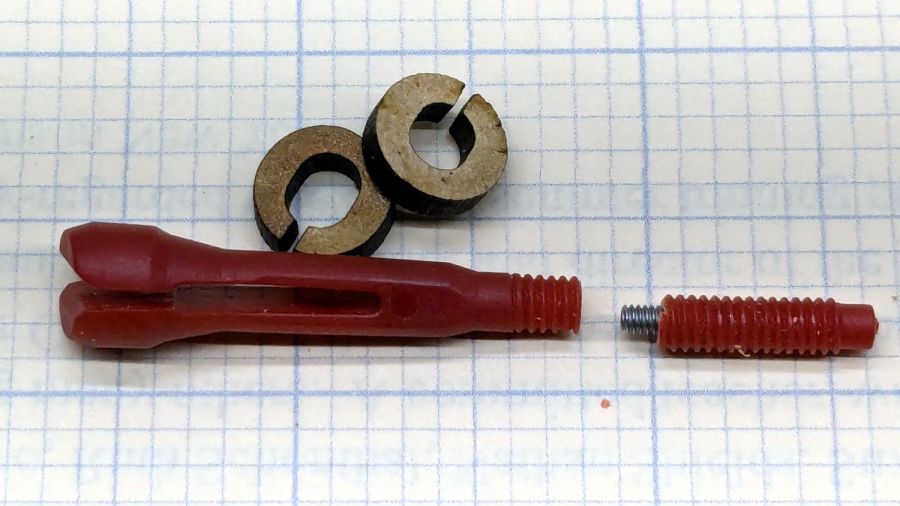
The red plastic feels like HDPE or a similar un-glue-able material, so it was going to need a mechanical splice. A tiny 2-56 setscrew falls in the class of things my buddy Eks describes as “If your design needs those, you’re doing it wrong”, but sometimes you gotta do what you gotta do.
The little wrench in the background measures 28 mils for 0-80 setscrews, of which I have none and don’t expect to get any.
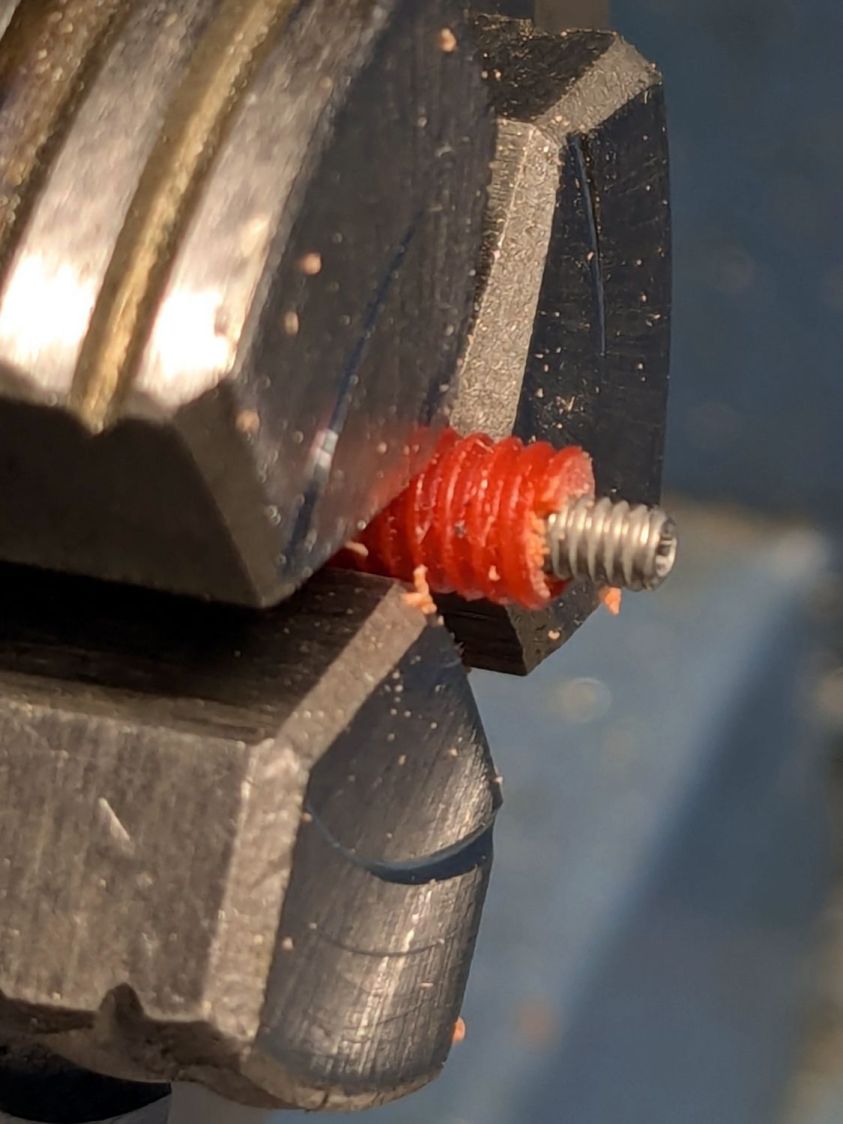
Anyhow, facing, drilling, and tapping the stub proceeded handily:
Razor Knife – setscrew in thread stub
You’d think I hadn’t faced off the end, but you’d be wrong. As far as I can tell, the end of the screw would be happy to break for as long as I’d be willing to try cutting it. Perhaps this indicates why it broke and suggests this repair will be temporary, at best.
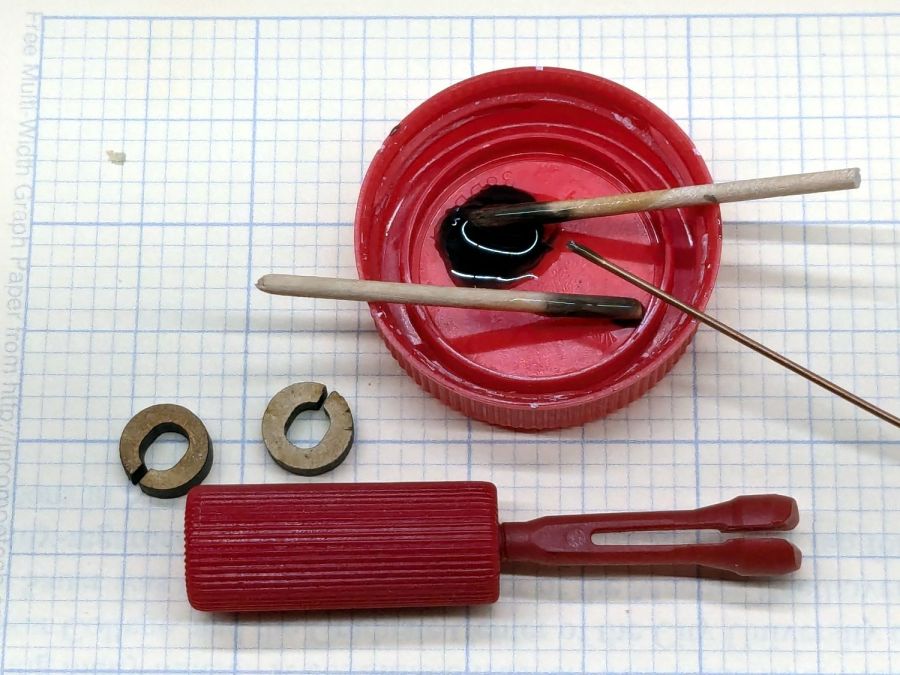
Doing the same to the collet required a clamp to fit its slightly oblong body:
That’s aggressive stick-out for a little plastic rod, but sissy cuts saved the day; it faced / drilled / tapped easily enough:
Razor Knife – collet repair parts
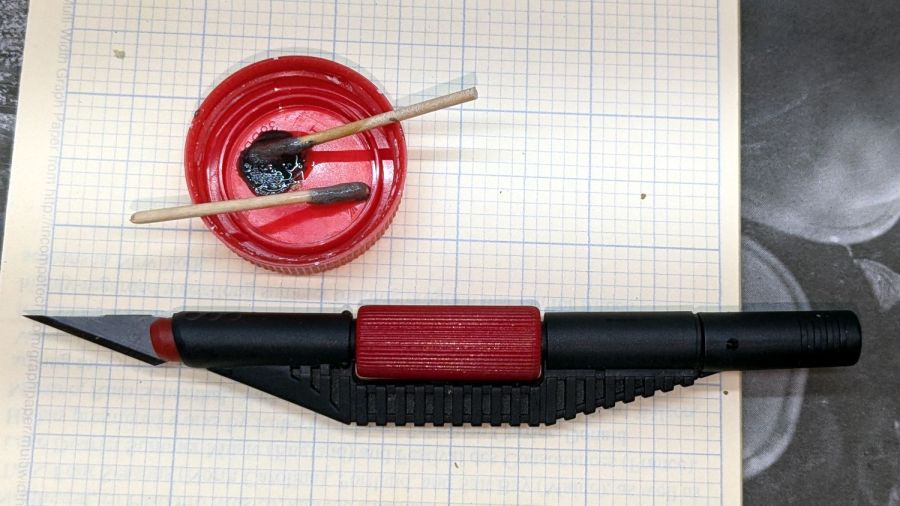
Despite the non-glue-able plastic, I tucked some JB PlasticBonder into the recesses, screwed everything together, and coerced the 8-32 threads into alignment inside the plastic nut:
Razor Knife – collet thread alignment
Reassemble in reverse order after the adhesive set up: