These critters can serve as good examples of what we’re not doing today:


They span 48 seconds of life on a single flower; just another busy day at Innisfree Garden.
Hoist some spicy grog for them…
The Smell of Molten Projects in the Morning
Ed Nisley's Blog: Shop notes, electronics, firmware, machinery, 3D printing, laser cuttery, and curiosities. Contents: 100% human thinking, 0% AI slop.
These critters can serve as good examples of what we’re not doing today:
They span 48 seconds of life on a single flower; just another busy day at Innisfree Garden.
Hoist some spicy grog for them…
The alert reader will already have noticed the absence of the Z-axis home switch in this picture from yesterday’s post:
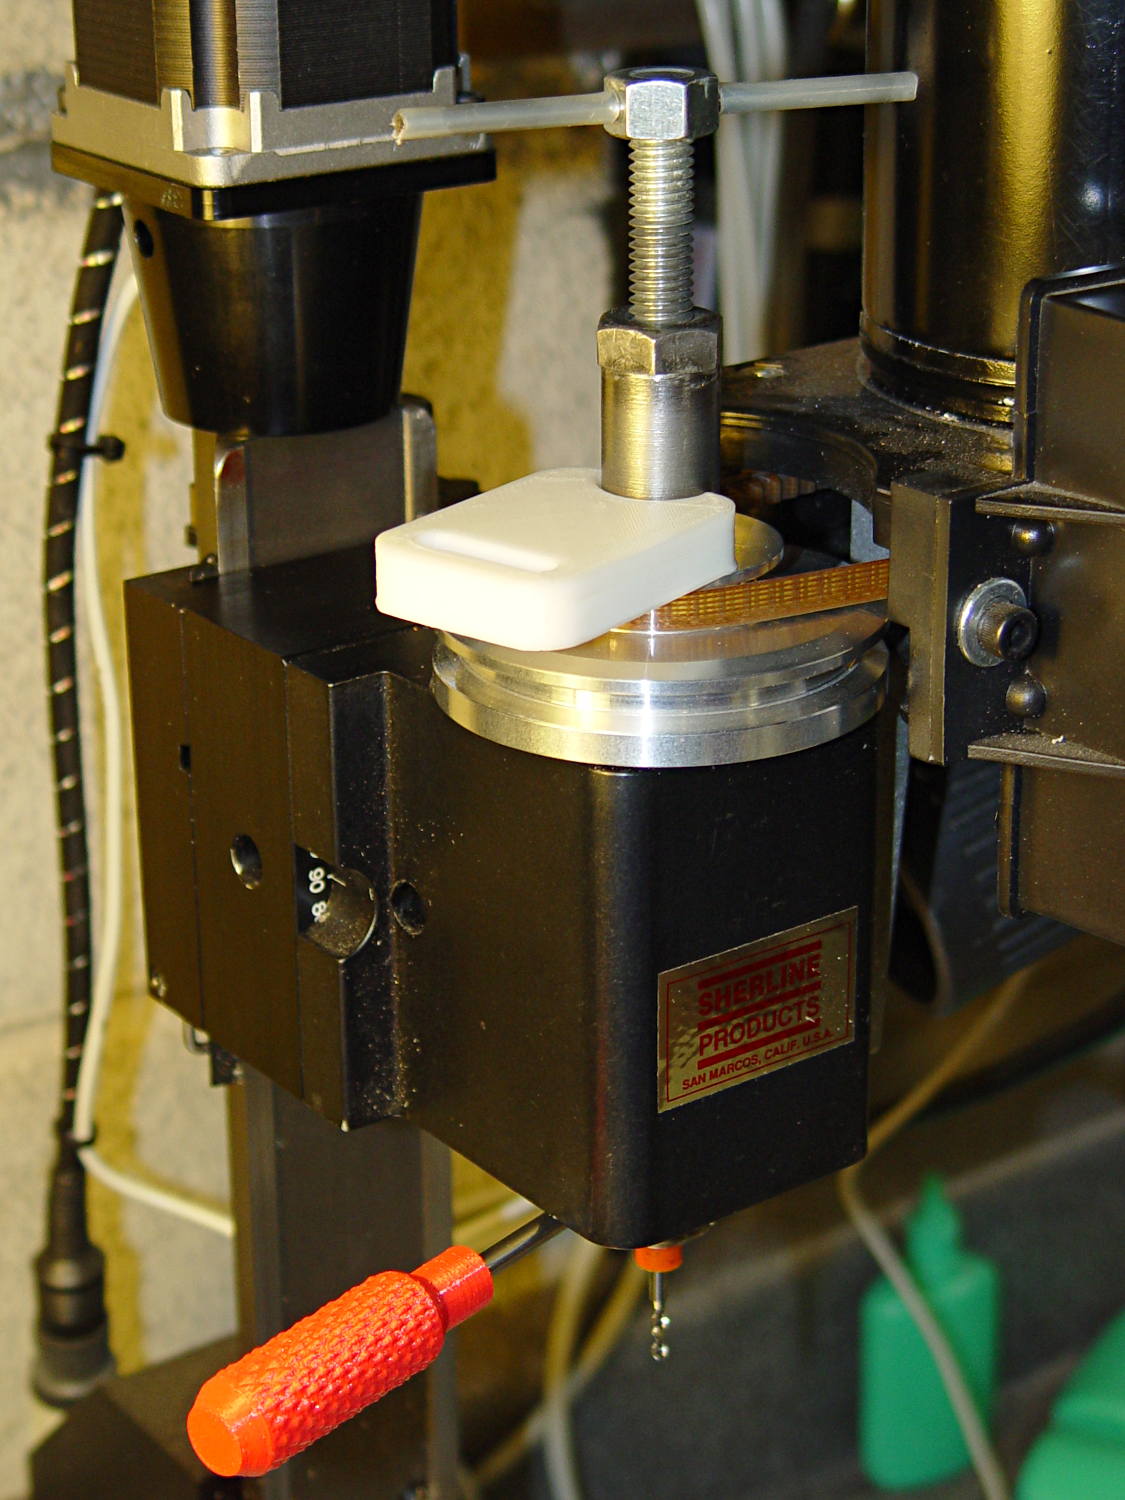
Turns out that I managed to crunch it, exactly as I expected: I’d added a block to the Z-axis stage that poked the home switch just slightly before the anti-backlash nut unscrewed from the top of the leadscrew, but the stage could continue moving another few millimeters.
You can see the gap just above the brass anti-backlash nut:

At that point, the nut has barely a single micro-smidgen of thread engaged; that last 0.1340 inch of travel (yeah, I measured it) isn’t usable.
Rather than put a collar around the end of the leadscrew, I opted for a brute-force block atop the Z-axis saddle nut that will slam into the bottom of the stepper motor mount just before the anti-backlash nut disengages:

A strip of tapeless sticky (double-sided tape, minus the tape) holds the block in place on the saddle nut. It’s not subject to any particular stress: as long as it doesn’t fall off, it’s all good.
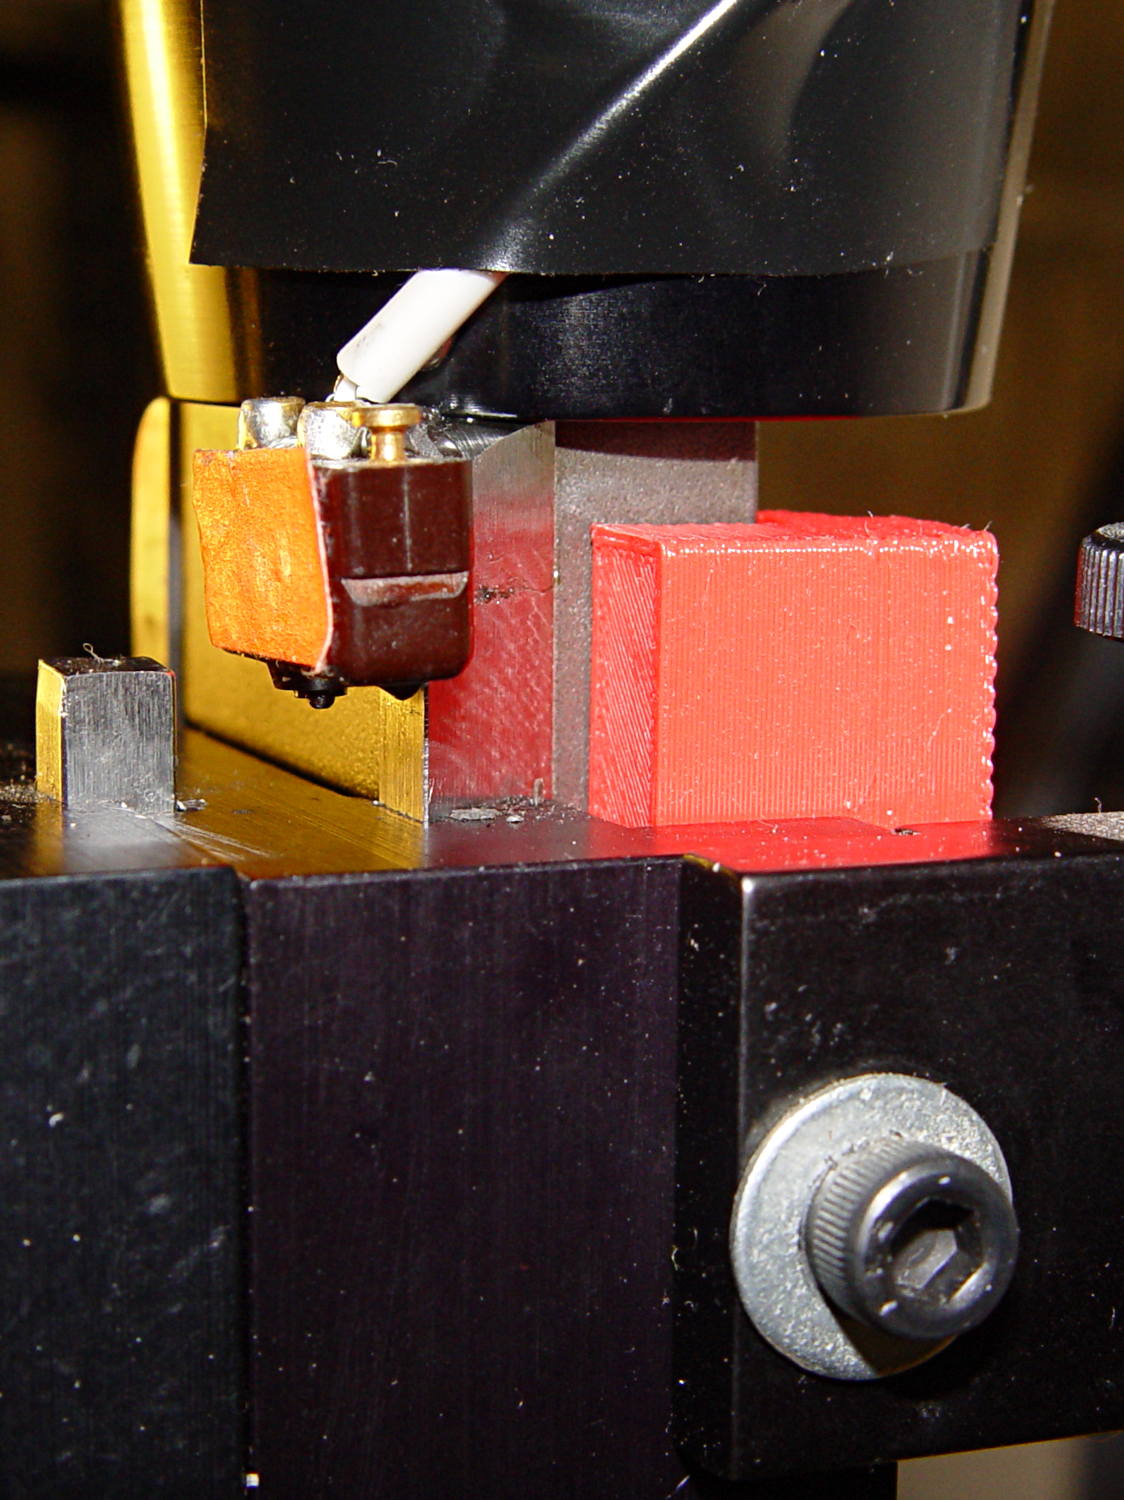
I ran the stage upward until it stalled, then epoxied a new switch (with the old fluorescent tape) in place. This shows the result after backing the stage down a few millimeters:
The solid model shows off the bevel that provides a bit more room for anti-backlash nut adjustment, not that I ever adjust it that much:
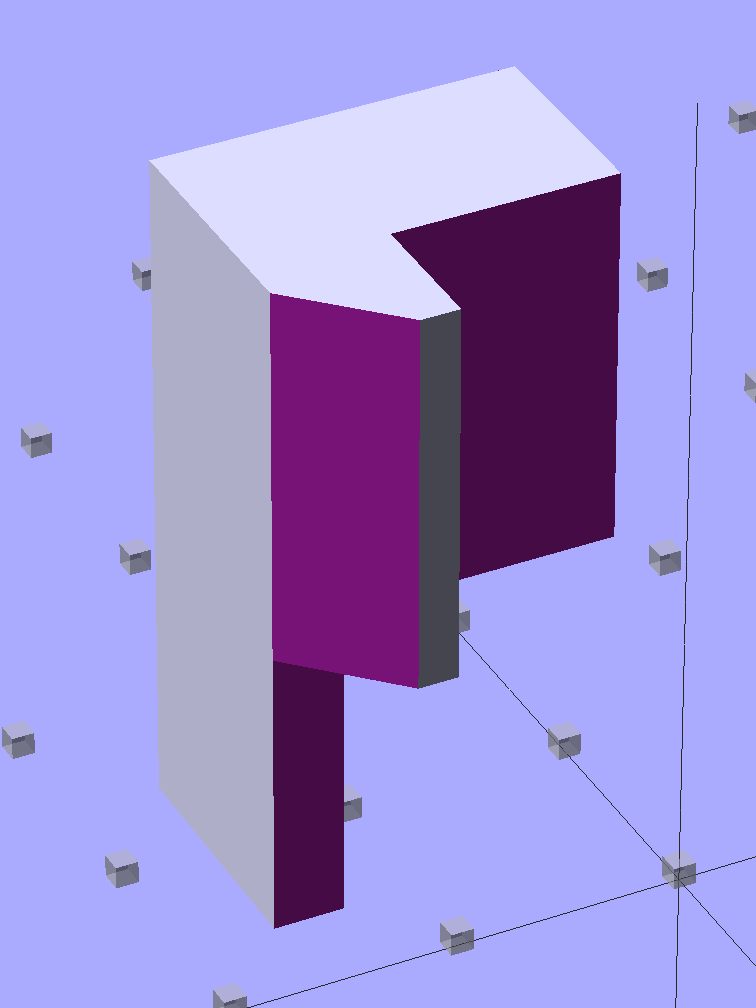
Obviously, it doesn’t print in that position, but it’s easier to design it in the natural orientation and flip it around for printing.
The OpenSCAD source code:
// Sherline Z-axis Overrun Prevention Block
// Ed Nisley KE4ZNU December 2013

Layout = "Show";			// Show Build

//- Extrusion parameters must match reality!
//  Print with 2 shells and 3 solid layers

ThreadThick = 0.25;
ThreadWidth = 0.40;

HoleWindage = 0.2;

Protrusion = 0.1;			// make holes end cleanly

//----------------------
// Dimensions

BlockZ = 30.0;				// overall height
ZLimit = 17.0;				// Z travel limit

TongueX = 9.0;				// beside Z axis dovetail
TongueY = 10.0;

StubX = 6.0;				// behind Z axis pillar
StubY = 3.0;

BlockX = TongueX + StubX;	// overall X

TabY = 3.0;					// behind brass bracket
TabX = BlockX - sqrt(2)*TabY;
TabZ = BlockZ - ZLimit;

BlockY = TongueY + StubY + TabY;	// overall Y

//----------------------
// Useful routines

module ShowPegGrid(Space = 10.0,Size = 1.0) {

  Range = floor(50 / Space);

	for (x=[-Range:Range])
	  for (y=[-Range:Range])
		translate([x*Space,y*Space,Size/2])
		  %cube(Size,center=true);

}

//- The Block

module Block() {

	difference() {
		cube([BlockX,BlockY,BlockZ]);

		translate([-Protrusion,-Protrusion,-Protrusion])	// remove column
			cube([(StubX + Protrusion),(TongueY + Protrusion),2*BlockZ]);

		translate([-BlockX/2,-Protrusion,-Protrusion])		// form tab
			cube([2*BlockX,(TongueY + StubY),(TabZ + Protrusion)]);

		translate([0,BlockY,(BlockZ/2 - 0*Protrusion)])
			rotate(45)
				cube([3*StubY,2*StubY,(BlockZ + 2*Protrusion)],center=true);

		translate([0,0,-Protrusion])
			cube([sqrt(2)*TabY,2*BlockY,(TabZ + Protrusion)]);
	}
}

//-------------------
// Build it...

ShowPegGrid();

if (Layout == "Show")
	Block();

if (Layout == "Build")
	translate([-BlockZ/2,-BlockY/2,BlockX])
	rotate([0,90,0])
		Block();
While putting the speed wrenches in the box with the Sherline four-jaw chuck, it occurred to me that I had all the makings of a handle for Sherline’s steel tommy bars:

Because these are intended for pushing, rather than twisting, I dialed the knurl back to 32 DP, reduced the depth to 0.5 mm, and ran the bar almost all the way through the handle for strength:
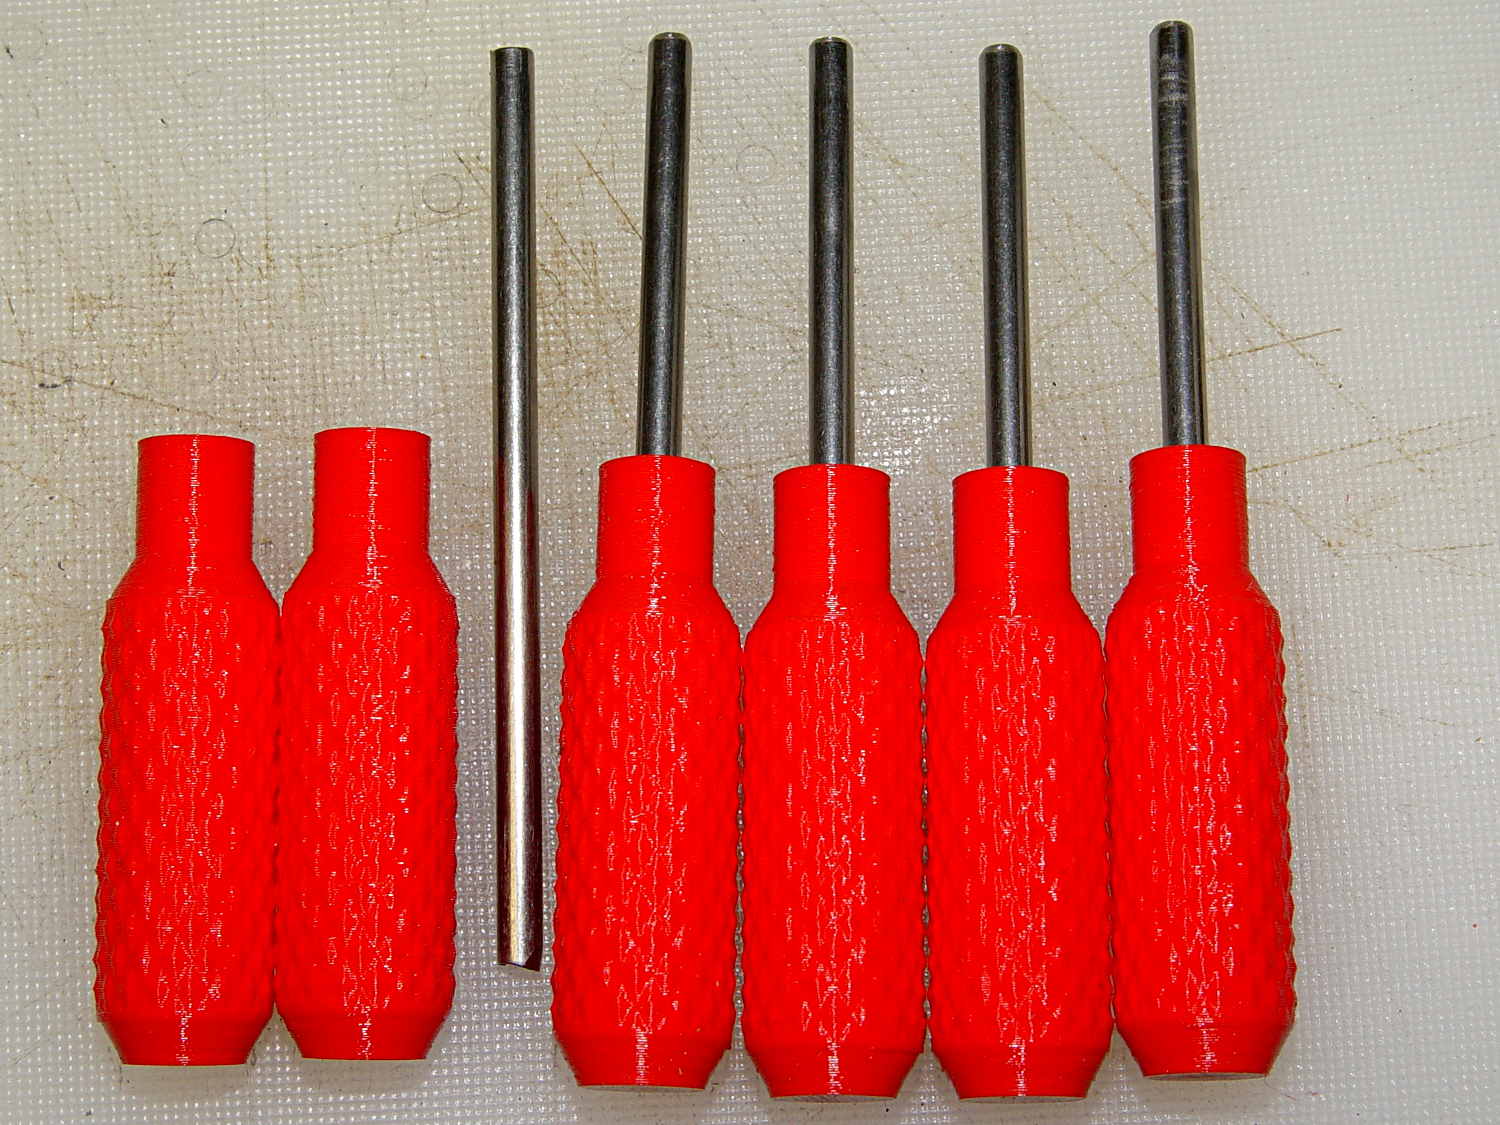
A dab of urethane adhesive inside the handle holds the bar in place. They started out a snug slip fit, so we’ll see how well that holds the bars in place.
A tommy bar holds the spindle against the torque from the collet pusher:
A pair will come in handy with the three-jaw chuck the next time that one appears.
The white slab is a very early 3D printed tool from my Thing-O-Matic, made to hold the pin at exactly the proper distance from the pulley so it fits squarely into the pusher and locks it to the spindle:

Other folks make much nicer tommy bar handles than mine, but I’d say my 3D printed handles beat a common nail any day!
The OpenSCAD source code:
// Knurled handles for Sherline tommy bars
// Ed Nisley - KE4ZNU - December 2013

use <knurledFinishLib_v2.scad>

//- Extrusion parameters must match reality!
//  Print with 2 shells and 3 solid layers

ThreadThick = 0.20;
ThreadWidth = 0.40;

HoleWindage = 0.2;			// extra clearance

Protrusion = 0.1;			// make holes end cleanly

PI = 3.14159265358979;
inch = 25.4;

//----------------------
// Dimensions

ShaftDia = 10.0;				// un-knurled section diameter
ShaftLength = 10.0;				//  ... length

SocketDia = 4.0;				// tommy bar diameter
SocketDepth = 40.0;

KnurlLen = 35.0;				// length of knurled section
KnurlDia = 15.0;				//   ... diameter
KnurlDPNom = 32;				// Nominal diametral pitch = (# diamonds) / (OD inches)

DiamondDepth = 0.5;				//   ... depth of diamonds
DiamondAspect = 2;				// length to width ratio

NumDiamonds = floor(KnurlDPNom * KnurlDia / inch);
echo(str("Num diamonds: ",NumDiamonds));

NumSides = 4*(NumDiamonds - 1);		// 4 facets per diamond. Library computes diamonds separately!

KnurlDP = NumDiamonds / (KnurlDia / inch);				// actual DP
echo(str("DP Nom: ",KnurlDPNom," actual: ",KnurlDP));

DiamondWidth = (KnurlDia * PI) / NumDiamonds;

DiamondLenNom = DiamondAspect * DiamondWidth;					// nominal diamond length
DiamondLength = KnurlLen / round(KnurlLen/DiamondLenNom);		//  ... actual

TaperLength = 0.75*DiamondLength;

//----------------------
// Useful routines

module PolyCyl(Dia,Height,ForceSides=0) {			// based on nophead's polyholes

  Sides = (ForceSides != 0) ? ForceSides : (ceil(Dia) + 2);

  FixDia = Dia / cos(180/Sides);

  cylinder(r=(FixDia + HoleWindage)/2,
           h=Height,
           $fn=Sides);
}

module ShowPegGrid(Space = 10.0,Size = 1.0) {

  Range = floor(50 / Space);

	for (x=[-Range:Range])
	  for (y=[-Range:Range])
		translate([x*Space,y*Space,Size/2])
		  %cube(Size,center=true);
}

//- Build it

ShowPegGrid();

difference() {
	union() {
		render(convexity=10)
		translate([0,0,TaperLength])
			knurl(k_cyl_hg=KnurlLen,
				  k_cyl_od=KnurlDia,
				  knurl_wd=DiamondWidth,
				  knurl_hg=DiamondLength,
				  knurl_dp=DiamondDepth,
				  e_smooth=DiamondLength/2);
		color("Orange")
		cylinder(r1=ShaftDia/2,
					r2=(KnurlDia - DiamondDepth)/2,
					h=(TaperLength + Protrusion),
					$fn=NumSides);
		color("Orange")
		translate([0,0,(TaperLength + KnurlLen - Protrusion)])
			cylinder(r2=ShaftDia/2,
					r1=(KnurlDia - DiamondDepth)/2,
					h=(TaperLength + Protrusion),
					$fn=NumSides);
		color("Moccasin")
		translate([0,0,(2*TaperLength + KnurlLen - Protrusion)])
			cylinder(r=ShaftDia/2,h=(ShaftLength + Protrusion),$fn=NumSides);

	}
	translate([0,0,(2*TaperLength + KnurlLen + ShaftLength - SocketDepth + Protrusion)])
		PolyCyl(SocketDia,(SocketDepth + Protrusion),6);
}
Although automobile batteries have “standard” sizes designated by BCI Group numbers, this Group 34R Sears Diehard battery was about an inch shorter than the previous one:

It arrived with a plastic grid embossed with the helpful notation “Use this height adapter under battery if necessary”, but I figured lower was better. A little bending, two snippets of mouse pad (remember mouse pads?), and a section of white plastic rod faced off / drilled on the lathe anchored it flat on the platform with no wiggle room at all.
With any luck, that’s the last battery the van will ever need…
For all the usual reasons, I didn’t hang the mesh netting over the bedroom window when I put up the bird feeder on the far corner of the patio:
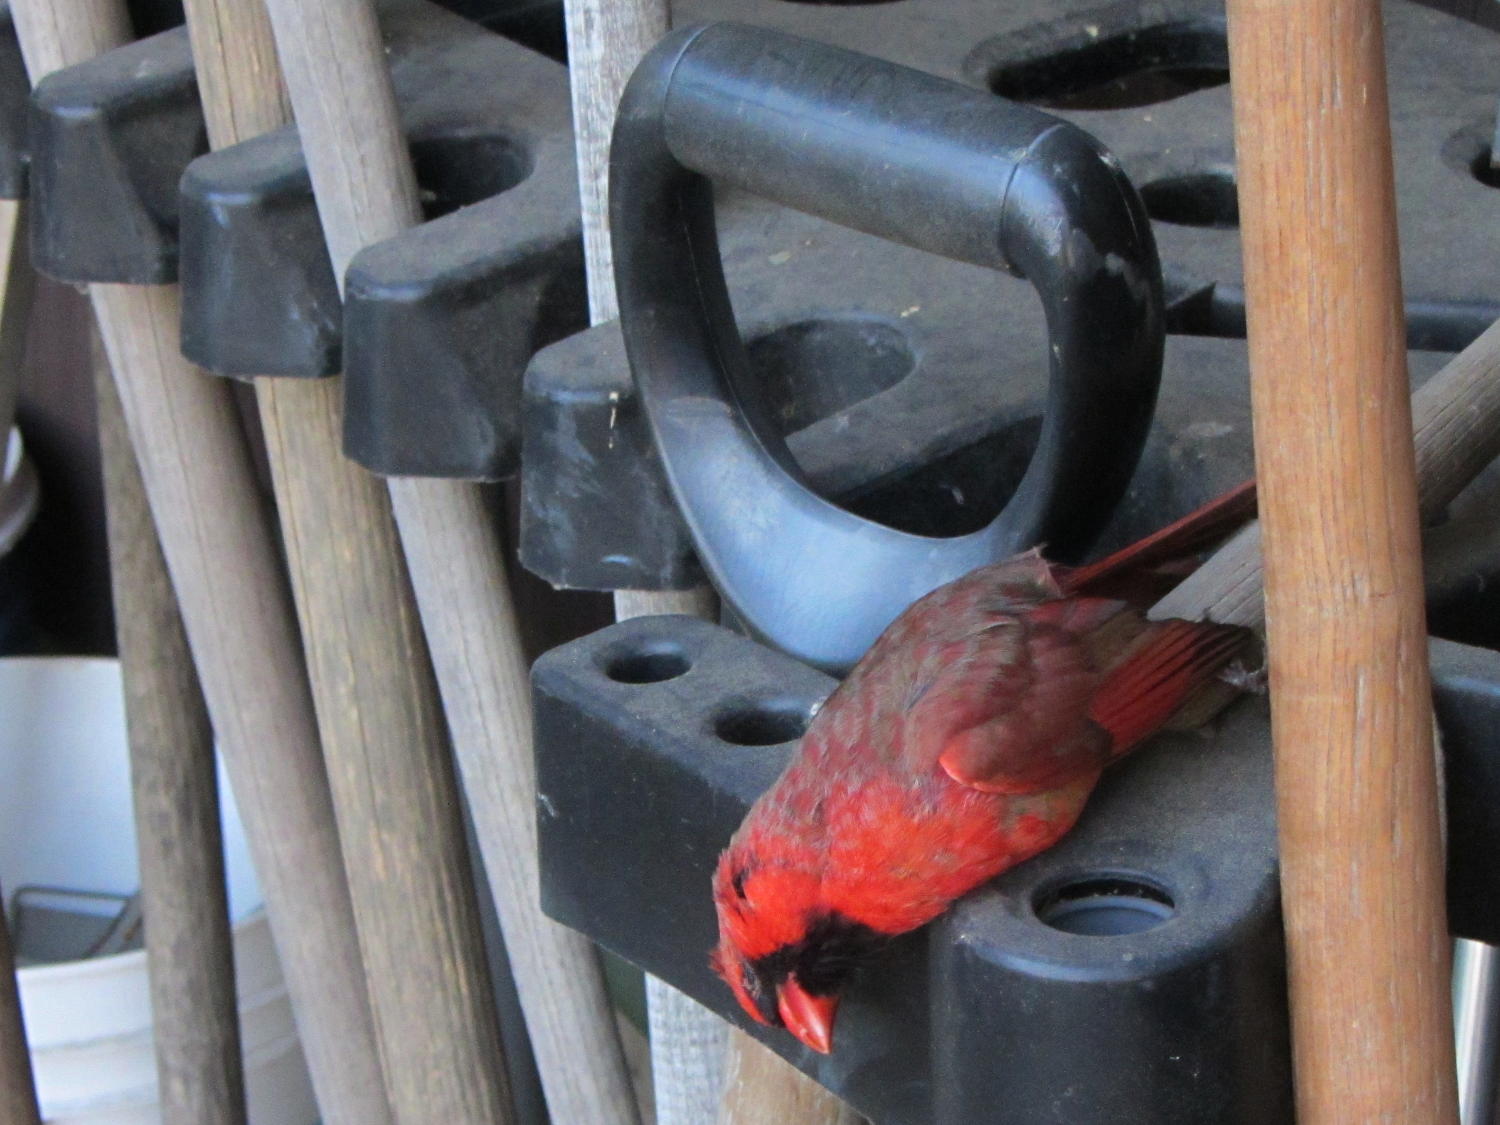
That window is far enough away that birds get up to full speed and low enough that they can see through the windows on the far side of the bedroom to the bushes and trees north of the house.
The mesh is up now and I feel like crap.
One of the battery packs powering the GPS+audio interface on our bikes has completely failed, with zero volts at the output and no charge indication. The other five chug along as well as can be expected:

The push-to-test button on Pack 4 has become increasingly erratic over the last few months, rendering the charge status LEDs mostly useless, so it has two curves: the lower capacity came directly from the bike, the higher hot off the charger.
For reference, here’s what they looked like in May 2012:

And right after they arrived:

Given their nearly constant use and charge cycling, I’m impressed.
Those Lenmar DVDU923 packs look similar, at twice the no-name 2010 price. So it goes…
Quick summary: the current Linux startup machinery Runs All The Things! in parallel, leaving you to figure out all the interdependencies and update all the script files to match your requirements. Mostly, the distro maintainers figure all that, but if you have essential files mounted as NFS shares, then you can will reach a login screen before the mount process completes.
Having wrestled with this problem for a while, I think I’ve doped out the right way to coerce the Upstart Pachinko Machine to converge on a workable login.
The solution is to fire off a unique signal after the NFS mount command, then force the display manager to wait until it receives that signal, rather than depend on happenstance as I did before. The mounts occur in /etc/init/local.conf, which now looks like this:
description "Stuff that should be in /etc/rc.local"
author "Ed Nisley - KE4ZNU"

start on (local-filesystems and net-device-up IFACE=em1)
stop on shutdown

emits nfs-mounted

script

logger Starting local init...

logger Mounting NFS filesystems
mount /mnt/bulkdata
mount /mnt/userfiles
mount /mnt/diskimages
mount /mnt/music
initctl emit nfs-mounted
logger Ending local init

end script
The start condition ensures that this code won’t run until the wired LAN is up; note that what was once eth0 is now em1. Then, after the mounts happen, initctl fires the nfs-mounted signal.
The modification to /etc/init/lightdm.conf script consists of one additional line to wait for that signal:
start on ((filesystem
           and runlevel [!06]
           and started dbus
           and plymouth-ready
           and nfs-mounted)
          or runlevel PREVLEVEL=S)

stop on runlevel [016]

emits login-session-start
emits desktop-session-start
emits desktop-shutdown
I’m not convinced lightdm.conf is the right spot to jam a stick in the gears, but it seems to be the least-awful alternative. The login-session-start signal doesn’t appear in any file in that subdirectory and I have no idea where else to look.
Anyhow, the greeter screen now shows a desktop background from the NFS mount, which I regard as A Good Sign:

Until the next startup revision, anyway…
