The Smell of Molten Projects in the Morning

Ed Nisley's Blog: Shop notes, electronics, firmware, machinery, 3D printing, laser cuttery, and curiosities. Contents: 100% human thinking, 0% AI slop.

Author: Ed

  • Nissan Fog Lamp: Arduino Firmware

    Nissan Fog Lamp: Arduino Firmware

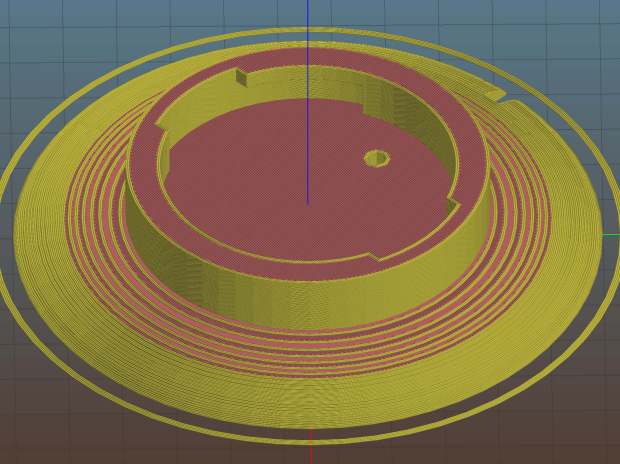
    The upcycled Nissan fog lamp now has a desk stand:

    Nissan Fog Lamp - table mount
    Nissan Fog Lamp – table mount

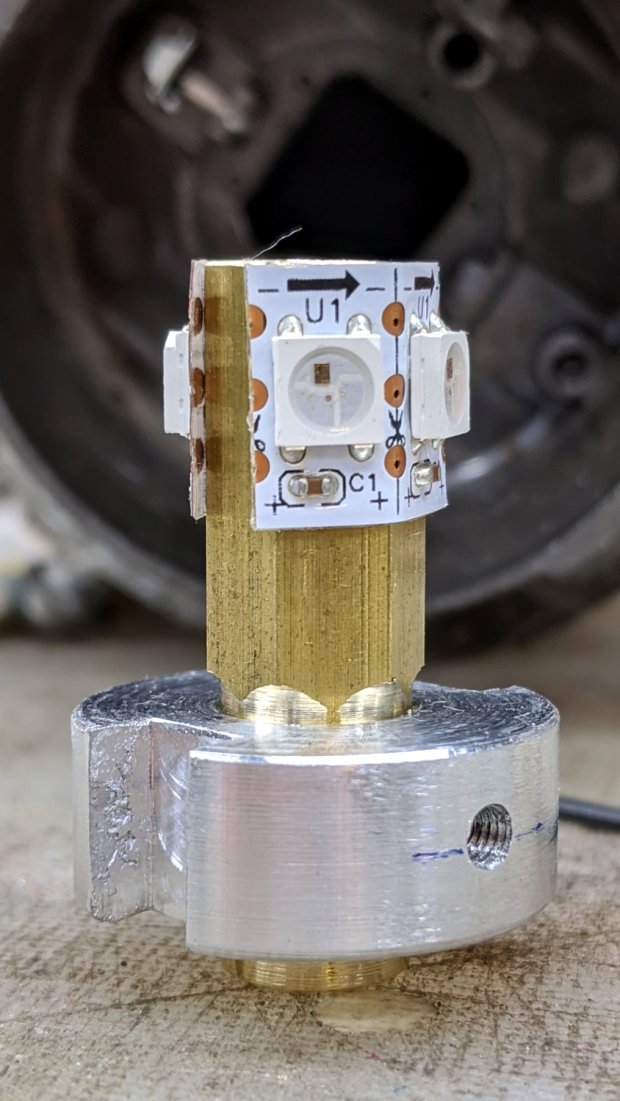
    A knockoff Arduino Pro Mini atop a strip of foam tape drives the WS2812 RGB LEDs:

    Nissan Fog Lamp - table mount interior
    Nissan Fog Lamp – table mount interior

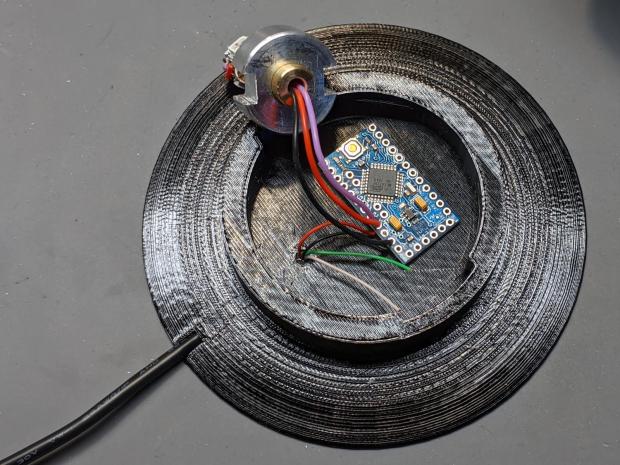
    Next time, I’ll cut the wires another inch longer.

    The firmware is a tidied-up version of the vacuum tube code, minus cruft, plus fixes, and generally better at doing what it does. The Pro Mini lacks a USB output, so this came from the same code running on a Nano:

    14:44:04.169 -> Algorithmic Art
    14:44:04.169 ->  RGB WS2812
    14:44:04.169 -> Ed Nisley - KE4ZNU - April 2020
    14:44:04.169 -> Lamp test: flash full-on colors
    14:44:04.169 ->  color: 00ff0000
    14:44:05.165 ->  color: 0000ff00
    14:44:06.160 ->  color: 000000ff
    14:44:07.155 ->  color: 00ffffff
    14:44:08.151 ->  color: 00000000
    14:44:09.180 -> Random seed: da98f7f6
    14:44:09.180 -> Primes: 7 19 3
    14:44:09.180 ->  Super cycle length: 199500 steps
    14:44:09.180 -> Inter-pixel phase: 1 deg = 26 steps
    14:44:09.180 ->  c: 0 Steps:  3500 Init:  1538 Phase:   2 deg PWM: 255
    14:44:09.180 ->  c: 1 Steps:  9500 Init:  7623 Phase:   0 deg PWM: 255
    14:44:09.213 ->  c: 2 Steps:  1500 Init:  1299 Phase:   6 deg PWM: 255
    14:44:19.265 -> Color 2     steps 1500  at 15101    ms 50       TS 201     
    14:45:34.293 -> Color 2     steps 1500  at 90136    ms 50       TS 1701    
    14:45:43.085 -> Color 1     steps 9500  at 98940    ms 50       TS 1877    
    14:45:47.332 -> Color 0     steps 3500  at 103192   ms 50       TS 1962    
    14:46:49.324 -> Color 2     steps 1500  at 165170   ms 50       TS 3201  
    … much snippage …
    17:26:52.896 -> Color 2     steps 1500  at 9769584  ms 50       TS 195201  
    17:28:07.926 -> Color 2     steps 1500  at 9844618  ms 50       TS 196701  
    17:29:11.000 -> Color 0     steps 3500  at 9907697  ms 50       TS 197962  
    17:29:22.974 -> Color 2     steps 1500  at 9919653  ms 50       TS 198201  
    17:30:27.941 -> Supercycle end, setting new color values
    17:30:27.941 -> Primes: 17 7 3
    17:30:27.941 ->  Super cycle length: 178500 steps
    17:30:27.941 -> Inter-pixel phase: 1 deg = 23 steps
    17:30:27.941 ->  c: 0 Steps:  8500 Init:  5415 Phase:   0 deg PWM: 255
    17:30:27.974 ->  c: 1 Steps:  3500 Init:  3131 Phase:   2 deg PWM: 255
    17:30:27.974 ->  c: 2 Steps:  1500 Init:   420 Phase:   5 deg PWM: 255
    17:30:46.394 -> Color 1     steps 3500  at 10003091 ms 50       TS 369     
    17:31:21.964 -> Color 2     steps 1500  at 10038658 ms 50       TS 1080  

    The “Super cycle length” is the number of 50 ms steps until the colors start repeating, something over an hour in that sample. When the code reaches the end of the supercycle, it picks another set of three prime numbers, reinitializes the color settings, and away it goes.

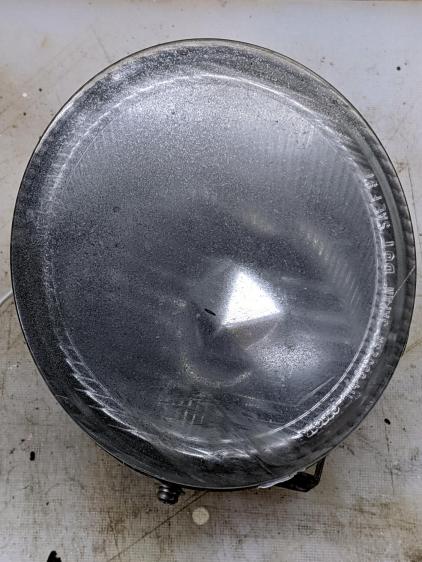
    The fog light looks pretty in action:

    Nissan Fog Lamp - blue phase
    Nissan Fog Lamp – blue phase

    The four LEDs don’t produce the same light pattern as the halogen filament and they’re distinctly visible when you squint against the glare:

    Nissan Fog Lamp - reflector LED detail
    Nissan Fog Lamp – reflector LED detail

    The shadow on the right comes from the larger hood support strut, the shadow on the left is the narrower strut, and the two other gaps show the beam angle gaps between the LEDs.

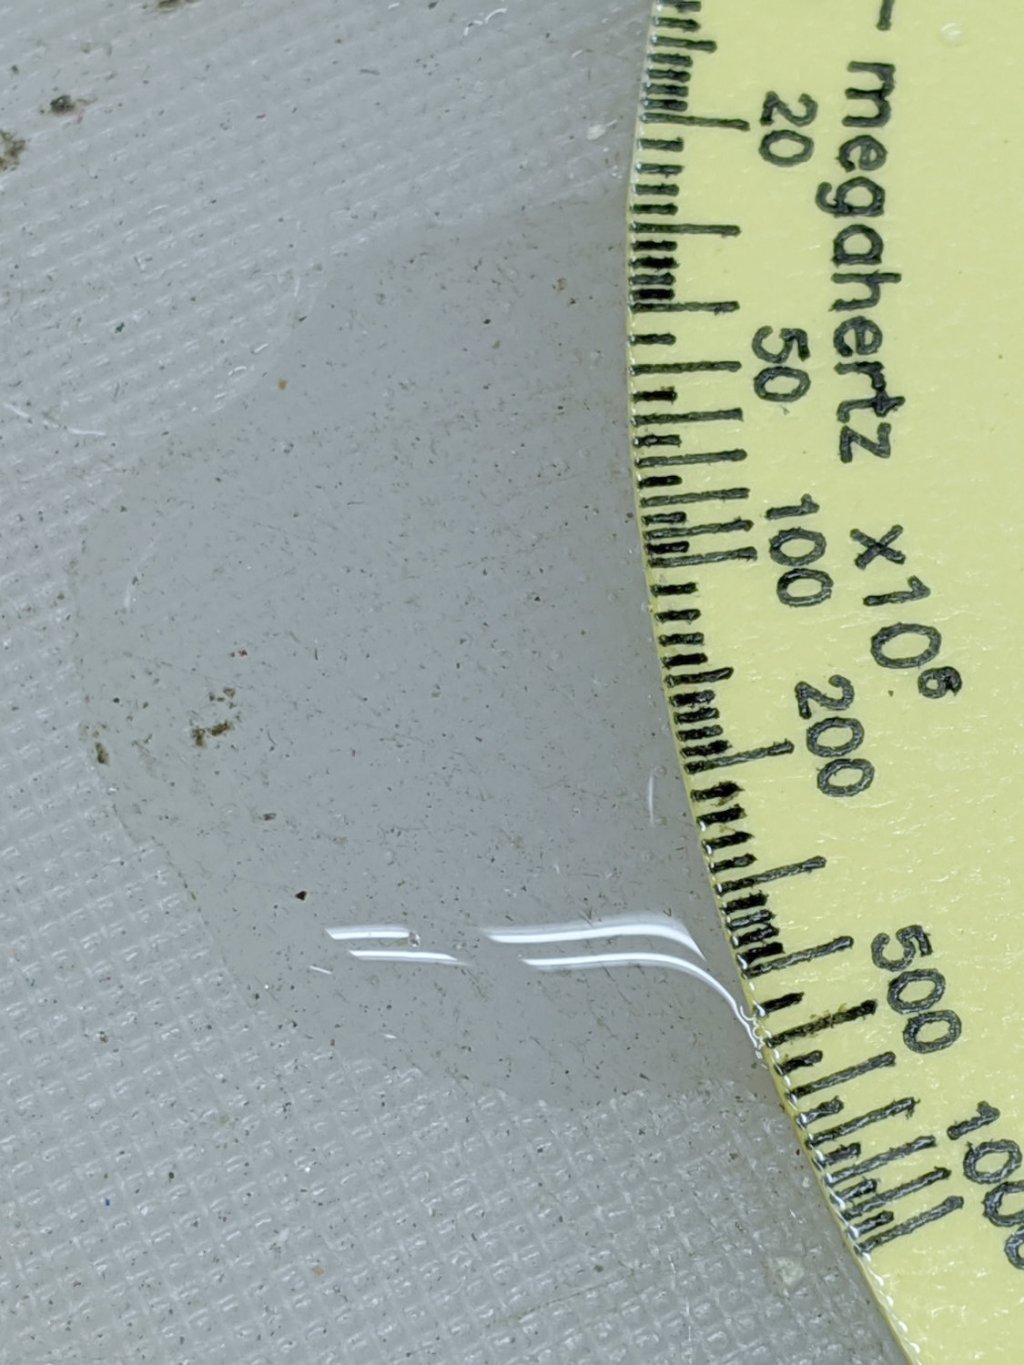
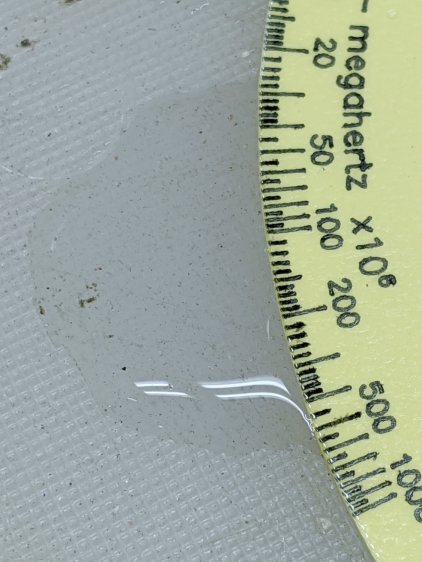
    You’ll see plenty of residual sandpaper scratches on the lens: my surface (re)finishing hand is weak.

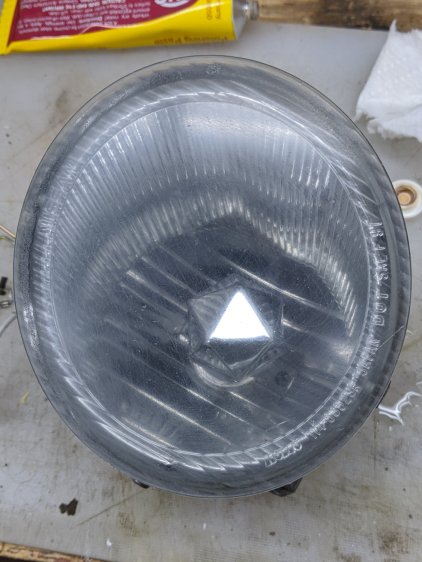
    The LED beamwidth is so broad the “bulb” position inside the reflector doesn’t make much difference, particularly as it must, at most, wash a wall and ceiling at close range:

    Nissan Fog Lamp - wall wash light
    Nissan Fog Lamp – wall wash light

    All in all, a much-needed dose of Quality Shop Time.

    The Arduino source code as a GitHub Gist:

    // Neopixel Algorithmic Art
    // W2812 RGB Neopixel version
    // Ed Nisley – KE4ZNU
    #include <Adafruit_NeoPixel.h>
    #include <Entropy.h>
    //———-
    // Pin assignments
    const byte PIN_NEO = A3; // DO – data out to first Neopixel
    const byte PIN_HEARTBEAT = 13; // DO – Arduino LED
    #define PIN_MORSE 12
    //———-
    // Constants
    // number of pixels
    #define PIXELS 4
    // lag between adjacent pixels in degrees of slowest period
    #define PIXELPHASE 1
    // update LEDs only this many ms apart (minus loop() overhead)
    #define UPDATEINTERVAL 50ul
    #define UPDATEMS (UPDATEINTERVAL – 0ul)
    // number of steps per cycle, before applying prime factors
    #define RESOLUTION 500
    //———-
    // Globals
    Adafruit_NeoPixel strip = Adafruit_NeoPixel(PIXELS, PIN_NEO, NEO_GRB + NEO_KHZ800);
    uint32_t FullWhite = strip.Color(255,255,255);
    uint32_t FullOff = strip.Color(0,0,0);
    uint32_t MorseColor;
    struct pixcolor_t {
    unsigned int Prime;
    unsigned int NumSteps;
    unsigned int Step;
    float StepSize;
    float Phase;
    byte MaxPWM;
    };
    unsigned long int TotalSteps;
    unsigned long int SuperCycleSteps;
    byte PrimeList[] = {3,5,7,11,13,17,19,29}; // small primes = faster changes
    // colors in each LED and their count
    enum pixcolors {RED, GREEN, BLUE, PIXELSIZE};
    struct pixcolor_t Pixel[PIXELSIZE]; // all the data for each pixel color intensity
    uint32_t UniColor;
    unsigned long int MillisNow;
    unsigned long int MillisThen;
    //– Select three unique primes for the color generator function
    // Then compute all the step parameters based on those values
    void SetColorGenerators(void) {
    Pixel[RED].Prime = PrimeList[random(sizeof(PrimeList))];
    do {
    Pixel[GREEN].Prime = PrimeList[random(sizeof(PrimeList))];
    } while (Pixel[RED].Prime == Pixel[GREEN].Prime);
    do {
    Pixel[BLUE].Prime = PrimeList[random(sizeof(PrimeList))];
    } while (Pixel[BLUE].Prime == Pixel[RED].Prime ||
    Pixel[BLUE].Prime == Pixel[GREEN].Prime);
    if (false) {
    Pixel[RED].Prime = 1;
    Pixel[GREEN].Prime = 3;
    Pixel[BLUE].Prime = 5;
    }
    printf("Primes: %d %d %d\r\n",Pixel[RED].Prime,Pixel[GREEN].Prime,Pixel[BLUE].Prime);
    TotalSteps = 0;
    SuperCycleSteps = RESOLUTION;
    for (byte c = 0; c < PIXELSIZE; c++) {
    SuperCycleSteps *= Pixel[c].Prime;
    }
    printf(" Super cycle length: %lu steps\r\n",SuperCycleSteps);
    Pixel[RED].MaxPWM = 255;
    Pixel[GREEN].MaxPWM = 255;
    Pixel[BLUE].MaxPWM = 255;
    unsigned int PhaseSteps = (unsigned int) ((PIXELPHASE / 360.0) *
    RESOLUTION * (unsigned int) max(max(Pixel[RED].Prime,Pixel[GREEN].Prime),Pixel[BLUE].Prime));
    printf("Inter-pixel phase: %d deg = %d steps\r\n",(int)PIXELPHASE,PhaseSteps);
    for (byte c = 0; c < PIXELSIZE; c++) {
    Pixel[c].NumSteps = RESOLUTION * Pixel[c].Prime; // steps per cycle
    Pixel[c].StepSize = TWO_PI / Pixel[c].NumSteps; // radians per step
    Pixel[c].Step = random(Pixel[c].NumSteps); // current step
    Pixel[c].Phase = PhaseSteps * Pixel[c].StepSize; // phase in radians for this color
    printf(" c: %d Steps: %5d Init: %5d Phase: %3d deg",c,Pixel[c].NumSteps,Pixel[c].Step,(int)(Pixel[c].Phase * 360.0 / TWO_PI));
    printf(" PWM: %d\r\n",Pixel[c].MaxPWM);
    }
    }
    //– Helper routine for printf()
    int s_putc(char c, FILE *t) {
    Serial.write(c);
    }
    //——————
    // Set the mood
    void setup() {
    pinMode(PIN_HEARTBEAT,OUTPUT);
    digitalWrite(PIN_HEARTBEAT,LOW); // show we arrived
    Serial.begin(57600);
    fdevopen(&s_putc,0); // set up serial output for printf()
    printf("Algorithmic Art\r\n RGB WS2812\r\nEd Nisley – KE4ZNU – April 2020\r\n");
    Entropy.initialize(); // start up entropy collector
    // set up pixels
    strip.begin();
    strip.show();
    // lamp test: a brilliant white flash
    printf("Lamp test: flash full-on colors\r\n");
    uint32_t FullRGB = strip.Color(255,255,255);
    uint32_t FullR = strip.Color(255,0,0);
    uint32_t FullG = strip.Color(0,255,0);
    uint32_t FullB = strip.Color(0,0,255);
    uint32_t FullOff = strip.Color(0,0,0);
    uint32_t TestColors[] = {FullR,FullG,FullB,FullRGB,FullOff};
    for (byte i = 0; i < sizeof(TestColors)/sizeof(uint32_t) ; i++) {
    printf(" color: %08lx\r\n",TestColors[i]);
    for (int p=0; p < strip.numPixels(); p++) {
    strip.setPixelColor(p,TestColors[i]);
    }
    strip.show();
    delay(1000);
    }
    // get an actual random number
    uint32_t rn = Entropy.random();
    printf("Random seed: %08lx\r\n",rn);
    randomSeed(rn);
    // set up the color generators
    SetColorGenerators();
    MillisNow = MillisThen = millis();
    }
    //——————
    // Run the mood
    void loop() {
    MillisNow = millis();
    if ((MillisNow – MillisThen) >= UPDATEMS) { // time for another step?
    digitalWrite(PIN_HEARTBEAT,HIGH);
    TotalSteps++;
    strip.show(); // send out precomputed colors
    for (byte c = 0; c < PIXELSIZE; c++) { // compute next increment for each color
    if (++Pixel[c].Step >= Pixel[c].NumSteps) {
    Pixel[c].Step = 0;
    printf("Color %-5d steps %-5d at %-8ld ms %-8ld TS %-8lu\r\n",
    c,Pixel[c].NumSteps,MillisNow,(MillisNow – MillisThen),TotalSteps);
    }
    }
    // If all cycles have completed, reset the color generators
    if (TotalSteps >= SuperCycleSteps) {
    printf("Supercycle end, setting new color values\r\n");
    SetColorGenerators();
    }
    for (int p = 0; p < strip.numPixels(); p++) { // for each pixel
    byte Value[PIXELSIZE];
    for (byte c=0; c < PIXELSIZE; c++) { // compute new colors
    Value[c] = (Pixel[c].MaxPWM / 2.0) * (1.0 + sin(Pixel[c].Step * Pixel[c].StepSize – p*Pixel[c].Phase));
    }
    UniColor = strip.Color(Value[RED],Value[GREEN],Value[BLUE]);
    strip.setPixelColor(p,UniColor);
    }
    MillisThen = MillisNow;
    digitalWrite(PIN_HEARTBEAT,LOW);
    }
    }
    view raw AlgoArt-RGB.ino hosted with ❤ by GitHub

  • Groundhog Activity

    Groundhog Activity

    The groundhog responsible for trimming the lawn greenery in our area has discovered the long-disused driveway salt barrel:

    Groundhog - in salt barrel
    Groundhog – in salt barrel

    There’s always another appointment on the calendar, though:

    Groundhog - trotting on driveway
    Groundhog – trotting on driveway

    A busy critter with no time to waste!

  • Pileated Woodpecker vs. Stump

    Pileated Woodpecker vs. Stump

    A pileated woodpecker devoted considerable attention to debugging the remains of a stump in our front yard:

    Pileated Woodpecker - front yard stump
    Pileated Woodpecker – front yard stump

    It’s surely a descendant of this one, eleven years ago:

    Pileated Woodpecker
    Pileated woodpecker

    If you’re willing to wait a decade or so, a stump pretty much falls apart on its own, meanwhile providing habitat for critters both great and small.

    Update: By popular demand, a slightly pixelated pileated woodpecker:

    Pileated Woodpecker - front yard stump - pixelated
    Pileated Woodpecker – front yard stump – pixelated
  • Nissan Fog Lamp: Desk Stand

    Nissan Fog Lamp: Desk Stand

    The Nissan fog lamp looks pretty good pointing at the ceiling:

    Nissan Fog Lamp - table mount
    Nissan Fog Lamp – table mount

    I briefly considered sandblasting the shell to knock back the corrosion, but came to my senses: this is art!

    The shell has a bayonet mount intended for the cable connector, but a bout of solid modeling produced a matching twist-lock desk stand:

    Nissan Fog Light Base - Slic3r preview
    Nissan Fog Light Base – Slic3r preview

    The locking dogs overhang little enough, relative to their diameter, to let the thing build without internal supports. Took about three hours without any intervention at all.

    The little hole matches up with the slot on the bottom holding a USB cable bringing power from a wall charger:

    Nissan Fog Lamp - table mount interior
    Nissan Fog Lamp – table mount interior

    It’s a knockoff Arduino Pro Mini without the USB interface found on a Nano, so the USB data wires don’t connect to anything.

    The base might look better under a layer of (black?) epoxy, although I’m definitely a fan of those brutalist 3D printed striations.

    The OpenSCAD source code as a GitHub Gist:

    // Nissan Fog Light Base
    // Ed Nisley KE4ZNU 2020-04-20
    /* [Hidden] */
    ThreadThick = 0.25;
    ThreadWidth = 0.40;
    HoleWindage = 0.2;
    function IntegerMultiple(Size,Unit) = Unit * ceil(Size / Unit);
    Protrusion = 0.1; // make holes end cleanly
    //———————-
    // Dimensions
    ID = 0;
    OD = 1;
    LENGTH = 2;
    /* [Fog Light] */
    ShellBase = [49.0,55.0,10.0];
    Dog = [55.0,60.0,7.0];
    DogWidth = 21.0;
    DogAngle = atan(DogWidth / ShellBase[ID]);
    echo(str("Dog angle: ",DogAngle));
    ReflectorOD = 90.0;
    LensOD = 110.0;
    LensAngle = -90; // peak relative to dogs
    WallThick = 4.0;
    BaseThick = 2*WallThick;
    CableOD = 3.5;
    $fn = 3*4*5;
    //——————-
    // Useful shapes
    module Dogs(h=Dog[LENGTH]) {
    translate([0,0,h/2])
    intersection() {
    cube([Dog[OD],DogWidth,h],center=true);
    cylinder(d=Dog[OD],h=h,center=true);
    }
    }
    //——————-
    // Build it
    difference() {
    union() {
    cylinder(d=(Dog[OD] + 2*WallThick),h=(BaseThick + ShellBase[LENGTH]));
    intersection() {
    resize([0,0,2*BaseThick])
    sphere(d=LensOD);
    translate([0,0,BaseThick/2])
    cube([2*LensOD,2*ReflectorOD,BaseThick],center=true);
    }
    }
    translate([0,0,BaseThick])
    cylinder(d=ShellBase[OD],h=ShellBase[LENGTH] + Protrusion);
    translate([0,0,BaseThick]) {
    Dogs();
    rotate(1.5*DogAngle)
    Dogs();
    rotate(2*DogAngle)
    Dogs(2*ShellBase[LENGTH]);
    }
    rotate(LensAngle)
    translate([0.75*ShellBase[ID]/2,0,-Protrusion]) {
    cylinder(d=CableOD,h=2*BaseThick,$fn=8);
    translate([LensOD/2,0,CableOD/2])
    cube([LensOD,CableOD,CableOD + Protrusion],center=true);
    }
    translate([31,0,ThreadThick-Protrusion])
    cube([23.0,55.0,2*ThreadThick],center=true);
    }
    linear_extrude(height=2*ThreadWidth + Protrusion) {
    translate([32,0,-Protrusion])
    rotate(-90) mirror([1,0,0])
    text(text="Ed Nisley",size=6,font="Arial:style:Bold",halign="center");
    translate([23,0,-Protrusion])
    rotate(-90) mirror([1,0,0])
    text(text="softsolder.com",size=5,font="Arial:style:Bold",halign="center");
    }

  • Nissan Fog Lamp: RGB LED “Bulb”

    Nissan Fog Lamp: RGB LED “Bulb”

    After cleaning the fog lamp lens enough to be encouraging, I made an LED “bulb” from four WS2812 RGB pixels:

    Nissan Fog Lamp - LED bulb standup
    Nissan Fog Lamp – LED bulb standup

    The small threaded hole has an M3 setscrew to let the brass post slide up & down to adjust the LED position inside the fog lamp’s reflector.

    Despite my poor experience with the PCB-based WS2812 LEDs, the strip-mounted ones have been ticking along in the hard drive platter lamp basically forever, at least after I tamped down the heat problem.

    The brass hex rod has plenty of thermal conductivity, particularly clamped into an aluminum disk connected more-or-less well to the fog lamp’s base.

    Nissan Fog Lamp - RGB LED lamp
    Nissan Fog Lamp – RGB LED lamp

    The two short wires linking the two LED strips (the purple wire is data into the first LED) hold them in place around the hex, despite their desire to straighten out, pull free of their adhesive, and fall off.

    The general idea was to put the LEDs at about the same level as the halogen bulb filament, thereby spreading enough light to fill the reflector housing:

    Nissan Fog Lamp - LED vs halogen
    Nissan Fog Lamp – LED vs halogen

    I drilled a hole through the hex as a cable “conduit”, turned the end into a nice rod, then machined a stub of aluminum to fit:

    Nissan Fog Lamp - parting off LED base
    Nissan Fog Lamp – parting off LED base

    A pair of slots milled along the sides of the aluminum disk fit the housing’s locating features:

    Nissan Fog Lamp - LED bulb trial fit
    Nissan Fog Lamp – LED bulb trial fit

    Nissan used an elaborate spring latch to clamp the halogen bulb’s sheet-metal base in place, but its 50 mil wire didn’t have nearly enough give for my chunky aluminum disk. My version of a spring latch came from a length of 24 mil music wire, which definitely beats the epoxy I was planning to use.

    Heat transfer seems to be a non-issue, as the LEDs get barely warm to the touch. Until they drop dead, I’ll assume it’s all good in there.

    Two screws hold the lens in place, but the collision seems to have stripped their grip on the plastic and they didn’t un-screw:

    Nissan Fog Lamp - lens retaining screw
    Nissan Fog Lamp – lens retaining screw

    Jamming a utility knife blade under the screw head and prying upward while turning the screwdriver persuaded them out of their sockets, after which the lens popped out of its form-fitted silicone gasket with surprisingly little effort:

    Nissan Fog Lamp - reflector stains
    Nissan Fog Lamp – reflector stains

    The lamp spent a week or so beside the road, out in the weather, and shipped a few drops of rainwater through the rectangular hole under the spring latch anchor. Some delicate cotton-swab action removed most of the grime without too much damage, but the reflective film on those corrugations won’t ever be the same again.

    Now it’s just a simple matter of software …

  • Tek Circuit Computer: Water Test

    Tek Circuit Computer: Water Test

    So the question came up: “Exactly what happens when one of those things gets wet?”

    Which obviously requires an experiment:

    Laminated Tek CC vs Water - start
    Laminated Tek CC vs Water – start

    That’s the mis-cut top deck revealing why GRBL really needs four digits after the decimal point, but, other than that, it’s perfectly representative of the genre: heavy paper, good ink, nicely laminated in plastic.

    Prediction: water should seep into the paper, dissolve the ink, maybe delaminate the plastic, and generally make a mess.

    Which is exactly what happens:

    Laminated Tek CC vs Water - finish
    Laminated Tek CC vs Water – finish

    User Advisory: your shiny new Homage Tektronix Circuit Computer is not waterproof, so don’t use it in the sauna!

  • Nissan Fog Lamp: Salvage & Lens Clearing

    Nissan Fog Lamp: Salvage & Lens Clearing

    The debris field from a recent high-energy collision with a utility pole just north of Red Oaks Mill included another attractive hunk of jewelry:

    Nissan Fog Lamp - as found
    Nissan Fog Lamp – as found

    I asked the guy who runs the towing service across the intersection if this was a “high-performance car / low-performance driver” situation. He said “Nah, the car was a piece of crap.” It apparently collided with the pole after pulling out of the adjacent gas station with entirely too much foot on the throttle; the young driver was last seen having considerable difficulty with a field sobriety test.

    Anyhow, the labeling suggests it’s the right-side fog light from a Nissan car.

    After removing various shattered plastic mounts and scrubbing off the obvious dirt, the lens didn’t look much better:

    Nissan Fog Lamp - as-found lens
    Nissan Fog Lamp – as-found lens

    The bright triangle is one facet of the hood over the 55 W halogen bulb. The lens seems to be covered with a scattershot coat of gray spray paint or primer, rather than ordinary road grime, applied with surprising uniformity over the entire surface.

    A quick wet-sand operation with 400 through 3000 grit paper, then some Simichrome, cleaned it up pretty well:

    Nissan Fog Lamp - semi-cleared lens
    Nissan Fog Lamp – semi-cleared lens

    Repeating the whole process, this time with a vigorous circular motion:

    Nissan Fog Lamp - cleared lens
    Nissan Fog Lamp – cleared lens

    It’s definitely got a used-car finish: nice polish over deep gouges.

    Look closely to see 400 grit diagonal scratches headed upward to the right; I must use 600 or 800 grit paper between the 400 and 1000. I don’t care about optical clarity, just knocking back the worst of the damage will suffice.

    Methinks it would look pretty with internal RGB LED lighting, although the optics are obviously set up for a halogen filament just under the edge of the internal hood. If I get it just right, the thing could project a beam across the room …